 bluename
How to Avoid Garden Irrigation Splashing Fungal Spores Up onto Hibiscus Lower Leaves
I learned the hard way that how you water a hibiscus matters just as much as how often. If you use a strong spray or let water smack the soil, you are launching fungal spores straight onto the lower leaves. The fix is simple. Water low. Water slow. Keep the bottom leaves dry. I nearly lost a gorgeous red hibiscus to black spot before I figured this out. Once I changed my watering setup and timing, the lower leaves stayed clean within about two weeks. No new spots. No yellowing. No drama.
Hibiscus is one of those plants that gives you huge tropical blooms but also tests your patience. It is not a set-and-forget plant. It needs decent light, steady moisture without soggy roots, and a little protection from overhead water. The flowers are stunning. The leaves are glossy. The growth can be fast. But the lower foliage is also a magnet for fungal issues if you irrigate carelessly.
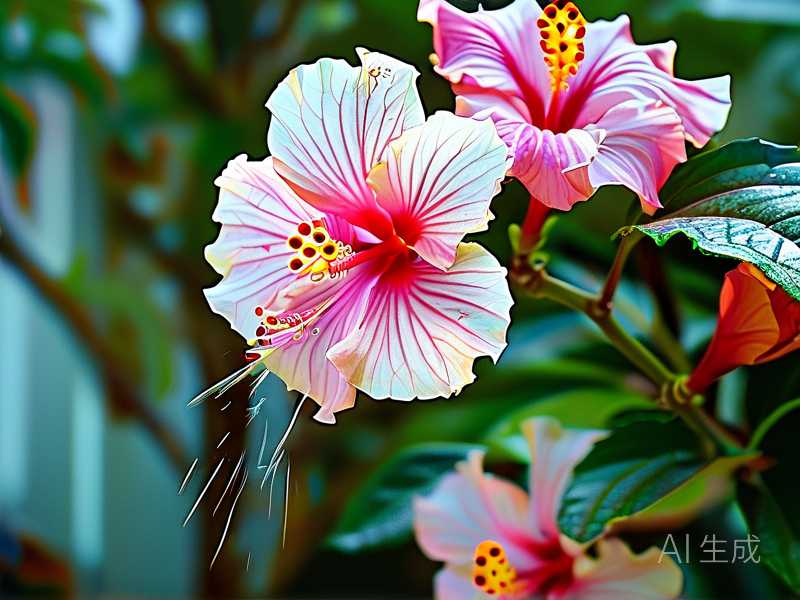
This guide is for home gardeners in the US, Canada, the UK, and Australia who grow hibiscus in pots or in the ground. I will share exactly what I do now to prevent irrigation from splashing fungal spores upward. I will also walk through light, soil, fertilizing, seasonal care, and common problems based on my own experience.
A Quick Note on Fungal Spores and Splash
Fungal spores often live in the top layer of soil or on decaying plant debris. When water drops hit that soil hard, tiny droplets bounce upward. Those droplets can carry spores. The lower hibiscus leaves are usually the first target.
According to the RHS, many common leaf spot diseases spread through water splash. That is why overhead watering is often discouraged for plants prone to fungal issues. The AHS also notes that keeping foliage dry can reduce the spread of many common garden pathogens.
I used to think this was overblown advice. Then my hibiscus lower leaves started showing small brown spots with yellow halos. At first I blamed bugs. Then I noticed the pattern. The spots were only on leaves near the soil line. The upper leaves looked perfect. The moment I switched to a gentler watering method, the spread stopped.
Understanding the Hibiscus Plant
Hibiscus comes in two main groups for home gardeners. Tropical hibiscus with glossy leaves and huge flowers. Hardy hibiscus with bigger flowers and dieback growth in cold regions. Both can get fungal leaf issues if water splashes up from the soil.
Tropical hibiscus is the one I grow most. It is fast-growing. It blooms heavily in warm months. It is also a bit dramatic when stressed. Dropped buds. Yellow leaves. Leaf spots. Most of the time, the cause is moisture related.
The good news is that hibiscus responds quickly to correction. If you stop splashing water on the lower leaves, you often see improvement within ten to fourteen days. I tested this on two plants side by side. One I watered with a soft wand at soil level. The other I watered with a standard hose nozzle from above. After two weeks, the first plant had clean lower foliage. The second had new spots on the lowest leaves. That was enough proof for me.
Light Requirements for Hibiscus
Hibiscus loves bright light. But “bright” does not mean scorching afternoon sun in every climate.
Best Light Setup
Place hibiscus where it gets at least six hours of direct sun. Morning sun is ideal. In very hot regions, give it some afternoon shade. A spot with morning sun and dappled afternoon light works well.
In cooler climates like the UK or parts of Canada, hibiscus usually needs all the sun it can get. A south-facing or west-facing window is good for indoor plants. Outdoors, choose the sunniest protected spot.
I grew one hibiscus in too much shade. It got leggy. It barely flowered. The leaves stayed wet longer after rain. That made fungal issues worse. I moved it to a sunnier position and pruned the weak growth. Within three weeks, new buds appeared.
Signs of Too Much Sun
Leaves may look bleached. Edges may crisp. Buds may drop before opening. If you see this, move the plant or add shade cloth during the hottest part of the day.
Signs of Too Little Sun
Leaves turn dark green but thin. Stems stretch. Flowering drops. The plant looks weak. Lower leaves may stay damp for hours. That dampness invites fungal growth. If you combine shade with overhead watering, you are asking for trouble.
One of my early mistakes was putting a hibiscus in a bright-looking corner that only got two hours of sun. I watered it the same as my sunny patio plant. The soil stayed wet. The lower leaves developed mildew. I fixed it by moving the plant and switching to bottom watering for a while.
Watering Guide for Hibiscus
Watering is where most hibiscus problems start. It is also where you can prevent fungal splash issues.
The Core Principle
Water deeply but less often. Keep the soil evenly moist during active growth. Do not let the pot sit in water. Do not wet the leaves if you can help it.
I now follow a simple rule. If the top inch of soil is dry, I water. I aim the water directly at the soil surface. I use a soft flow. I stop when water drains from the bottom of the pot.
How to Avoid Splashing Fungal Spores onto Lower Leaves
This is the part that changed everything for me. Here is what I do step by step.
First, I removed the lowest leaves that were touching the soil. These leaves act like landing pads for splashed droplets. Removing them improved airflow and reduced infection.
Second, I added a thin layer of mulch on top of the soil. I use fine pine bark or clean compost. The mulch absorbs the impact of water droplets. Less splash. Fewer spores flying up.
Third, I switched to a watering wand with a gentle shower setting. I hold the nozzle close to the soil. I do not blast the surface. I let the water sink in slowly.
Fourth, I water in the morning. This gives any accidental leaf moisture time to dry during the day. Night watering leaves droplets on leaves for hours. That is a fungal invitation.
Fifth, I check the lower leaves after each watering. If any are wet, I gently shake the branch or wipe the leaf with a dry cloth. I know that sounds fussy. But it takes ten seconds. It stopped my recurring leaf spot problem.
Drip Irrigation Option
If you grow hibiscus in the ground or in a large container, drip irrigation is the best long-term fix. A simple drip line or soaker hose delivers water at the soil level. No splash. No wet leaves. I installed a basic drip kit for my patio pots. It cost very little. The water goes exactly where it should.
For indoor hibiscus, I use a small watering can with a narrow spout. I slide the spout under the leaves and pour slowly. It feels awkward at first. But you get used to it. The lower leaves stay bone dry.
Preventing Overwatering and Root Rot
Overwatering is the number one killer. It also makes fungal leaf issues worse. Soggy soil creates a humid microclimate around the lower leaves. Even if you avoid splashing, constant dampness can cause mildew and root problems.
I used to water my hibiscus on a strict schedule. Every two days. Rain or shine. Hot or cool. That was a terrible approach. The plant sat in wet soil. The lower leaves stayed damp. The roots started to rot. I only noticed when the plant dropped half its leaves.
Now I check the soil with my finger. If the top inch is dry, I water. If not, I wait. In summer that might be every day. In winter it might be once every ten days. It depends on the weather and the pot size.
The 90% Rule
Here is something worth remembering. 90% of indoor plants die from overwatering. That figure gets tossed around a lot in houseplant circles. I believe it. I have killed more plants with too much water than with too little. Hibiscus is no exception. It likes moisture during growth, but it hates wet feet.
Soil and Repotting Methods
Good soil makes good watering easier. If the mix drains well, water moves through quickly. Less pooling. Less splash. Less fungal risk.
Best Soil Mix
I use a mix of about three parts quality potting soil, one part perlite, and one part compost. The compost feeds the plant. The perlite keeps the mix airy. For outdoor plants in hot climates, I add a little coarse sand. For indoor plants, I skip the sand and add more perlite.
Avoid heavy garden soil in pots. It compacts. It holds too much water. It splashes badly when watered. I tried using garden soil once because I ran out of potting mix. The hibiscus sulked. The soil surface became a muddy mess. Every watering left a brown film on the lower leaves.
Choosing the Right Pot
The pot matters more than people think. I would say this is one of the most overlooked parts of hibiscus care.
Use a pot with drainage holes. Always. No exceptions. I used a decorative pot without holes once. I put stones in the bottom and told myself it would drain. It did not. The roots sat in stagnant water. The plant got root rot. Rookie mistake.
Terracotta pots are great for hibiscus. They breathe. They dry out more evenly. Plastic pots retain more moisture. If you tend to overwater, go with terracotta.
Repotting Cycle
Repot young hibiscus every one to two years. Repot mature plants every two to three years. The best time is spring. I repot when I see roots poking out of the drainage holes or when the soil dries out too fast.
When I repot, I gently loosen the root ball. I trim any black or mushy roots. I add fresh mix at the bottom. I set the plant at the same depth as before. Then I water gently to settle the soil.
After repotting, I keep the plant in bright but indirect light for a few days. This reduces transplant shock. I also avoid fertilizing for about two weeks. The roots need time to recover.
Fertilizing Hibiscus
Hibiscus is a hungry plant during the growing season. But more fertilizer is not always better.
What I Use
I use a balanced liquid fertilizer for flowering plants. Something like a 10-10-10 or a formulation made for hibiscus. I dilute it to half strength. I feed every two weeks in spring and summer. I stop feeding in late autumn and winter.
Slow-release granules also work well. I mix a small amount into the soil at the start of spring. It feeds the plant gradually. I still use liquid feed every few weeks during peak bloom.
The “Thin and Frequent” Approach
I follow the old advice of feeding weakly and weekly. That means half-strength fertilizer more often, rather than strong doses all at once. It reduces the chance of fertilizer burn. It also keeps growth steady.
Never fertilize a dry plant. Water first. Then feed. I learned this after scorching the roots on a thirsty hibiscus. The leaves turned brown at the edges within days.
Do not fertilize a stressed plant. If the hibiscus has leaf spot, root rot, or transplant shock, hold off. Let it recover first. Pushing growth on a sick plant just makes things worse.
One mistake I made early on was feeding too much nitrogen. The plant grew huge green leaves but barely flowered. It also produced soft growth that attracted pests. Now I use a fertilizer with a bit more phosphorus during bloom season. The flowers are much better.
Seasonal Care for Hibiscus
Spring Care
Spring is the wake-up season. I start by removing any old or damaged leaves. I prune lightly to shape the plant and encourage branching. This is also the best time to repot if needed.
I slowly increase watering as the weather warms. I start feeding again after I see new growth. I also move indoor hibiscus outdoors gradually over a week or two. A sudden move can shock the plant.
One spring I put my hibiscus outside on the first warm day. That night a cold snap hit. The plant dropped every leaf. It recovered, but it took months. Now I harden it off slowly.
Summer Care
Summer is peak growing and blooming time. It is also the season when fungal splash problems are most common. I water early in the morning. I keep water off the leaves. I check the soil moisture often.
In very hot weather, I move potted hibiscus to a spot with afternoon shade. I also group my pots together. This raises humidity around the plants without wetting the leaves.
I watch for pests like spider mites and aphids in summer. Heat plus dry air can trigger spider mites. I spray the undersides of leaves with water every few days if mites appear. But I do this in the morning so leaves dry fast.
Good airflow is important. I space my plants enough that air can move between them. Crowding traps moisture and encourages disease.
Autumn Care
In autumn, I slow down on feeding. I reduce watering slightly. The plant is not growing as fast. I let the top layer of soil dry a bit more between waterings.
I bring my tropical hibiscus indoors before night temperatures drop below about 50 degrees Fahrenheit. I inspect the plant carefully first. I check under leaves. I wash off any pests. I also remove any leaves showing spots or damage.
One year I brought in a hibiscus without checking for pests. Within two weeks my indoor seedlings were infested with aphids. It was a mess. Now I quarantine every plant for a few days after bringing it inside.
Winter Care
Winter is the hardest season for tropical hibiscus in cold climates. The plant wants bright light, but the light is weak. It wants moisture, but the soil dries slowly.
I move my hibiscus to the brightest window. A south-facing window is best. I keep it away from radiators and cold drafts. I water sparingly. I stop fertilizing completely.
The leaves may yellow and drop. That is normal. The plant is adjusting. I do not panic. I reduce watering even more if the plant drops many leaves. A leafless hibiscus uses less water.
I do not repot in winter. I do not prune heavily. I just let the plant rest. It usually starts pushing new growth in late winter or early spring.
Common Pests and Problems
Even with good watering habits, problems can appear. Here are the most common ones I have dealt with.
Fungal Leaf Spot
Small brown or black spots on leaves. Often with yellow halos. Spread by water splash. Remove affected leaves. Improve airflow. Water at soil level. In severe cases I use a sulfur-based fungicide. But usually, fixing the watering method is enough.
I had one hibiscus with leaf spot on the lower leaves every summer. I tried sprays. I tried removing leaves. The problem kept coming back. It only stopped when I changed my irrigation. That was the real fix.
Powdery Mildew
White powdery coating on leaves. Common when nights are cool and humid. It loves crowded plants and damp leaves. I thin out some branches. I water in the morning. I keep the leaves dry.
Yellow Leaves
Yellow leaves can mean many things. Overwatering. Underwatering. Nutrient deficiency. Cold stress. I look at the pattern. If lower leaves turn yellow and drop, it is often overwatering. If all leaves look pale, it might need feeding. If leaves turn yellow after a cold night, it is probably temperature stress.
Root Rot
Soft, mushy roots. Wilting even when soil is wet. A sour smell from the soil. Root rot is usually fatal if caught late. I try to catch it early by checking roots if a plant looks sick. I trim the rotted parts and repot in fresh dry mix. Then I water very lightly until new growth appears.
Aphids
Tiny green or black insects on new growth. They suck sap and cause distorted leaves. I wash them off with a strong stream of water. For bad infestations, I use insecticidal soap. I spray early in the morning. I repeat every few days until they are gone.
Spider Mites
Tiny pests that cause stippled, pale leaves. You might see fine webbing. They love hot dry conditions. I hose down the plant regularly during hot spells. A little extra humidity helps keep them away.
The Three Fatal Mistakes for Beginners
There are three mistakes I see all the time with hibiscus. I made every single one myself.
Mistake One: Overwatering
This is the big one. 90% of indoor plants die from overwatering. Hibiscus is not a swamp plant. If the soil is constantly wet, the roots suffocate. Then the leaves yellow. Then the plant collapses.
I killed my first hibiscus with love. I watered it every single day because I wanted it to thrive. It died within two months. The roots were black and rotten. Now I check the soil before every watering.
Mistake Two: Wrong Light Levels
Too much direct afternoon sun can scorch leaves. Too little light causes weak growth and fewer flowers. I put one hibiscus in a dark hallway because it looked nice there. It dropped all its leaves in three weeks. Hibiscus is not a low-light plant.
Mistake Three: Using the Wrong Pot
No drainage holes. Too large a pot. Too heavy a soil mix. All of these cause water problems. I once used a huge pot thinking my small hibiscus would grow into it. The soil stayed wet for weeks. The plant got root rot. The pot was too big for the root system.
The right pot is only slightly larger than the root ball. It must have holes. It should be filled with a light, well-draining mix.
My Two-Week Observation
When I first switched to low, slow watering, I wanted to see how long it would take for the lower leaves to improve. The existing spots did not disappear. Fungal spots do not heal. But no new spots appeared. That was the key.
Within the first week, I noticed less moisture on the lower leaves. The soil surface stayed intact. No muddy splash marks on the pot rim.
By day ten, the new growth looked cleaner. The lowest leaves were dry after each watering. No new yellowing.
By the end of two weeks, the plant looked noticeably better. The upper growth was lush. The lower leaves were still scarred from old spots, but the infection had stopped spreading. I removed the worst leaves. After that, the plant filled in with clean new foliage.
That two-week period convinced me. Irrigation technique is not a minor detail. It is one of the most important parts of hibiscus care.
Extra Tips for Clean Lower Leaves
Here are a few extra things I do now.
I prune the bottom branches slightly. This raises the canopy and keeps leaves away from the soil surface. It also improves airflow.
I top-dress the soil with a half-inch of fine bark or gravel. This prevents splash and looks tidy. I avoid thick layers that hold moisture against the stem.
I position the hose or watering can before turning on the water. I use a rain wand with a shut-off valve. I turn the water on after the nozzle is pointed at the soil. This prevents accidental leaf showers.
If I use a sprinkler system, I check the spray pattern. Sprinklers that throw water sideways are the worst. They soak the lower leaves and splash soil constantly. I switched to drip emitters. The difference was immediate.
Frequently Asked Questions
Can hibiscus recover from fungal leaf spot?
Yes. The existing spots will not disappear, but the plant can grow healthy new leaves. Remove the worst affected leaves. Fix the watering method. Improve airflow. In most cases the spread stops quickly.
Is it okay to mist hibiscus leaves?
I avoid misting hibiscus. It increases leaf wetness and can spread fungal spores. If you need to raise humidity, use a pebble tray or group plants together. Keep the leaves dry.
How do I water hibiscus without splashing soil?
Use a watering wand with a gentle flow. Aim at the soil surface. Keep the nozzle close to the soil. Add mulch to break the water impact. For best results, use drip irrigation or a soaker hose. These deliver water slowly at ground level.
I wish I had known these simple habits years ago. It would have saved me a lot of frustration. The lower leaf fungal problem is mostly preventable. Change how you water. Keep the bottom leaves dry. Give the plant proper light and a well-draining pot. Within a couple of weeks, you should see a real difference.





