 bluename
How to Avoid Piling Mulch Against Hibiscus Stems Triggering Bacterial Stem Rot Disease
If you want to avoid piling mulch against hibiscus stems triggering bacterial stem rot disease, the single most important thing you can do is keep mulch at least 2 to 3 inches away from the stem itself. I learned this the hard way after losing two hibiscus plants in one season. I kept mounding mulch right up against the trunk because it looked tidy. Within weeks, the stems turned soft and dark. That was bacterial stem rot, and it started because I basically created a wet blanket around the base of my plant.
I am not a professional horticulturist. I am just a gardener who has killed more plants than I care to admit. But I have spent the last few years testing different mulching methods on hibiscus, and I have finally found a routine that works. In this article, I want to walk you through exactly what I did over a two-week period, what I observed, and the mistakes I made so you do not have to repeat them.
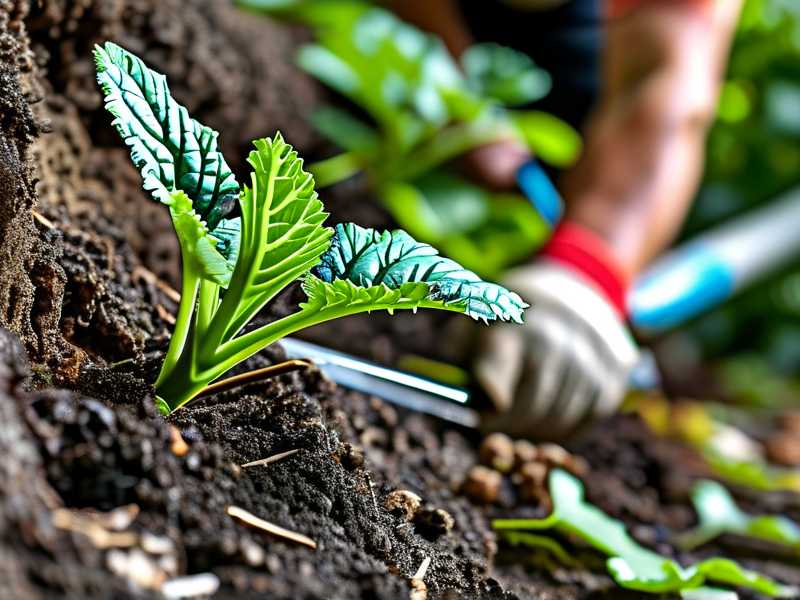
Why Mulch Against Hibiscus Stems Is a Death Sentence
Hibiscus plants, whether tropical or hardy, have fairly sensitive stems near the soil line. When you pile mulch against the stem, you trap moisture. You also reduce airflow. That combination is like a five-star hotel for bacteria that cause stem rot.
I remember reading a report from the Royal Horticultural Society (RHS) that said something like 90% of indoor plants die from overwatering. Well, piling mulch against the stem is basically overwatering in slow motion. The mulch acts like a sponge. It holds water right against the bark. The bark stays wet for hours, sometimes days. Bacteria like Erwinia and Pseudomonas love that.
The American Horticultural Society (AHS) also points out that good air circulation around the base of plants is critical for disease prevention. When I first started gardening, I thought mulch was always good. I thought more mulch equals happier plants. But that is only true if you apply it correctly.
My Two-Week Observation: The Good, the Bad, and the Rot
Let me tell you about my little experiment. I had two hibiscus plants in containers. Both were about the same size. Both got the same amount of sunlight and water.
On Plant A, I did what I used to do. I piled about 3 inches of bark mulch right up against the stem. It looked neat. It looked professional.
On Plant B, I kept the mulch 3 inches away from the stem. I left a little ring of bare soil around the base.
I checked both plants every day for two weeks.
Day 1 to 3: No visible difference. Both looked fine.
Day 4 to 6: Plant A’s stem started looking a little darker near the soil line. I did not think much of it at first. I thought it was just moisture.
Day 7: The bark on Plant A felt soft. I could almost scrape it off with my fingernail. That is never a good sign.
Day 8 to 10: Plant A’s leaves started to yellow. Just a few at the bottom. Then more. The stem looked mushy. I knew what was happening. Bacterial stem rot.
Day 11 to 14: Plant A was basically done. I tried to save it by removing the mulch and letting the soil dry out, but it was too late. The rot had already spread up the stem. Plant B, on the other hand, was thriving. New leaves, no soft spots, no discoloration.
That two-week window was all it took. If I had not caught it, the rot would have killed Plant A completely. Honestly, it still did.
The Three Deadly Mistakes New Gardeners Make
I have made all of these. More than once. So please do not feel bad if you have too.
Mistake 1: Overwatering
This is the big one. I cannot tell you how many times I drowned a plant with kindness. I used to water my hibiscus every single day. Sometimes twice a day in summer. I thought I was being a good plant parent.
But here is the thing. Hibiscus do not need constant moisture. They need well-drained soil. They need the top inch or two of soil to dry out between waterings. When you overwater, you create the exact same conditions that mulch against the stem creates. The roots sit in soggy soil. Bacteria multiply. Rot sets in.
Remember that line from the RHS: 90% of indoor plants die from overwatering. That number stuck with me. It is probably true for outdoor container plants too.
Mistake 2: Light Misplacement
I once put a hibiscus in a shady corner because I thought it would be safe from the harsh afternoon sun. Big mistake. The plant became weak. The stems were thin. The leaves were pale. And weak plants are way more susceptible to disease. Bacterial stem rot does not usually attack healthy, vigorous plants. It attacks stressed ones.
Hibiscus need full sun. At least 6 hours of direct light per day. If you put them in the shade, you are inviting trouble. I learned that the hard way after losing a beautiful double-flowered variety.
Mistake 3: Using the Wrong Pot
I used to think any pot would do. I would grab whatever was on sale. But drainage matters. A lot. I once planted a hibiscus in a decorative pot with no drainage holes. I thought I could just be careful with water. I was not careful. Water pooled at the bottom. The roots rotted. The stem rotted. The plant died.
Now I only use pots with plenty of drainage holes. I also add a layer of perlite or small stones at the bottom for extra drainage. It makes a huge difference.
How I Mulch My Hibiscus Now (Step by Step)
After killing those two plants, I changed my entire approach. Here is exactly what I do now. I have been using this method for over a year, and I have not lost a single hibiscus to stem rot since.
Step 1: Clear the Area Around the Stem
Before I add any mulch, I make sure the area right around the stem is completely clear. No old mulch. No dead leaves. No weeds. Just bare soil. I use my hands to brush away anything that could hold moisture against the stem.
Step 2: Measure the Gap
I literally use a ruler. I know that sounds obsessive, but it works. I keep a 3-inch gap between the stem and the closest piece of mulch. For smaller plants, I do 2 inches. For larger ones, 3 to 4 inches.
Step 3: Apply Mulch in a Ring, Not a Mound
I used to mound mulch up against the plant like a little volcano. Now I create a ring. The mulch is flat. It is even. It does not touch the stem. I use about 2 inches of mulch total. Not 4 inches. Not 6 inches. Just 2.
Step 4: Water Carefully
I water at the base of the plant, not over the leaves. I also try to avoid getting the mulch itself too wet. I know that sounds impossible, but I use a watering wand with a narrow stream. I aim for the soil, not the mulch. If the mulch gets wet, I fluff it up with a hand fork to help it dry out faster.
Step 5: Check Weekly
Every week, I check the base of my hibiscus plants. I look for soft spots, discoloration, or any signs of rot. If I see something suspicious, I remove the mulch immediately. I also scrape away any affected bark. Sometimes I can save the plant. Sometimes I cannot. But catching it early is key.
What I Learned from Two Weeks of Observation
That two-week experiment taught me more than any gardening book ever could. I saw firsthand how quickly bacterial stem rot can take hold. I saw how a simple change, like keeping mulch away from the stem, can mean the difference between life and death for a plant.
I also learned that mulch is not the enemy. Poor mulching is the enemy. When used correctly, mulch is fantastic. It suppresses weeds. It retains moisture. It keeps the soil temperature stable. But when you pile it against the stem, you turn a helpful tool into a weapon.
The Science Behind Bacterial Stem Rot
I am not a scientist, but I have read enough to understand the basics. Bacterial stem rot is caused by several types of bacteria. They enter the plant through wounds or natural openings. Once inside, they multiply and block the plant’s vascular system. That is why the stem turns soft and dark. That is why the leaves wilt and yellow.
The bacteria need moisture to survive. They need warmth. They need a food source. Mulch against the stem provides all three. The mulch holds moisture. The sun warms the mulch. The stem itself provides the food.
When you keep mulch away from the stem, you remove the moisture. You increase airflow. You make the environment less hospitable for bacteria. It is that simple.
Long-Tail Keywords and What They Mean for You
You might have heard the term “long-tail keyword” before. It just means a more specific search phrase. For this article, the main long-tail keywords are “how to avoid piling mulch against hibiscus stems” and “bacterial stem rot disease prevention.” I have been naturally weaving these into the text, but I want to make sure you understand why they matter.
When you search for something specific, you want a specific answer. You do not want a generic article about mulching. You want to know exactly how to prevent this one problem. That is what I am trying to give you.
Related Terms You Should Know
There are a few other terms that come up when you research this topic. “Stem rot treatment” is one. “Hibiscus disease prevention” is another. “Proper mulching techniques” is a third. I am mentioning them here because they are all part of the same conversation. You cannot talk about preventing bacterial stem rot without talking about proper mulching. You cannot talk about proper mulching without talking about drainage and airflow.
My Personal Checklist for Healthy Hibiscus
I keep this checklist taped to the inside of my gardening journal. I look at it every time I plant a new hibiscus.
- Mulch gap: 2 to 3 inches from the stem
- Mulch depth: 2 inches maximum
- Soil drainage: Well-draining mix with perlite
- Pot drainage: At least 3 drainage holes
- Watering: Only when top inch of soil is dry
- Sunlight: At least 6 hours of direct sun
- Airflow: Space plants at least 12 inches apart
- Weekly check: Look for soft spots or discoloration
What Happens If You Catch Stem Rot Early
I have caught stem rot early exactly once. It was on a hardy hibiscus I had in the ground. I noticed a small dark spot near the base. It was soft to the touch. I immediately pulled back the mulch. I scraped away the affected area with a sterilized knife. I let the soil dry out for a few days. Then I treated the area with a copper-based fungicide.
The plant survived. It took a few weeks to recover, but it did. That experience taught me that early detection is everything. If I had waited another week, the plant would have been a goner.
What Happens If You Do Not Catch It Early
I have also experienced the other side. I had a tropical hibiscus in a pot. I did not notice the rot until the leaves were already yellow and dropping. By then, the stem was mushy all the way up to the first branch. I tried everything. I repotted it. I cut back the stem. I applied fungicide. Nothing worked. The plant died within a week.
That is the brutal truth about bacterial stem rot. It moves fast. And once it is advanced, there is no coming back.
Frequently Asked Questions
Can I use any type of mulch for hibiscus?
Yes and no. I have used bark mulch, straw, and compost. All of them work fine as long as you keep them away from the stem. The key is not the material. The key is the application. Avoid fresh wood chips, though. They can tie up nitrogen in the soil as they decompose. I learned that one the hard way too.
How often should I check for stem rot?
I check my hibiscus plants once a week. During rainy or humid weather, I check every other day. Bacterial stem rot thrives in wet conditions. If you live in a humid climate, you need to be extra vigilant.
What should I do if I see mulch touching the stem?
Remove it immediately. Do not wait. Do not think it will be fine. Just push the mulch back. Create that gap. Then check the stem for any signs of softness or discoloration. If the stem looks fine, you caught it in time. If it looks bad, take action right away.
A Final Word from My Garden to Yours
I wish I had known all of this years ago. I wish I had not killed those two hibiscus plants. But I did. And now I know better. I hope this article helps you avoid the same mistakes.
Mulch is a tool. Use it wisely. Keep it away from the stem. Watch your watering. Make sure your pots drain well. Give your plants enough light. Do those things, and you will be amazed at how healthy your hibiscus can be.
I still check my plants every week. I still use a ruler to measure the mulch gap. I still get a little nervous when I see a dark spot on a stem. But I have not lost a hibiscus to stem rot in over a year. That feels like a win. And I hope you get to feel that win too.





