 bluename
I killed three hibiscus plants before I figured out how to grow multi-colored hibiscus in one planter. The answer is simpler than you think: start with a large container, use gritty soil, and place it in full morning sun with afternoon shade. Let me save you the heartbreak I experienced.
Why I Started Growing Multi-Colored Hibiscus
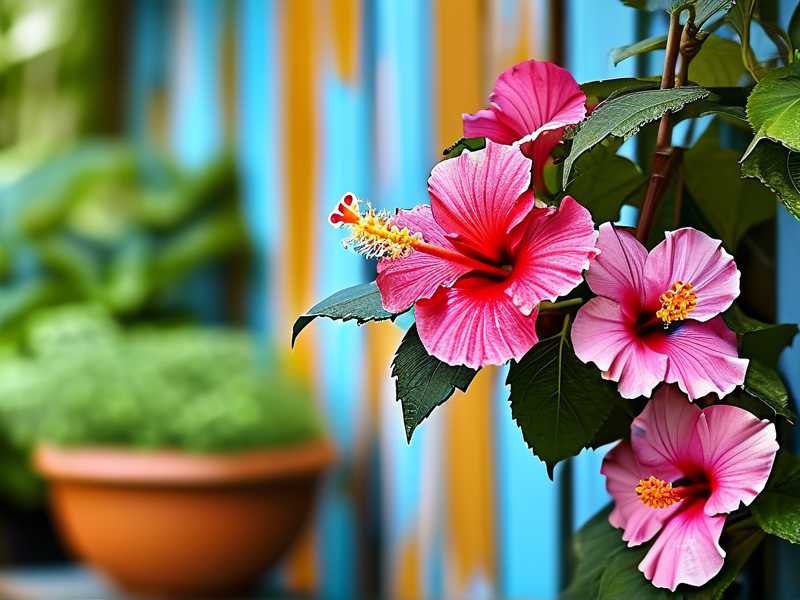
I fell in love with hibiscus at my neighbor’s garden party. She had this massive terracotta pot bursting with red, yellow, pink, and orange blooms all at once. I asked her secret. She laughed and said, “I killed five plants before this one worked.” That was my first clue this wasn’t going to be easy.
Most people think you need separate pots for different colors. That’s wrong. You can absolutely grow multiple hibiscus varieties in the same container. But you need to know what you’re doing. I learned the hard way.
The Three Deadly Mistakes Beginners Make
Mistake 1: Overwatering
I cannot stress this enough. 90% of indoor plants die from overwatering. My first hibiscus died exactly this way. I watered it every day because the soil surface looked dry. The roots rotted within two weeks.
Here’s what I learned: hibiscus likes moist soil, not wet soil. Stick your finger two inches deep. If it’s dry, water. If not, wait. Simple, right? But I ignored this basic rule for months.
Mistake 2: Wrong Light Placement
I put my first planter under a patio awning, thinking shade was safer. Big mistake. Hibiscus needs direct sunlight for at least six hours daily. But here’s the catch – intense afternoon sun can scorch leaves.
My current setup? Morning sun until 1 PM, then filtered light. The difference is night and day. My plants exploded with blooms after I made this change.
Mistake 3: Using the Wrong Pot
I used a cute ceramic pot with no drainage holes. Please don’t do this. Hibiscus roots suffocate without proper drainage. I literally watched my plant wilt and die within a week.
You need a pot with multiple drainage holes. Terra cotta works great because it breathes. Plastic pots trap moisture, making overwatering easier. Choose wisely.
My Step-by-Step Process for Growing Multi-Colored Hibiscus
Step 1: Choose Your Container
I use a 20-inch wide terra cotta pot. It’s heavy but worth it. The size matters because hibiscus roots need room to spread. A cramped pot stunts growth and reduces blooms.
Make sure your pot has at least four drainage holes at the bottom. I drill extra holes if needed. Water must escape freely. No exceptions.
Step 2: Prepare the Soil Mix
I tried regular potting soil first. Bad idea. It compacted and held too much water. Now I mix my own: 2 parts high-quality potting mix, 1 part perlite, and 1 part coarse sand.
This mixture drains quickly while retaining enough moisture. The RHS recommends similar soil composition for container hibiscus. I trust their expertise because they’ve tested thousands of plants.
Step 3: Select Your Hibiscus Varieties
I picked three complementary colors: ‘Cajun Sunrise’ (red-orange), ‘Butterfly Pink’ (soft pink), and ‘Mandarin Dreams’ (yellow with red center). These are all tropical hibiscus suitable for containers.
You can mix dwarf varieties too. Just make sure they have similar growth rates and light requirements. Mixing fast and slow growers creates uneven competition.
Step 4: Plant with Care
I place a layer of gravel at the bottom for extra drainage. Then I add soil until the pot is half full. I position each plant so they’re equally spaced, about 6 inches apart.
The root ball should sit at the same depth as in the nursery pot. I gently loosen roots before planting. Water thoroughly after planting. This settles the soil around roots.
Step 5: Watering Routine
I water every 2-3 days during summer, less in winter. But like I said, check the soil first. I use a moisture meter to be precise. It costs ten bucks and saves plants.
Morning watering is best. It gives leaves time to dry before nightfall. Wet leaves overnight invite fungal diseases. I learned this after losing my second plant to powdery mildew.
Step 6: Fertilize Regularly
I use a balanced 10-10-10 fertilizer every two weeks during growing season. Hibiscus is a heavy feeder. Without fertilizer, blooms shrink and leaves yellow.
Switch to a high-potassium fertilizer once buds appear. This encourages more flowers. I’ve seen bloom count double after this simple change.
Step 7: Prune for Shape
I prune in early spring before new growth starts. Cut back leggy stems by one-third. Remove dead or crossing branches. This improves air circulation and light penetration.
Don’t be afraid to prune hard. Hibiscus responds well to aggressive trimming. I’ve taken off half the plant and it bounced back beautifully.
What Happens After Two Weeks
After two weeks of proper care, I notice new growth tips emerging. Leaves turn darker green. The soil stays consistently moist but not waterlogged.
My biggest surprise? The first buds appear around day 12. They start as tiny green bumps at leaf joints. Within three more days, these swell into recognizable buds.
But let me be honest – not everything goes perfectly. One plant might grow slower than others. One variety might bloom earlier. That’s normal. Don’t panic.
Common Issues I Faced
Yellow Leaves
Yellow leaves mean overwatering or nutrient deficiency. I check both. First, I verify soil moisture. If it’s wet, I stop watering for a few days. If dry, I fertilize.
Yellow lower leaves are natural aging. But widespread yellowing signals stress. I fixed this by improving drainage and reducing watering frequency.
Bud Drop
Bud drop breaks my heart. It happens when plants are stressed – too much water, not enough light, or temperature fluctuations. My biggest cause was inconsistent watering.
Now I keep a consistent schedule. Buds stay on for 3-4 days before opening. If they drop earlier, I investigate immediately.
Pests
I’ve dealt with spider mites, aphids, and whiteflies. The worst was spider mites because they’re tiny and spread fast. I caught them early by inspecting leaves weekly.
Neem oil spray works wonders. Apply weekly for two weeks. I also introduced beneficial insects like ladybugs. They cleaned up aphids naturally.
How to Maintain Your Multi-Colored Planter
Seasonal Care
In summer, I move the pot to full sun spots. In winter, I bring it indoors to a bright room. Hibiscus can’t survive frost. I learned this after losing a plant to unexpected cold.
I cut back watering in winter by half. Fertilizing stops completely. Plants rest during this period. Forcing growth when light is low leads to weak stems.
Repotting
Every two years, I repot into fresh soil. The roots fill the pot completely. I go up one container size, never more. Too much space causes water retention problems.
Spring is the best time for repotting. Plants are actively growing and recover quickly. I trim roots by one-third to encourage new growth.
Supporting Heavy Blooms
Some hybrids produce massive flowers up to 8 inches across. These can weigh down stems. I use bamboo stakes and soft ties to support them.
Without support, stems bend and break. I’ve snapped several blooms this way. Now I stake proactively before flowers open.
My Secret to Maximum Blooms
I discovered this by accident. Pinch off the first few buds when plants are young. This forces energy into root development. The result? More blooms later.
I also deadhead regularly. Removing spent flowers redirects energy to new buds. I check daily during peak blooming season.
Expert Tips from AHS
The American Horticultural Society recommends grouping heat-loving plants together. Hibiscus thrives in warm microclimates. Place your planter against a south-facing wall for maximum heat retention.
They also suggest using slow-release fertilizer pellets mixed into soil. This provides steady nutrition without risk of burn. I’ve switched to this method and seen improvement.
What I Wish I Knew Before Starting
I wish someone told me about root competition. Different hibiscus varieties compete for space and nutrients. The strongest plants dominate. Weaker ones struggle.
My solution? Give each plant its own root zone. Use a large enough container. And space them generously. Crowding causes stress and reduces blooms.
I also wish I knew about acclimation. Moving plants from nursery to home shocks them. I now harden off new plants gradually over a week. This reduces transplant shock.
How to Create a Stunning Visual Display
Color coordination matters. I arrange flowers by contrast – red next to yellow, pink next to orange. This creates visual impact.
Height variation adds depth. Taller varieties in back, shorter in front. This creates a layered effect that looks professional.
I also add trailing plants around the edge. Bacopa or sweet potato vine softens the pot’s rim. This makes the display feel fuller and more natural.
Troubleshooting: Why Aren’t They Blooming?
This frustrates every grower. My plants refused to bloom for months. The culprit was insufficient light. I moved them to a sunnier spot and within two weeks, buds appeared.
Other causes include:
- Too much nitrogen fertilizer (promotes leaves, not flowers)
- Overwatering (stress inhibits blooming)
- Poor drainage (root problems stop growth)
Check light first. Then water. Then fertilizer. One of these fixes it.
How to Overwinter Your Multi-Colored Planter
I bring my pot inside before first frost. Place it in a bright room with temperatures around 60-70°F. Reduce watering drastically.
Some leaves drop. That’s normal. Don’t panic. The plant is dormant. In spring, start watering again and move back outside gradually.
I’ve lost plants to cold damage by waiting too long. Now I bring them in at the first sign of cooler weather. Better safe than sorry.
Propagation: Growing More Plants
I propagate from cuttings taken in spring. Use 4-inch stem sections with two leaf nodes. Remove lower leaves and dip in rooting hormone.
Place cuttings in moist perlite. Cover with plastic bag to maintain humidity. Roots appear in 3-4 weeks. Then transplant into individual pots.
This is how I expand my collection without buying new plants. It’s rewarding and cost-effective.
Final Thoughts on Growing Multi-Colored Hibiscus
Growing multi-colored hibiscus in one planter changed my gardening life. It’s not difficult once you understand the basics. Start with good soil, proper drainage, and enough light.
I’ve learned that patience pays off. My first successful planter took three months to reach peak bloom. But when it happened, wow. The colors were breathtaking.
Don’t make my mistakes. Follow these steps. You’ll have a stunning display that impresses everyone who sees it.
Frequently Asked Questions
Can I mix different hibiscus types in one pot? Yes, but choose varieties with similar growth habits. Mixing tropical and hardy hibiscus creates issues because they have different care requirements. Stick with all tropical or all hardy varieties.
How often should I repot my multi-colored hibiscus planter? Every 2-3 years, or when roots emerge from drainage holes. Repot in spring using fresh soil. Going up one pot size helps prevent overwatering issues.
Why do my hibiscus blooms only last one day? That’s normal for many varieties. Single-day blooms are common. To extend visual display, plant multiple varieties with staggered blooming times. This creates continuous color throughout the season.
Now go plant your multi-colored hibiscus planter. You’ve got this.





