Indoor Hibiscus Pest Prevention: Your Essential Monthly Inspection Checklist
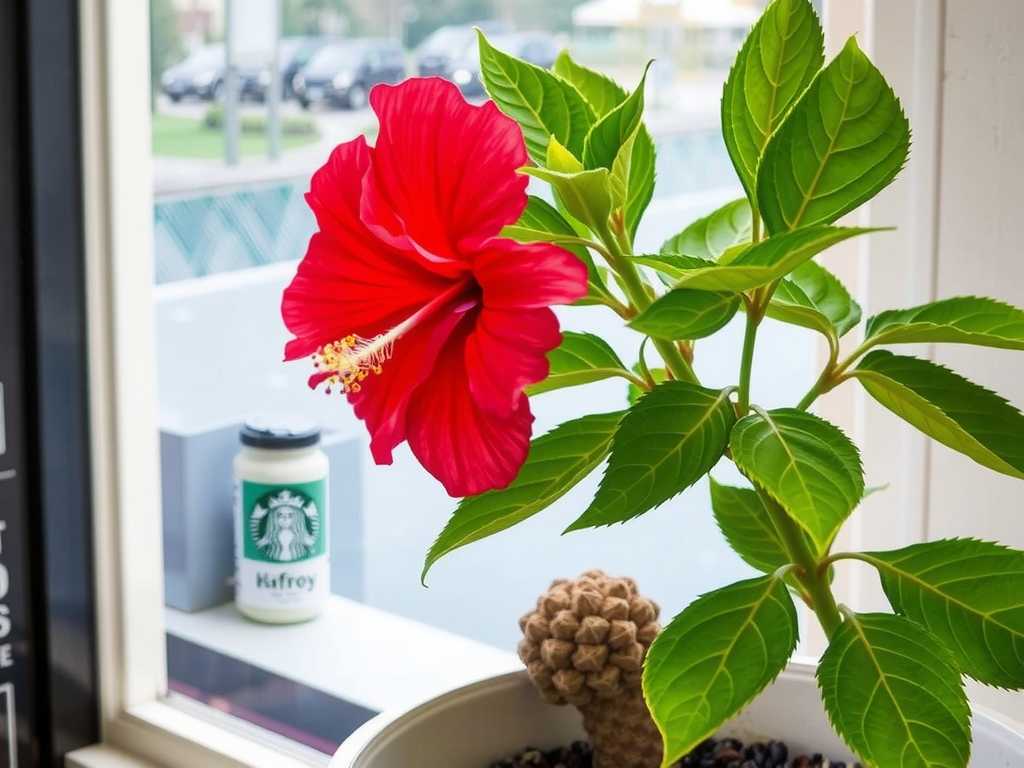
There’s nothing quite as disheartening as watching your prized indoor hibiscus, once covered in vibrant blooms, start to decline. You notice the leaves are sticky, or perhaps they’re speckled with tiny yellow dots. You see fine webbing in the crooks of stems or tiny white fluffs that look like cotton. As a fellow plant enthusiast, I’ve been there. The heart of the problem often isn’t a sudden catastrophe but a slow, unnoticed invasion. Pests don’t announce their arrival; they sneak in and establish colonies while we’re simply admiring the flowers. That’s why reactive treatment is a losing battle. The true secret to a thriving, bloom-heavy hibiscus is a proactive, systematic defense. After losing a beautiful ‘Cajun Cocktail’ to a severe spider mite infestation I caught too late, I developed a rigorous Indoor Hibiscus Pest Prevention routine centered on a Monthly Inspection Checklist. This isn’t just theory; it’s a battle-tested system born from failure and refined through success over years of indoor gardening.
For the past two years, I’ve committed to a full inspection on the first weekend of every month. It transformed my plant care from guesswork to a science. This guide will walk you through my exact checklist, share the pitfalls I encountered (and how to fix them), and show you how this simple monthly habit is the most effective thing you can do for your plant’s long-term health.

Why a Monthly Checklist is Your First and Best Defense
Pests like spider mites, aphids, mealybugs, and scale have life cycles that can explode in a matter of weeks. According to the Royal Horticultural Society (RHS), regular monitoring is the cornerstone of effective pest management in enclosed spaces. A monthly interval is the sweet spot—it’s frequent enough to catch an outbreak in its earliest, most manageable stage before it causes significant damage or spreads to other plants. Waiting for visible symptoms (leaf drop, stunted growth) means the population is already advanced.
My own “aha!” moment came after implementing this checklist. A plant I had nearly written off as “just stressed” was revealed, under close inspection, to have early-stage scale on its lower stems. Because I caught it during my scheduled inspection, a simple spot treatment with isopropyl alcohol solved the problem in one go. Without the checklist, I might have only noticed months later when the stems were covered.
The Ultimate Monthly Inspection Checklist: A Step-by-Step Walkthrough
Grab a notepad, a good light source (I use a headlamp for hands-free work), and a magnifying glass. Trust me, the magnifying glass is non-negotiable—it turns specks into identifiable insects. I inspect every plant, but for my hibiscus, I follow this exact sequence.
Step 1: The Pre-Inspection Quarantine & Setup
Before I even start looking, I move the hibiscus to my dedicated inspection area—a cleared table away from other plants. This prevents any dislodged pests from falling onto neighboring pots. I also note the date and the plant’s overall appearance in my log: “March 3rd – ‘Midnight Marvel,’ overall vigorous, three buds developing.” This log helps track patterns over time.
Step 2: Foliage Examination – Topside and Underside
This is the most critical step. Spider mites and aphids love the undersides of leaves.
- Action: I gently support a leaf with one hand and visually scan both the top surface and the underside. I look for:
- Discoloration: Yellow stippling (tiny dots), a silvery sheen, or unusual chlorosis.
- Residue: Sticky “honeydew,” which can lead to sooty mold.
- The Pests Themselves: Tiny moving dots (mites/thrips), stationary bumps (scale), or fluffy white clusters (mealybugs).
- My Mistake & Fix: I used to just glance. I missed the earliest signs. Now, I examine every single leaf, starting from the top of the plant and working down. For large plants, this takes time, but it’s essential.
Step 3: Stem and Node Scrutiny
Pests seek shelter in the tight spaces where leaves meet stems (the nodes) and along woody stems.
- Action: I run my fingers gently along the stems (feeling for unusual bumps) and peer into every leaf axil. This is where mealybugs throw their secret parties.
- Real Observation: During a routine check on my ‘Black Dragon,’ my finger caught on a tiny bump. Under the magnifier, it was a lone scale insect. Its isolation proved my monthly prevention was working—it hadn’t had time to reproduce.
Step 4: Bud and Bloom Check
Tender new growth and flower buds are high-sugar targets for aphids and thrips.
- Action: I carefully open a few developing buds if possible and look between the sepals. I also check the base of spent flowers.
- Tip: Thrips often leave behind faint brown streaks on petals. If I see this, I immediately place sticky blue traps nearby to monitor adult populations.
Step 5: Soil Surface and Pot Inspection
Fungus gnats are a common nuisance, and some pests can crawl or lay eggs near the soil line.
- Action: I look for flying adults when I water and check for larvae in the top inch of soil. I also wipe the outside of the pot and the saucer to remove algae or debris that can harbor pests.
Step 6: The Log and Action Decision
After the inspection, I update my log with findings: “No pests observed. New growth clean.” If I find something, I note the exact location, pest type, and severity. Then, I decide on an action:
- Level 1 (Minor): A few aphids or a single mealybug. Action: Physical removal with a cotton swab dipped in 70% isopropyl alcohol.
- Level 2 (Moderate): Several leaves with spider mite stippling or multiple scale. Action: Isolate plant immediately. Treat with a targeted insecticidal soap or horticultural oil spray, ensuring full coverage, especially undersides. Repeat treatment in 7-10 days to break the life cycle.
- Level 3 (Severe): Widespread infestation. Action: This is where I failed before having a checklist. Now, I consider more aggressive treatment, a full soil change, or in one heartbreaking case, disposing of the plant to protect the rest of my collection.
The 2-Week Follow-Up: Why It’s Crucial
A single treatment is rarely enough. Eggs are often resistant. My checklist includes a mandatory 2-week follow-up inspection for any plant that required treatment. Here’s what I observed over a two-week period with a hibiscus that had a mild mealybug issue:
- Week 1 (Post-Treatment): I isolated the plant. After spot-treating with alcohol, I gave it a gentle shower to dislodge any hidden bugs and applied insecticidal soap as a preventative. The plant looked slightly stressed from the washing.
- Day 3-7: I monitored daily for signs of chemical reaction (leaf burn) or pest resurgence. None appeared.
- Week 2 (The Follow-Up Inspection): This is the most important check. I went through the full checklist again, with extra attention to previously affected areas. I found one almost-invisible juvenile mealybug in a new leaf curl—proof that my first treatment missed an egg. I removed it, and the plant was declared clean. Without this 2-week check, that one bug could have restarted the entire cycle.
Common Pitfalls in Pest Prevention and How to Solve Them
Even with a checklist, you can stumble. Here are the problems I faced and how I corrected them.
-
Pitfall: Inconsistent Timing. Life gets busy, and I’d skip a month. “It looks fine,” I’d think.
- Solution: I set a recurring phone calendar alert for “Hibiscus Inspection Day.” Consistency is more powerful than occasional intensity.
-
Pitfall: Poor Lighting. Inspecting in dim room light meant I missed the subtle signs.
- Solution: I invested in a bright, portable LED grow light or use my headlamp. Shadows disappear, and every detail becomes clear.
-
Pitfall: Neglecting Plant Health. A stressed plant is a magnet for pests. My focus was solely on bugs.
- Solution: My checklist now includes a health audit: checking soil moisture, reviewing fertilization schedule, and ensuring adequate light. The American Horticultural Society (AHA) emphasizes that proper cultural care is the first line of defense, as healthy plants are more resistant to infestation.
-
Pitfall: Overreacting to Findings. The first time I saw a single spider mite, I doused the plant in a harsh systemic pesticide, which caused more damage than the pest.
- Solution: I learned to match the response to the threat. For a single pest, the gentlest effective method is best. I now keep a range of tools: alcohol swabs, insecticidal soap, neem oil, and yellow/blue sticky traps.
Integrating Prevention into Overall Hibiscus Care
Monthly pest inspection isn’t a standalone task; it’s the diagnostic part of a holistic care routine. While inspecting, I also assess if the plant needs watering, pruning, or a feed. This integrated approach means I’m constantly in tune with my plant’s needs, which inherently prevents the stress that invites pests. My checklist for hibiscus plants has become as natural as watering.
How often should I really check for pests on my indoor hibiscus? While a thorough monthly inspection is my non-negotiable foundation, I give my plants a quick visual scan every time I water. This “touchpoint check” takes seconds—looking for obvious webbing, flies, or stickiness—and helps catch problems that arise between scheduled deep dives.
I found pests! Should I immediately throw the plant away? Absolutely not, unless the infestation is catastrophic and poses a risk to an irreplaceable collection. Most common pests are manageable if caught early. Immediately isolate the affected plant from others, identify the pest correctly (use online resources or local extension services), and begin with the least invasive treatment. My ‘Black Dragon’ that had scale is now my healthiest plant because I caught it early.
")
Are chemical pesticides necessary for indoor hibiscus pest control? Rarely. In the controlled environment of a home, broad-spectrum chemical pesticides are often overkill and can harm beneficial microbes in the soil or cause phytotoxicity. My strategy, supported by integrated pest management (IPM) principles, is to start with physical removal, then use targeted organic controls like insecticidal soaps or horticultural oils which suffocate pests without leaving harsh residues. Reserve stronger chemicals for only the most persistent, severe cases.
Adopting a systematic monthly pest inspection checklist is the single most effective shift you can make in caring for your indoor hibiscus. It moves you from a reactive plant paramedic to a proactive plant guardian. The peace of mind that comes from knowing you’ve thoroughly checked your plant is invaluable. You’ll catch problems when they are mere suggestions, not declarations of war. Your hibiscus will reward this diligent care with stronger growth, more prolific blooming, and the resilience to enjoy a long, healthy life in your home. Start your checklist this weekend—your future self, and your hibiscus, will thank you for it.


发表评论