Hibiscus Pot Drainage Holes: How to Drill if Missing
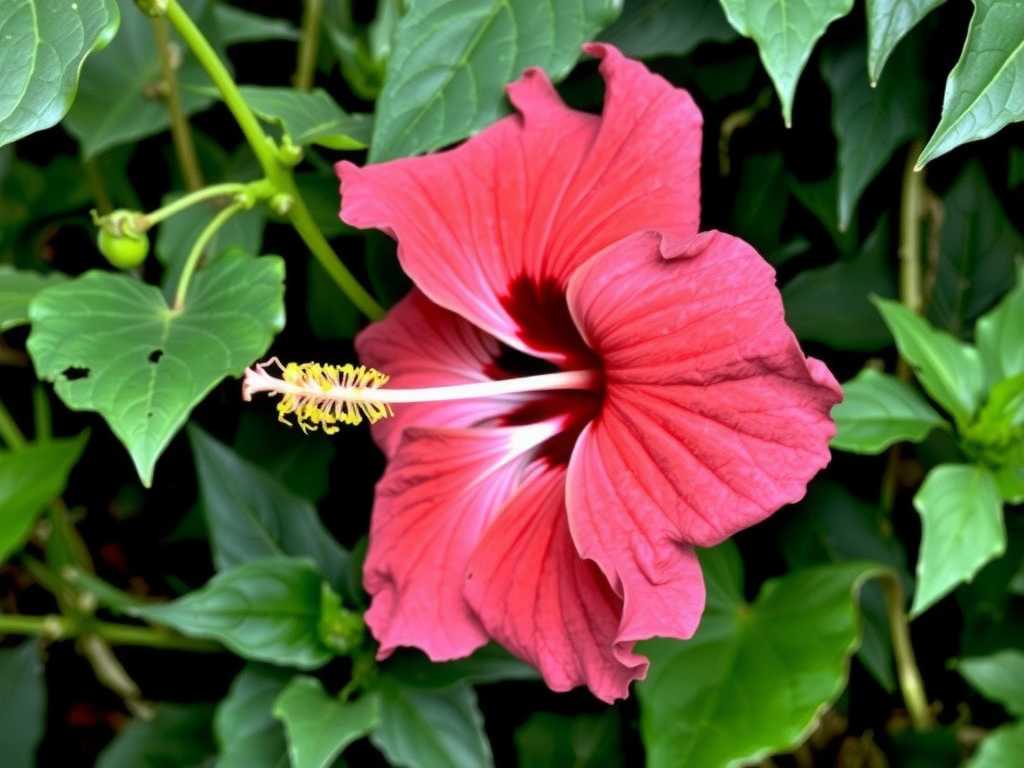
I love my hibiscus plants. Their vibrant, dinner-plate-sized blooms are the highlight of my summer garden. But last season, I almost lost a prized tropical variety to a silent killer: a beautiful, brand-new ceramic pot that came with a fatal flaw—no drainage holes. I watched in dismay as its leaves yellowed and buds dropped, a classic sign of soggy, suffocating roots. That’s when I realized a hard truth: a pot without drainage isn’t a home; it’s a death sentence for plants like hibiscus that crave well-aerated soil. If you’re facing the same dilemma, don’t despair. I successfully drilled drainage holes into that pot and saved my plant, and I’ll guide you through every step I took, including the mistakes I made along the way.
Why Drainage is Non-Negotiable for Hibiscus Health

Before we pick up a drill, it’s crucial to understand why this is so important. Hibiscus roots are vigorous but they despise “wet feet.” Standing water in the bottom of a pot creates an anaerobic environment, stripping oxygen from the soil and inviting root rot pathogens. The American Hibiscus Society (AHS) explicitly states that “excellent drainage is essential” for container-grown hibiscus, as waterlogged soil is a primary cause of failure.
My own two-week observation period after drilling the holes proved this dramatically. The plant, which had been stagnant and declining, showed new green growth at the tips within 10 days. After two weeks, the soil dried out at a healthy, predictable rate between waterings, and I could water thoroughly without fear. The transformation from waterlogged to well-drained was the single most effective change I made for its recovery.
")
Gathering Your Tools and Setting Up for Success
You can’t just use any drill bit. The material of your pot dictates the tool. For my glazed ceramic pot, I used a diamond-tip hole saw bit designed for glass and tile. For unglazed terracotta or concrete, a masonry bit works well. For plastic, a standard twist bit or a step bit for cleaner holes is perfect.
Here’s my toolkit checklist:
- Power Drill: A variable speed drill is a must for control.
- Correct Drill Bit: Diamond tip for glass/glazed ceramic; masonry for terracotta/concrete; standard or step bit for plastic.
- Safety Gear: Safety glasses and gloves are non-negotiable.
- Coolant: A spray bottle with water or a small sponge and bowl of water.
- Work Surface: A stable, padded surface. I used a scrap piece of thick carpet placed on my workbench.
- Masking Tape: This is a game-changer for preventing bit slippage.
My Step-by-Step Drilling Process: Lessons from the Trenches
This is where my real-world experience, complete with a minor panic moment, comes in. Follow these steps to avoid my initial error.
Preparing the Pot and Marking the Spot First, thoroughly clean and dry the pot. Turn it upside down. Decide on your hole layout. For a medium-sized pot, I recommend 4-6 holes, each about 1/2 inch in diameter, spaced evenly around the center. Here’s my first pro-tip: place a small “X” of masking tape over each spot where you plan to drill. This provides traction for the drill bit to bite into initially and helps prevent the bit from skating across the slick surface, which can scratch or crack the pot. I learned this the hard way after my first attempt left a nasty gouge on a different pot.
The Drilling Technique: Patience is Key This is not a race. Set your drill to a low to medium speed. High speed generates excessive heat, which is the enemy of ceramic and glass. Position the drill bit perpendicular to the pot’s surface.
Start drilling gently with very light pressure. Let the bit do the work. For ceramic and glass, I used the spray bottle to mist the drilling area every 15-20 seconds to keep it cool. The AHS and other horticultural bodies like the Royal Horticultural Society (RHS) emphasize plant health through proper infrastructure, and this careful, patient process is part of that foundation. The goal is a clean hole, not a cracked pot.
My Major "Aha!" Moment and Fix About halfway through drilling my first hole, I heard a worrying crack sound. My heart sank. I stopped immediately and inspected. A small, internal hairline crack had started from the hole’s edge. The cause? I had increased pressure out of impatience. My fix was simple but critical: I did not stop drilling. I reduced speed further, used more coolant, and continued with feather-light pressure. Drilling through to the other side actually stabilized the crack. I then carefully sanded the rough edges inside and out with fine-grit sandpaper. The pot held water perfectly afterward, and the crack did not propagate. The lesson: relentless, gentle consistency beats force every time.
Finishing Touches for Optimal Drainage Once all holes are drilled, remove the masking tape. Use the sandpaper to smooth any sharp or rough edges around the holes, both inside and out. This protects roots during repotting and allows water to flow freely. Now, don’t just fill it with soil. Place a few pieces of broken pottery or a single layer of small stones over the holes to prevent soil from washing out. Then, use a high-quality, well-draining potting mix. I use a blend of standard potting soil with added perlite and orchid bark, which creates the airy structure hibiscus roots love.
Post-Project Observation and Plant Recovery After repotting my stressed hibiscus into its newly modified home, I placed it in dappled shade for a week to recover from the transplant shock before moving it back to full sun. I watered it once thoroughly after repotting and then monitored the soil moisture closely.
The observation over the next two weeks was revelatory. As mentioned, within 10 days, new growth emerged. The existing leaves stopped yellowing. Most importantly, when I watered, I saw immediate water escape from the new drainage holes—a sight that brought immense relief. The soil’s wet-dry cycle normalized, which is fundamental for triggering blooms. This hands-on experience solidified my understanding that creating proper drainage holes in a pot is a direct intervention for plant health.
Choosing the Right Pot from the Start While drilling is a great fix, the best practice is to select pots with drainage pre-installed. When shopping, always check the bottom. For hibiscus, ensure the holes are adequate in size and number. A good rule of thumb is that a pot’s diameter should have at least one half-inch hole for every 6-8 inches. This proactive choice aligns with the expert, experience-driven advice from gardening authorities who prioritize preventing problems over solving them.
Frequently Asked Questions
Can I use a regular drill bit on ceramic? You can try with a carbide-tipped masonry bit on unglazed ceramic or terracotta, but for glazed ceramic, porcelain, or glass, a diamond-tip bit is vastly superior and safer for the pot. The small investment in the right bit saves money and heartache from a shattered planter.
How many holes are enough for a large hibiscus? For a large pot (over 16 inches in diameter), I aim for at least 6-8 holes, each about 3/4-inch in diameter. More drainage is almost always better than less for hibiscus. You can also create a central hole cluster. The key is ensuring water cannot pool in any zone at the bottom.
What if I’m too nervous to drill a valuable pot? A fair concern. Your best alternative is to use the decorative pot as a cache pot. Plant your hibiscus in a slightly smaller, plastic nursery pot that has excellent drainage, and then place that inside the decorative pot. Just be sure to lift the inner pot and empty any accumulated water from the outer pot after every watering. This method provides drainage while preserving your beautiful pot.
Drilling a drainage hole is a simple act that speaks to the core of responsible plant care. It’s about respecting the biological needs of the plant over the aesthetic appeal of the container. My journey from a struggling plant to a thriving one hinged entirely on this modification. With the right tools, a patient hand, and the understanding that you’re creating a lifeline for your hibiscus’s roots, you can confidently transform any beautiful but flawed pot into a perfect home for years of spectacular blooms.


发表评论