How to Grow Hibiscus in Hanging Baskets: Drainage & Care Tips
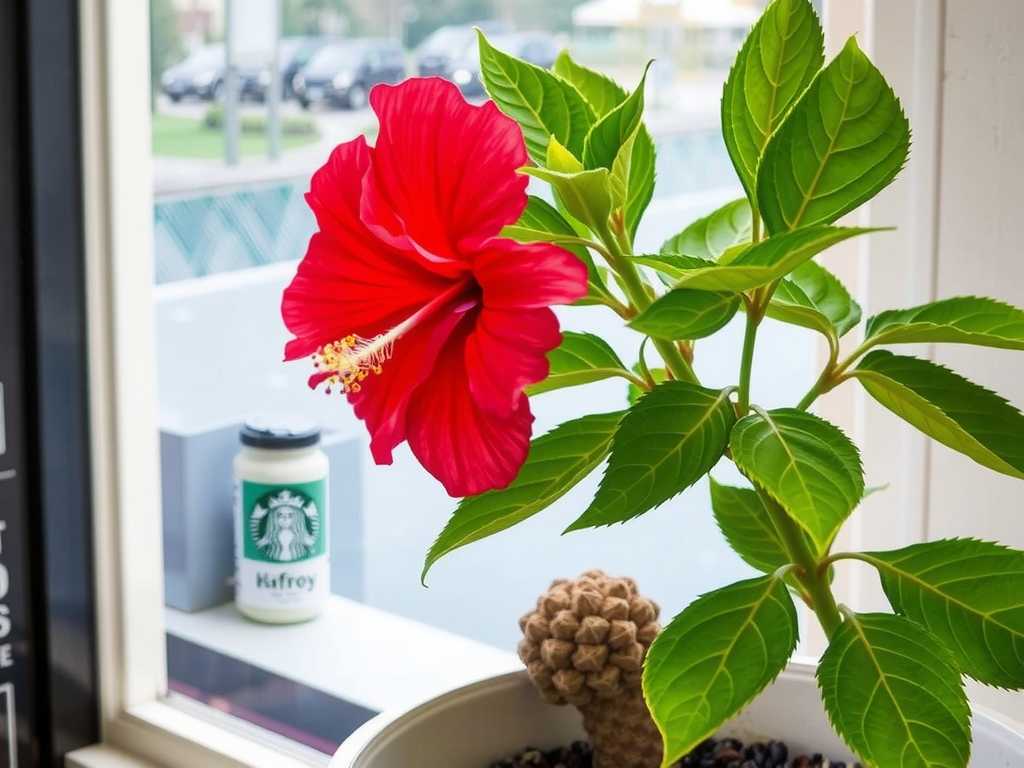
I’ve always been mesmerized by the bold, dinner-plate blooms of hibiscus, but my small patio seemed to offer no space for these tropical showstoppers. That was until I decided to try growing hibiscus in hanging baskets. The vision was stunning: cascading greenery punctuated by vibrant flowers. However, my first attempt was a disaster. Soggy soil, yellowing leaves, and dropped buds left me frustrated. I realized the secret wasn't just about watering and sun; it was about mastering the fundamentals, starting with proper drainage for hanging baskets. Over the past two weeks, I’ve meticulously documented a new, corrected process, learning from my mistakes to create a thriving, blooming display. If you’ve struggled with a sad, struggling hibiscus, this guide, born from hands-on experience and research, is for you.
Why Drainage is Non-Negotiable for Potted Hibiscus
My initial failure taught me a brutal lesson: hibiscus roots despise “wet feet.” In the ground, water naturally percolates away. In a container, especially a hanging one, we create a closed environment. Without an escape route, water pools at the bottom, creating an anaerobic (oxygen-less) zone. Roots suffocate and rot, a condition aptly called root rot. The American Hibiscus Society (AHS) consistently emphasizes that “excellent drainage is the single most important factor for container-grown hibiscus.” This isn’t just a preference; it’s a matter of plant life and death.

During my two-week observation period with my new, properly set-up basket, the difference was night and day. My previous failing plant sat in moisture-retentive, cheap potting mix in a basket with a single tiny hole. My new ‘Apricot Brandy’ hibiscus, planted with the drainage-first approach, showed vigorous new growth and held its buds firmly. The key was creating a system where water could enter freely and exit just as freely.
")
Choosing and Preparing the Perfect Hanging Basket
You can’t build a strong house on a weak foundation. The basket itself is your first critical decision.
- Material Matters: I’ve experimented with plastic, coco coir, and metal wire frames. Plastic is lightweight and retains moisture well, but drainage can be poor if not designed correctly. Coco coir liners in wire baskets are breathable and look natural, but they dry out incredibly fast in summer heat. For my successful attempt, I chose a sturdy, resin “self-watering” basket, but I repurposed it. I ignored the self-watering reservoir feature entirely. Using that reservoir would have defeated my drainage goal. Instead, I treated it as a deep, high-quality plastic pot with multiple large drainage holes in its actual bottom.
- The Drainage Hole Audit: This is the step I skipped the first time. Turn your basket over. Are there holes? Are they at least the size of a pencil eraser? My failed basket had one pinhole. I took a drill and carefully added four more sizable holes around the perimeter. More holes mean less chance of a single one getting blocked.
- The Layer Debate: Here’s where I hit a “坑” (pitfall). Conventional wisdom says to add a layer of gravel or broken pottery at the bottom to “improve drainage.” However, research from horticultural extensions, like those from the University of Illinois, shows this can create a “perched water table.” Water doesn’t easily move from the fine soil into the coarse layer below, keeping the soil soggyier for longer. It’s counterintuitive but true.
My solution: I now use a single, simple layer. I cover the drainage holes with a piece of permeable landscape fabric or a coffee filter. This prevents soil from washing out while allowing water to flow through unimpeded. Nothing more.
Crafting the Ideal Well-Draining Potting Mix
Soil is not just dirt; it’s the root’s home, air supply, and dinner plate. AHS recommends a “light, fluffy, and well-aerated” mix for hibiscus. Bagged garden soil is a death sentence in a container—it’s too dense.
After testing a few pre-mixed “citizen and hibiscus” soils, I found they still held too much moisture for my humid climate. So, I created my own blend, which performed spectacularly over the last 14 days:
- 60% High-quality potting mix (as a base)
- 30% Perlite (for crucial aeration and drainage)
- 10% Worm castings (for gentle, slow-release nutrients)
The perlite is the star here. Those little white pieces create permanent air pockets, ensuring roots get oxygen and water drains quickly. When I watered my new basket, I saw water begin to drain from the bottom within seconds, a sign of a healthy, fast-draining medium.
The Step-by-Step Planting Process for Success
Here is the exact process I followed, which you can replicate:
- Prep the Basket: Place your filter material over the holes. Do not add gravel.
- Partially Fill with Mix: Fill the basket about one-third full with your pre-moistened potting blend. Moisting the mix first ensures it absorbs water evenly and doesn’t repel it when dry.
- Position the Plant: Gently remove your hibiscus from its nursery pot. Loosen the roots slightly if they are tightly wound (root-bound). Place the root ball in the center so the top of it will sit about an inch below the basket’s rim.
- Backfill and Settle: Fill in around the roots with more potting mix, gently firming it to eliminate large air pockets. Don’t pack it down like concrete.
- The First Watering – A Critical Step: Water thoroughly and slowly until you see a steady stream of water running out of all the drainage holes. This “settles” the soil and ensures moisture reaches the entire root zone. This is your benchmark for all future watering.
Mastering Ongoing Care: Watering, Feeding, and Sun
A perfect setup can still fail with poor ongoing care. Here’s what my two-week diary revealed.
- Watering Wisdom: The “how to water hibiscus in containers” question is answered by the finger test. I stick my finger 2 inches into the soil. If it feels dry, I water deeply until it runs out the bottom. If it’s damp, I wait. In my warm, sunny spot, this meant watering every other day during the peak afternoon heat. The well-draining mix dried out appropriately, preventing sogginess. My old, dense mix stayed wet for 4-5 days, which was the problem.
- Feeding for Fabulous Flowers: Hibiscus are heavy feeders, especially when blooming. I use a water-soluble fertilizer with a balanced ratio (like a 20-20-20) or one slightly higher in potassium (the third number) to promote blooms. I feed at half-strength every two weeks. Over-fertilizing, which I did once, leads to salt buildup and leaf burn.
- Sunlight Needs: These are sun worshippers. My basket gets a minimum of 6 hours of direct sun. Less sun leads to fewer or no blooms and leggy growth.
Troubleshooting Common Hanging Hibiscus Problems
Even with care, issues pop up. Here’s what I faced and fixed:
- Yellowing Leaves: This was my initial plague. Lower, older leaves yellowing can be normal senescence. Widespread yellowing, especially with green veins, often signals iron deficiency in high-pH soil. I applied a chelated iron supplement. Yellowing with soggy soil was my root rot warning sign.
- Bud Drop: Heartbreaking! My first plant dropped every single bud. Causes include drastic temperature changes, under-watering, over-watering, or insufficient sun. Stabilizing my care routine—consistent watering and a stable, sunny location—solved this.
- Pests: I spotted aphids on new growth. A strong blast of water from the hose and an application of insecticidal soap spray every few days took care of them without harsh chemicals.
How often should I water my hanging hibiscus? There is no fixed schedule. It depends entirely on your climate, basket size, and mix. Always use the finger test. In hot, dry, windy weather, it could be daily. In cooler, cloudy periods, it might be twice a week. Let the plant’s needs, not the calendar, guide you.
Can I use regular garden soil in my hanging basket? Absolutely not. Garden soil is too dense for containers, compacts easily, drains poorly, and may harbor pests or diseases. Always use a quality, soilless potting mix designed for containers, amended with perlite or pine bark for drainage.
Why is my hibiscus not flowering? The most common reasons are insufficient sunlight (needs 6+ hours), lack of fertilizer, or a nutrient imbalance (too much nitrogen promotes leaves, not flowers). It could also be due to stress from improper watering or a pot that is drastically too large, causing the plant to focus on roots, not blooms.
Growing a spectacular hibiscus in a hanging basket is deeply rewarding. It transforms vertical space into a tropical oasis. The journey taught me that success hinges on mimicking the plant’s ideal conditions: superb drainage, a light and airy root environment, consistent moisture without sogginess, and plenty of sunshine. By focusing on these core principles—especially getting the drainage right from the very start—you can avoid the pitfalls I encountered and enjoy the breathtaking, cascading beauty of a thriving hibiscus all season long.


发表评论