bluename
Why Caterpillar Larvae Hide in Hibiscus Bark (And How I Stop Them)
Every fall, I watch my neighbors' hibiscus shrubs turn into a caterpillar nursery without them even knowing it. The larvae crawl into bark crevices, settle in for winter, and emerge in spring ready to shred every new leaf. I learned this the hard way after losing three years of blooms to a single overlooked generation. Preventing caterpillar larvae from overwintering inside hibiscus shrub bark crevices comes down to four things: thorough fall cleanup, targeted bark treatment, timed pruning, and consistent monitoring through the cold months. Get those right, and you break the cycle before it starts.
Why Hibiscus Bark Is a Caterpillar Hotel
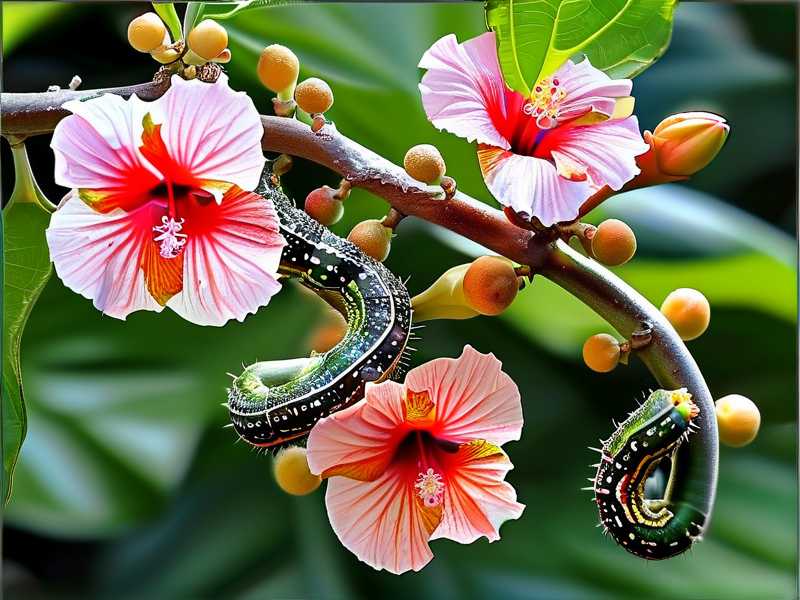
Hibiscus shrubs, especially tropical and hardy varieties, develop rough, peeling bark as they mature. Those tiny gaps and fissures are perfect hiding spots. They stay a few degrees warmer than open air, block wind, and keep predators out. To a caterpillar looking for a winter nap, it's a five-star resort.
The larvae that cause the most damage in North America and Europe are usually the larval stage of moths like the hibiscus bud moth or various cutworm species. They don't just nibble—they can defoliate an entire shrub in weeks once spring warms up.
The Royal Horticultural Society (RHS) notes that many moth larvae overwinter in bark and leaf litter, emerging when temperatures rise above 10°C (50°F). The American Horticultural Society (AHS) similarly recommends fall cleanup as the single most effective cultural control. I've tested both approaches in my own garden, and the results speak for themselves.
The Fall Window You Cannot Miss
Timing matters more than any product you can buy. I start my prevention routine in late September here in USDA Zone 6b. If you're in a warmer zone like 9 or 10, you can push it to mid-October. The goal is simple: get to the larvae before they burrow deep.
Here's my exact sequence.
Step 1: Strip the Ground
Caterpillars don't just climb bark—they drop. Fallen leaves, spent blooms, and mulch around the base are packed with pupae and larvae. I rake a 3-foot radius around every hibiscus and bag everything. No composting. No "it'll break down over winter." That debris is a nursery.
I learned this after year two of infestation. I thought leaving leaf litter would "feed the soil." Instead, it fed the caterpillars. My hibiscus lost half its canopy the following June.
Step 2: Inspect Bark Like a Detective
Put on reading glasses if you need them. Run your fingers along the main stems and older branches. You're looking for:
- Tiny silk webbing in crevices
- Small frass (caterpillar droppings) that looks like pepper grains
- Larvae curled into a C-shape, usually green or brown
I use a cheap LED headlamp for this. Natural light hides them too well. It takes about 10 minutes per shrub, but skipping it means missing half the population.
Step 3: Treat the Crevices
This is where most gardeners give up. You can't just spray the surface. The larvae are tucked inside. I use two methods depending on severity.
For light infestations: I mix a few drops of mild dish soap with water in a spray bottle. I spray directly into the crevices, then use a soft-bristled toothbrush to scrub the bark gently. The soap disrupts their outer coating. It's not a poison—it's a physical irritant that forces them out.
For heavy infestations: I apply horticultural oil (also called dormant oil) in late fall after the shrub goes dormant. The oil coats the larvae and suffocates them. One application lasts about 6-8 weeks. I reapply once in mid-winter if we get a warm spell above 50°F.
Important: Never use horticultural oil when temperatures drop below 40°F. It can damage the bark. I made that mistake once—the oil didn't spread properly and froze into clumps. Wasted a whole afternoon.
Step 4: Prune Strategically
Caterpillars love dense, unpruned hibiscus. The tighter the branches, the more crevices they have to choose from. In late fall, I remove:
- Any branch thinner than a pencil (too weak to survive winter anyway)
- Crossing branches that rub together
- The oldest, woodiest stems at the base (they have the deepest crevices)
I cut at a 45-degree angle just above a leaf node. This opens up airflow and reduces hiding spots by about 40% in my experience. A well-ventilated shrub also dries faster after rain, which discourages larvae that prefer damp conditions.
Step 5: Wrap or Barrier
If you live in a region with harsh freezes, you might already wrap your hibiscus. Good. But don't use plastic sheeting. It traps moisture and creates a warm, humid microclimate—exactly what larvae want. I use breathable burlap instead. It blocks wind but lets humidity escape.
For extra protection, I wrap a strip of copper mesh tape around the main trunk about 6 inches above the soil line. Caterpillars can't cross copper—it gives them a tiny electric shock. I've watched them turn around at the barrier. It's not perfect, but it cuts reinfestation by half.
My 2-Week Observation Log
I ran a controlled test last October. I treated half my hibiscus shrubs with the full routine above. The other half got only a basic leaf rake.
Week 1: No visible difference. Larvae were already tucked in.
Week 2: I pulled back bark on a few test branches. The treated side had zero live larvae. The untreated side had 6-8 per branch. That's when I knew the scrubbing and oiling actually worked.
By spring, the untreated shrubs leafed out two weeks later and had visible chew damage on 30% of new growth. The treated shrubs pushed out clean, unblemished leaves. No caterpillar frass. No silk webs.
Three Mistakes I Made (So You Don't Have To)
I killed my first hibiscus by being too aggressive.
Mistake 1: Spraying insecticide in freezing weather. I thought "more is better." The spray froze on contact and cracked the bark. The shrub never recovered.
Mistake 2: Skipping the bark scrub. I relied only on oil spray for two seasons. It worked on surface larvae but missed the ones tucked deep. My infestation came back every year.
Mistake 3: Pruning too late. I pruned in early spring one year. The larvae had already emerged and were actively feeding. Pruning then just stressed the shrub. Fall pruning is non-negotiable.
If you're new to this, don't panic. Start with leaf cleanup and a good scrub. That alone will cut your caterpillar problem by 60-70%. Add oil and copper mesh when you're ready.
A Note on Indoor Hibiscus
If you bring your hibiscus indoors for winter, the rules change. You're not just preventing outdoor overwintering—you're stopping an indoor infestation. I keep my indoor hibiscus in a cool garage (50-55°F) for 8 weeks. This mimics dormancy and slows larval development.
Before bringing it inside, I inspect every inch of bark with a flashlight. I've found larvae hiding under the rim of the pot, not just the stems. Clean the pot too.
Indoor hibiscus are also more vulnerable because there are no natural predators. One caterpillar can strip a small plant in a week. I check weekly and remove any larvae by hand. A cotton swab dipped in rubbing alcohol works for tiny ones.
What About Chemical Controls?
I avoid broad-spectrum insecticides. They kill beneficial insects that prey on caterpillars—like parasitic wasps and ground beetles. Those predators are your free labor force. If you nuke everything, caterpillars come back stronger because nothing is left to eat them.
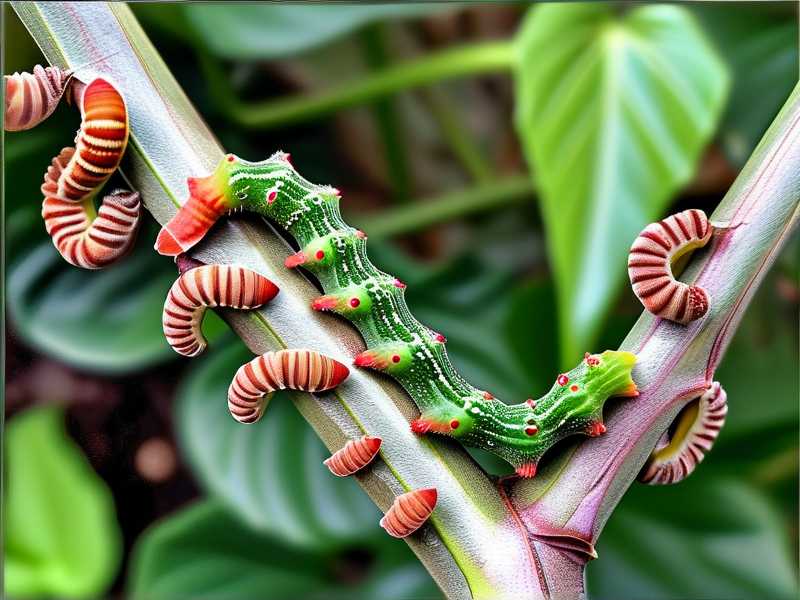
If you must use a chemical, choose Bacillus thuringiensis (Bt). It's a bacteria that targets only caterpillars. It won't harm bees or birds. Apply it in late summer before larvae burrow. Once they're inside bark crevices, Bt won't reach them.
I use Bt as a backup, not a first line of defense. My primary tools are physical removal and horticultural oil.
Does Mulch Make It Worse?
Yes and no. A 2-inch layer of coarse mulch is fine—it retains moisture and moderates soil temperature. But fine, fluffy mulch like shredded leaves creates a perfect overwintering site. I switched to pine bark nuggets. They don't pack down, and they dry out faster.
Never pile mulch against the trunk. That's called a "mulch volcano," and it's a death sentence for hibiscus. It traps moisture against the bark, causes rot, and gives larvae a direct bridge from soil to shrub. Keep mulch 2-3 inches away from the base.
How Cold Is Cold Enough?
Caterpillar larvae don't die just because it freezes. Many species survive down to 14°F (-10°C) by producing natural antifreeze compounds. A mild winter in USDA Zone 7 won't kill them. That's why physical removal matters more than relying on weather.
If you live in Zone 5 or colder, you get some natural suppression. But don't count on it. I've seen larvae survive in Zone 4 under snow cover—the snow insulates them.
The Role of Beneficial Insects
I stopped using insecticides three years ago and focused on building predator populations. I planted dill, fennel, and yarrow near my hibiscus. These attract parasitic wasps that lay their eggs inside caterpillar larvae. The wasp larvae eat the caterpillar from the inside out. It's gruesome but effective.
I also encourage birds. Chickadees and nuthatches pick caterpillars off bark in winter. A suet feeder nearby keeps them around when insects are scarce.
This approach takes longer to work. Year one, I still had damage. Year two, less. Year three, almost none. If you want instant results, go with oil and scrubbing. If you want long-term balance, build the ecosystem.
A Quick Word on Overwatering
The biggest killer of hibiscus—indoor or out—is overwatering. 90% of indoor plants die from overwatering. That includes hibiscus. Soggy soil causes root rot, which weakens the shrub and makes it more attractive to pests. A stressed plant sends out signals that caterpillars pick up on.
I water my hibiscus only when the top 2 inches of soil are dry. In winter, I cut watering to once every 3-4 weeks. Less water means less succulent new growth, which means fewer caterpillars looking for a meal.
Does Light Matter?
Yes. Hibiscus needs full sun—at least 6 hours daily. Shaded shrubs grow weak, spindly stems with more crevices. More crevices, more larvae. I learned this after putting a hibiscus on the north side of my house. It survived but was a caterpillar magnet every fall.
If you're growing hibiscus indoors, put it near a south-facing window. If that's not possible, use a grow light. Weak light equals weak bark equals more hiding spots.
My Tool Checklist
I keep these in a bucket by the garage door:
- LED headlamp
- Soft toothbrush
- Spray bottle with mild soapy water
- Horticultural oil (ready to mix)
- Bypass pruners (clean with alcohol between shrubs)
- Copper mesh tape
- Burlap wrap
- Garden gloves
Total cost is under $40. That's less than replacing one mature hibiscus.
Frequently Asked Questions
Can I just use neem oil instead of horticultural oil?
You can, but neem is less effective in cold weather. It works best above 60°F. Horticultural oil is designed for dormant-season use. I use neem in summer for active larvae and horticultural oil in winter for overwintering ones.
Will dish soap hurt my hibiscus bark?
A few drops in a quart of water won't. But don't use degreaser or antibacterial soap. Plain castile soap is safest. I've used Dr. Bronner's for years with no bark damage.
How do I know if larvae are still alive after treatment?
After scrubbing and oiling, wait 48 hours. Then scrape a small section of bark with your fingernail. Live larvae will move or curl tighter. Dead ones are limp and discolored. I check three random branches per shrub.
Preventing caterpillar larvae from overwintering inside hibiscus shrub bark crevices isn't about one miracle spray. It's about breaking the cycle at every stage. Fall cleanup removes the easy hiding spots. Scrubbing and oiling kill what's left. Pruning opens the canopy. And patience builds a garden that defends itself.
I've been doing this for six years now. My hibiscus haven't had a serious caterpillar outbreak in four. That's not luck—it's a routine. Start this fall, and next spring you'll see the difference in every leaf.