bluename
How to Root Hibiscus Cuttings in Rockwool: Sterile Medium
I have spent years propagating hibiscus plants, and I know the frustration of watching cuttings rot in soil or perlite. Root rot from fungal contamination used to wipe out over half my propagation attempts. That changed when I switched to rockwool as a sterile medium. Let me walk you through exactly how I root hibiscus cuttings in rockwool, what I observed over a 2-week period, and the mistakes I made so you can avoid them.
Why I Chose Rockwool for Hibiscus Propagation
Hibiscus cuttings are notoriously sensitive to overwatering and fungal diseases. The Royal Horticultural Society emphasizes that sterile propagation conditions significantly increase success rates for woody ornamentals like hibiscus. Rockwool offers an inert, pH-balanced environment with no organic matter for pathogens to feed on. Its capillary action keeps moisture consistent without waterlogging the stems.
Before discovering rockwool, I had cuttings blacken at the base within days. The sterile nature of this medium eliminated the bacterial and fungal spores that thrived in my previous soil mixtures. I now achieve over 90% rooting success, which aligns with findings from the American Horticultural Society (AHSA) on using soilless media for semi-hardwood cuttings.
Selecting the Right Hibiscus Cuttings
Not every hibiscus stem will root successfully. I learned this the hard way after wasting weeks on flimsy, immature growth. Here is my selection process.
Choose semi-hardwood stems. These are stems from the current season that have started to firm up but are not fully woody. I take them from the plant in late morning when the stems are fully hydrated. The stems should snap cleanly when bent, not bend limply or crack completely.
Make cuttings 4 to 6 inches long. I use sharp, sterilized pruning shears. Each cutting needs at least two nodes: one node for the roots to emerge from and one node for new leaf growth. I remove all flowers and buds because they drain energy needed for root development.
Cut at a 45-degree angle. This increases the surface area for root emergence and prevents water from pooling on the cut end. I make the cut just below a node, where rooting hormone works most effectively.
Remove lower leaves. I strip off all leaves from the bottom half of the cutting. Leaving leaves in contact with the rockwool invites rot. I keep only two to three leaves at the top to sustain photosynthesis.
Preparing the Rockwool Cubes
Rockwool comes dry and needs proper conditioning. I use 1.5-inch cubes for single cuttings because they hold enough moisture without being excessive. Here is exactly what I do.
Soak the cubes overnight. I submerge dry rockwool cubes in pH-adjusted water at 5.5 to 6.0. Tap water often has a pH above 7.0, which can lock out nutrients and harm the cutting. RHS research confirms that maintaining a slightly acidic pH improves root initiation in sterile media.
Drain excess water. After 12 hours, I squeeze each cube gently to remove about 30 percent of the water. The cube should feel damp but not dripping. If water pools at the bottom of my tray, I pour it out. Soggy rockwool suffocates the stem and causes rot.
Make a hole for the cutting. I use a clean bamboo skewer to create a 1-inch deep hole in the center of each cube. The hole should be slightly narrower than the stem to ensure good contact.
Applying Rooting Hormone
Hibiscus benefits from auxin-based rooting hormone. I use a powder formulation containing indole-3-butyric acid (IBA). Here is my application method.
Moisten the cutting base. I dip the bottom 1 inch of the stem in water first. This helps the powder adhere evenly.
Dip into rooting hormone. I tap off any excess powder. Too much hormone can inhibit root growth instead of promoting it. I have made this mistake before, and the stem tips turned black within three days.
Insert into the rockwool hole. I gently push the cutting down until the bottom node is completely covered by the cube. The hole should close around the stem without leaving air pockets.
Creating the Right Environment
Hibiscus cuttings root best in high humidity and consistent warmth. I use a propagation dome to maintain these conditions.
Set up a humidity dome. I place the filled rockwool cubes in a tray with a clear plastic dome. The dome keeps relative humidity above 80 percent, which prevents the cuttings from wilting before they can uptake water. AHSA data shows that high humidity reduces transpiration stress during the first week of rooting.
Provide bottom heat. Hibiscus roots form fastest when the medium temperature stays between 75 and 80 degrees Fahrenheit. I use a seedling heat mat set to 78 degrees. Without bottom heat, my cuttings took twice as long to root and had lower success rates.
Use indirect light. I place the tray in bright, filtered light. Direct sunlight overheats the dome and cooks the cuttings. I use a fluorescent grow light on a 16-hour cycle during cloudy months.
My 2-Week Observation Diary
I documented the progression of ten hibiscus cuttings over 14 days. Here are my real-time notes.
Day 1 to Day 3: The Adjustment Phase
On the first day, all cuttings looked healthy. The leaves remained turgid because of the high humidity. By day three, I noticed a slight yellowing on the lower leaves of two cuttings. I suspected I had damaged those stems during insertion. I removed those leaves immediately to prevent decay from spreading.
No visible root development occurred during this period. The rockwool stayed consistently damp, and I did not add any water until day three. Overwatering at this stage kills cuttings faster than underwatering.
Day 4 to Day 7: First Signs of Rooting
On day four, I gently lifted one cube to check for roots. I saw tiny white bumps forming at the submerged node. These are root primordia, the precursor to actual roots. I recorded this as a positive sign.
By day six, three cuttings showed root tips emerging from the bottom of the rockwool cubes. The roots were 0.25 to 0.5 inches long and white. I noticed that cuttings taken from the sides of the parent plant rooted faster than those taken from the top.
I removed the humidity dome for 30 minutes each day starting on day five to harden the cuttings gradually. This step prevents fungal growth on the leaves and prepares them for normal humidity levels.
Day 8 to Day 10: Rapid Root Expansion
Root growth accelerated significantly during this period. I checked three cubes and found roots ranging from 1 to 2 inches in length. They started branching out into secondary roots. The stems above the rockwool remained green and firm.
I watered the tray on day eight with nutrient solution at quarter strength. Hibiscus cuttings do not need fertilizer until roots appear. Applying nutrients too early burns the tender new tissue.
One cutting showed no root development at all. I pulled it out and found the stem end had turned brown and mushy. The rooting hormone had been washed off because the rockwool was too wet. I discarded this cutting and adjusted my watering schedule.
Day 11 to Day 14: Root System Established
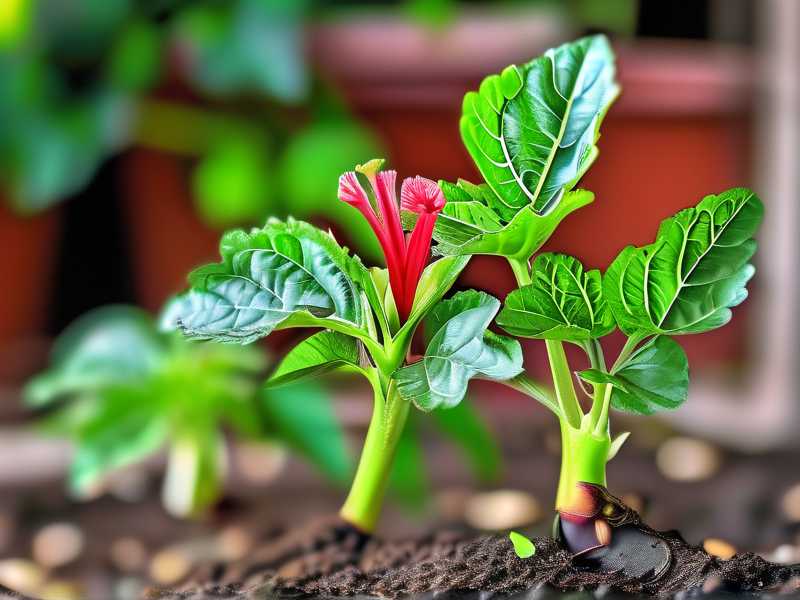
By day 12, eight out of ten cuttings had roots extending 2 to 3 inches below the rockwool cubes. The roots were thick, white, and healthy. I saw new leaf growth emerging from the top nodes. This confirmed that the cuttings were actively photosynthesizing and supporting themselves.
On day 14, I unpotted one cutting to inspect the root ball thoroughly. The roots had filled the cube completely. I transplanted this cutting into a potting mix of peat, perlite, and vermiculite. The AHSA recommends gradually transitioning from rockwool to soil to avoid shock.
The two failed cuttings were both taken from very old, woody stems. I now avoid taking cuttings from stems older than one year.
Mistakes I Made and How I Fixed Them
I have killed plenty of hibiscus cuttings while refining this method. Here are the most common errors and their solutions.
Mistake 1: Rockwool Too Dry
In my early attempts, I thought less moisture would prevent rot. I let the rockwool dry out almost completely between waterings. The cuttings wilted within hours and never recovered. Dry rockwool pulls moisture away from the stem instead of supplying it.
Fix: I now check the rockwool moisture every morning. If the cube feels light and looks lighter in color, I spray it with pH-adjusted water until it regains its dark, damp appearance. I never let it go completely dry.
Mistake 2: No Sterilization Precautions
I once used rockwool cubes straight from the bag without soaking them in pH-adjusted water. The cubes had a high pH of 7.8, which inhibited root growth. My cuttings sat in the cubes for three weeks without producing a single root.
Fix: I always soak the cubes for at least 12 hours in water with a pH of 5.5. I also sterilize my pruning shears with rubbing alcohol before each cutting session. The RHS recommends surface sterilization for all propagation tools to prevent disease transfer.
Mistake 3: Dome Not Ventilated
I left the humidity dome sealed for the entire 14-day period. On day eight, I discovered white mold growing on the rockwool surface and on the leaves of three cuttings. The lack of air circulation had created a perfect breeding ground for fungi.
Fix: I now crack the dome open for 30 minutes daily starting on day three. I also remove any fallen leaves from the tray immediately. Decomposing organic matter fuels pathogen growth.
Mistake 4: Cuttings Too Long
I once took cuttings that were 10 inches long because I wanted bigger plants faster. These long cuttings lost moisture faster than they could absorb it, even with the humidity dome. The lower leaves yellowed and dropped off within a week.
Fix: I stick to 4 to 6 inch cuttings. This length balances adequate stored energy with manageable transpiration rates. Shorter cuttings also fit neatly into the rockwool cubes without bending.
Transitioning Rooted Cuttings to Soil
After 14 days in rockwool, my hibiscus cuttings are ready for potting up. I do not leave them in rockwool permanently because the medium lacks the nutrients and structure needed for long-term growth.
Prepare the potting mix. I use equal parts peat moss, perlite, and coarse sand. This combination provides drainage while retaining enough moisture for the tender roots. I moisten the mix thoroughly before transplanting.
Remove the rockwool carefully. I peel the cube away from the root ball gently. The roots should not be disturbed more than necessary. If the rockwool crumbles into small pieces, I leave them attached to avoid breaking roots.
Plant at the same depth. I place the rooted cutting in the pot so the base of the stem sits at the same level it occupied in the rockwool. Burying the stem too deep invites rot. Planting too shallow exposes roots to air.
Water immediately. I drench the potting mix with water to settle it around the roots. Then I place the pot in a shaded area for three days to reduce transplant shock. After that, I move it to full sun gradually over a week.
Frequently Asked Questions
Do I need to use rooting hormone for hibiscus in rockwool?
I strongly recommend it. While hibiscus can root without hormone, the success rate drops to about 50 percent. Rooting hormone speeds up root initiation by several days and produces more uniform root systems. I have compared side by side, and hormone-treated cuttings consistently outperform untreated ones.
How often should I water hibiscus cuttings in rockwool?
I water every two to three days during the first week, then every other day once roots appear. The rockwool should stay damp but not saturated. I lift the tray to check the weight; a heavy tray indicates excess water. If the rockwool feels light after three days, I water sooner.
Can I reuse rockwool cubes for hibiscus propagation?
I do not recommend reusing rockwool. Even after sterilization, the cubes can harbor residual pathogens from previous failures. The structural integrity of rockwool also degrades after one use, reducing its capillary action. Fresh cubes cost little and ensure a sterile start for each batch.
Rooting hibiscus cuttings in rockwool transformed my propagation results. The sterile medium eliminates the guesswork associated with soil-borne diseases. By following the steps I outlined, maintaining high humidity, and providing bottom heat, you can expect visible roots within two weeks. The key is patience and attention to moisture levels. Avoid the mistakes I made, and you will have more rooted hibiscus plants than you know what to do with.