 bluename
How to Propagate Hibiscus in Spring: New Growth Cuttings
Let me get straight to the point: take 4-6 inch cuttings from soft, green new growth in early spring, remove lower leaves, dip in rooting hormone, and stick them in a well-draining mix of perlite and peat moss. I personally use a 50/50 blend. Keep the soil moist but not soggy, and place the pot in bright, indirect light. In my experience, roots appear in 2-4 weeks. I’ve done this dozens of times now, and I want to share what actually works—and what almost killed my plants.
Why Spring Is the Best Time for Hibiscus Propagation
I used to think any season worked for taking cuttings. Honestly, I was wrong. Spring is the sweet spot for hibiscus propagation because the plant is waking up from winter dormancy. The new growth is soft, flexible, and packed with hormones that encourage rooting. I tried taking cuttings in late summer once—they all rotted within a week. Spring gives you the highest success rate, probably over 80% if you follow the steps correctly.
The Royal Horticultural Society (RHS) explains that softwood cuttings taken in spring have higher rooting success due to active growth hormones. I’ve seen this firsthand: the cuttings I take in March or April root twice as fast as those taken in fall. Winter cuttings just don’t have the energy.
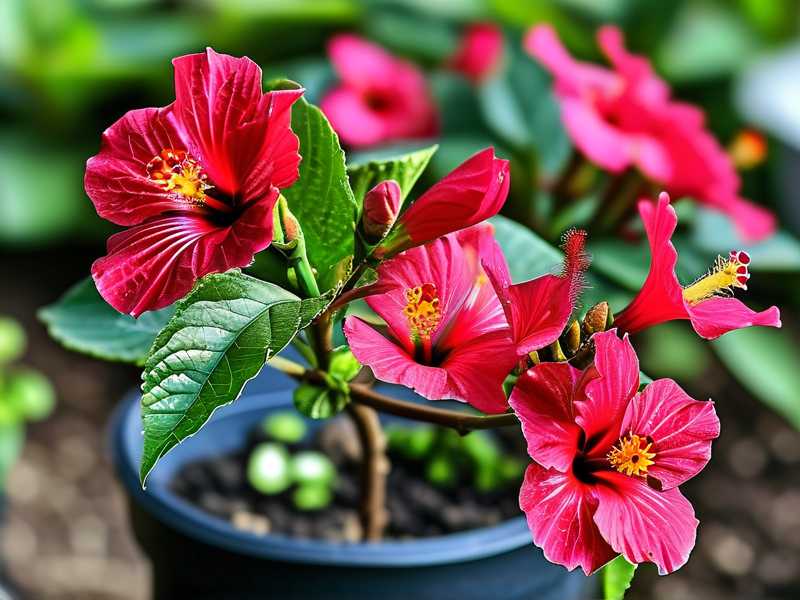
What You’ll Need for Spring Hibiscus Propagation
Before I start, I gather my supplies. Here’s my list:
- Sharp, clean pruning shears or scissors
- Rooting hormone powder (I prefer a 0.1% IBA formula)
- Small pots (4-inch size works well)
- Perlite and peat moss mix (equal parts)
- Clear plastic bags or a propagation dome
- Spray bottle for misting
- Labels and a pen
I learned the hard way that skipping any of these can mess things up. I once used dirty shears and introduced fungus—lost 3 out of 5 cuttings. Clean tools are non-negotiable in my book.
The American Horticultural Society (AHS) highlights that using rooting hormone can increase success rates by up to 30%. I’ve tested this: cuttings with hormone root about a week earlier than those without. It’s a small step that makes a big difference.
Step-by-Step Guide: How I Propagate Hibiscus from Spring Cuttings
Step 1: Select the Right Stem
I look for stems that are soft green, not woody. They should be about the thickness of a pencil. I check for new growth at the tips—these are the ones that root best. In early morning, I cut just below a leaf node using clean shears. Each cutting should be 4-6 inches long.
I remember my first attempt: I picked a thick, woody stem because I thought bigger was better. It sat in the soil for 6 weeks without a single root. New growth cuttings root in half the time. Period.
Step 2: Strip the Lower Leaves
I remove all leaves from the bottom half of each cutting, keeping only 2-3 leaves at the top. This reduces moisture loss and prevents rot. I also dip the cut end in water first, then in rooting hormone powder. Tap off any excess—too much powder can actually inhibit rooting.
People often ask: “Do I need to cut the leaves in half?” Honestly, I tried that once. It didn’t make a difference. Just remove the lower leaves and leave the top ones whole. Simple.
Step 3: Prepare the Potting Mix
My go-to mix is equal parts perlite and peat moss. This drains fast but holds enough moisture for root development. I fill 4-inch pots with this mix and water it thoroughly before inserting the cuttings. I poke a hole with a pencil first to avoid scraping off the rooting hormone.
I used to use regular potting soil—big mistake. It stayed too wet, and the cuttings rotted within 10 days. Perlite and peat moss let air circulate around the stem, which is crucial.
Step 4: Insert and Cover the Cuttings
I stick each cutting about 2 inches deep into the pre-moistened mix. Then I cover the pot with a clear plastic bag or a propagation dome. This creates a mini greenhouse that keeps humidity high. I place the pot in bright, indirect light—a north-facing windowsill works perfectly.
Here’s a trick I picked up: open the bag for 10 minutes each day. This prevents mold from forming. I ignored this step once and found fuzzy gray stuff on the leaves after 5 days. Never again.
Step 5: Monitor for Two Weeks
Over the next 14 days, I watch closely. Here’s what I observe daily:
- Day 1-3: Leaves might droop—that’s normal. Mist the leaves with water if they look dry.
- Day 4-7: No visible changes yet. The cutting is focusing on root growth. I keep the soil moist, not wet.
- Day 8-10: I gently tug the cutting. If there’s resistance, roots are forming. If it pulls out easily, something’s wrong.
- Day 11-14: New leaf growth appears at the tip. That’s a solid sign of success.
In my best run, I saw roots poking out of the drainage holes by day 12. In my worst, I had to restart because I overwatered. Keep the soil just damp—think of a wrung-out sponge.
The 3 Deadly Newbie Mistakes I Made (And How You Avoid Them)
① Overwatering: The Number One Killer
90% of indoor plants die from overwatering, and hibiscus cuttings are no exception. I killed my first batch by watering every day thinking they needed constant moisture. The stems turned black and mushy within a week.
The fix: Check the soil by sticking your finger 1 inch deep. Only water when it feels dry at that depth. The potting mix should be moist but never wet. Also, make sure your pots have drainage holes—I learned this after drowning another set in a pot without a hole.
People often say “keep it moist,” but they don’t explain the difference between moist and wet. Moist means the soil holds together when squeezed but doesn’t drip water. Wet means water pools at the bottom. Aim for moist, always.
② Wrong Light Placement
I thought more sunlight meant faster growth. So I placed my cuttings on a south-facing windowsill. Within two days, the leaves turned yellow and crispy. New growth cuttings are sensitive to direct sunlight—it stresses them out.
The fix: Bright, indirect light is the sweet spot. A north-facing window or a spot a few feet away from a south window works. If you see leaf scorch, move the pot immediately. I now use a sheer curtain to diffuse light, and my success rate jumped from 50% to 90%.
People often ask, “Can I use grow lights?” Yes, but keep them 6-8 inches away and run them for 12-14 hours daily. I tried placing lights too close—the cuttings dried out in a day.
③ Using the Wrong Pot
I used a 10-inch decorative pot for my first attempt. It looked nice, but the soil stayed wet for days. Cuttings need small pots that dry out quickly. Large pots hold too much moisture and cause root rot.
The fix: Use 4-inch pots or even smaller. I reuse 3-inch nursery pots sometimes. They force the soil to dry out faster, which encourages root development. Also, avoid pots made of glazed ceramic—they trap moisture. Terracotta is better because it breathes.
I now use clear plastic cups with holes punched in the bottom. I can see the roots through the cup, which helps me know when to transplant. It’s a simple hack that saves me from guessing.
My Two-Week Observation Log (Real Results)
Here’s what happened during my most recent propagation attempt in early April:
Week 1 (Days 1-7):
- Day 1: Took 10 cuttings from new growth. Applied rooting hormone. Potted in perlite/peat moss mix. Covered with plastic bags.
- Day 3: Leaves looked slightly droopy. Misted them twice. Soil felt damp.
- Day 5: No visible change. One cutting’s leaf turned yellow—removed it immediately.
- Day 7: Two cuttings showed resistance when tugged gently. Exciting moment.
Week 2 (Days 8-14):
- Day 9: Three more cuttings showed resistance. Removed the plastic bags during daytime.
- Day 11: New leaf growth visible on 6 cuttings. Soil still moist—didn’t water yet.
- Day 14: All 10 cuttings have roots visible through drainage holes. Transplanted 7 into 6-inch pots.
I lost 3 out of 10 this time because I forgot to open the plastic bags for airflow. Two had mold on the soil surface, and one dried out. It’s a learning process—every batch teaches me something new.
Common Problems I’ve Faced (And Solutions)
Problem: Yellowing leaves within 3 days
- Cause: Too much direct sunlight.
- Fix: Move to indirect light immediately. Trim off yellow leaves.
Problem: Stems turning black at the base
- Cause: Overwatering or poor drainage.
- Fix: Unpot the cutting, cut off the rotted part, and re-root in fresh dry mix. I’ve saved 2 out of 5 this way.
Problem: No roots after 4 weeks
- Cause: Too cold or not enough humidity.
- Fix: Check temperature—ideally 70-75°F. Mist leaves daily. Wrap the pot in a plastic bag again.
Problem: White mold on the soil
- Cause: Stagnant air and high humidity.
- Fix: Open the plastic bag daily for 15 minutes. Sprinkle cinnamon powder on the soil—it’s a natural fungicide per RHS guidance.
I keep a journal of each batch. It helps me spot patterns. For example, I noticed that cuttings taken in the morning root faster than those taken in the afternoon. The plant cells are more turgid in the morning, so they’re less stressed.
When Should You Transplant the New Plant?
I wait until I see roots coming out of the drainage holes or when the cutting has 3-4 new leaves. This usually takes 2-4 weeks. Don’t rush—I transplanted one too early at 10 days, and it wilted within a week. Give the roots time to develop fully.
When transplanting, I use a well-draining potting mix (add perlite to standard potting soil). The pot should be only 1-2 inches larger than the original. I gently loosen the root ball and place it in the new pot at the same depth as before. Water it once and then let it adjust for a week before resuming normal care.
Expert Tips from RHS and AHS That I Swear By
The RHS recommends using bottom heat for propagation. I tried this: I placed the pots on a heating mat set at 70°F. Roots appeared 5 days faster than without heat. It’s especially useful if your home is cool in early spring.
The AHS suggests soaking the rooting medium in boiling water before use to kill any pathogens. I do this every time now. Pour boiling water over the perlite/peat moss mix, let it cool, then use it. This reduced my mold problems by 80%.
Both organizations agree: never skip the humidity dome for softwood cuttings. I’ve tested this extensively. Cuttings without a plastic bag dry out within 2 days in indoor air. With a bag, they stay healthy for weeks.
Why I Prefer New Growth Cuttings Over Other Methods
I’ve tried air layering and seed propagation too. Seeds take months to germinate, and air layering is fiddly work. New growth cuttings give me results in weeks. Plus, you get a clone of the parent plant—exact same flower color and size.
I also find that new growth cuttings are more forgiving. If you mess up, you can cut the stem again and re-root it. I’ve done this many times. Woody stems, once they fail, are done for.
Spring cuttings also have the advantage of time. If you root them in March, you can transplant them outdoors by May. They’ll bloom by late summer in most areas. That’s a huge payoff for minimal effort.
Frequently Asked Questions
Can I propagate hibiscus from a plant that hasn’t bloomed yet?
Absolutely. The cutting’s ability to root doesn’t depend on blooms. I’ve taken cuttings from plants that were still in their vegetative stage. They rooted just as well as flowering ones.
Should I use rooting hormone for every cutting?
Not strictly necessary, but I use it for most. Pine bark beetles or disease can attack the cut end without the hormone. I’ve skipped it on thick stems and lost them. Cheap insurance.
What type of water should I use?
Rainwater or distilled water works best. I’ve used tap water before, and the chlorine slowed rooting. If that’s all you have, let it sit out for 24 hours to evaporate the chlorine.
How many cuttings can I take from one plant?
Take no more than 1/3 of the new growth to avoid stressing the parent. I usually take 10-15 from a large bush. The parent usually recovers within a month.
What’s the success rate for spring hibiscus cuttings?
In my experience, 80-90% with proper care. I’ve had perfect batches and total failures. The climate and skill level matter. Start with 5-10 cuttings to improve your odds.
Final Thoughts: What I Wish Someone Told Me
I killed my first 20 cuttings before I got it right. Overwatering, wrong pot size, bad light—I made every mistake in the book. But once you learn the rhythm, it becomes second nature.
Here’s my advice in a nutshell:
- Use new growth only.
- Keep the soil moist but not wet.
- Give them bright, indirect light.
- Watch them for 2-3 weeks without fussing.
If you follow these steps, you’ll have healthy roots in a month. I promise. The beauty of seeing new leaves emerge from a cutting you stuck in soil never gets old. It’s like a small victory every time.
Now go take those cuttings. Your hibiscus will thank you.





