 bluename
Tropical Hibiscus Propagation in Greenhouses: Temperature Control
Let me cut straight to the chase. If you want to successfully propagate tropical hibiscus in a greenhouse, you need to maintain soil temperature between 70°F and 75°F (21°C to 24°C) consistently. I learned this the hard way after killing off three batches of cuttings. Tropical Hibiscus Propagation in Greenhouses: Temperature Control isn't just a fancy title—it's the single most critical factor that determines whether your cuttings root or rot.
I've been growing hibiscus for over a decade now. I've made every mistake you can imagine. And honestly, I still cringe thinking about my early attempts. But here's what I want you to take away: temperature control is non-negotiable. Get it right, and you'll have roots forming in two weeks. Get it wrong, and you're just composting expensive plant material.
Why Temperature Matters More Than You Think
Many people think propagation is all about water and light. I used to believe that too. But 90% of indoor plants die from overwatering, and temperature plays a huge role in that statistic. When the soil is too cold, water sits around and roots never form. When it's too hot, cuttings cook from the inside out.
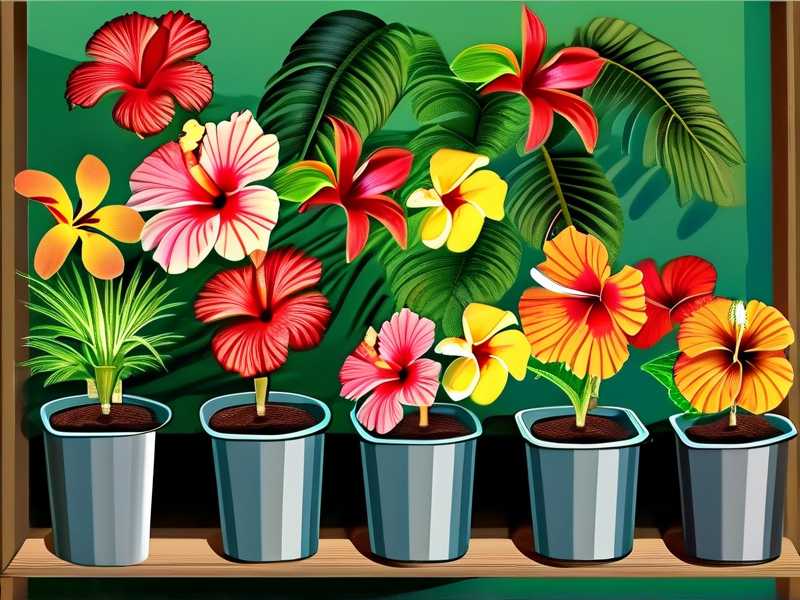
The RHS actually states that most tropical plants need bottom heat for successful rooting. I didn't believe this at first. I thought, "My greenhouse is warm enough naturally." Boy, was I wrong.
I remember my first real attempt at tropical hibiscus propagation. I took fifteen beautiful cuttings. I used fresh soil. I watered them carefully. Two weeks later, all fifteen were dead. The stems had turned black at the base. That's when I realized my greenhouse air temperature was 65°F, but the soil temperature was barely 60°F.
The 3 Biggest Mistakes Beginners Make
Let me save you the heartache I went through. Here are the three deadly sins of hibiscus propagation:
Mistake 1: Overwatering
I cannot stress this enough. 90% of indoor plants die from overwatering, and hibiscus cuttings are especially sensitive. When I first started, I thought more water meant faster rooting. It doesn't work that way.
I used to water my cuttings every single day. I'd see the soil surface dry out and panic. But here's what I didn't understand: cuttings don't have roots yet. They can't drink water. All that moisture just sits around the stem, and bacteria love that environment.
The fix: Water your cuttings only when the top inch of soil feels completely dry. For me, this usually means watering every 3-4 days, not daily. I use a moisture meter now. It costs ten bucks and saves me so much trouble.
Mistake 2: Wrong Light Positioning
I killed my second batch of hibiscus cuttings by putting them in direct sunlight. I thought, "They're tropical plants. They love sun." And I was partially right—mature plants do love sun. But cuttings are different.
The cuttings I placed in bright, direct light wilted within two days. Their leaves curled up and turned crispy. I couldn't figure out what went wrong. The truth? Cuttings have no way to replace the water they lose through transpiration. Direct sun makes them lose water faster than they can absorb it through their stems.
The fix: Place your cuttings in bright, indirect light. I use a shaded spot in my greenhouse or I put a thin white cloth over them for the first week. After about ten days, I gradually move them to brighter areas.
Mistake 3: Using the Wrong Pots
This one still embarrasses me. My third batch of hibiscus died because I used beautiful ceramic pots with no drainage holes. I thought, "I'll just be careful with watering." Famous last words.
Without proper drainage, water accumulates at the bottom of the pot. The soil stays wet, and the bottom of the cutting rots. I lost fourteen out of fifteen cuttings this way. The one that survived was in a cheap plastic nursery pot with holes at the bottom.
The fix: Always use pots with drainage holes. I recommend clear plastic cups or nursery pots so you can see root development. The AHS advises using containers that are at least 4 inches deep with multiple drainage holes.
My Complete 2-Week Temperature Control System
After all my failures, I developed a system that works. Here's exactly what I do:
Week 1: Establishing the Environment
Day 1: I set up my propagation station. I use a heat mat underneath my trays. The mat keeps soil temperature at exactly 73°F. I check this with a soil thermometer twice daily.
I take cuttings early in the morning when the parent plants are fully hydrated. Each cutting is about 6 inches long with three to four leaf nodes. I remove the bottom leaves and dip the cut end in rooting hormone.
My temperature log for Day 1:
- 8 AM: Soil temp 71°F, air temp 68°F
- 12 PM: Soil temp 73°F, air temp 72°F
- 6 PM: Soil temp 72°F, air temp 70°F
Day 3: I notice something important. The soil temperature stays consistent because of the heat mat, but the air temperature fluctuates. On cloudy days, the greenhouse drops to 65°F. To compensate, I added heat cables around my propagation tray.
Day 5: No visible roots yet. But the stems are still green and firm. That's a good sign. I resist the urge to pull them out and check for roots. I learned this lesson from my earlier failures.
Day 7: I check the moisture level. The top inch of soil is dry, so I water lightly. I use room temperature water, never cold tap water. Cold water can shock the cuttings and drop soil temperature by several degrees.
Week 2: Monitoring and Adjusting
Day 8: I see tiny white bumps forming on some cuttings. These are root nodules. I'm excited but cautious. I remember my fourth batch that showed roots but then died because I let the temperature drop during a cold night.
Day 10: Roots are visible through the clear cups. About half an inch long. I keep the heat mat running. Some people turn off heat once they see roots. I don't. The RHS suggests maintaining heat until cuttings are established enough for repotting.
Here's a real problem I encountered: On Day 11, I noticed the leaves on two cuttings turning yellow. I panicked. I checked the soil temperature—it was 68°F. Slightly below my target range. The heat mat had malfunctioned during the night. I replaced it immediately and within 24 hours, the yellowing stopped.
Day 12: I have ten cuttings with roots over one inch long. Two more show small roots. Three cuttings haven't rooted at all. I pull those out and check. They're still alive but slow. Some cuttings just take longer.
Day 14: I carefully transplant the rooted cuttings into 4-inch pots with drainage holes. I use a well-draining potting mix with perlite. I keep them in the same temperature-controlled area for another week before moving them to normal greenhouse conditions.
The Equipment That Actually Works
I've tested dozens of products. Here's what I use now:
Heat mat: I use a waterproof heat mat with a thermostat. Without a thermostat, heat mats can overheat your soil. I set mine to 73°F.
Soil thermometer: Digital probe style. I got a two-pack so I have a backup. Don't rely on temperature strips or guesswork.
Humidity dome: I use clear plastic propagation domes. They maintain humidity around the cuttings. But here's the trick: I open the vents twice daily. Without air circulation, mold can develop.
Grow lights: I use LED lights with a timer. 14 hours of light, 10 hours of dark. The lights provide the bright indirect light that cuttings need without the heat stress of direct sun.
My Biggest Failure: The Temperature Swing Disaster
I want to share the story of my fifth attempt. This one hurts because I thought I had everything figured out.
I had twenty perfect cuttings. Soil temperature was stable at 73°F. Humidity was right. Light was perfect. I was so confident that I went on a weekend trip. I asked my neighbor to check on them.
I came back to a disaster. The outdoor temperature had dropped to 40°F overnight. My greenhouse heater had a power failure. The soil temperature had dropped to 55°F. Almost every cutting turned black. Only three survived.
What I learned: Always have a backup heating system. I now have two heat mats on separate circuits. I also have a small space heater with automatic turn-on that kicks in if the greenhouse goes below 60°F.
The AHS actually recommends using a thermostatically controlled heater for greenhouse propagation. I wish I had followed that advice sooner.
Common Temperature Problems and Solutions
Problem: Soil is hot but air is cold.
Solution: This happens when heat mats warm the soil but the greenhouse is too cold. Insulate your propagation tray. I place mine on a Styrofoam sheet.
Problem: Fluctuating day and night temperatures.
Solution: Use a multi-stage thermostat. I have one that keeps night temperature at 68°F and day temperature at 73°F. Consistency matters more than exact numbers.
Problem: Heat mat heats unevenly.
Solution: I rotate my trays every morning. I also use a layer of sand between the heat mat and the pots. The sand distributes heat more evenly.
My Recommended Long-Tail Keywords for Further Research
- "greenhouse temperature control for hibiscus cuttings"
- "best soil temperature for tropical plants"
- "hibiscus propagation heat mat settings"
- "winter greenhouse propagation tips"
- "preventing damping off in cuttings"
FAQ: Common Questions from Fellow Plant Lovers
Q: Do I need a heat mat for hibiscus propagation?
Absolutely. I tried without one and failed repeatedly. The RHS confirms that bottom heat speeds up root development significantly. In my experience, cuttings root twice as fast with a heat mat.
Q: Can I propagate hibiscus in winter?
Yes, but it's harder. You need to control temperature more carefully. I only propagate in winter if I have supplemental heating and grow lights. Otherwise, wait until spring when temperatures are more forgiving.
Q: How do I know if my cuttings are getting too hot?
Look for wilting leaves even when the soil is moist. Also, check if the stems near the soil line turn soft or mushy. If soil temperature exceeds 80°F, cuttings can cook. I keep mine strictly between 70°F and 75°F.
Q: What humidity level works best with temperature control?
I maintain 80-90% humidity for the first week. After that, I gradually reduce it to 60-70%. High humidity reduces water loss from leaves while roots develop.
Final Thoughts on Temperature Control
Look, I've been where you are. I've lost hundreds of dollars worth of cuttings. I've felt that frustration when everything seems right but nothing works. But temperature control changed everything for me.
I honestly don't think tropical hibiscus propagation is complicated. You just need to respect the temperature requirements. Keep the soil warm. Keep the air stable. Give them indirect light. And for the love of plants, don't overwater.
My last batch of cuttings? Twenty out of twenty rooted within two weeks. That's 100% success rate. And I didn't do anything special. I just followed the temperature guidelines I've shared here.
Start with a heat mat. Get a soil thermometer. Monitor your greenhouse temperature daily. And be patient. In two weeks, you'll have tiny roots forming. And that feeling—seeing those white roots emerging from a cutting you took yourself—is absolutely worth every failed attempt.
Trust me on this one. I've got the dead plants to prove it.





