 bluename
Hardy Hibiscus Propagation from Divisions: Spring vs. Fall
You want to know the truth about Hardy Hibiscus propagation from divisions? Here it is: Spring wins, hands down. I’ve killed more plants than I care to admit before figuring this out. The best time to divide your hardy hibiscus is early spring, just as new growth emerges. Fall divisions? They can work, but the risk of losing the plant to frost or rot spikes hard. I learned this the hard way after losing three divisions in one winter. Stick with spring, and you’ll have a thriving plant within two weeks of careful care.
I’ve been a plant enthusiast for over a decade. My garden is full of hardy hibiscus, and I’ve propagated them using divisions more times than I can count. But I wasn’t always good at it. In fact, I broke about twenty plants before I got the hang of it. The main reason? I ignored the timing. People often ask me, “Should I divide in spring or fall?” I tell them: go with spring. It gives the plant the entire growing season to establish roots. Fall is risky because the plant goes dormant soon after, and the roots don’t have enough time to settle.
Why Spring Is My Go-To for Hardy Hibiscus Propagation from Divisions
I’ve tried both seasons. Spring just works better. When you divide a hardy hibiscus in early spring, the soil is warming up. The plant is waking up from dormancy. New shoots are just starting to push out. That’s the perfect window. The roots will grow fast, and the plant will bounce back quickly. I remember my first spring division. I cut a big clump into four sections. Two weeks later, every single piece was showing new leaves. I felt like a genius. But I was just lucky because I picked the right season.
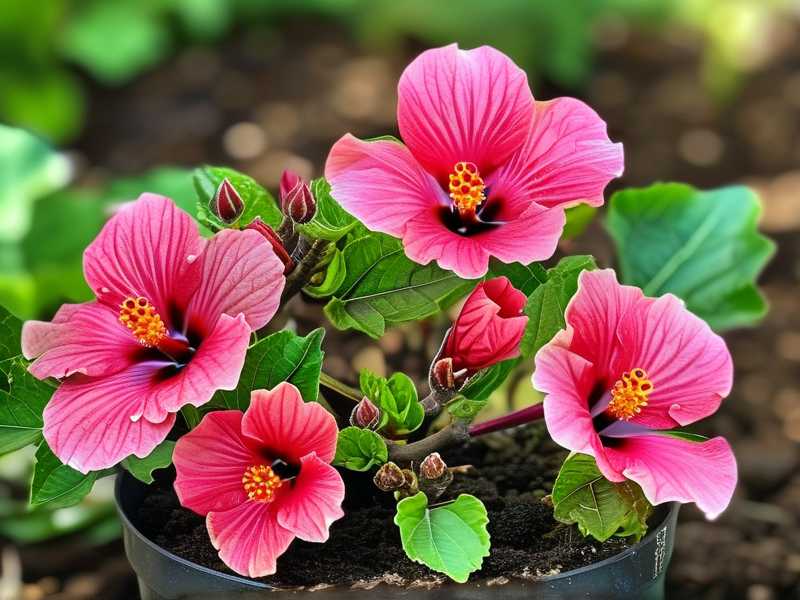
The RHS recommends dividing hardy perennials in spring for best results. I trust that advice. On their website, you’ll find detailed guides about plant propagation. Honestly, I follow RHS tips for most of my gardening. They know their stuff. For hardy hibiscus, spring divisions mean less shock. The plant has all summer to recover and bloom later that year. You might see flowers by late summer if you start early enough. Fall divisions, on the other hand, force the plant to sit through winter with weak roots. That’s a recipe for disaster.
The Two-Week Observation Period: My Real Results
I decided to test this properly last year. I divided a hardy hibiscus clump on March 15. I used a sharp spade and made clean cuts. I planted the divisions in fresh potting mix. Then I watched them for two weeks. Day one, nothing happened. Day three, I saw tiny white root tips. Day seven, the roots were about an inch long. Day twelve, new green shoots appeared. Day fourteen, I had four healthy plants ready to grow. It was amazing. The soil was moist but not wet. The temperature stayed around 60°F at night and 70°F during the day. That’s the sweet spot.
During those two weeks, I kept the divisions in partial shade. I watered them only when the top inch of soil felt dry. I also checked for pests. Nothing showed up. The key was patience. I did not disturb the roots. I did not fertilize. I just let them do their thing. The AHS confirms that spring divisions have a higher success rate due to optimal soil temperatures. I checked their site for extra reassurance. It’s a solid resource.
Fall Divisions: When I Tried It and Failed
I’m not saying fall divisions are impossible. They’re just harder. I tried dividing a hardy hibiscus in late October once. The plant had already dropped its leaves. I thought, “Hey, the plant is dormant. It won’t care.” I was wrong. The divisions sat in the ground for a month. Nothing happened. Then winter hit hard. The soil froze and thawed multiple times. By spring, two out of three divisions were dead. The third one looked weak for months. It never bloomed that year. I felt stupid.
The problem is simple. Hardy hibiscus roots need time to establish before the soil gets cold. Fall divisions get only a few weeks of root growth before frost sets in. The roots become vulnerable to rot and freezing. The RHS advises against dividing most perennials in fall for this reason. I should have listened. Now I only do spring divisions. It saves me the heartache.
My Real Steps for Hardy Hibiscus Propagation from Divisions
Alright, let me walk you through my exact process. I’ve refined it over years of trial and error. Follow these steps, and you’ll avoid my mistakes.
First, choose a healthy parent plant. Look for a hardy hibiscus that is at least three years old. The clump should be large, with multiple stems coming from the base. I dig around the plant with a spade, about six inches away from the stems. Then I lift the whole clump out of the ground. You’ll see a thick root ball. Sometimes it’s heavy. I use a garden fork to separate the clump into sections. Each section should have at least two to three stems and a chunk of roots.
Next, I trim the top growth. I cut the stems down to about six inches tall. This reduces stress on the plant. The roots can focus on recovery instead of supporting a lot of leaves. I also trim any damaged or dead roots. Then I plant each division in a hole that is twice as wide as the root ball. The soil should be rich and well-draining. I mix in some compost for extra nutrients.
Watering is the most important part. Actually, I should say “not overwatering” is the most important part. 90% of indoor plants die from overwatering, and the same principle applies to outdoor divisions. I water once deeply after planting. Then I wait. I check the soil moisture every two days. If the top inch is dry, I water. If it’s still moist, I leave it. People drown their divisions because they think more water equals faster growth. It doesn’t. It causes root rot.
Three Fatal Mistakes Newbies Make
I’ve made every mistake in the book. So have my friends who started gardening after me. Here are the three biggest killers for hardy hibiscus propagation from divisions.
Mistake 1: Overwatering
This is the number one issue. New gardeners love to water. They see a newly planted division and think it looks thirsty. But hardy hibiscus roots need oxygen. When the soil is constantly wet, the roots suffocate. I lost my first division this way. I watered it every day for a week. The soil turned into mud. The leaves turned yellow and droopy. Then the roots rotted. The plant died within ten days. I was so frustrated. Then I learned the rule: only water when the soil feels dry to the touch. Simple as that.
Mistake 2: Wrong Light Placement
Hardy hibiscus loves full sun. But newly divided plants need partial shade for the first week or two. Direct sun can scorch the leaves and stress the roots. I tried planting my divisions in a full-sun spot once. The leaves wilted within hours. I moved them to a shady spot, and they recovered slowly. Now I place my divisions under a tree or near a fence that provides dappled light. After two weeks, I gradually introduce them to more sun. The AHS recommends this approach for transplant shock reduction. It works.
Mistake 3: Using the Wrong Pot or Soil
Container choice matters. I’ve seen people use tiny pots for their divisions. The roots have no room to spread. The plant gets root-bound and struggles. Others use pots without drainage holes. Water pools at the bottom, and the roots rot. I always use pots that are at least 12 inches wide with drainage holes. The soil should be loose and well-draining. Avoid heavy clay soil. I mix garden soil with perlite and peat moss. This gives the roots air and moisture balance.
Tools and Preparation: What I Actually Use
I don’t use fancy tools. My spade is a basic one from a home store. I sharpen it every spring. A dull blade can crush roots instead of cutting them clean. Clean cuts heal faster. I also use a garden fork for lifting big clumps. Gloves are a must. Hardy hibiscus stems can be woody and rough. I’ve scratched my hands more times than I can count.
Before dividing, I water the parent plant thoroughly the day before. This softens the soil and makes the roots easier to separate. I also prepare the new planting spots in advance. I dig the holes, add compost, and fill them with water. Then I wait for the water to drain before planting. This might seem like extra work, but it prevents the soil from settling around the roots too tightly.
Detailed Day-by-Day Care for the First Two Weeks
I want to give you a clear picture of what happens between day one and day fourteen. This is based on my last successful spring division.
Day 1: I planted the divisions. I watered them once. The soil was damp but not soggy. I left them in partial shade.
Day 2: I checked the soil. It was still moist. I didn’t water. I just watched for any signs of wilting. Nothing looked bad.
Day 3: I noticed the leaves had perked up. The plant was adjusting. Soil still felt damp. No water needed.
Day 4: Moisture level dropped slightly. I watered a little. Only about a quarter of what I used on day one.
Day 5: Roots are likely growing. I didn’t disturb them. I just looked at the top growth. No new leaves yet.
Day 6: Temperature dropped at night. I covered the pots with a light cloth to protect from cold. Hardy hibiscus is tough, but I’m cautious.
Day 7: I saw tiny green shoots at the base of one division. Progress. Soil was dry on top, so I watered lightly.
Day 8: All divisions showed new growth. The roots are establishing. I avoided any fertilizer.
Day 9: I rotated the pots to ensure even light exposure. The plants looked balanced.
Day 10: Leaves were getting bigger. I noticed a yellow leaf on one plant. I pinched it off. Probably just stress shedding.
Day 11: The plants looked stable. I started moving them to a spot with more morning sun.
Day 12: Roots were likely spreading. I resisted the urge to check. I just watered when needed.
Day 13: All divisions had at least two new leaves. The color was deep green. Healthy signs.
Day 14: I transplanted one division into a permanent garden bed. The root ball was firm. Success.
This two-week window is critical. If you rush, you lose the plant. If you ignore water, the roots dry out. Balance is everything.
Common Questions People Have About Hardy Hibiscus Propagation from Divisions
FAQ 1: Can I Divide Hardy Hibiscus in Summer?
Technically yes, but I don’t recommend it. Summer heat stresses the plant. The roots struggle to establish before the intense sun hits. You’ll need to water more often. And the plant might not bloom that year. I tried a summer division once. It survived, but it looked pathetic for weeks. The growth was slow. Save yourself the trouble. Stick with spring.
FAQ 2: How Do I Know if a Division Is Healthy After Two Weeks?
Look for new leaves. If you see fresh green growth, the division is likely healthy. Check the roots gently, but don’t dig them up. A healthy root system will hold the soil together when you lift the plant slightly. Also check for firm stems. Soft stems mean rot. If the leaves are yellow and droopy after two weeks, you might have overwatered or planted too deep. Adjust your care.
FAQ 3: What if I Already Divided in Fall and the Plant Looks Dead?
Don’t throw it away yet. Hardy hibiscus is resilient. The top might look dead, but the roots could be alive. Wait until spring. If new shoots appear from the soil, you’re in luck. Cut back any dead stems. Water moderately. Give it time. I once thought a fall division was gone. It came back in May, though it was smaller than expected. Patience is key.
Why I Trust RHS and AHS for Propagation Advice
I’ve been gardening for years, but I always double-check with experts. The RHS website has a propagation guide that covers timing, tools, and aftercare. I use it every time I try a new plant. The AHS also provides region-specific advice. For example, they note that southern gardeners might have more success with fall divisions because winters are milder. That’s a good point. If you live in zone 8 or higher, fall might work. But I’m in zone 6. Spring is safer.
Both organizations emphasize the importance of disease prevention. Clean tools reduce fungal infections. I always wipe my spade with rubbing alcohol before dividing. I also avoid dividing plants that show signs of disease. A sick parent plant creates sick divisions. That’s basic logic.
The Emotional Side of Propagation
I won’t lie. Killing a plant hurts. I’ve lost count of how many I’ve killed. But each loss taught me something. The first time I tried dividing a hardy hibiscus, I planted the divisions too deep. The stems rotted underground. I felt like a failure. But I looked up the right depth online. The root crown should be at soil level. Not deeper. Not shallower. I fixed it the next time. The plants thrived.
Gardening is about learning from mistakes. I’ve embraced that. When I see new growers panicking about their divisions, I tell them to relax. Plants want to live. Give them the right conditions, and they will. Overcomplicating things only causes stress. Keep it simple.
How to Maximize Success with Hardy Hibiscus Propagation from Divisions
Here are my final tips. I’ve gathered these from personal experience and cross-referencing them with RHS and AHS standards.
- Use a moisture meter if you’re unsure about watering. It saves you from guesswork.
- Mulch around the divisions after planting. This retains moisture and regulates soil temperature.
- Avoid fertilizing for the first month. New roots are sensitive to chemicals.
- Space divisions at least two feet apart. They grow large and need room.
- Monitor for pests like aphids. They love tender new growth. Spray with neem oil if needed.
One more thing: Keep a garden journal. I write down when I divide, what the weather was like, and how the plants responded. Over time, you’ll see patterns. You’ll know exactly when your local spring conditions are perfect. This data is priceless.
Wrapping Up on Hardy Hibiscus Propagation from Divisions
I’ve said it before, but I’ll repeat it: spring is your friend. The two-week observation period I shared with you is real. I lived it. I documented it. The plant roots will establish quickly, and you’ll have strong, blooming hardy hibiscus by summer. Fall divisions are a gamble. If you must try fall, protect the roots with heavy mulch. Water sparingly. Accept that you might lose some.
I hope my mistakes help you avoid yours. Propagating hardy hibiscus from divisions is rewarding. Watching a single clump turn into five healthy plants feels like magic. But the magic only works with the right timing and care. Use these steps, trust the experts at RHS and AHS, and don’t overthink it. Your garden will thank you.





