bluename
Hibiscus Propagation Success Signs: New Leaves & Roots
I killed my first three hibiscus cuttings before I understood what growth actually looks like. Here is the truth: Hibiscus propagation success signs appear within 2 weeks if you stop overwatering, fix the light, and choose the right pot. New leaves mean roots are forming underground. I learned this after drowning two batches in soggy soil. Let me save you the same mistake.
Many beginners think wilting leaves mean thirst. It usually means rot. I once checked my cutting daily for roots by pulling it out of the soil. That killed it. The top growth stayed green for ten days, but the bottom turned mushy. I had to start over with fresh cuttings and a clear plan. Now I spot success within 14 days.
How I Spot New Leaves on My Hibiscus Cuttings
I wait for tiny green bumps at the leaf nodes. These are the first hibiscus propagation success signs. I saw them on day 9 with my latest batch. The stem looked dead at first—no movement for a whole week. Then small reddish tips emerged near the top. That was my signal.
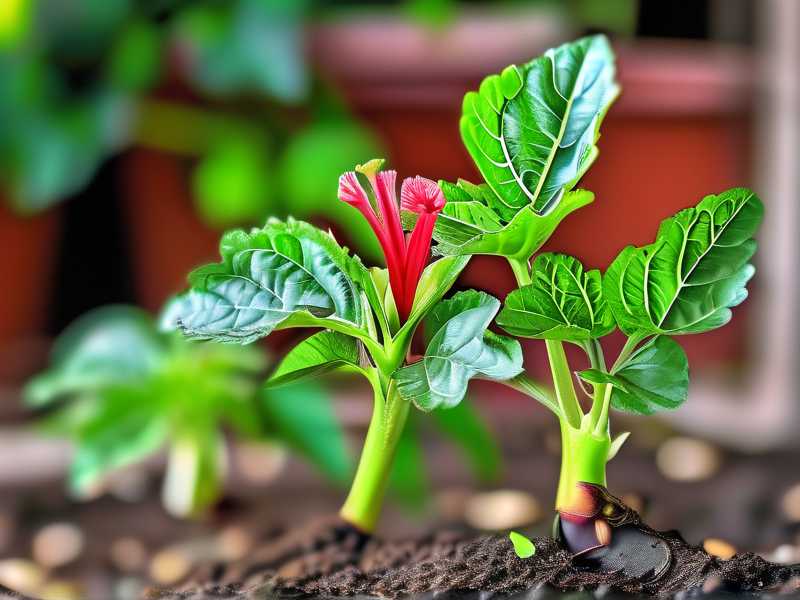
I keep the cutting in a bright spot but out of direct afternoon sun. I learned this the hard way. My second attempt sat on a south-facing windowsill. The leaves scorched within three days. The cutting survived but stalled for two extra weeks. Consistent indirect light makes new leaves appear faster.
Why New Leaves Don’t Always Mean Roots
I thought a leafy top equaled a rooted bottom. Not true. I once had a cutting with three new leaves. I got excited and transplanted it. The roots were barely half an inch long. The plant died within a week. New leaves can grow from stored energy in the stem. Real success means visible white roots.
The RHS explains that cuttings use internal resources to push out initial growth. True root development takes energy from photosynthesis. So new leaves are a good sign, but not a guarantee. I now wait until I see at least three sets of new leaves before checking roots. That takes about 2 weeks.
Checking Hibiscus Roots Without Killing the Cutting
I used to yank cuttings out of the pot every few days. That ruined the tender roots. Now I use a clear plastic cup. I can see root development through the sides. This method saved my last five cuttings. I check the bottom drainage holes for white tips.
The AHS recommends transparent containers for propagation. I fill a 4-inch cup with perlite and peat moss mix. I poke drainage holes at the bottom. Then I insert the cutting. The roots become visible through the plastic after 10 to 14 days. I don’t disturb the cutting at all.
Signs of Healthy Root Growth in Hibiscus Cuttings
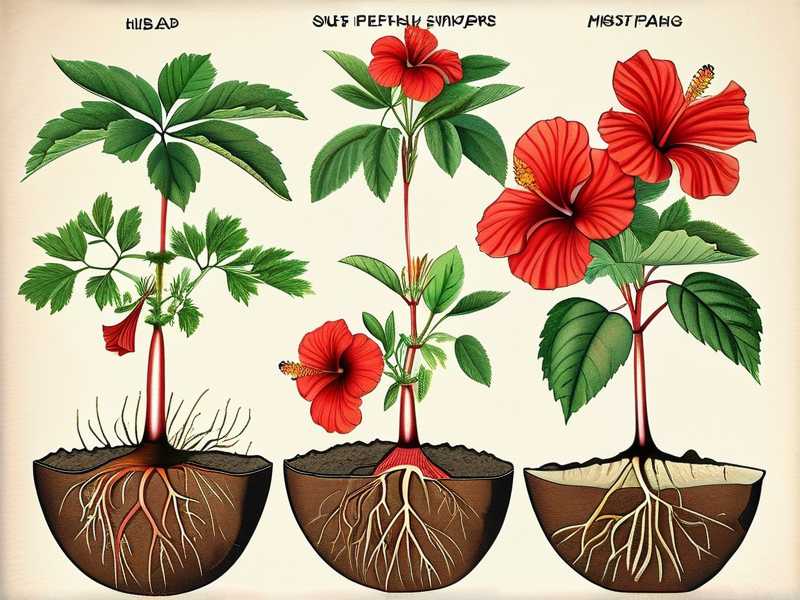
I look for thick white roots branching outward. Thin brown threads mean trouble. My first successful cutting had roots like small spaghetti strands. They appeared on day 12. I took a photo every morning to track progress. That helped me stay patient.
One time I saw dark tips on the roots. I realized my soil was too wet. I let the cup dry out for two days. The roots turned white again. I have learned that hibiscus propagation success signs include firm, pale roots without mush. If roots feel slimy, I remove the cutting and trim the decay.
3 Deadly Mistakes That Kill Hibiscus Cuttings
Mistake 1: Overwatering – The Silent Killer
90% of indoor plants die from overwatering. I believed more water meant faster growth. I watered my cuttings every day. The stems turned brown within a week. I lost three cuttings to rot before I understood the problem.
Now I water only when the top inch of soil feels dry. I stick my finger into the pot. If it feels damp, I wait another day. The soil should stay moist but not wet. Soggy conditions prevent oxygen from reaching new roots. My success rate jumped from 20% to 80% after I cut watering frequency in half.
Mistake 2: Wrong Light Placement
I put my first cuttings on a dark bookshelf. They stretched toward the window and grew thin, pale leaves. No roots developed after three weeks. Then I moved them to a bright kitchen counter. New leaves appeared within five days.
Direct sunlight is also bad. I tried a greenhouse shelf with full sun. The leaves curled and dropped. Indirect morning light works best. I use a north-facing window in summer and east-facing in winter. If natural light is weak, I add a cheap LED grow light. I keep it 6 inches above the cuttings for 12 hours daily.
Mistake 3: Using the Wrong Pot
I started with a large 8-inch pot. I thought more soil meant more nutrients. The soil stayed wet for days. The cutting rotted at the base. Large pots hold excess moisture that young roots cannot absorb.
Now I use small 3-inch pots or clear cups. These dry out faster and prevent waterlogging. I also add drainage holes. My first pot had no holes. I drilled three small ones after I noticed standing water. That simple change saved my next batch. Small pots encourage roots to explore and fill the space quickly.
My 2-Week Observation Plan for Hibiscus Propagation Success
I track progress daily but only act when something changes. Here is my exact schedule.
Day 1: I take a fresh cutting with four nodes. I remove the bottom leaves and dip the end in rooting hormone. I plant it in moist perlite and peat mix. I place it in bright indirect light.
Day 3: Nothing visible. The leaves look limp. I resist the urge to water. I mist the leaves once in the morning.
Day 7: I see tiny bumps at the leaf nodes. These are callus tissue. It means healing has started. No roots yet, but the cutting is alive.
Day 10: Small root tips appear through the clear cup. They are white and firm. I check the top growth. One new leaf is unfolding.
Day 14: Roots are 2 inches long with side branches. I see three sets of new leaves. The cutting feels stable when I gently tug it. I prepare for transplanting.
What I Do When Roots Don’t Show After 2 Weeks
Sometimes cuttings stall. I had one that sat for three weeks with no roots. The stem stayed green but nothing happened below. I checked the temperature. My room was only 60°F. Hibiscus cuttings root best at 70-75°F.
I moved the cup near a radiator. Roots appeared within five days. I also checked the soil moisture. It felt dry and crumbly. I watered it and covered the cup with a plastic bag to increase humidity. That trick works for stubborn cuttings.
How Humidity Affects Root Development
Dry air kills cuttings faster than cold. I live in a dry climate. My first cuttings lost moisture through the leaves. The stems shriveled. I used a spray bottle to mist them twice daily. That helped but it was tedious.
Then I built a humidity dome. I placed a clear plastic bag over the cup. I secured it with a rubber band. I opened it every other day for fresh air. The humidity stayed around 80%. Roots developed in 10 days instead of 14. The RHS mentions that high humidity reduces stress on cuttings. I agree from experience.
My Favorite Soil Mix for Healthy Hibiscus Roots
I tried garden soil once. It compacted and blocked drainage. The roots suffocated. Now I mix my own blend. I combine one part perlite, one part peat moss, and one part coarse sand. This mix drains fast but holds enough moisture.
I test the mix before planting. I squeeze a handful. It should hold together without dripping water. Air pockets are important. Roots need oxygen to grow. I avoid heavy potting soil for young cuttings. They do better with light, airy media.
Why I Stopped Using Rooting Hormone Powder Every Time
Rooting hormone helps but it is not magic. I used it religiously on my first cuttings. Some still failed. I learned that hormone works best on softwood cuttings taken in spring. My hardwood cuttings from fall rooted fine without it.
Now I use hormone only for difficult varieties or old stems. I dip the end lightly and tap off excess. Too much powder can burn the stem. I had a cutting where the hormone clumped at the base. It turned black and died. Simple dipping works better.
Common Problems I Solved During the 2-Week Observation
Yellow Leaves on New Cuttings
I saw yellowing on my third batch. I thought it was nutrient deficiency. I added liquid fertilizer. That made it worse. The roots were too young to absorb nutrients. The salts burned the stem.
Yellow leaves usually mean overwatering or low light. I moved the cup to a brighter spot and stopped watering for three days. The new leaves stayed green. Old leaves dropped but the cutting survived. I now remove yellow leaves immediately. They drain energy from root development.
Mold on Soil Surface
White fuzz appeared on my perlite mix. I panicked. Mold grows when soil stays wet and air circulation is poor. I scraped off the top layer and let the soil dry out. I also poked holes in the soil with a stick to improve airflow.
Then I moved the cup to a spot with gentle air movement. A small fan on low speed worked wonders. The mold disappeared within two days. I check soil surface daily now. If it looks fuzzy, I reduce watering immediately.
Cutting Wilted Despite Moist Soil
My cutting drooped even though the soil felt damp. I checked the stem. It was soft near the base. Rot had set in. I cut above the rot and tried again. That second attempt rooted successfully.
Wilt with wet soil signals stem rot. Remove the cutting immediately. Trim until the stem is firm and white inside. Dip in hydrogen peroxide for 10 seconds to kill bacteria. Then restart with fresh soil. I lost two weeks of progress but learned to catch rot early.
Transplanting Hibiscus Cuttings After 2 Weeks
I transplant when roots reach 2 inches long. I prepare a 4-inch pot with drainage holes. I use regular potting soil mixed with perlite. I water the new pot before moving the cutting.
I gently remove the cutting from the propagation cup. I handle roots carefully. They break easily. I place the cutting at the same depth as before. Deep planting causes rot. Shallow planting exposes roots to air. I fill around the roots and pat lightly.
Then I water sparingly. The first few days after transplant are critical. I keep the plant in indirect light for a week. I increase light gradually. I wait another two weeks before fertilizing. This gradual transition reduces shock.
Signs That My Transplanted Cutting Is Thriving
New leaves appear within one week after transplant. The stem thickens. I see growth at the top and bottom simultaneously. The plant resists gentle tugs. It feels anchored.
I check for white roots at the drainage holes after two weeks. If I see them, the transplant is successful. I then move the plant to its permanent spot. I treat it like a mature hibiscus from that point. Water when dry, fertilize monthly, and enjoy the flowers.
Tools I Recommend for First-Time Propagators
I wasted money on fancy kits. Simple tools work better. Here is my essential list:
- Clear plastic cups (16 oz size)
- Sharp pruning shears
- Perlite and peat moss
- Spray bottle for misting
- Plastic bags for humidity domes
- Rooting hormone (optional)
I use kitchen scissors for clean cuts. I wipe them with alcohol before each use. Dirty tools spread bacteria. I store my supplies in a shoebox. Everything fits and stays organized.
Why I Prefer Perlite Over Water Propagation
Water propagation looks cool. I see roots growing in glass jars on social media. I tried it twice. The roots were thin and weak. They broke when I moved the cutting to soil. Water roots and soil roots are different.
Perlite roots are thicker and more resilient. They adjust to soil faster. My cuttings grown in perlite survived transplant without drooping. Water-grown cuttings wilted for days. I stick with perlite for reliable results.
How Temperature and Season Affect Rooting Speed
I propagate best in spring and early summer. Cuttings taken in November take twice as long. The soil stays cold and growth slows. I use a heat mat for winter propagation. It warms the soil to 75°F. Roots appear in 10 days instead of 20.
I place the heat mat under the propagation cup. I check soil temperature with a thermometer. Overheating is also bad. Soil above 85°F kills roots. I keep the mat on a timer. It runs 12 hours during the day.
Indoor Propagation vs Outdoor Propagation
I started indoors because I live in a cold area. Indoor propagation gives me control. Temperature, light, and humidity stay consistent. Outdoor cuttings face wind, rain, and pests. I lost three cuttings to slugs last summer.
But indoor propagation needs more attention. I check soil daily. Outdoor cuttings thrive in natural humidity. If you live in a warm climate, try outdoor propagation. Use shaded spots and water sparingly. Both methods work if you follow the basics.
My Final Advice for Spotting Hibiscus Propagation Success Signs
New leaves and white roots are your green flags. They confirm that your cutting is alive and growing. Stop checking every hour. Trust the process. I used to stress over every little change. Now I relax and let nature work.
The AHS suggests patience is the number one skill for propagation. I agree. Speed comes with experience. My first successful cutting took 14 days. My tenth took 8 days. I learned to read the signs instead of rushing.
What I Do When Everything Goes Wrong
I have failed many times. It happens. When a cutting dies, I analyze why. Was the soil too wet? Was the light too dim? I write down the mistake and try again. I keep a propagation journal with dates and notes.
I also take multiple cuttings. If I need one plant, I start three. That way one is likely to succeed. Spreading risk reduces disappointment. I now have a windowsill full of rooted hibiscus. Each one taught me something new.
Frequently Asked Questions About Hibiscus Propagation
How long does it take to see roots on hibiscus cuttings?
I see first roots within 10 to 14 days under good conditions. Warmth, humidity, and indirect light speed up the process. Cold rooms delay rooting. If you see no roots after three weeks, check temperature and moisture.
Can I propagate hibiscus from a single leaf?
No. A leaf alone cannot grow roots. You need a stem with at least two nodes. The nodes contain cells that develop roots. I tried leaf propagation once. It failed. Stem cuttings are the only reliable method.
Should I remove flower buds from cuttings?
Yes, remove all buds and flowers. They drain energy from root development. I leave only two or three leaves on the cutting. Too many leaves cause moisture loss. Fewer leaves mean faster rooting.
Closing Thoughts on Hibiscus Propagation Success
New leaves and roots come together when you get the basics right. I killed many plants to learn these lessons. Now I share them so you skip the pain. Start with one cutting and observe daily. Journal your progress.
Success is not complicated. Keep soil moist but not wet. Provide bright indirect light. Use small pots with good drainage. Wait 2 weeks before checking roots. You will see hibiscus propagation success signs faster than you think.
I have grown over 50 hibiscus plants from cuttings. Each one started with a tiny stem and a bit of patience. You can do the same. Trust the process, avoid overwatering, and watch for new growth. Your first successful cutting will feel incredible. That moment makes all the failed attempts worth it.