 bluename
How to Avoid Buying Nursery Hibiscus Carrying Hidden Scale or Nematode Infestations
You can spot a clean hibiscus before it ever reaches your trunk. I have learned this the hard way. Hidden scale insects and root-knot nematodes often ride home from big box garden centers and specialty nurseries alike. The trick is knowing where to look. Check the leaf backs, stem joints, and the bottom of the nursery pot before you buy. I will walk you through my exact quarantine routine, what saved plants look like, and the mistakes that cost me two full summers.
Hibiscus plants bring huge tropical flowers to patios in the United States, Canada, the United Kingdom, and Australia. They are not hard to grow once you understand their rhythm. But a stressed nursery plant with hidden pests will collapse within weeks. Scale and nematodes are the two sneakiest problems. Neither one announces itself on day one. By the time you notice yellow leaves or sticky residue, the infestation has usually spread.
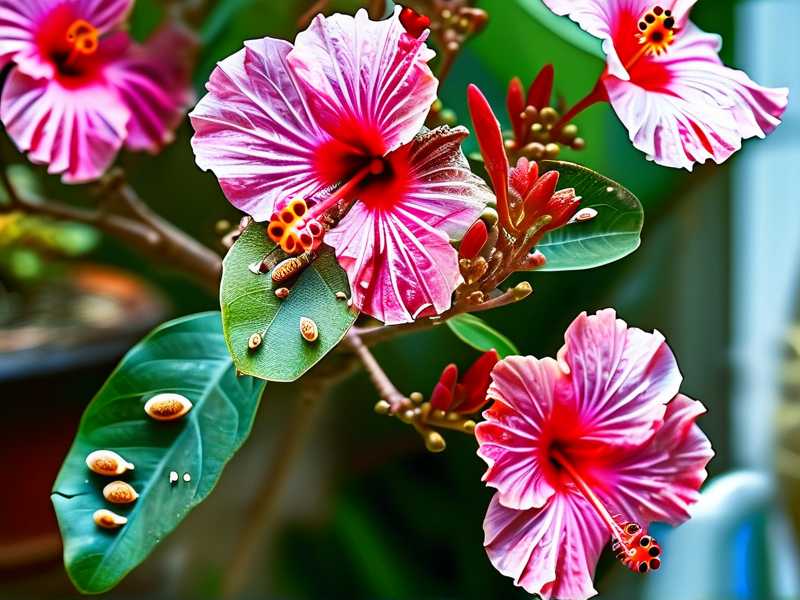
I started inspecting nursery hibiscus after my third failed plant. The first one looked perfect from the top. Glossy leaves. Two open blooms. I brought it home and placed it by my front steps. Ten days later the leaves felt tacky. Small brown bumps lined the stems. That was soft scale. They had been there all along, hiding under the lower leaves I never lifted.
So let’s get into the practical side. I want you to avoid that exact scenario.
Inspect the Leaf Undersides Before You Pay
Scale insects rarely sit on top of the leaves when the infestation is fresh. They prefer the undersides, especially along the main vein. Before I buy any hibiscus, I turn the pot around. Then I lift three or four lower leaves with my fingers. I look for tiny oval bumps that do not rub off easily. Some people mistake scale for dust or corky plant texture.
Soft scale looks like little brown or tan helmets. They can be flat or slightly raised. Armored scale is harder and darker. Both suck sap from the plant. As they feed, they release honeydew. That sticky stuff invites sooty mold. If your fingers feel tacky after touching the leaves, put the plant back.
I once found scale on a beautiful double peach hibiscus. It was the only one left on the shelf. The flowers were huge. I wanted it badly. But I lifted a leaf, saw three bumps near the petiole, and walked away. That decision saved my other patio plants.
Check the Stem Joints and Leaf Axils
Scale likes crevices. The spot where a leaf meets the stem is a favorite hiding place. I run my thumbnail gently along the leaf axils. If I feel bumps that pop off with slight pressure, I stop. Healthy bark should feel smooth or slightly rough depending on the variety. It should not feel bumpy in a regular pattern.
Another trick I use is the white paper test. I hold a plain white envelope under a branch. Then I tap the branch lightly. If tiny specks fall and then start moving, those are mites or thrips, not scale. If brown bumps stay stuck, that points to scale. Either way, I leave the plant on the shelf.
Look at the Drainage Holes for Nematode Clues
Root-knot nematodes are invisible to the naked eye. But their damage is not. These microscopic roundworms attack hibiscus roots. They cause swollen knots and galls. The roots stop taking up water and nutrients properly. Above ground, the plant looks wilted even when the soil is wet. Leaves yellow from the bottom up. Growth stalls.
You cannot see nematodes when you buy a plant. But you can spot warning signs. I always slide the nursery pot up slightly. If I can see roots poking through the bottom, I check their shape. Healthy white roots look smooth. Nematode-damaged roots may show small bead-like swellings. That is not always visible through the drainage holes, but sometimes it is.
More often, I look at the overall health of the plant. A hibiscus that is wilted in the morning despite moist soil raises a red flag. So does a plant with stunted new leaves. So does a root ball that feels unusually lumpy when I press the pot sides.
I bought a nematode-infected hibiscus two years ago from a local nursery. It was marked down because it looked a little tired. The soil was damp. The leaves were yellowing at the base. I told myself it just needed fertilizer. Wrong. Within a month, the entire plant collapsed. When I pulled it out, the roots were knotted and deformed. I had to throw away the soil and disinfect the pot.
The nursery pot tells you a lot if you know how to read it. Flip it over. Look for roots circling hard or pressing out in thick mats. Severe root binding is not the same as nematodes, but stressed roots invite secondary problems. I avoid any hibiscus that has been sitting in the same tiny pot for too long. Those plants are more vulnerable to root pests and disease.
Quarantine Every New Hibiscus for Two Weeks
I never place a new hibiscus near my established plants right away. This one habit has saved my collection more than any spray or soil drench. My quarantine area is a shaded corner of the driveway, about fifteen feet from my other containers. I set the new plant there for two full weeks.
During those fourteen days, I watch. I check the leaf undersides every two or three days. I dab any suspicious bump with a cotton swab dipped in rubbing alcohol. If the bump dissolves or turns brownish-orange, it is likely scale. If it does not budge, it might be natural corking.
I also smell the soil. Healthy hibiscus soil should smell earthy, not sour. A sour or rotten smell often means root problems below. That can be from overwatering at the nursery, or from nematode damage letting rot organisms in. Either way, I do not plant it near my healthy plants.
For the first week, I hold off on heavy watering. Nursery plants often arrive soaked. I wait until the top inch of soil dries out. Then I water lightly. This gives me a chance to see how the plant drains. Poor drainage and hibiscus do not mix.
The Two-Week Observation Period: What I Actually Saw
I brought home a red hibiscus from a garden center last spring. It had shiny leaves and one bud opening. But I noticed a few small bumps on the lower stem. I thought they might be scale. Instead of returning the plant, I quarantined it and treated it.
On day one, I took a soft toothbrush. I dipped it in warm water with a few drops of mild dish soap. I gently scrubbed every stem and leaf underside. Then I rinsed the whole plant with a gentle shower spray. I repeated this on day four. By day seven, I saw no new bumps. The plant perked up. After two weeks, I moved it to my main patio. Six months later, it was still clean.
That worked because the infestation was tiny. If a plant is covered in scale, I return it immediately. No point fighting a losing battle.
My First Big Mistake: Forgetting to Check the Soil Surface
People think scale only lives on stems and leaves. But scale crawlers drop onto the soil surface too. I learned this after treating a plant but ignoring the top of the potting mix. Two weeks later, new bumps appeared on the lower leaves. The crawlers had climbed back up.
Now I remove the top half inch of nursery soil after bringing a plant home. I replace it with fresh potting mix. This removes fallen scale crawlers and any eggs near the surface. It also gets rid of slow-release nursery fertilizer that may be too strong.
My Second Mistake: Trusting a Pretty Flower Display
I used to pick hibiscus by bloom count. Big mistake. Flowers hide problems. A heavily blooming plant may be stressed and pushing out flowers as a last-ditch effort. I now focus on foliage and roots first. Flowers are a bonus, not a signal of health.
A healthy hibiscus has deep green leaves with no stippling or yellow edges. The new growth should look vigorous. The stems should be firm, not wrinkled. If the plant is dropping buds or has flowers but dull leaves, I pass.
My Third Mistake: Reusing Old Potting Soil
After I lost my nematode-infected hibiscus, I almost reused the soil for another plant. That would have spread the problem. Root-knot nematodes survive in soil and root debris. I now throw away soil from any plant with suspicious roots. I disinfect the empty pot with a bleach solution. One part bleach to nine parts water. Soak for ten minutes. Rinse well. Dry in the sun.
Many home gardeners in the US, UK, Canada, and Australia ask me if they can treat nursery hibiscus with systemic insecticides. One popular option is imidacloprid. It works on scale when applied as a soil drench. The plant takes it up through the roots. Scale feed and die. I have used this on a badly infested hibiscus that I could not return. It took about two weeks to see fewer live bumps. By week three, the plant looked cleaner. But I still hand-scrubbed the leaves first.
For nematodes, no chemical fix works for home gardeners in most regions. Prevention is everything. Buy from nurseries that use clean potting media. Avoid plants that have been sitting on the ground, where nematodes can move into the pot through drainage holes. I place my nursery pots on raised benches at home to avoid this.
One thing I want to stress. Not every bump is scale. Hibiscus stems develop small lenticels. These are natural pores that help the plant breathe. They look like tiny pale dots or short dashes. They do not move. They do not scrape off. If you scratch one gently and it does not come off, leave it alone.
Root-knot nematode symptoms often resemble overwatering. That is why so many people miss them. A plant with nematodes wilts during the heat of the day. It recovers a little at night. The leaves turn yellow slowly. The plant just sits there, not growing. You can lift the root ball after a few weeks and see the knots. That is the only sure way to know.
I now inspect roots before buying if the nursery allows it. I gently slide the pot off. A healthy root ball holds together but has white and cream roots. A nematode-damaged root ball may fall apart. The roots look stubby and knotted. I have done this at independent garden centers where staff are friendly. Big box stores usually do not allow it, but I still look through the drainage holes.
How to Spot a Good Nursery Hibiscus in the First Place
Buy from a source you trust. I prefer small local growers who can tell me when the plant was potted and what soil they used. I ask one question: has this plant been grown on the ground or on a bench? If they do not know, I move on.
I also inspect the pot itself. A pot with green algae on the outside has been wet for a long time. That does not guarantee nematodes, but it means the soil has not dried enough between waterings. Overly wet soil stresses hibiscus roots. Stressed roots are more susceptible to pests.
A pot with roots visible through the bottom should give you pause. Some root visibility is normal. But thick, circling, brown roots poking out in a dense ring mean the plant is overdue for repotting. Those plants are often root-bound and weak. I only buy root-bound plants if I can pot them up the same day and cut the circling roots.
Timing matters too. I do not buy hibiscus in late autumn in the UK or northern US. Plants are going dormant or semi-dormant. Pests hide better when growth slows. Nurseries also hold their stock longer at that time of year, increasing the chance of infestations. Spring and early summer are safer. The plants are actively growing and showing fresh leaf color.
What to Do If Your New Hibiscus Already Has a Small Scale Problem
If you find one or two bumps, you can often fix it without chemicals. I have done this many times. Remove the plant from your other plants. Mix a solution of warm water and insecticidal soap. I use one teaspoon of mild liquid soap per liter of water. Add one teaspoon of neem oil. Shake well. Spray the entire plant, focusing on leaf undersides and stem joints. Then use a soft brush to remove dead scale. Repeat every five to seven days for three weeks. Keep the plant out of direct sun while the spray dries to avoid leaf burn.
For light infestations, this lesson saved more than a few of my hibiscus. You can find more about scale control and general hibiscus care from the Royal Horticultural Society. Their advice on pest identification is practical and research-backed. I also follow the American Horticultural Society for regional growing tips that suit my climate.
I cannot stress enough how dangerous overwatering is for hibiscus. It is not just a root rot issue. Overwatered plants produce soft, tender growth that scale love. The same goes for high-nitrogen fertilizers. I do not feed newly purchased hibiscus for the first month. Let the plant settle. Pushing soft growth too early invites pests.
90% of indoor plants die from overwatering. This line gets repeated often for a good reason. Hibiscus grown in containers suffer the same fate. More water does not fix scale or nematodes. It usually makes things worse. I check the soil with my finger before I water any new nursery plant.
My Advice to New Hibiscus Buyers Right Now
Buy the ugliest-looking plant with the healthiest leaves and roots. I am only half joking. A plant with fewer blooms but clean stems and fresh root tips will outperform a showy, pest-ridden one every time.
Take a flashlight with you if the nursery is dim. Shine it under the leaves. Scale is easier to see with a backlight. I keep a small keychain light in my glove box for this exact reason. It has caught scale on more than one occasion.
Ask the staff where the plants came from. If they hesitate or give a vague answer, be cautious. Nurseries that care about plant health usually know their growers. Big chain stores often simply do not know. That does not mean every plant from a big box store is bad. I have found clean hibiscus there. I just inspect twice as hard.
Consider overwintering before buying in colder regions. In the UK and Canada, hibiscus often spend months indoors. That is exactly the environment where hidden scale explodes. Dry indoor air, lower light, and warm rooms create a perfect storm. I treat every plant before it comes inside for winter. That means a month of observation and two rounds of insecticidal soap.
I met a gardener in Manchester who lost an entire windowsill of houseplants to scale that hitchhiked on a hibiscus. She had no idea until the sticky honeydew dripped onto her desk. The hibiscus looked fine when she bought it. So no, a clean top does not equal a clean plant.
The real secret is patience. You cannot rush the inspection. You cannot skip the quarantine. You cannot assume a nursery did the work for you. Once you accept that, avoiding hidden scale and nematodes becomes routine. It takes me about five minutes now to check a plant before buying. Those five minutes have saved me months of frustration.
If you already brought home a suspect plant, do not panic. Isolate it. Inspect it every two days. Treat small problems early. Return severe cases if you can. And never reuse sick soil.
The joy of growing hibiscus is worth all this fuss. These plants give enormous flowers in return for basic care. They bloom all summer on a sunny patio. They attract hummingbirds in the US and brighten conservatories in the UK. Clean plants are out there. You just have to find them with your eyes open and your fingers in the soil.
Frequently Asked Questions
Can scale insects spread from a new hibiscus to my other houseplants? Yes. Scale crawlers are tiny and can travel on your hands, tools, or even through close leaf contact. That is why I keep new plants isolated for two weeks and wash my hands after handling any suspect plant.
What does root-knot nematode damage look like on the above-ground part of a hibiscus? The plant may look wilted even when the soil is wet. Leaves turn yellow from the bottom up. Growth becomes stunted. It looks a lot like overwatering or nutrient deficiency, which is why you should inspect the roots if the top growth does not respond to improved care.
Should I treat every new hibiscus with insecticidal soap even if I see no pests? I recommend only treating if you see signs of pests. Unnecessary sprays can stress the plant. A careful inspection and two weeks of quarantine are usually enough for clean plants. If you spot anything suspicious, then treat immediately.





