 bluename
How to Recover Outdoor Hibiscus After Large Caterpillars Chew Holes Through Mature Foliage
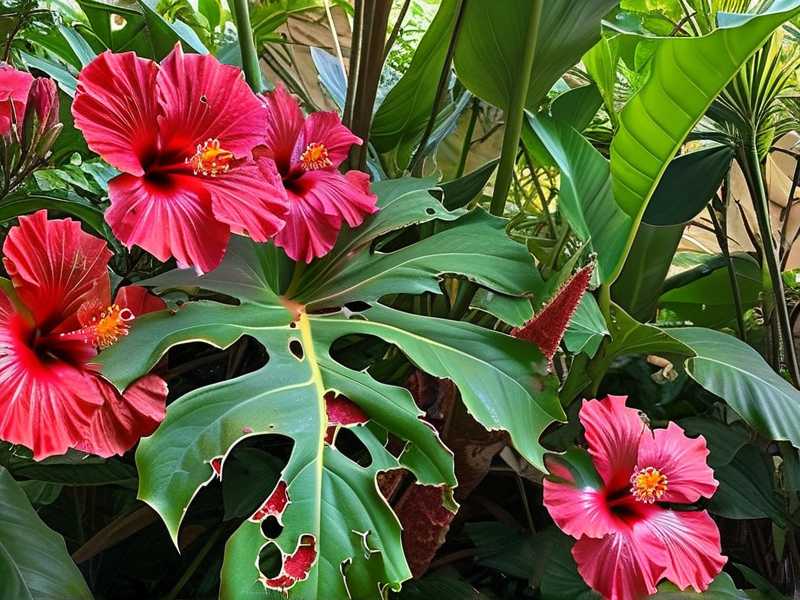
If caterpillars have turned your hibiscus leaves into lace, don't panic. The plant can recover. The fastest fix is manual removal combined with a targeted spray, followed by a 14-day recovery care routine I've tested on my own plants. Hibiscus grown outdoors in USDA zones 4 through 11 bounce back surprisingly well once the chewing stops, provided you support the plant with correct watering, light, and a little patience. I've brought back hibiscus shrubs that were 70 percent defoliated, and they flowered again in about three to four weeks.
Why Caterpillars Attack Outdoor Hibiscus
Before you reach for a spray bottle, it helps to know exactly what you're dealing with. On hibiscus, the usual leaf-chewing culprits include the hibiscus sawfly larva, the Io moth caterpillar, the saddleback caterpillar, and various looper species. Some are small and green, hiding on leaf undersides. Others are larger and boldly colored, chewing through mature foliage overnight.
What surprised me during my first serious caterpillar outbreak was how fast the damage appeared. I checked my hibiscus on a Friday evening and everything looked fine. By Sunday morning, at least thirty leaves had large ragged holes, and several were reduced to veins. I found the caterpillars resting along the stems during the day, perfectly camouflaged.
The chewing itself won't usually kill an established outdoor hibiscus. What kills it is the stress response. The plant drops damaged leaves, slows root function, and becomes vulnerable to rot if you overwater while trying to "help." That was my first mistake years ago. I watered more because I thought the plant needed energy. I ended up with yellowing leaves and soggy soil. The caterpillars weren't the real threat. My overreaction was.
Once the caterpillars damage mature foliage, the plant shifts energy toward survival rather than flowering. Your job is to remove the pest pressure, limit additional stress, and let the hibiscus rebuild. The method is simple, but it requires consistency for about two weeks.
My Step-by-Step Recovery Method
Let me walk you through exactly what I do now when I spot large caterpillar damage on my outdoor hibiscus. This approach has worked for me on tropical hibiscus in containers and hardy hibiscus planted in the ground.
Step 1: Inspect Every Stem and Leaf Underside
I start in the morning or late afternoon when caterpillars are less active and easier to spot. You'd be surprised how many hide along leaf midribs or at the base of flower buds. I wear garden gloves because some species, like the saddleback, can sting.
I check every damaged leaf and the nodes directly below it. Caterpillars typically rest near their last feeding site. If I find only a few, I remove them by hand and drop them into soapy water. This alone can stop the damage. During one outbreak on my container hibiscus, I removed eleven caterpillars in a single session. The chewing stopped that same day.
Step 2: Prune the Worst Damaged Foliage
Not every leaf needs to go. I remove leaves that are more than 60 percent damaged or completely skeletonized. These won't photosynthesize well and can invite fungal issues if they rot. For leaves with small holes or minor edge damage, I leave them on the plant. They still produce energy, and the shrub looks fuller during recovery.
When pruning, I use clean, sharp bypass pruners. I wipe the blades with rubbing alcohol between cuts if I suspect any disease. Cutting back heavily damaged stems by no more than one-third of their length can also stimulate new growth. I avoid aggressive hard pruning during active caterpillar season unless the plant is truly stripped.
Step 3: Apply a Targeted Caterpillar Control
I don't reach for broad-spectrum chemicals first. For outdoor hibiscus, I start with Btk, which is short for Bacillus thuringiensis var. kurstaki. It's a naturally occurring bacterium that affects only leaf-eating caterpillars. Bees, birds, and beneficial insects are not harmed by it in the same way. That matters to me because I want pollinators visiting my hibiscus.
I mix it according to the label and spray in the evening when caterpillars are feeding. I soak both sides of the leaves, focusing on new growth and damaged areas. Btk works when caterpillars eat treated tissue. They stop feeding within hours and die within a few days. It's not an instant contact kill, but it's effective.
For severe infestations or cabbage looper species that seem resistant, I may use spinosad instead. I keep that as my backup because it has a broader impact. Either way, I reapply after about seven days if I still see fresh damage or live caterpillars.
I also add a second check two or three days after the first spray. I pick off any remaining caterpillars. Combining manual removal with Btk gives much faster control than spraying alone.
Step 4: Stabilize Watering Immediately
Right after caterpillar damage, the hibiscus may look thirsty. Leaves curl or droop because their surface area has been reduced and damaged. But the root system has not suddenly grown larger. Watering more won't fix leaf damage. In fact, it can make things worse, especially in containers.
I check the top inch or two of soil with my finger before watering. If it's still moist, I wait. During the first week after defoliation, my hibiscus actually uses slightly less water because it has fewer leaves transpiring. Let me say that again because it's counterintuitive: less foliage often means less water use in the short term.
Once I see new buds or small leaves emerging, usually within 7 to 14 days, I gradually return to my normal watering rhythm. The key is steady moisture without waterlogging.
Step 5: Hold Off on Fertilizer for a Bit
This was another lesson I learned the hard way. In the past, I fertilized damaged hibiscus immediately, thinking it would push new growth. What happened? The plant pushed soft, weak growth that attracted even more pests. You don't need that.
I now wait until I see definitive new growth before applying any fertilizer. That's usually 7 to 10 days after caterpillar control. When I do feed, I use a balanced, water-soluble fertilizer at half strength. Hibiscus responds well to moderate feeding, not heavy doses. I repeat at half strength every two to three weeks during active recovery. High-phosphorus bloom boosters can wait until the plant has a solid set of new leaves.
My Two-Week Observation Log
I want to share a real recovery timeline so you know what to expect. This was from a large tropical hibiscus in a 14-inch container on my patio. It had about 50 percent leaf damage from loopers.
Day 1: Inspected the plant thoroughly. Found and removed 9 caterpillars. Pruned six severely damaged leaves. Sprayed Btk in the evening. Soil was slightly moist, so I did not water.
Day 2: No new frass visible, which is a good sign. Frass is the brownish caterpillar droppings. Older damage looked dry, not spreading. Left the plant in morning sun with afternoon shade.
Day 3: Two remaining caterpillars found near the base of new growth. Removed them. Leaves that were already damaged began to look limp. I resisted the urge to water. Soil check showed moisture about two inches down.
Day 5: No new caterpillar activity. A few tiny green buds appeared at the leaf nodes. This is the plant responding to branch tips that are still viable. I waited one more day before watering.
Day 6: Watered lightly in the morning. Added no fertilizer yet. The plant looked slightly sparse but stable. No further defoliation.
Day 8: I noticed small new leaves starting to unfurl. Color looked healthy, not pale. I applied half-strength balanced liquid fertilizer after watering. I kept the pot in its usual location, not moving it around.
Day 10: New leaves expanded. A few original leaves with minor damage remained and were still green. I removed one leaf that had turned yellow at the edge. I watered only when the top of the soil felt dry.
Day 12: Vigorous growth at multiple nodes. The plant was clearly past the shock phase. I saw the first tiny flower bud forming. This was earlier than expected, but welcome.
Day 14: I gave another light feed. The plant had about one-third of its previous foliage back. Older damaged leaves were slowly being replaced. By week four, it was flowering again, and the lace-like leaves were no longer the main visual feature.
That two-week window is critical. If you can keep the plant stable and the caterpillars gone, the hibiscus does most of the healing on its own.
The Three Fatal Mistakes New Growers Make
Over my years growing hibiscus outdoors, I've seen the same errors repeated constantly. These are the ones that turn a minor caterpillar issue into a dying plant.
Mistake 1: Overwatering After Damage
90% of indoor plants die from overwatering. That phrase usually refers to houseplants, but the principle applies to outdoor hibiscus in containers too. After caterpillar damage, many gardeners see limp leaves and immediately flood the pot. The roots then sit in water, suffocate, and begin to rot. The plant collapses not from the caterpillars, but from root failure.
I use one simple rule now: if I wouldn't water an undamaged hibiscus in the same conditions, I don't water the damaged one either. The only exception is if the soil has gone fully dry. Then I water normally, not excessively.
Mistake 2: Wrong Light Response
Some people move a damaged hibiscus into deep shade to "rest" it. Others move it into full blazing sun to "boost energy." Both can backfire. A hibiscus that loses foliage still benefits from good light, but harsh afternoon sun on a stressed plant can scorch the remaining leaves.
I keep damaged container hibiscus in their normal spot if they were thriving there before. If the plant was already in full afternoon sun, I may temporarily shift it so it receives morning sun and light afternoon shade for about a week. I don't rotate it daily or fuss over it. Stability matters.
Mistake 3: Choosing the Wrong Pot
This is a root-level issue that shows up during recovery. A pot that is too large holds extra water. A pot without drainage holes becomes a swamp. A dark plastic pot in full sun can heat the soil and stress the roots further. I've killed my first hibiscus this way. The pot looked pretty, but it had no drainage, and the root ball turned to mush.
For outdoor hibiscus, I now use containers with multiple drainage holes. I prefer unglazed terracotta or breathable fabric pots in hot climates. In cooler regions, glazed ceramic or heavy plastic works fine as long as excess water can escape. If your hibiscus is in the ground, check instead that the planting site isn't collecting water. Even established hibiscus hate soggy root zones.
Light Requirements for a Recovering Hibiscus
Outdoor hibiscus perform best with at least six hours of direct sun per day in most regions. That's consistent with general guidelines from the American Horticultural Society, which emphasizes matching a plant's light needs to its current health. A healthy hibiscus can handle strong sun. A recently defoliated one needs a gentler transition.
In my own garden, tropical hibiscus do well with morning sun and a little afternoon protection during extreme heat. Hardy hibiscus, like the perennial types, tolerate full sun better. After caterpillar damage, I watch how the remaining leaves respond. If they curl or develop bleached patches, the light is too intense. If new growth is leggy and pale, there isn't enough light.
The trick is not to make big changes. Caterpillar recovery takes energy from the plant. A stable light environment helps it allocate that energy efficiently. I only intervene with temporary shade if temperatures climb above 95°F or if the plant was recently moved.
Watering During the Recovery Period
I use the finger test constantly. I push my finger into the soil to the second knuckle. For container hibiscus, if it feels dry at that depth, I water until water runs from the drainage holes. Then I stop. I never let the pot sit in a saucer of water for more than 30 minutes. That standing water can wick back up and keep the lower roots too wet.
For in-ground hibiscus, I water deeply but less often. A slow, deep soak encourages roots to grow downward. During caterpillar recovery, I aim for consistent moisture without saturation. Mulching around the base helps in hot weather, but I keep the mulch pulled back a few inches from the main stem to prevent rot.
One sign I watch for is new leaf tip browning. That can mean salt buildup, inconsistent watering, or root stress. If the soil has been wet for days and leaves are yellowing, I ease off watering immediately. If the soil is bone dry and leaves are crispy, I water and then reevaluate my schedule.
Soil and Repotting After Severe Damage
If your hibiscus is in a container and the soil has become compacted or water-repellent, recovery will be slower. I repot stressed hibiscus only if the root health is in question. Repotting adds stress, so I don't do it as a first response to caterpillar damage.
When I do repot, I use a mix that drains well but holds some moisture. A reliable blend for tropical hibiscus is roughly three parts quality potting soil, one part perlite or pumice, and one part compost or aged bark. This keeps the mix airy. The Royal Horticultural Society recommends using a well-drained growing medium for container shrubs to prevent root diseases, which matches what I've observed.
The pot size matters too. I only move up one size at a time, usually about two inches wider in diameter. Too much extra soil stays wet and can rot roots. I also refresh the top layer of soil every spring for established container plants rather than fully repotting every year.
Fertilizing After the Plant Stabilizes
Hibiscus are hungry plants when actively growing, but damaged plants need a gentler approach. I base my feeding schedule on what I see. No new growth, no fertilizer. Once new leaves start, I feed.
I use a balanced liquid fertilizer with roughly equal NPK numbers, something like 10-10-10 or 20-20-20 diluted to half strength. I apply it every two weeks during active growth. Some growers prefer a fertilizer with a bit more potassium for stronger stems and better blooming. I have had good results with balanced formulas and the occasional switch to a tomato or bloom fertilizer later in the season.
I avoid fertilizing when temperatures exceed 90°F, when the soil is dry, or when the plant is still defoliated. Feeding a stressed hibiscus can burn roots and make recovery slower.
Pest Prevention for the Rest of the Season
Once you've cleared the caterpillars, you don't want a repeat in three weeks. I do a quick inspection every few days. I look for frass on leaves, not just the caterpillars themselves. Frass is often easier to spot. I also check the undersides of leaves and along leaf veins.
Planting companion plants that attract beneficial insects can help. Small-flowered herbs and native flowering plants bring in parasitic wasps and predatory bugs that keep caterpillar numbers down. I don't rely on this alone, but it reduces pressure. I also avoid broad-spectrum insecticides that kill natural enemies.
For a localized repeat outbreak, I find that spraying Btk at the first sign of new chewing works well. Timing matters. Caterpillars must eat treated leaves. I spray in the evening, avoid rain for at least 24 hours, and recheck after a few days.
Pruning adjacent dense growth can also help. Caterpillars love to hide in thick canopies. I thin out crossed branches and interior suckers lightly, which improves airflow and makes inspection easier.
Seasonal Care After Caterpillar Recovery
Hibiscus care shifts with the seasons, and a recovering plant benefits from seasonal adjustments.
Spring
This is the easiest time for a hibiscus to bounce back. I prune in early spring once the risk of hard frost passes. I remove dead or weak stems and shape the plant lightly. New growth emerges quickly, especially as temperatures warm. If I need to repot or refresh soil, I do it in spring. I also begin a regular feeding schedule once growth is active. A plant that recovered from caterpillars in late summer often needs a gentle spring prune to remove lingering damaged wood and encourage a fuller shape.
Summer
Heat and sun intensity peak. I make sure the soil doesn't dry completely for container plants. I water in the morning. During heat waves, I may move potted hibiscus to a location with some afternoon shade. I scout for pests every three to four days because caterpillars and spider mites are most active. For plants that survived heavy defoliation, I continue half-strength feeding every two to three weeks but skip feeding during extreme heat.
Autumn
I gradually reduce feeding as growth slows. I don't fertilize after late summer unless the plant is still actively growing in a warm climate. I also reduce watering slightly for potted plants as temperatures cool. This signals the plant to harden off. I remove any leaves that are heavily damaged or diseased to prevent fungal problems over winter.
Winter
For tropical hibiscus in cold regions, winter means moving the plant indoors or protecting it. I bring my potted tropical hibiscus inside before night temperatures drop below 50°F. I place it near a bright window and reduce watering. I stop fertilizing entirely. Some leaf drop is normal after moving indoors. I don't panic if a few more leaves fall. I water only when the top inch of soil is dry. Hardy hibiscus in the ground need a layer of mulch around the crown in cold zones. They die back to the ground, return in spring, and usually regrow vigorously.
Common Problems After Caterpillar Damage
A few issues show up repeatedly after defoliation. These are the ones I see most often in my own plants and in questions from other hibiscus growers.
Yellow Leaves After Recovery
Yellowing can mean several things. Overwatering is the most common cause. If the soil stays wet and leaves turn yellow from the bottom up, ease off. If yellowing appears on new growth with green veins, it may be an iron deficiency or high soil pH. I address that with a minor element supplement or acidifying fertilizer. A few yellow leaves after major defoliation can also be normal as the plant sheds damaged tissue.
No New Growth After Two Weeks
If two weeks pass and you see no new buds, check the basics. Is the plant getting enough light? Is the soil waterlogged? Are remaining stems alive? I scrape a tiny bit of bark with my thumbnail. Green underneath means alive. Brown and brittle means that stem has died. Sometimes a heavily defoliated hibiscus drops all its leaves and looks done, but the roots are still alive. With correct care, it pushes new growth from the base in three to four weeks.
Fungus or Mold on Damaged Leaves
Ragged leaf edges can collect moisture and develop fungal spots. I remove leaves that turn mushy or develop dark, spreading lesions. I water at the soil level rather than overhead to keep foliage dry. Good air movement helps. I don't





