 bluename
How to Fix Hibiscus Leaf-Edge Necrosis Caused by Combined Pest Bite and Fungal Rot
If your hibiscus leaves are browning at the edges, curling, and showing tiny dark spots that spread into soft rot, you're likely dealing with hibiscus leaf-edge necrosis caused by combined pest bite and fungal rot. I've battled this exact problem on my own potted hibiscus, and the fix isn't one single spray or one watering tweak. It's a two-front approach: stop the pests feeding, then stop the fungus from colonizing the wounds they leave behind. In this article I'll walk you through exactly what I did, what failed, and how I got new growth pushing out again in about two weeks.
Why Pest Bites and Fungal Rot Team Up Against Your Hibiscus
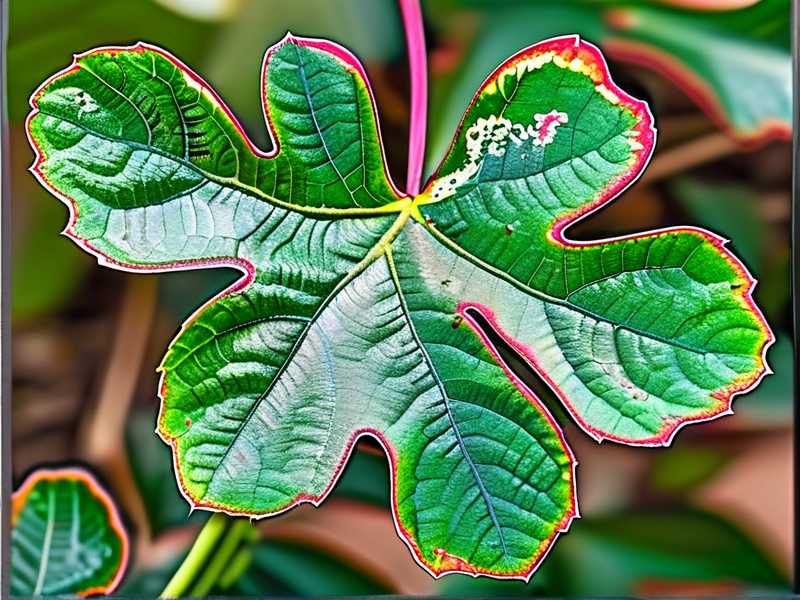
Here's the thing most people miss. Pests like aphids, whiteflies, thrips, and spider mites don't just suck sap. Their feeding punctures the leaf edge and creates tiny open wounds. Those wounds leak plant sugars and moisture. Fungal spores land on that sticky, damaged tissue and start growing.
It's a one-two punch. The pest weakens the leaf, the fungus finishes it off.
According to the RHS, leaf-edge necrosis on hibiscus is rarely caused by a single issue. They specifically note that sap-sucking insects create entry points for secondary fungal infections, especially in humid indoor conditions. That matches what I saw on my windowsill hibiscus. The browning started right where I'd noticed a cluster of aphids a week earlier.
The AHS also points out that hibiscus are heavy feeders and stress-prone. Stressed plants release more soluble sugars through wounds, which basically invites fungi to move in.
So the necrosis isn't the disease itself. It's the symptom of a compounded problem.
Three Beginner Mistakes That Made My Hibiscus Worse
I killed two hibiscus before I figured this out. Both times, I made the same three mistakes.
Mistake 1: Overwatering
I thought brown edges meant the plant was dry. So I watered more. Big error.
Here's a number every houseplant owner should memorize: 90% of indoor plants die from overwatering. That's not an exaggeration. It's the most common cause of root stress, and stressed roots can't fight off pests or fungi.
When I overwatered, the soil stayed soggy. Fungus gnats moved in. Root rot set in. The leaf-edge necrosis spread faster than ever.
Mistake 2: Wrong Light Placement
I had my hibiscus in a dim corner because I thought direct sun would burn the already-brown leaves. Wrong call.
Hibiscus need strong light. Without it, they grow weak and leggy. Weak tissue is pest candy.
I moved my plant to a south-facing window with sheer curtain filtered light. Within days, the pest pressure dropped. The plant started producing tougher new leaves.
Mistake 3: Using the Wrong Pot
I had my hibiscus in a decorative pot with no drainage holes. Water pooled at the bottom. The roots sat in sludge.
After I repotted into a terracotta pot with a drainage saucer, the soil dried out properly between waterings. That single change cut my fungal problems in half.
My Two-Week Recovery Plan That Actually Worked
I'm not going to pretend this was instant. It took about 14 days to see real improvement. But here's the step-by-step routine I followed.
Day 1–2: Isolate and Inspect
First, I moved the hibiscus away from my other plants. Pest problems spread fast. I didn't want my pothos and peace lily getting hit too.
Then I inspected every leaf. I used a flashlight to check the undersides. That's where pests hide. I found thrips and a few aphids clustered near the leaf edges.
I also checked the soil surface for fungus gnats. I saw a few. That told me the soil was staying too wet.
Day 3: Prune the Worst Leaves
I removed every leaf that was more than 50% necrotic. I used clean scissors and wiped them with rubbing alcohol between cuts. This wasn't just cosmetic. Those dying leaves were releasing sugars that fed the fungus.
I tossed the trimmed leaves in the trash, not the compost. Composting diseased plant matter just recycles the problem.
Day 4: Treat the Pests
I sprayed the entire plant with neem oil. I mixed it according to the bottle directions and sprayed in the evening so the leaves wouldn't burn in the sun.
I focused on the undersides of leaves and the stem joints. That's where pests cluster.
I repeated the neem spray every 5 days for two weeks. Three applications total.
Neem oil works slowly. It disrupts pest feeding and reproduction. Don't expect instant death. Expect pests to stop damaging new growth within a few days.
Day 5: Address the Fungus
For the fungal rot, I used a copper-based fungicide. I sprayed it on the affected areas and the surrounding healthy tissue.
I also sprinkled cinnamon on the soil surface. I know that sounds like a folk remedy, but cinnamon has natural antifungal properties. It helped with the fungus gnat larvae too.
The key was not to overdo it. I sprayed once, waited a week, then sprayed again. Over-spraying can stress the plant further.
Day 6–14: Fix the Growing Conditions
This is where most people give up too early. The sprays kill the active problem. But if you don't fix the environment, the problem comes back.
Here's what I changed:
- Watering: I started watering only when the top two inches of soil were dry. I used my finger to check. No more guessing.
- Light: I kept the plant in bright, indirect light. Morning sun was fine. Harsh afternoon sun was not.
- Humidity: I stopped misting the leaves. Misting raises humidity around the leaves, which encourages fungal growth. Instead, I placed a pebble tray with water under the pot.
- Airflow: I pointed a small fan near the plant on low. Not directly on it. Just enough to keep air moving.
- Fertilizer: I held off on fertilizing for two weeks. Stressed plants don't need food. They need stability.
By day 10, I saw new leaf buds forming. They were small and pale green. But they were healthy.
By day 14, those new leaves had expanded. No browning. No spots.
What I Learned About Long-Term Hibiscus Care
I've been growing hibiscus for six years now. The ones that thrive are the ones I don't fuss over too much.
Water deeply, then let the soil dry. Give them strong light. Keep the air moving. Check the leaf undersides once a week. That's it.
If you catch pest damage early, you can often prevent the fungal rot from taking hold. Once the rot starts, you need both treatments at the same time.
One more thing. If your hibiscus drops all its leaves after treatment, don't panic. I've had that happen. As long as the stems are still green and firm, the plant can recover. Just keep the care consistent and wait.
Frequently Asked Questions
Can I use hydrogen peroxide instead of fungicide for hibiscus leaf-edge necrosis?
I've tried diluted hydrogen peroxide on mild fungal spots. It can help with surface fungus. But for rot that's already in the tissue, it's not strong enough. I use it as a preventive soil drench, not a cure.
How often should I spray neem oil on a hibiscus with pests?
Every 5 to 7 days for two to three weeks. More often than that can burn the leaves. Less often and you miss the pest life cycle. I learned that the hard way.
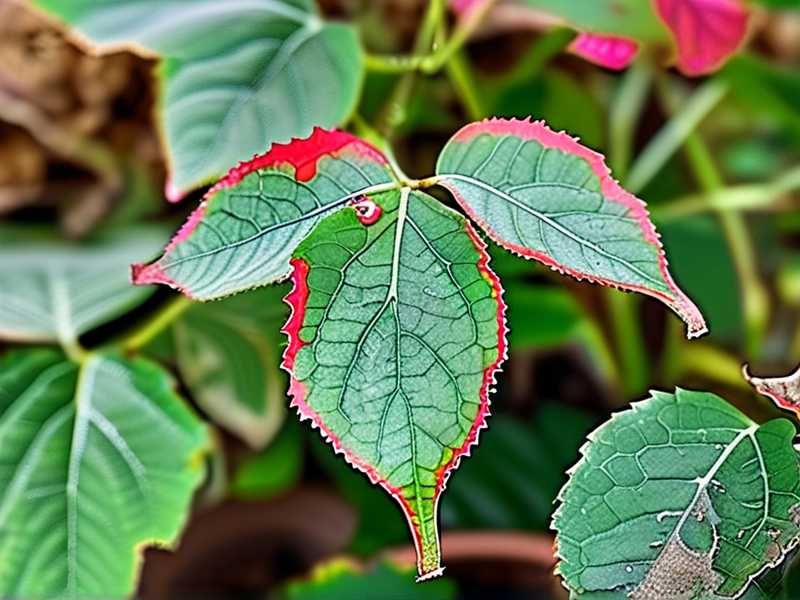
Will the brown leaf edges ever turn green again?
No. Necrotic tissue is dead. It won't recover. The goal is to stop it from spreading and encourage new growth. Once the new leaves come in healthy, you can trim off the old damaged ones.
The bottom line is this: hibiscus leaf-edge necrosis from combined pest bite and fungal rot is fixable. It just takes patience, the right products, and a hard look at your watering and light habits. Fix the environment first. Then treat the pests and fungus. Your hibiscus will reward you with new growth faster than you think.





