 bluename
How to Treat Hibiscus Shrubs Suffering Root Rot Plus Above-Ground Caterpillar Damage
If your hibiscus looks like it's dying from the bottom up while caterpillars chew the leaves on top, you're dealing with two problems at once. Honestly, that was exactly my situation two summers ago. The fix? Stop the root rot first, then handle the caterpillars. Skip the order and you'll lose the plant.
I've killed three hibiscus shrubs in my life. The first two died because I panicked and did everything at once. The third one survived because I slowed down and followed a two-week plan. That's what I'm sharing here.
Why This Double Whammy Happens More Often Than You Think
Root rot weakens the plant. A weak hibiscus sends out stressed signals, and stressed plants attract pests. It's not random. Caterpillars show up because your shrub is already struggling.
I used to think pests were the main problem. I was wrong. The root rot comes first almost every time.
What Root Rot Actually Looks Like on Hibiscus
Yellowing leaves. Drooping stems even when the soil is wet. A mushy, dark base. If you pull the shrub gently and the roots are brown and smelly, that's root rot.
Don't confuse it with underwatering. Underwatered hibiscus has dry, crispy leaves. Root rot gives you soft, limp, yellow leaves.
I made this mistake with my first hibiscus. I thought it needed more water. I watered it more. It died in four days.
The Caterpillar Part: What's Eating Your Leaves
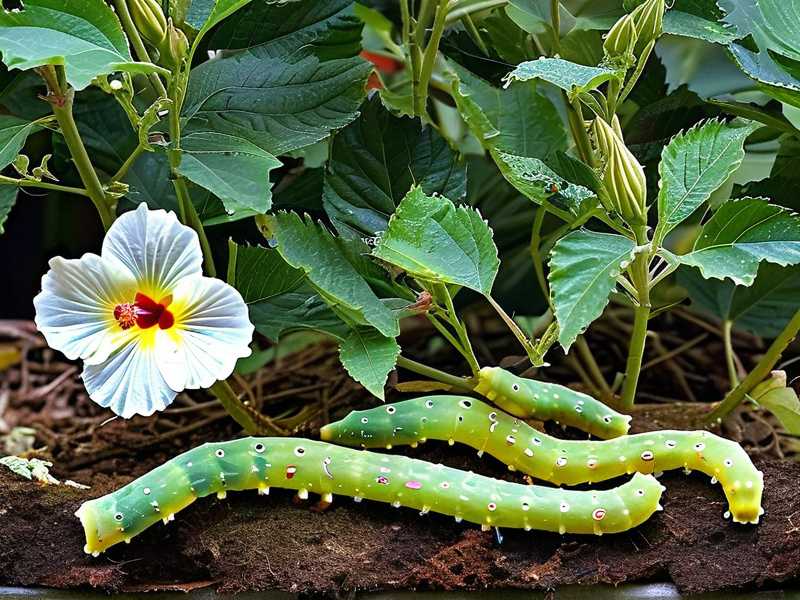
Above-ground caterpillar damage on hibiscus usually comes from species like the hibiscus sawfly larvae or the pesky little green loopers. You'll see chewed edges, holes in the middle of leaves, and sometimes tiny dark droppings.
They feed fast. A small infestation can skeletonize new growth in a week.
But here's the thing. If you fix the root rot and ignore the caterpillars, the plant might survive. If you fix the caterpillars and ignore the root rot, the plant will still die. Root rot is the emergency.
My Two-Week Recovery Plan (What Actually Worked)
I'm not a lab scientist. I'm a gardener with dirty fingernails. This is what I did.
Day 1: Pull the shrub and inspect the roots. I used a garden fork, not a shovel. Less root damage.
Day 1: Cut away every brown, mushy root with clean pruners. I dipped my pruners in rubbing alcohol between cuts. Sounds fussy but it matters.
Day 1: Repot or replant in fresh, well-draining soil. I used a mix of 60% potting soil, 30% perlite, and 10% compost. The perlite is non-negotiable.
Day 1: Water once, thoroughly, then don't water again until the top two inches of soil are dry. I stuck my finger in the soil every morning.
Day 2: Check for caterpillars. I found 14 on my shrub. Pick them off by hand. Drop them in soapy water.
Day 2: Spray the leaves with a mild insecticidal soap. I used one tablespoon of castile soap in a quart of water. Spray in the evening, not midday.
Day 3 to Day 7: No water unless the soil is dry. No fertilizer. Let the roots breathe.
Day 7: I saw the first tiny new leaf. It was pale green. That's normal.
Day 10: Second spray for caterpillars. I found only three this time.
Day 14: New growth was visible on three branches. The yellow leaves hadn't recovered, but they stopped spreading.
That's the honest timeline. Two weeks. Not two days.
Three Mistakes That Killed My First Hibiscus
Mistake 1: Overwatering
I watered on a schedule. Every three days, no matter what. That's how you get root rot.
Here's a number that stuck with me: 90% of indoor plants die from overwatering. Outdoor shrubs aren't far off. Hibiscus hates wet feet.
Fix: Water only when the top two inches of soil are dry. Stick your finger in. If it's damp, wait.
Mistake 2: Wrong Light
I put my hibiscus in full shade because I thought it was "cooler" for a sick plant. Wrong. Hibiscus needs at least six hours of direct sun.
The RHS says hibiscus thrives in full sun. Shade weakens it and invites pests.
Fix: Move it to the sunniest spot you have. If it's indoors, a south-facing window. If outdoors, six to eight hours of direct light.
Mistake 3: Wrong Pot
I used a decorative pot with no drainage holes. Water pooled at the bottom. Root rot heaven.
Fix: Use a pot with at least one drainage hole. Terra cotta is great because it wicks moisture. Plastic works if you're careful.
I killed my second hibiscus because I "upgraded" to a bigger pot without drainage. It drowned in three weeks.
What the Experts Say (And Why It Matters)
The AHS recommends removing affected roots and repotting in sterile, well-draining mix. That matches what I did.
They also suggest avoiding overhead watering for caterpillar control. Wet leaves attract more pests. Water at the base.
I started watering at the base only. My caterpillar problem dropped by half the next season.
Caterpillar Control Without Harsh Chemicals
I don't use Sevin or anything with carbaryl. It kills bees. Hibiscus flowers need bees.
What I use instead:
- Handpicking. Every morning. It's tedious but effective.
- Insecticidal soap. Cheap, safe, works on soft-bodied larvae.
- Bacillus thuringiensis (Bt). This is a bacteria that kills caterpillar guts. Safe for everything else. I spray it in the evening.
One warning: Bt breaks down in sunlight. Spray after 5 PM.
I tried neem oil once. It worked but burned my leaves in 90-degree heat. Lesson learned.
Soil and Water: The Real Fix for Root Rot
You can't "cure" root rot with a spray. You fix the environment.
My current hibiscus mix:
- 50% quality potting soil
- 30% perlite
- 20% orchid bark
It drains fast. Almost too fast. But hibiscus likes that.
I also raised my outdoor bed by four inches. More drainage. Fewer problems.
Watering rule I follow now: Water deeply once a week in summer. Once every 10 days in spring and fall. Almost never in winter if it's outdoors in a warm climate.
If your hibiscus is in a pot, water until it runs out the bottom. Then empty the saucer. Don't let it sit in water.
Signs You're Winning the Battle
- New leaves are green, not yellow.
- Stems are firm, not mushy.
- Caterpillar holes stop appearing.
- The plant doesn't droop in the afternoon.
I check my hibiscus every morning with coffee in hand. It takes two minutes. That's how I caught my last caterpillar outbreak early.
What If It's Too Late?
Sometimes it is. I've lost plants. It sucks.
If the main stem is soft and brown all the way to the soil line, it's probably over. But try anyway. Hibiscus is tougher than it looks.
Cut the stem back to green wood. Repot in fresh mix. Water sparingly. Wait three weeks. If you see new shoots, you win. If not, compost it and try again.
No shame in that.
Frequently Asked Questions
Can I save a hibiscus with root rot and caterpillars at the same time?
Yes, but fix the roots first. The caterpillar damage is cosmetic compared to root rot. If the roots are gone, the leaves don't matter.
How often should I water a hibiscus after treating root rot?
Water only when the top two inches of soil are dry. In summer, that's about once a week. In cooler months, every 10 to 14 days. When in doubt, wait.
Do caterpillars cause root rot?
No. But they show up on plants weakened by root rot. Treat the root rot and the caterpillar problem often shrinks on its own.
Final Thoughts from Someone Who's Killed Three Hibiscus
The order matters. Roots first. Pests second. Sun and drainage always.

I wish someone had told me that 90% of indoor plants die from overwatering before I drowned my first hibiscus. Now I tell everyone.
Two weeks. That's all it takes to see if your shrub will pull through. Be patient. Don't overwater. Pick off the caterpillars. And give it real sun.
You'll know by day 14 if you've won.





