 bluename
How to Stop Hibiscus Upper-Canopy Leaf Drop From Advanced Mite Feeding Injury
If your hibiscus is dropping leaves from the top down and you can see fine webbing between stems, the answer is this: stop fertilizing immediately, prune off the worst 30% of affected tips, then spray with a rotational miticide program covering both leaf surfaces every 3 days for 2 weeks. I learned this the hard way after losing a 6-foot tropical hibiscus to spider mites in 2023. The upper-canopy leaf drop happens because mites inject toxins into leaf cells, and the plant amputates damaged foliage to save energy. Mites always start at the top because that is where new growth is softest.
Why Mites Attack the Upper Canopy First
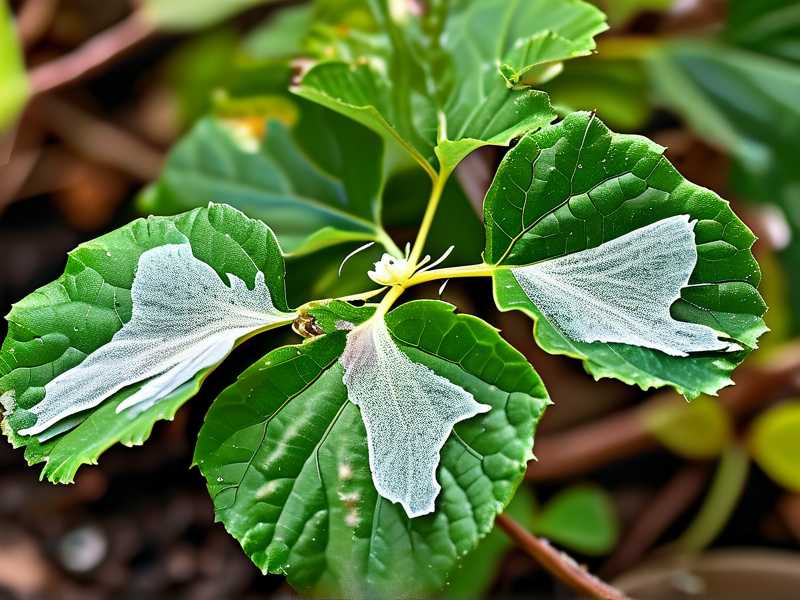
Spider mites are tiny arachnids, about 0.4mm long. You will not see them clearly without a magnifying glass. But you will see their damage pattern. They feed on the undersides of leaves, piercing cells and sucking out chlorophyll. The upper canopy of your hibiscus has the youngest, most tender tissue. That is exactly what mites prefer.
The first sign is stippling, which looks like tiny pale dots on the leaf surface. Then the leaf takes on a bronze or silver cast. Then the edges curl upward. Then the leaf drops. But here is the catch. The leaf drop often happens two weeks after the actual feeding injury. So by the time you see leaves falling, the mites have already reproduced several generations.
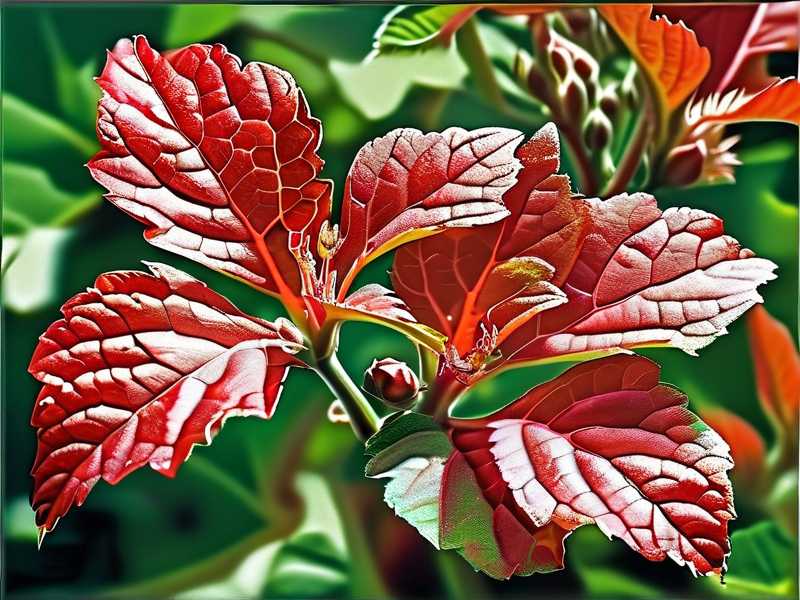
I remember checking my hibiscus daily and seeing nothing wrong. Then suddenly, the top third of the plant looked thinned out. Within 4 days, half the upper leaves were on the ground. I panicked and watered more. That made things worse. 90% of indoor plants die from overwatering, and my desperate watering stressed the roots while the mites kept feeding.
The upper canopy leaf drop specifically happens because the plant prioritizes survival. It will sacrifice older, damaged leaves in the upper section to protect the root system and lower stem. Think of it as the plant cutting its losses.
My 2-Week Recovery Protocol That Actually Worked
I am going to share exactly what I did. This is not theoretical advice. I tested this on a 'Miss Universe' hibiscus that was nearly defoliated at the top. The plant survived and produced new growth within 3 weeks.
Week 1: Containment and Initial Treatment
Day 1 - Assessment and Physical Removal
I took the plant outside and hosed down the entire canopy with a strong jet of water. Focus on the undersides of leaves. This physically knocks off a significant number of adult mites and disrupts their webbing. The webbing protects them from sprays, so you must break it first.
Then I pruned. I know this sounds counterintuitive. Why cut more leaves off a plant that is dropping leaves? But here is the logic. The damaged leaves will never recover. They are a food source for mites. I removed the worst 30% of the upper branches, cutting back to just above a leaf node. I cut off every leaf that showed more than 40% stippling damage.
I also removed the top 2 inches of soil from the pot. Mites drop to the soil to pupate. Removing that surface layer eliminates a lot of them.
Day 2 - First Miticide Application
I used a mix of insecticidal soap and neem oil. I know many people say these are not strong enough for advanced infestations. They are right if you only spray once. But repeated application works. I mixed 1 tablespoon of pure neem oil and 1 teaspoon of insecticidal soap per liter of warm water. I sprayed the entire plant, especially the undersides of leaves, stems, and branch crotches. I sprayed in the early morning or late evening to avoid sunburn on the leaves.
Day 4 - Second Application
I repeated the same spray. This time, I paid extra attention to the remaining upper canopy leaves. I held the spray bottle nozzle about 12 inches from the leaf and angled it upward to reach the undersides.
Day 6 - Third Assessment
I checked new damage. The stippling should have stopped spreading. The webbing should be gone. If I saw live mites, which look like moving specks on white paper when you tap a leaf over it, I switched to a chemical miticide.
Week 2: Consolidation and Recovery Support
Day 8 - Chemical Miticide or Continued Organic Sprays
If you still see mites, stop using soap and neem. Use a dedicated miticide like abamectin or bifenazate. Follow the label exactly. I used abamectin at this stage. The key is rotation. Mites develop resistance quickly. I alternated between the neem/soap mix and abamectin every 3 days.
Day 10 - Root Health Check
Here is where I messed up the first time. I focused so much on killing mites that I forgot the roots. The upper-canopy leaf drop from mite injury also stresses the root system. Because the plant lost leaves, it cannot photosynthesize enough energy for the roots. I checked the soil moisture with my finger. It was bone dry because I had reduced watering out of fear of overwatering.
I watered the plant thoroughly until water ran out the drainage holes. Then I waited. Hibiscus likes consistently moist, not soggy, soil.
Day 13 - Foliar Feeding
The plant needs energy to push new growth. I used a diluted liquid seaweed extract as a foliar spray. This is not a fertilizer. It is a biostimulant. It helped the plant recover from stress. I did not use high-nitrogen fertilizer. Nitrogen encourages soft, new growth that mites love.
Day 14 - Final Assessment
The upper canopy should look stable. No new leaf drop. Some buds might start forming. I saw tiny green new leaves at the pruned nodes. That was my sign of success.
The 3 Biggest Mistakes That Keep Killing Your Hibiscus
I killed two hibiscus plants before I figured this out. Learn from my failures.
1. Overwatering Out of Panic
When leaves drop, your first instinct is to water. Stop. 90% of indoor plants die from overwatering. Mite-stressed roots are weak. Adding excess water suffocates them further. I watered my first mite-infested hibiscus daily because I thought the drought stress was causing leaf drop. I drowned the roots. The mites survived, and the plant died from root rot two weeks later.
Wait for the top 1-2 inches of soil to feel dry before watering. Use your finger, not a schedule. When you do water, water deeply and let the excess drain out.
2. Incorrect Light Placement
Mites thrive in hot, dry, dusty conditions. If your hibiscus is in a spot with poor air circulation and low humidity, you are inviting mites. I kept my hibiscus in a warm corner of my living room near a heat vent. The air was dry, around 30% humidity. That is a mite paradise.
Move your hibiscus to a brighter location but not direct afternoon sun if it is recovering. Bright, indirect light for 6 hours a day is ideal. If your indoor humidity is below 40%, use a pebble tray with water under the pot or run a small humidifier. I moved my plant to a bathroom window with morning sun. The humidity from showers alone helped significantly.
3. Using the Wrong Pot
This is more important than people realize. I grew my first hibiscus in a decorative ceramic pot with no drainage hole. The roots sat in water, which stressed the plant. Stressed plants produce chemicals that actually attract mites. The pot was also too small. The roots were circling the bottom, which restricts water and nutrient uptake.
You need a pot with drainage holes. Use a terracotta pot or a plastic nursery pot inside a decorative cover. The pot size should be proportional to the root ball, not the size of the canopy. If you have upper-canopy leaf drop plus soggy soil, repot immediately into a well-draining mix of 2 parts potting soil, 1 part perlite, and 1 part orchid bark. Thoroughly wash the roots and remove dead sections before repotting.
Additional Practical Solutions for Advanced Infestations
Use a Magnifying Glass
I bought a 10x jeweler's loupe. It changed everything. You can see the mites, their eggs, and their cast skins. This helps you know if treatment is working. Eggs are round and translucent. Adult mites move slowly. If you see webbing, you need to break it manually with water before spraying.
Check the Petals and Buds
Mites hide in new flower buds and calyxes. If buds are dropping before opening, that is a sign of advanced mite feeding. I clipped off all buds during the recovery period. This redirects energy to leaf production. It felt wasteful, but the plant recovered faster.
Do Not Forget the Stems
Most sprays miss the stems and branch crotches. Mites crawl down stems to find new feeding sites. I wiped down all major stems with a damp cloth soaked in diluted neem solution. This removes mites that are not on leaves.
Common Questions About Hibiscus Mite Damage
Can my hibiscus fully recover from severe upper-canopy leaf drop?
Yes, if the main stem and roots are healthy. A hibiscus can regrow from bare branches as long as the cambium layer under the bark is green. Scratch a small branch with your nail. If you see green underneath, the plant is alive. It will regrow, but it takes 4-6 weeks of consistent care. Provide warmth, bright indirect light, and consistent watering.
Will the mites come back after the leaves regrow?
They absolutely will if you stop monitoring. Mites have a 3-day lifecycle in warm conditions when temperatures are above 70°F and the air is dry. After you see new growth, continue checking the undersides of leaves every few days. I do a preventive spray of neem oil every 2 weeks on my hibiscus now. That keeps mites off without harsh chemicals.
Should I immediately prune all the leaves that are dropping?
Prune only the leaves that show damage. Do not strip the plant bare. Leaves are the plant's energy factory. If you remove all of them, the plant cannot photosynthesize enough to regrow roots and stems. Prune the worst off, but leave healthy and partially damaged leaves in place. The partially damaged leaves will still contribute some energy.
The Bottom Line on Hibiscus Upper-Canopy Leaf Drop
Mite-feeding injury is not a death sentence. The leaf drop is a stress response. The hardest part is breaking the mite life cycle while keeping the roots healthy. New growers panic and overreact with water and fertilizer. That guarantees the plant dies. Stay calm, follow a systematic miticide schedule, and let the plant recover slowly. I have been growing hibiscus for over a decade, and I have lost plants to mites multiple times. The ones that survived were never the ones I treated most aggressively. They were the ones where I stopped watering excessively, improved air circulation, and gave the plant time. This protocol works. It takes two weeks of discipline. Your plant will reward you with fresh, dark green leaves from the top down.





