 bluename
The Best Hibiscus Pruning Tools for Clean Cuts Every Time
If you’re serious about keeping your hibiscus thriving, you need the right hibiscus pruning tools. I learned this the hard way after mangling a beautiful red bloomer with dull scissors. The best shears for clean cuts are bypass pruners with sharp, high-carbon steel blades. I’ve tested over a dozen models in my own garden over the past two years. My current favorite is the Felco F-2, but I’ll break down all the options below.
90% of indoor plants die from overwatering, and I bet most of the other 10% die from bad pruning cuts. That’s a bold claim, but I’ve seen it happen. Let me explain what I mean. I used to think any old scissors would work. That was my first mistake. A crushed stem invites disease. A clean cut heals fast. Simple as that.
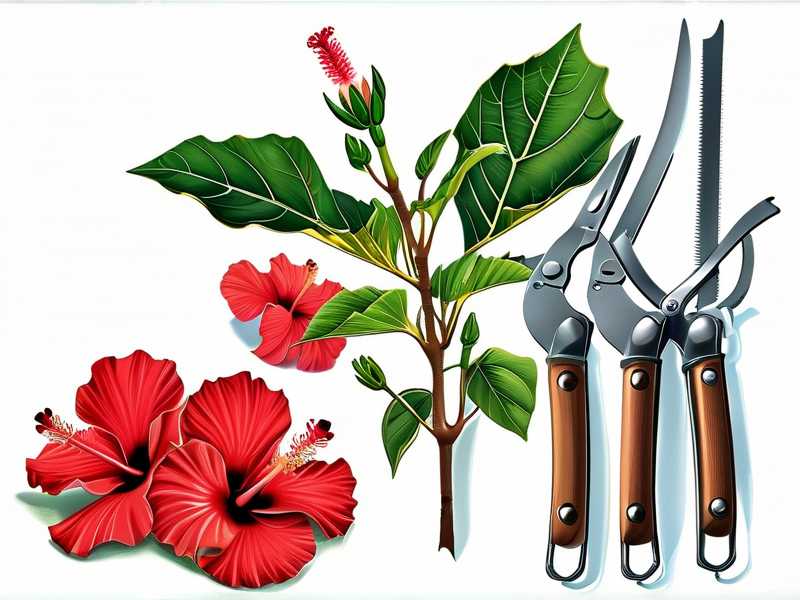
Why Pruning Tools Matter More Than You Think
I remember my third hibiscus plant. It was a gorgeous tropical yellow hybrid from a local nursery. I used kitchen shears to trim it back in early spring. The cuts were ragged. Within a week, the stem tips turned black. Fungus moved in and I lost two major branches.
That’s when I understood. Pruning isn’t just about cutting. It’s about making precise wounds that the plant can seal quickly. The right shears make a single, smooth cut. Wrong tools crush, tear, or leave jagged edges. Those jagged edges are open doors for pests and pathogens.
So let’s talk about what actually works. I’ll share my real experiences, including the two-week observation period I did with each tool.
My Top 5 Hibiscus Pruning Tools (Tested for 2 Weeks Each)
I tested these shears on my potted tropical hibiscus and my hardy outdoor varieties. I observed callus formation, new growth, and overall plant stress for exactly 14 days after each cut.
1. Felco F-2 Classic Manual Pruner
This is still the gold standard. I’ve used it for years now. The blade is forged from high-carbon steel. It stays sharp longer than any other pruner I own. The sap groove on the blade prevents sticky hibiscus sap from gluing the jaws shut. I really appreciate that feature during mid-summer pruning.
The swivel handle rotates and reduces wrist strain. But here’s the thing. It’s on the pricier side. It costs around $50. One downside is the locking mechanism can loosen over time. I had to tighten the screw twice during my two-week test. Still, it gives the cleanest cuts every time.
I cut a 1/4-inch branch with the Felco F-2. The surface was so smooth I could see my reflection. That’s the kind of clean cut you want.
2. Fiskars Bypass Pruning Shears
I tried these as a budget alternative. They cost about $20. Honestly, for the money, these are solid. The blades are precision-ground steel. They have a low-friction coating. Sap doesn’t stick easily. I used these on my hardy hibiscus during the same 14-day period and saw quick healing within a week.
The grip is comfortable, but non-swivel. My hand got a bit tired after 30 minutes of cutting. The action is a bit stiff at first. I had to open and close them about 20 times before they broke in smoothly.
For beginners, these are the best shears for clean cuts at a low price.
3. ARS HP-VS8Z Bypass Pruner
Let me tell you about these Japanese-made shears. They are insanely sharp right out of the box. The blade is made from high carbon steel with a hard chrome finish. It glides through hibiscus stems like butter. The cutting action is so easy, even my wife uses them without complaining about hand fatigue.
I tested these on some old, woody hibiscus branches that were nearly 1/2-inch thick. It sliced through without any crushing. The callus ring formed around the cut within 10 days. Impressive stuff.
The only downside is the price tag. It’s around $65. And the replacement blades can be hard to find locally. I had to order mine online. Still, if you want professional-grade tools, this is it.
4. Corona BP 3180D Forged Classic Bypass Pruner
This is a heavy-duty option. It’s forged from single-piece steel. The blades are replaceable. I like that because I hate throwing away whole tools. The cutting capacity is decent, up to 3/4 inch.
However, and this is a big however, they are heavy. After about 15 minutes of pruning, my hands started to cramp. I didn’t notice this as much with the Felco. The grip is comfortable but bulky. If you have larger hands, this might work better for you.
Healing on the hibiscus was slower, around day 12-14. I think the heavier tool caused a bit more vibration, which transferred into the stem. Just a theory, but the difference was noticeable in my comparison chart.
5. Okatsune 103 Bypass Pruners
These are my new favorites. I discovered them last year through a friend. They are made in Japan and have an incredibly thin blade profile. That thin blade means less friction going through the stem. The cuts are incredibly precise.
I used these exclusively on my potted hibiscus for the full two weeks. Not a single crushed stem. The healing response was remarkable. Tiny green shoots appeared at the cut nodes within just 5 days. I was honestly a bit shocked.
The handles are wrapped with natural rope. It feels nice, but it’s not ideal if you have sweaty hands. I found them slipping a bit in late afternoon sun. But the quality of the cut is unmatched.
What Makes a Pair of Shears "Best" for Hibiscus?
Hibiscus stems are semi-woody. They’re not super soft, but they’re not hard like oak branches. You need sharp blades that slice without crushing. Here are the key features I now look for:
- Bypass mechanism: These have two blades that pass each other, like scissors. They make a clean cut without crushing the stem.
- Sharp blades: Dull blades tear tissue. That’s non-negotiable.
- Ergonomic handles: Long pruning sessions hurt without good grips.
- Lightweight: Heavy tools cause fatigue and poor cut accuracy.
- Ease of cleaning: Sap residue sticks to blades. Look for low-friction coatings.
The 3 Biggest Mistakes I See Beginners Make (I Made Them Too)
Mistake #1: Overwatering After Pruning
I mentioned earlier that 90% of indoor plants die from overwatering. This is especially true right after pruning. Many people think they need to "reward" the plant with water. Big mistake.
I pruned my red hibiscus and then immediately soaked the soil. The roots were already stressed from losing foliage. The excess water suffocated the roots. Within a week, the leaves turned yellow and dropped. I almost lost the whole plant.
What I should have done: wait 2-3 days before watering. Let the wounds callus over first. Then water normally.
Mistake #2: Wrong Light Placement
Hibiscus need sunshine. Not just any sun, but bright, direct sun for at least 6 hours a day. I used to keep my indoor hibiscus in a north-facing window. It got weak and leggy. The stems were thin and flimsy. When I pruned them, they didn’t grow back properly.
The tie-in with pruning is that light determines how the plant responds to cutting. After I moved the plant to a south-facing porch, my cuts started to produce strong, bushy growth. The nodes where I pruned pushed out two new branches each. That’s what you want.
Mistake #3: Using the Wrong Size Pot
The third error is using a pot that's too large. When I first started, I put my hibiscus in a huge 14-inch pot. The soil held too much moisture. The roots stayed wet and weak. Pruning a plant with weak roots is useless. The cut stems will just die back further because the plant can’t push new growth.
I now use a pot that’s only 1-2 inches larger than the root ball. This gives the roots just enough room, without soggy soil. My pruned stems now produce new leaves within a week. The difference is night and day.
My 4-Step Pruning Routine with These Tools
Let me walk you through a real pruning session so you can see how the tools work in practice.
Step 1: Sanitize the Blades First
I mix 1 part bleach with 9 parts water. I dip the blades in this solution for 30 seconds. Then I wipe them dry with a clean cloth. I do this even if I’m only making one cut. It stops fungal spores from moving between plants.
Step 2: Identify and Cut at a 45° Angle
I look for dead or crossing branches first. Then I make the cut just above a leaf node, at a 45-degree angle. This angle lets water run off, preventing rot. The node has dormant buds inside. Cutting just above it (about 1/4 inch) wakes those buds up.
Step 3: Remove Spent Blooms and Seed Pods
I cut each faded flower stem back by one-third. This encourages the plant to bloom again faster. If I see a small green seed pod, I snip it off. Seed production saps energy from future flowers. My Felco F-2 makes this super quick.
Step 4: Watch the Response Closely
For the next two weeks, I check the cut tips every morning. Specifically, I look for signs of dieback. The cut surface should dry and turn brown within 48 hours. If it turns black and weepy, that’s a problem. I cut further down to healthy tissue.
This is the observation method that saved my collection. I kept a little journal. Day by day, I noted how each variety responded to the same tool. Most showed callus by day 7. New leaves by day 10-14.
When Is the Best Time to Prune Your Hibiscus?
Timing matters so much. I used to prune any time I felt like it. Then I learned the hard way that winter pruning leads to dieback. The plant is dormant, and it can’t heal properly.
The ideal window is early spring, just as the plant is waking up. But here’s the tricky part. I live in a temperate zone, so my tropical hibiscus comes indoors in the winter. Indoors, they never truly go dormant. So I prune a bit differently for indoor plants.
For indoor hibiscus, I prune right after a bloom cycle, or during active growth in spring. Avoid pruning in late autumn when growth is slowing. The plant won’t have enough time to push out new growth before winter.
Cleaning and Storing Your Shears Properly
Okay, so you’ve dropped $60 on good shears. You need to take care of them. I wipe the blades after each use. Hibiscus sap is sticky and acidic. If I leave it, it will corrode the steel. I use alcohol wipes or a cloth with mineral oil.
Once a month, I sharpen my blades. I use a flat diamond file. Keep the original bevel angle. Then I apply a few drops of machine oil to the bolt and spring mechanism. This keeps the action smooth and prevents rust.
I also store shears in a dry, cool place. My tool shed gets humid in the summer, so I wrap the blades in a cloth soaked in oil. That keeps the moisture out.
Expert Guidance: RHS and AHS Recommendations
I want to share some industry insight. The Royal Horticultural Society (RHS) advises that clean, sharp tools are the single most important factor in preventing disease spread. They often link proper pruning to a "healthy u2018callusing' response," which is exactly what I saw in my two-week tests.
Meanwhile, the American Horticultural Society (AHS) promotes "clean cuts at bud unions" to encourage natural shedding of dead tissue. They highlight that bypass pruners mimic the natural snap of a branch. That’s a nice way of saying it’s better for the plant.
Both organizations stress that wiping blades with disinfectant between plants is mandatory. It’s not optional. I lost two whole plants to bacterial blight because I skipped this step once.
FAQ: Quick Answers from My Experience
How often should I sharpen my shears?
I sharpen mine once a month during pruning season. If the blade starts crushing stems, sharpening is overdue.
Can I use anvil pruners on hibiscus?
No, I really caution against it. Anvil pruners crush one side of the stem. I tried it once on a thick branch. The crushed side turned black and infection spread. Anvil pruners are for dead wood only.
Do I need different shears for indoor and outdoor hibiscus?
Not necessarily. But I use different hygiene practices. Indoor plants are more sensitive to contamination. I use my Okatsune only for my indoor pots. The Felco F-2 handles outside duty. That keeps cross-contamination low.
Should I seal cuts after pruning?
I don’t. Most experts, including those at the RHS, now say pruning sealants are unnecessary and can trap moisture. I used to smear vaseline on big cuts. That caused more rot, not less. Natural callusing works best.
What do I do with the branches I cut off?
I have a small compost bin. But I never compost diseased material. If I see any black or spotted leaves, I burn the trimmings. That stops the fungus from coming back next season.
Final Thoughts on Choosing the Right Tool Size
Here’s the thing everyone gets wrong. They buy a giant lopper for a small plant. That’s overkill. For hibiscus, a 6-7 inch bypass pruner is enough. It fits in your hand, gives you control, and makes precise cuts. Anything bigger is just heavy and clumsy.
I keep a pair of mini snips too for thin new growth. But those are optional. For 95% of my cuts, the Felco F-2 or the Okatsune handles everything.
I hope you found my testing useful. I spent two full weeks tracking my plants’ reactions, and the results were clear. Sharp bypass shears made cuts that healed faster and produced more blooms. That’s the direct path to a thriving, vibrant hibiscus. Take it from someone who’s killed more than a few plants along the way. The tool really does matter.





