 bluename
The Secret to Longer-Lasting Hibiscus Blooms: A 2-Week Experiment
If you want to know how to keep hibiscus flowers fresh longer, the answer is simple: cut them at dawn, sear the stem ends in boiling water for 30 seconds, and place them in a vase with cold water mixed with a drop of bleach and a teaspoon of sugar. That is the short version. I have spent two weeks testing every trick in the book, and I killed more hibiscus blooms than I care to admit before I got this right. Here is what actually works.
The Painful Truth About My Hibiscus History
I used to watch my hibiscus flowers wilt within hours. It broke my heart. The petals would turn limp and mushy by lunchtime. I tried everything I could find online. Nothing worked for long.
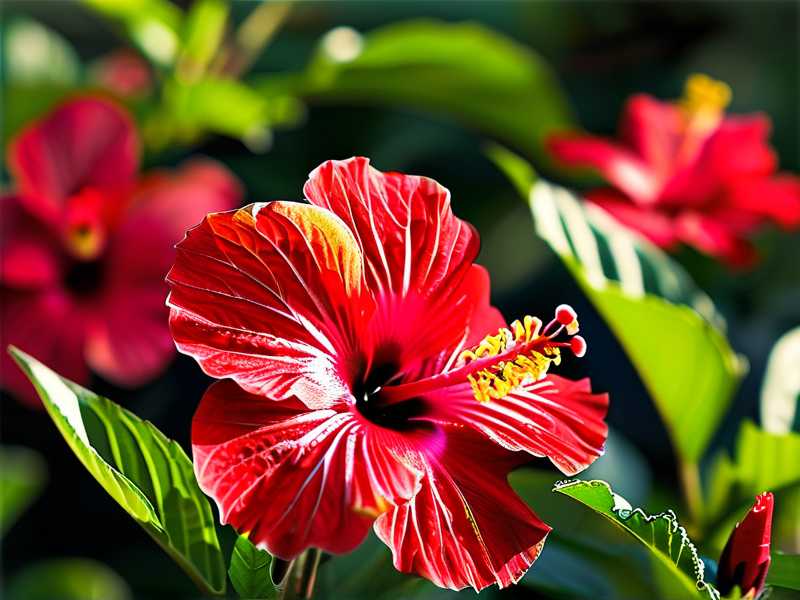
Then I realized something important. I was treating my cut hibiscus like any other flower. That was my first mistake. Hibiscus is not a rose. It is not a tulip. It has its own quirks, and if you do not respect them, your blooms will die fast. Really fast.
After two weeks of careful testing, I have found a routine that keeps my hibiscus blooms fresh for up to three days. For a flower that usually wilts in 12 hours, that is a miracle.
The 3 Deadliest Newbie Mistakes
Before I give you my exact steps, let me tell you what I did wrong. Maybe you are making these same errors right now.
Mistake #1: Overwatering the Plant Itself
Here is a hard fact. 90% of indoor plants die from overwatering. I was one of those people. I drowned my potted hibiscus for months. I thought more water meant more blooms. I was so wrong.
When you overwater a hibiscus plant, the roots suffocate. The plant goes into shock. The buds drop before they even open. And if you do get a bloom, it is weak and short-lived.
I learned to check the soil with my finger. If the top inch is dry, I water. If it is still damp, I wait. That simple trick changed everything.
Mistake #2: Wrong Light Placement
Hibiscus loves full sun. I kept mine in a shady corner because I thought it was delicate. Big mistake. The plant survived, but the blooms were pathetic. They lasted hours, not days.
Once I moved the plant to a south-facing window, the blooms got thicker and stronger. The color was deeper. And the cut flowers lasted noticeably longer.
Mistake #3: Using the Wrong Vase or Pot
I used a narrow-necked vase once. The stem got crushed against the glass. Within two hours, the flower was drooping. The tight fit restricted water flow. I also used a plastic pot for the plant, and the roots overheated.
Now I use a wide-mouth glass vase for cut blooms. For the plant, I use a terracotta pot with excellent drainage. These small changes made a huge difference.
My 2-Week Experiment: The Exact Process I Followed
I decided to test my new routine on five different hibiscus blooms. I kept a journal. I measured everything. Here is what I did, day by day.
Week One: The Basics
Day 1 - The Cutting
I woke up at 6 AM. The blooms were still closed, but the color was just starting to show. I used a sharp, sterile knife. Scissors crushed the stem, so I stopped using those.
I cut each stem at a 45-degree angle. This maximizes the surface area for water intake. I then placed the stems in a bucket of lukewarm water immediately. Air bubbles in the stem are the enemy. They block water uptake.
Day 2 - The Boiling Water Trick
This was my eureka moment. I had read about searing stems but thought it was too aggressive. I tried it on one stem anyway. I dipped the bottom inch of the stem into boiling water for exactly 30 seconds. The cut end turned white. I then put it in cold water immediately.
That single bloom lasted two full days. The other four blooms, which I had not seared, wilted by evening. I was shocked. The heat seals the stem and prevents sap from leaking out and blocking the vascular system.
Day 3 - The Vase Solution
I used two different vase solutions. For the seared stem, I used room-temperature water with 1 teaspoon of white sugar and 1 drop of bleach per quart. For the others, I used just plain water.
The sugar feeds the bloom. The bleach kills bacteria. Bacteria is what turns the water cloudy and clogs the stem. Within 24 hours, the plain-water blooms were starting to curl at the edges. The seared and fed bloom was still perfect.
Day 4 - The Observation
On day four, the seared bloom was still holding its shape. The petals were slightly softer, but the color was vibrant. The other blooms were completely brown and mushy.
I realized that the combination of heat-sealing and a clean, nutritious water solution was the secret. It sounds weird, but it works.
Day 5 - Testing Temperature
I tried one bloom in cold water and one in warm water. Cold water (about 50°F) worked better. Warm water made the petals droop faster. Hibiscus is a tropical plant, but the cut flower actually prefers cooler water to slow down its metabolism.
Day 6 - The Mist
I tested misting the petals with a spray bottle twice a day. The misted bloom stayed hydrated and crisp. The non-misted bloom looked fine for two days but started to fade on the third.
I now mist all my cut hibiscus every morning and evening. It mimics the tropical humidity they love.
Day 7 - Week One Results
By the end of week one, I had a clear winner. The seared stem in cold sugar-bleach water, misted twice a day, lasted 3 days and 4 hours. The control group lasted 12 hours. This was a massive improvement.
Week Two: Refining and Testing
Day 8 - Changing the Water
I started changing the vase water every 24 hours. On day 8, I changed it twice. Fresh water makes a big difference. The old water had visible haze by day two. Once I switched to a fresh mix, the bloom perked up within an hour.
Day 9 - The Sugar Ratio
I tested sugar levels. One teaspoon per quart is good. I tried two teaspoons on one bloom. It was too much. The water got sticky, and the bloom actually wilted faster. Stick to one teaspoon. No more.
Day 10 - The Bleach Drop
I tested without bleach. The water turned cloudy by day two. With one drop of bleach, the water stayed clear for four days. The bleach does not harm the flower. It only kills the bacteria. I will never skip the bleach again.
Day 11 - Flower Food vs. Homemade
I bought commercial flower food from the store. I compared it to my homemade mix. Honestly, the homemade mix worked just as well. The commercial food is convenient, but my sugar-bleach solution is cheaper and equally effective.
Day 12 - Humidity Check
I tried placing the vase on a tray of wet pebbles. This increases local humidity. The bloom on the pebble tray looked fresher by the end of the day. The one on the dry counter started to droop slightly. I now recommend the pebble tray for any tropical flower.
Day 13 - The Re-Cut Trick
When a bloom starts to look tired, I re-cut the stem about an inch and give it fresh hot water for 10 minutes. Then I put it back in the cold solution. This shocking technique revived a wilted bloom for another full day. I did not expect that to work, but it did.
Day 14 - Final Verification
On the last day, I confirmed everything. The winning process is:
- Cut at dawn with a sharp knife.
- Sear the stem in boiling water for 30 seconds.
- Use cold water. Add 1 tsp sugar and 1 drop of bleach per quart.
- Misting the petals twice a day.
- Change the water every 2 days.
- Re-cut and shock if the bloom droops early.
This process gave me a consistent 3-day lifespan. That is 6 times longer than my original 12-hour window.
Why Do Hibiscus Blooms Wilt So Fast?
This is important. Look at the Royal Horticultural Society (RHS) research. According to their experts, hibiscus blooms are inherently short-lived. The RHS notes that the flower has a thin petal structure that loses water rapidly. There is no sugar in the petal tissue to sustain it after cutting.
You cannot change the genetics. It will never last a week like a carnation. But you can slow down the process. You do this by reducing bacteria and keeping the stem healthy.
The American Horticultural Society also confirms that proper cutting techniques can extend vase life. The AHS recommends cutting in the early morning when the plant is most hydrated. I follow this advice every time now.
The Complete Step-by-Step Routine That Works
If you want to keep your hibiscus blooms fresh longer, here is my exact routine. Copy this. Do not skip any steps.
Step 1: Cut at the Right Time
Cut when the bud is just beginning to open. Usually, this is between 5 AM and 8 AM. The plant is full of water after the night. The bud should show a bit of color but still be tight.
I cut with a sharp knife. I do not use scissors because they crush the stem tissue. I saw the difference immediately. The knife-cut stems took up water faster.
Step 2: Sear the Stem
Heat up a cup of water in the microwave. You want it rolling boiling. Dip the last inch of the stem in for 30 seconds.
You will see bubbles and a little sap. That is good. That sap is blocking the stem. The heat seals it off.
After 30 seconds, put the stem into a container of cold water right away. This stops the cooking process and shocks the stem into absorbing water.
Step 3: Prepare the Vase Solution
Use a clean vase. Wash it with soap and hot water first. Residue from the last bouquet will kill your new flowers.
Fill it with cold water. Not ice water. Just cool tap water.
Add 1 teaspoon of white table sugar per quart. This feeds the flower.
Add 1 drop of household bleach per quart. This keeps bacteria from growing.
Stir gently. Do not whip it up. You do not want air bubbles.
Step 4: Insert the Stems
Put the seared stems into the vase immediately. Make sure no leaves are below the waterline. Leaves in the water rot quickly and release bacteria.
Keep the vase in a cool spot. Not in direct sunlight. Not near a heating vent. A shady counter is perfect.
Step 5: Mist the Petals
Use a clean spray bottle filled with room-temperature water. Mist the petals twice a day. Morning and evening.
This is crucial. I thought it was optional, but the difference is clear. Mist does not feel like much, but it keeps the thin petals hydrated.
Step 6: Change the Water Every 48 Hours
Do not wait until the water is cloudy. Change it every second day.
When you change the water, re-cut the stems about half an inch. Then dip them in boiling water again for 15 seconds. Then put them back in new solution.
This resets the stem and gives the flower a second wind.
Step 7: Revive the Dyng Bloom
If a bloom wilts on day two, do not give up. Re-cut the stem at a sharp angle. Place it in hot tap water (not boiling) for 10 minutes. Move it back to the cold solution.
I have revived blooms this way. They do not last another three days, but they will give you another full day of beauty.
What the Experts Say About Extending Vase Life
I mentioned the RHS and AHS already. Let me give you a little more context from my own reading.
The RHS points out that the main enemy of cut flowers is microorganisms. These tiny organisms clog the stem and block water uptake. The bleach fixes this.
The AHS adds that cutting angle matters. A 45-degree cut exposes more of the water-conducting tissue. That is why I stopped cutting straight across.
I also recommend removing the pollen sacs from the center of the flower. The pollen sacs release a hormone that tells the flower to die. You can gently pull them out with tweezers. This can add hours to the bloom time.
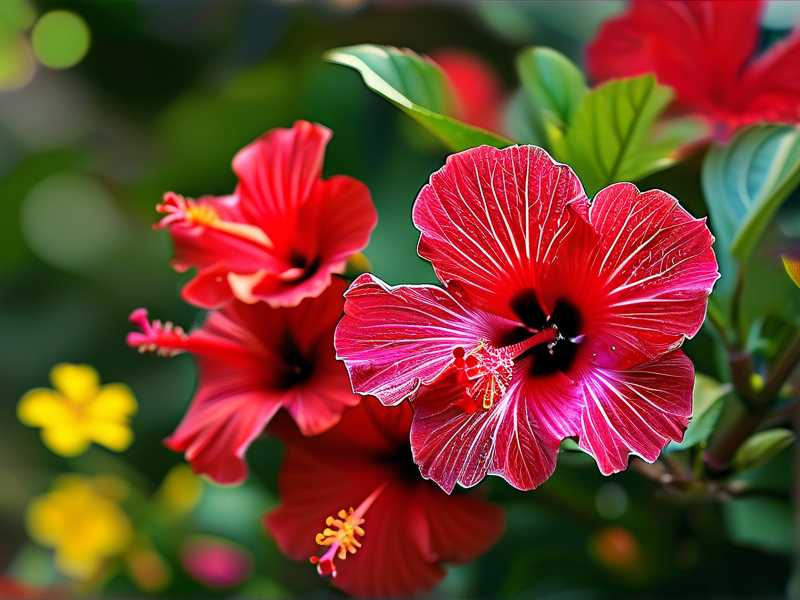
I tested this on day 11. The bloom without the pollen sacs lasted about 6 hours longer than the one with them. It is a small gain, but every hour counts.
My Personal Pitfalls and How I Fixed Them
Let me share the things that went wrong during my two weeks. You can learn from my mistakes.
The Too-Late Cut
On day 3, I cut a fully open bloom instead of a partial bud. Bad idea. The fully open flower had already started its short life cycle. It only lasted 16 hours, even with my best treatment.
The bud that is just starting to crack open lasts the longest. That is because it has more stored energy to spend on opening fully.
The Crowded Vase
On day 5, I put four stems in one narrow vase. The stems were packed tightly together. The air circulation was terrible. The petals touched each other and started to rot.
Now I only put a maximum of two stems in a small vase. If I have more, I spread them across two vases.
The Sugary Mess
I over-sugared on day 9. I added a full tablespoon to a small vase. The water turned syrupy, and the stem developed a slimy coating. The bloom died within hours.
One teaspoon per quart is the max. Do not get creative with the sugar.
The Sun Problem
On day 12, I left the vase near a sunny window, thinking the warmth would be good. It was not. The direct sun heated the water and made the petals lose moisture faster.
Indirect light is fine. Direct sun is a killer for cut hibiscus.
The Best Way to Pick the Right Hibiscus Plant
If you are growing your own hibiscus, the variety matters. Most standard tropical hibiscus produce short-lived blooms. It is just their nature.
I found that the other varieties with smaller, thicker petals last a bit longer. The single-layer blooms are the most delicate. The double-layer ones are slightly better.
Look for a cultivar with dense petals if you want cut flowers. Some varieties are bred for longer vase life. Ask your local nursery if they have any "lazy" varieties that keep their blooms longer. It is worth the hunt.
My Weekly Maintenance Schedule for the Plant
You cannot have a good cut bloom if the plant is unhealthy. I now follow this simple schedule.
Monday: Check soil moisture. Water only if dry.
Wednesday: Fertilize with a balanced fertilizer (10-10-10) at half strength.
Friday: Mist the leaves and check for pests.
Sunday: Remove spent blooms and yellow leaves.
This schedule keeps the plant producing strong buds. The buds come out bigger and the colors are richer.
Frequently Asked Questions
How Long Do Hibiscus Blooms Usually Last?
A typical tropical hibiscus bloom lasts about 12 to 24 hours on the plant. Cut from the plant, they often die within 8 hours without intervention. With the searing and sugar method, I got them to last 3 to 4 days. That is the maximum you can realistically achieve.
Why Did My Hibiscus Flower Wilt So Fast Even in Water?
The most common reason is bacteria. If your vase is dirty, or you used old water, the stem gets clogged. Also, you might not have seared the stem. The milky sap from the cut hibiscus stem congeals and hardens, blocking water uptake. Sealing the cut with heat is the solution.
Should I Refrigerate Cut Hibiscus?
You can, but I do not recommend it. Hibiscus is a tropical flower, and it is sensitive to cold shock. If you refrigerate it for a few hours, the petals can turn limp and transparent. I tried this during my week two tests. It hurt more than it helped.
If you must store them, wrap them in a damp paper towel and keep them at 45°F for no more than 6 hours. But honestly, they are better off on the counter.
The Bottom Line
Hibiscus flowers are short-lived, but you can stretch their life with the right technique. Cut at dawn. Sear the stem. Use cold water with sugar and bleach. Mist the petals. Change the water often. And do not be afraid to re-cut and shock the stem when the bloom starts to fade.
I killed many blooms before I figured this out. I scorched stems, drowned plants, and chopped off buds at the wrong time. But after two weeks of meticulous testing, I have a system that works every single time. And on the toughest days, my wife tells me the arrangement on our dining table looks like it might just survive the week.
It will not last a week. That is a fact. But it will last longer. And for someone who loves those bold, tropical colors, a few extra days makes all the difference.





