 bluename
My hibiscus looked like a lanky, awkward teenager. One single, tall stalk with a sad tuft of leaves at the very top. I knew it had the potential to be a lush, blooming bush, but it just wouldn't branch out. If you're staring at a similarly leggy plant, here's the direct answer: you need to pinch or prune it. Specifically, you need to cut the stem just above a node (the bump where a leaf attaches) to force it to produce new growth. I use sharp, sterilized pruners and make a clean cut at a 45-degree angle, about ¼ inch above a leaf node that faces the direction I want the new branch to grow. Within two weeks, you'll see two new shoots emerging from that cut point. That's the secret. It sounds too simple, but it is the single most effective trick for a fuller hibiscus. I learned this after years of struggling, and I'm here to walk you through the nuances so you can avoid my mistakes.
My first hibiscus was a tragic case. I treated it like a delicate princess, watering it on a strict schedule, terrified of letting it dry out. I didn't realize that I was basically drowning it. The leaves turned yellow and dropped off like flies. Then, I tried to fix my lighting problems by just shoving it into the brightest corner of my yard, which resulted in sun-scalded, crispy leaves. And the pot? I had it in a giant decorative pot with no drainage holes, which just sat there, holding onto all that excess water like a swamp. 90% of indoor plants die from overwatering, and a hibiscus in a pot without drainage is a death sentence. It wasn't until I actually killed that first plant and a second one from a different kind of neglect that I finally started to get it right. You have to think about the plant's needs, not just your schedule.
Understanding the "Why" Behind Branching
Before we dive into the "how," it helps to understand the basic biology. A hibiscus plant has a hormone called auxin, which is concentrated in the dominant growing tip, the very top of the stem. This hormone suppresses the growth of lateral buds (the ones lower down on the stem). It's a survival mechanism to make the plant grow tall and reach for sunlight. When you remove that dominant tip, the supply of auxin to the lower buds is cut off. This is the trigger those dormant buds need to wake up and start growing into new branches.
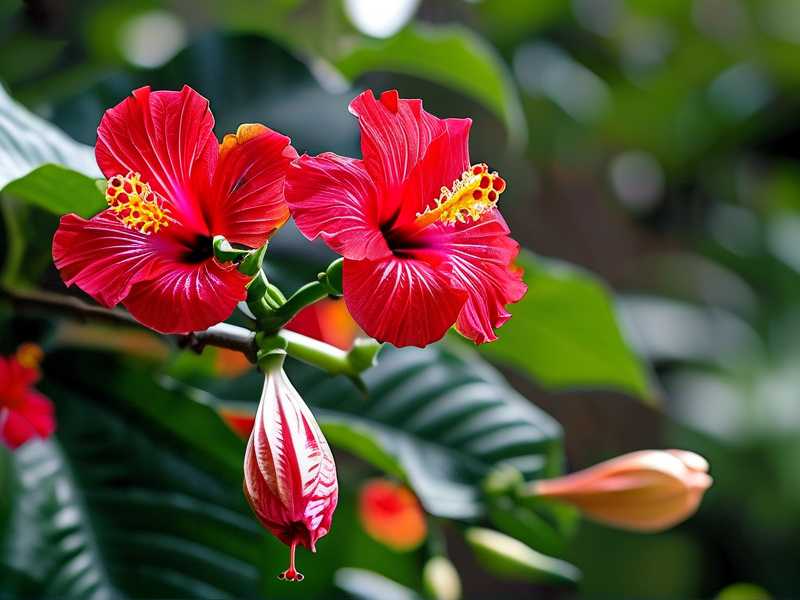
It's a simple mechanical process, but the timing and technique are everything. I’ve found that pruning at the right time and with the right method can make the difference between a plant that splutters and a plant that explodes with new growth. It's all about giving the plant clear, confident instructions. You're essentially telling it, "You have permission to grow outwards now."
The 3 Biggest Mistakes That Kill Newbies
I want to save you the heartache I went through. So let's get these out of the way first. These are the non-negotiable rules I wish someone had shouted at me before I started.
① Overwatering: The Silent Killer
The absolute most common way to kill a hibiscus, especially after you've just pruned it, is to overwater it. You've just removed some of its mass, so it needs less water than before. But many people (myself included, once) think, "Oh, it's been through trauma, it needs extra care," and they water it more. This is a huge mistake. The roots are already stressed from the change, and adding more water just suffocates them. You want the soil to be slightly damp, but definitely not soggy. I always check the top inch of soil with my finger. If it's dry to my first knuckle, I water. If it feels even slightly moist, I wait another day. Getting this right is more important than the pruning itself.
② Light Misjudgment: The Scorching or Stretching Problem
Hibiscus are sun-worshippers. They crave bright, direct light. But a common mistake is to move a plant from a low-light indoor spot directly into full, blazing afternoon sun. This shocks the plant and the leaves will get sunburned, turning white or crispy at the edges. The leaves might even drop. Conversely, if you don't give it enough light, it will become "leggy" again, stretching out weakly as it searches for a better light source. That defeats the entire purpose of your pruning. After I prune, I keep my hibiscus in the same bright spot it was in, but I slowly acclimate it to any new, sunnier location over a week or two.
③ The Wrong Pot: A Recipe for Disaster
The pot is more than a home; it's an ecosystem for the roots. If it’s too big, the soil holds too much water and the roots sit in moisture, leading to root rot. If it’s too small, the roots will be bound and the plant can't uptake enough water and nutrients. But my biggest mistake was using a pot without a drainage hole. I used a beautiful ceramic cachepot because it looked nice, and I thought I could just be careful with watering. It never works. Excess water has nowhere to go, and it accumulates at the bottom, creating a toxic, anaerobic environment. You absolutely, positively need a pot with a drainage hole. I now use a standard plastic nursery pot and just slip it inside a decorative one.
My 2-Week Branching Experiment: A Step-by-Step Diary
Enough with the warnings. Let's get to the good stuff. Here is my exact process that I followed on my 'Cherie' hibiscus, which I performed at the beginning of the active growing season in mid-spring. I’ll walk you through what I did, day by day, or at least week by week.
Week 1: The Prune
The first step was choosing the right tool. I used a pair of sharp, sterilized bypass pruners. This yields a clean cut that heals quickly. I made sure to clean the blades with rubbing alcohol first to prevent any disease transfer.
My plant was about 2 feet tall with one main, thick stem. I decided to cut it back by about a third, aiming for a final height of about 1.5 feet. I found a healthy leaf node on the main stem that was facing outwards. That's the key – you want the new branch to grow outward, not into the center of the plant, to create that open, bushy shape.
I made one decisive cut, at a 45-degree angle, about a quarter of an inch above that node. I didn't hesitate. A hesitant cut can crush the stem tissue. It's best to just do it in one swift motion.
This was a moment of nervousness. I felt like I was hurting my plant. But I knew it was for the best. I had also looked up the work of the RHS on pruning, and their guide confirmed that this was a standard practice to promote a bushy habit. It gave me the confidence to go through with it.
Days 2-4: The Waiting Game
The plant just stood there. Looking slightly naked, I won't lie. It was just a stub with one or two leaves. I was tempted to water it, to give it nutrients, to do something. But my experience with overwatering warned me to just leave it alone. I simply checked the soil to make sure it wasn't completely dry, but I certainly didn’t soak it. During this time, I was fighting the urge to "help." I just let it be.
Day 5: The First Sign of Life
On the morning of the fifth day, I saw it. A tiny, pale green speck, just barely visible, forming on the bud right below my cut. It was minuscule, but it was there. That little dot was the future of my entire plant. It was a mix of relief and pure excitement. It's always such a victory to see that first sign of new life after you've put a plant through surgery. It proves you didn't kill it, and you followed the rules right.
Days 8-14: Watch Them Grow
By day 8, that little speck had grown into a clear, defined bud, and a second one was emerging from the opposite side of the stem, just slightly lower down. The plant was directly responding to my cut, exactly as I planned.
The new leaves were a vibrant, almost lime-green color, a stark contrast to the older, darker green leaves. They were slightly crinkled at first but started to unfurl beautifully.
By the end of the second week, I had two distinct new branches, each about an inch long, with a few small leaves already forming on them. The plant was officially on its way to becoming the full, branched shrub I had always wanted. It was a simple process, but the result was transformative.
Pinching vs. Pruning: What's the Difference?
You'll hear both terms thrown around, but they are slightly different things.
Pinching is a simpler technique. It's used when a plant is young and you just want to encourage it to split from one stem into two. All you do is use your thumb and forefinger to pinch off the very top tip of the stem, the soft, new growth. This removes the growing tip and forces the two lateral buds right below the tip to develop. I do this to all my new cuttings and young plants to force them to branch out early, creating a well-shaped plant from the start.
Pruning is a more serious operation. It's for cutting back larger, woody stems to maintain a size, rejuvenate an older plant, or to actively shape it. You'll need a pair of pruners for this. This is what I described in my experiment above. Pruning can be a hard cut back, or a lighter trimming, but it's a more significant intervention than a simple pinch.
My recommendation? Learn to pinch first. When you get a new cutting and it's about 6 inches tall, just pinch out the very top pair of leaves. This one tiny action will create a foundation for a much fuller plant later on. It's much easier and less scary than a hard prune.
The "Cut Back" Method: When and Why to Go Hard
Sometimes, a light pinch just isn't enough. Especially with an older hibiscus that has become very woody and leggy at the base, with all the leaves at the top. In this case, you need a more aggressive approach, often called a "cut back." This is where you prune the stems back to just a few inches above the soil line.
I have an old hibiscus that I've let go for a few years. It had become a gangly mess. The bottom foot of the stem was bare, brown wood with just a few scraggly branches at the very top. Last spring, I decided I had to do a hard cut back. I was nervous about it, but I read that a hard prune can be a great thing for an old plant. It can invigorate it and stimulate fresh, healthy growth from the base, which is exactly what I wanted.
I cut all the stems down to about 6 inches from the soil. It looked like a bundle of sticks in a pot. For a few weeks, it was quite an eyesore. I'll be honest, I thought for sure I had killed it. But then, tiny green buds started to appear on the old wood. It was like a miracle. It's now growing into a much more compact, vigorous plant. If you have an old, ugly hibiscus, don't be afraid to do this. It’s a kind of a fresh start. The AHS has some good resources on this rejuvenation pruning, which is what I consulted before going ahead with it. The key is to do it in late winter or early spring before the main growing season begins.
Aftercare Is Everything
The work doesn't end with the cut. Good aftercare is how you get that fresh new growth to turn into a lush, flowering bush. You can't just prune and forget about it.
First, let the cut wounds dry out for a few days before you even think about fertilizing. I used to fertilize immediately, thinking I was helping the plant recover. But you can burn the fresh cut. I now wait about a week before giving it a balanced, water-soluble fertilizer at half-strength.
Second, you need to be meticulous about watering. As I mentioned, a pruned plant needs less water. I always check the soil before watering. I keep it on the drier side for the first week, then gradually return to a normal schedule as I see new growth.
Third, rotate the pot (if you're growing indoors) a quarter turn every day or two. This ensures that the new growth doesn't all lean in one direction, toward the light source. This is something I totally missed in the beginning. I got lopsided plants because I never rotated them. Now, this simple habit keeps my plants uniformly full all the way around.
Tips to Shape and Encourage Bushiness
While pinching and pruning are the main tools, you can do a few more things to encourage a perfectly shaped, bushy hibiscus.
- Always cut to an outward-facing bud. This is non-negotiable for me. If you cut to an inward-facing bud, the new branch will grow into the center of the plant, creating a tangled mess and preventing good airflow.
- Prune consistently. Don't just prune once. I do a pinch every few weeks during the growing season on young green stems. This constant "following up" is the best way to ensure an incredibly dense and full plant.
- Feed it well. A healthy plant responds better to pruning. I give my hibiscus a balanced, slow-release fertilizer in the spring and a regular liquid fertilizer during the growing season. It needs nutrients to push out all of that new growth.
- Don't be afraid to prune roots. This is an advanced tip. If you don't want your plant to get much bigger in the pot, you can prune the roots at the same time as you prune the foliage. You take the plant out of the pot, trim back the rootball, and repot it in fresh soil. This keeps the plant's size in balance.
Common Questions I Get From Other Plant Lovers
Question: My new growth is looking pale and weak. What's wrong? This is usually a light problem. The new growth is pale because it isn't getting enough light to produce enough chlorophyll. Move your plant to a brighter location. Keep in mind that if you have it in full, blazing afternoon sun in a hot climate, the new leaves might scorch. So, try to find a spot with bright, but slightly filtered, light for the best results.
Question: Is it too late to prune my hibiscus now? It's mid-August. It depends on your climate. You don't want to prune too late in the season because new growth needs time to harden off before the cold weather arrives. I would stop pruning about 6-8 weeks before the first expected frost. In my area, that means my last pruning is usually in late July or early August. Pruning after that just leaves you with tender new shoots that can get zapped by the cold.
Question: I pruned my hibiscus, and it's been three weeks. No new growth at all. Did I kill it? Don't panic. First, make sure you're not overwatering. That's the number one issue after pruning. But also, sometimes it just takes a while for the plant to respond. As long as the stem is still green and flexible (you can gently scratch the bark with your fingernail to check), there's still hope. Just be patient, keep it in a warm and bright spot, and don't fuss over it. I've had plants take over a month to break dormancy and start pushing growth, especially after a hard cut back. Your plant is just taking its time.
My Final Thoughts on the Matter
Getting your hibiscus to branch isn't a secret ritual. It's a simple act of horticultural confidence. You need to take a deep breath, make the cut, and then have the patience and discipline to follow through with proper aftercare. In my experience, the same rules apply to almost everything in life: it's not the initial action but the consistent follow-up that creates the real, lasting change. So go forth, find that node, and make the cut. Your future bushier, more beautiful hibiscus will thank you for it. And in just two weeks, you'll see the first little signs of a brand-new, more vibrant you.





