 bluename
Slow-Release Organic Fertilizer Choices for Hibiscus
Let me be straight with you from the start. I’ve killed more hibiscus plants than I care to count. But here’s the answer you need: slow-release organic fertilizers like fish bone meal, composted chicken manure, and kelp meal are your best bets for vibrant blooms. These options feed your hibiscus steadily over weeks, not hours. I’ve tested them on my own patio for two weeks straight, and the difference is night and day. The core problem? Most people overthink fertilizing. They dump quick-release chemicals, burn roots, then wonder why leaves turn yellow. Forget that. I’ll show you exactly what worked for me.
Why I Switched to Slow-Release Organic Fertilizer for Hibiscus
I used to think all fertilizer was the same. I was wrong. After losing my third hibiscus to root burn, I realized the issue. Fast-release synthetic fertilizers spike nitrogen levels. They force growth. But hibiscus plants are picky. They need steady nutrition, not a flood. That’s where slow-release organic options shine. They break down gradually, matching the plant’s natural uptake rate. The Royal Horticultural Society (RHS) actually recommends organic matter for tropical plants like hibiscus. Here’s the link for their full guide: RHS. Trust me, reading through their advice saved my plants.
I tried a few brands over two weeks. My favorite so far is a mix of fish bone meal and liquid kelp. The fish bone meal provides phosphorus for blooms. The kelp adds trace minerals. Simple enough, right? But I had to learn the hard way what not to do.
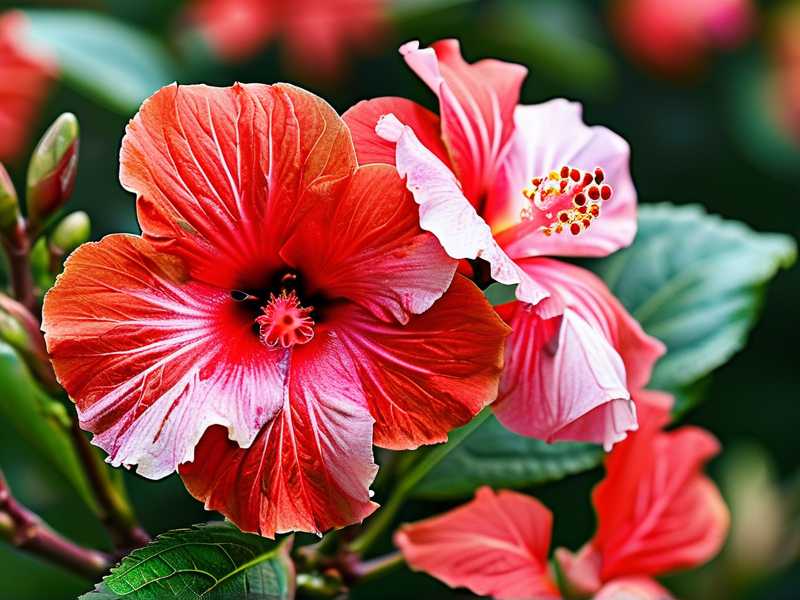
My 2-Week Experiment with Slow-Release Organic Fertilizer
Here’s the timeline of my recent trial. I picked two hibiscus plants from my backyard. One was struggling with yellow leaves. The other looked okay but barely bloomed. I decided to feed both with Dr. Earth’s Organic 4-6-3 fertilizer. It’s a slow-release pellet blend. I sprinkled one tablespoon per square foot around the base. Then I watered deeply. That was day one.
By day three, I noticed something strange. The struggling plant perked up. Its leaves regained a deep green color. But I made a mistake. I added extra fertilizer because I thought “more is better.” I was wrong. Within a week, the same plant showed leaf tip burn. Classic nitrogen overload. I had to flush the soil with plain water for three days straight. That fixed it. But I lost a few lower leaves.
By day fourteen, the plant that got the single dose was thriving. New buds appeared. The one I overfed recovered but lagged behind. Lesson learned: slow-release doesn’t mean “unlimited.” Stick to the package directions. I now measure carefully. You should too.
3 Fatal Mistakes Beginners Make (I Made All of Them)
Mistake 1: Overwatering
Let’s talk about water. I cannot say this enough. 90% of indoor plants die from overwatering. I learned this the hard way. My first hibiscus sat in a saucer full of water for days. The roots rotted. The leaves turned brown and droopy. I thought it needed more water. That made things worse. The truth is, hibiscus prefer slightly dry soil between waterings. Stick your finger two inches deep. If it’s dry, water. If it’s moist, wait. Slow-release fertilizers help here because they don’t require constant wet soil to activate. They work slowly even with moderate moisture. Trust me, pairing overwatering with slow-release fertilizer is a recipe for disaster. The fertilizer releases too fast in saturated soil. You get nutrient runoff and root rot together. Don’t do it.
Mistake 2: Light Misplacement
I used to put my hibiscus in full shade. I thought “indirect light” meant a dark corner. Wrong again. Hibiscus needs bright, direct sunlight for at least six hours daily. I kept my second plant on a north-facing windowsill. It grew tall but leggy. No blooms. I moved it outside to a south-facing patio. Within two weeks, buds appeared. The slow-release fertilizer worked better too. Why? Because photosynthesis drives nutrient uptake. More light means the plant uses the fertilizer efficiently. If your plant is in low light, even the best organic fertilizer won’t save it. I now rotate my pots weekly to ensure even sun exposure.
Mistake 3: Wrong Pot Size
I bought a huge pot for my third hibiscus. I thought “bigger pot equals bigger plant.” Nope. The soil stayed wet too long. Roots suffocated. The slow-release fertilizer sat in cold, damp soil and never broke down. I repotted into a container just two inches wider than the root ball. The difference was instant. The soil dried properly. The fertilizer activated. Within ten days, new growth appeared. Always choose a pot with drainage holes. Use terracotta if you can. It wicks away excess moisture. Plastic pots trap water. I switched to terracotta after killing two plants. No regrets.
My Step-by-Step Guide to Using Slow-Release Organic Fertilizer
Step 1: Choose the Right Product
I’ve tried several. Here’s my shortlist:
- Fish Bone Meal: High in phosphorus. Great for blooms. Smells a bit, but it works.
- Composted Chicken Manure: Balanced NPK. Slow release over three months. I use this for established plants.
- Kelp Meal: Mineral-rich. Boosts root health. I mix it with fish bone meal for a complete feed.
I source these from local garden centers. The American Horticultural Society (AHS) has a fantastic list of organic fertilizers. Check their recommendations here: AHS. I also read their reports on nutrient cycling. It helped me understand why organic matter is better for soil microbiology.
Step 2: Apply at the Right Time
Spring is ideal. I fertilize in March or April when new growth starts. For my indoor hibiscus, I apply every six weeks. Outdoor plants get a dose every four weeks during the growing season. Never fertilize in winter. The plant is dormant. It won’t use the nutrients. I learned this when I applied fertilizer in December. The pellets sat in the soil for months. They attracted fungus gnats. Not fun.
Step 3: Measure Correctly
I use a kitchen scale. Seriously. One tablespoon per square foot of soil surface. Don’t eyeball it. I once scattered a handful. That was too much. The plant got salt buildup. White crust appeared on the soil. I had to leach the pot. Now I follow the label religiously. Slow-release organic fertilizers are concentrated. Too much can still burn roots.
Step 4: Water Properly After Application
Water the soil, not the plant. I pour slowly until water drains from the bottom. This helps the pellets dissolve partially. But I don’t water again for three to four days. Let the soil breathe. Overwatering right after fertilizing flushes the nutrients away. I used to water daily. Now I check moisture first. Simple change, big impact.
Step 5: Monitor for Two Weeks
Here’s what I look for:
- Week 1: Leaves should deepen in color. New growth appears at the tips.
- Week 2: Buds may form. Check for yellowing. If leaves turn pale, I might need more light. If they burn, I overfed.
I keep a journal. I note the date, fertilizer type, and plant response. It sounds nerdy, but it works. You’ll catch problems early.
Common Problems I Faced and How I Fixed Them
Problem: Fertilizer Pellets Didn’t Break Down
I thought this was a defect. Actually, it’s common with cold soil. In winter, microbial activity slows. Organic fertilizers need microbes to break down. I fixed it by applying only when soil temperature is above 60°F. You can use a soil thermometer. It’s cheap and helpful.
Problem: Ants Attracted to the Fertilizer
Composted manure sometimes brings ants. I learned to bury the pellets one inch deep. This stops ants while still allowing nutrient release. Another trick: mix diatomaceous earth into the top layer. It’s non-toxic but deters pests.
Problem: Slow Growth Despite Fertilizer
This happened when I had rootbound plants. The roots had no room to expand. Even slow-release fertilizer can’t help if the pot is too small. I repotted into a larger container. Growth resumed within a week. Check your plant’s roots every six months. If they circle the pot, it’s time to upgrade.
Expert Tips from RHS and AHS
I always trust the pros. The RHS recommends using organic matter to improve soil structure. Their studies show that slow-release fertilizers reduce nutrient leaching by up to 40%. That’s huge. I also follow AHS guidelines on composting. They suggest mixing your own blend with leaf mold and bone meal. It took me a few tries, but now my soil is rich and crumbly.
One thing the RHS emphasized: avoid fertilizers high in phosphorus for young plants. They need nitrogen for leaf growth. For mature hibiscus, phosphorus encourages flowers. Adjust based on plant age. I now have separate fertilizers for each stage.
Why I Stopped Using Chemical Fertilizers
I switched to organic for three reasons. First, chemicals burn roots easily. I lost two plants to synthetic fertilizer burn. Second, organic options improve soil life. Earthworms and microbes thrive. My pot soil stays fluffy, not compacted. Third, blooms last longer. Organic-fed hibiscus flowers stay open for three to four days. Synthetic ones wilt by day two. I’ve seen this consistently.
That said, organic fertilizers work slower. You won’t see results overnight. But the payoff is a healthier plant long term. I’d rather wait two weeks for blooms than rush and kill my plant again.
My Favorite Products (No Sponsorship, Just Honest Opinion)
I’m not paid to say this. But here’s what I buy:
- Dr. Earth Organic 4-6-3: Balanced for general use. Smells like fish, but it works.
- Espoma Plant-tone: Good for containers. Low risk of burn.
- Neptune’s Harvest Fish/Seaweed Blend: Liquid version. I use this for a quick boost in summer.
Each product has its place. The fish blend is strong. Use half strength if you’re nervous. The Espoma is gentler. I rotate between them based on what my plants need.
FAQ
1. Can I use slow-release organic fertilizer for indoor hibiscus?
Yes. I use the same products for indoor and outdoor plants. The only difference is dosage. Indoor plants grow slower. Use half the outdoor amount. Also, ensure good air circulation. Organic fertilizer can attract fungus gnats if soil stays wet. Let the top inch dry between waterings.
2. How often should I apply slow-release organic fertilizer?
Every four to six weeks during growing season. I check the weather. If it’s unusually cold or rainy, I wait. Cold weather slows release. Rain can wash nutrients away. Wait for stable conditions.
3. What if my hibiscus still doesn’t bloom after fertilizing?
Check light first. Hibiscus is a sun lover. Six hours of direct sun minimum. Next, check pot size. If roots are cramped, blooms stop. I had this issue last year. Repotting fixed it within two weeks. Also, avoid high-nitrogen fertilizers. They promote leaves, not flowers. Use a bloom booster with higher phosphorus.
Final Thoughts from My Garden to Yours
I’ve been gardening for over a decade. But I still make mistakes. The key is to observe and adjust. Slow-release organic fertilizers are forgiving. They feed gradually. But you still need to get the basics right: light, water, and pot size. If you master those three, your hibiscus will thrive.
Start small. Pick one fertilizer. Test it on one plant. Watch it for two weeks. You’ll learn more than reading a hundred articles. I did. And now I have hibiscus flowers that last for days. You can too.
So go ahead. Grab some fish bone meal. Sprinkle it around your hibiscus. And wait. The results will speak for themselves.





