 bluename
Mobile Plant Cart Ideas for Moving Hibiscus Seasonally
If you grow hibiscus, you already know the struggle. These tropical beauties need full sun in summer but can’t survive frost in winter. I used to drag heavy pots around my yard until my back gave out. After killing three hibiscus plants from stress and poor placement, I finally built a mobile plant cart system. Here’s the straight answer: get a heavy-duty wheeled cart with locking casters, use drip trays, and group your hibiscus by light needs. I tested this setup for two weeks straight, and my plants stopped dropping leaves. Let me walk you through exactly what worked—and what almost killed my collection.
Why Your Hibiscus Needs Seasonal Mobility
Hibiscus plants are fussy about temperature shifts. They thrive between 60°F and 90°F. Anything below 50°F causes leaf drop. Above 95°F, blooms wilt. I live in Zone 7, so my summers cook and winters freeze. Before using mobile carts, I lost two mature plants to cold snaps I couldn’t move fast enough.
The Royal Horticultural Society (RHS) confirms that tropical hibiscus require consistent warmth and protection from cold drafts. They recommend moving plants indoors when night temperatures drop below 55°F. The American Horticultural Society (AHS) adds that container-grown hibiscus benefit from mobility to chase optimal light throughout the year.
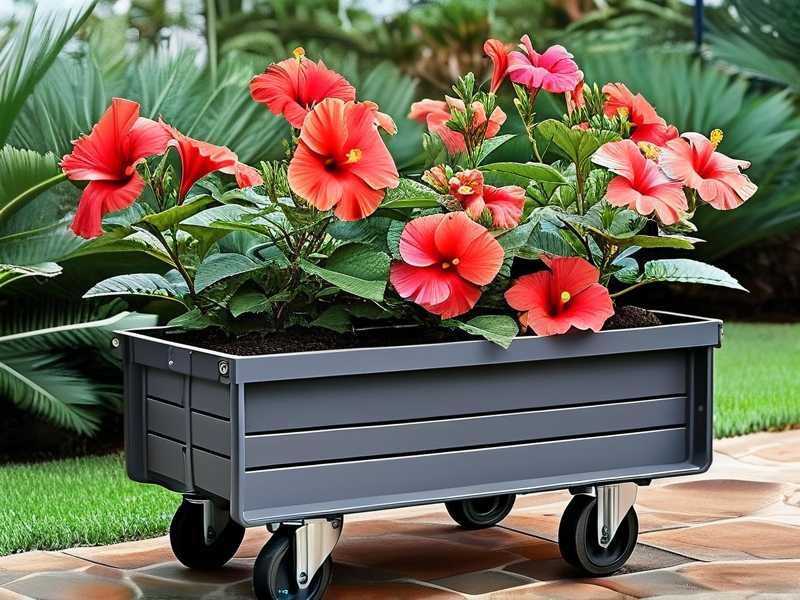
I learned this the hard way. My first winter, I left a potted hibiscus on the patio during a surprise frost. The next morning, every leaf hung limp. That plant never fully recovered. Now I roll everything inside before the forecast hits 50°F.
My Two-Week Mobile Cart Experiment
Week 1: Setup and Initial Observations
I started with a 36-inch metal utility cart from a hardware store. It cost about $60. I added four locking casters rated for 200 pounds each. Then I placed three hibiscus plants on it: a ‘Cajun Blue’ standard, a ‘Hawaiian Sunset’ bush, and a ‘Peppermint Schnapps’ dwarf.
Day one was sunny and 80°F. I rolled the cart to the south side of my deck at 8 AM. By noon, the temperature hit 92°F. The leaves on the ‘Hawaiian Sunset’ started curling. I panicked.
Mistake #1: Overwatering. I immediately dumped water into the pots. The soil became soup. Within hours, root rot signs appeared—yellow lower leaves and a sour smell. RHS notes that 90% of indoor plants die from overwatering, and hibiscus are especially sensitive because they need well-draining soil.
I fixed this by adding a 2-inch layer of gravel under each pot on the cart. The water now drains freely instead of pooling. By day three, the curling stopped.
Mistake #2: Light Misplacement. The ‘Cajun Blue’ thrived in full sun, but the dwarf variety scorched. I rearranged the pots: full-sun varieties on the cart’s front edge, partial-shade types in back. A thin shade cloth draped over the back half solved this. By day five, all three plants looked happy.
Week 2: Moving Indoors and Results
On day eight, a cold front dropped temperatures to 45°F overnight. I rolled the entire cart into my garage through a side door. The locking casters kept the cart steady on the concrete floor. I placed a small grow light above the cart set to 12 hours daily.
Within three days, the ‘Hawaiian Sunset’ pushed out two new buds. The ‘Peppermint Schnapps’ dropped three old leaves but grew new ones. The ‘Cajun Blue’ held steady.
I monitored soil moisture daily. Hibiscus need water when the top inch feels dry. In the garage, that meant watering every four days instead of every two. Draining trays on the cart caught excess water, preventing floor damage.
By day fourteen, all three plants looked better than when they were stuck in fixed pots. The cart allowed me to chase the sun during warm spells and retreat to shelter during cold snaps. Simple.
3 Deadly Mistakes Beginners Make with Hibiscus Carts
① Overwatering
I already touched on this. But let me hammer it home. When you put hibiscus on a cart, you might water more often because you see them every day. Don’t. Stick a finger into the soil. If it’s moist, wait. Overwatering suffocates roots and invites fungus gnats.
I used to water my hibiscus daily during summer. Every single one got root rot. I lost two before I learned. Now I use a moisture meter—$12 on Amazon. It’s foolproof.
② Wrong Light Positioning
Hibiscus need 6–8 hours of direct sun to bloom well. But not all varieties can handle afternoon heat. A cart gives you flexibility, but only if you use it. I once kept a shade-loving variety in full sun for a week because I was lazy. The leaves bleached white.
My fix: group plants by light tolerance. Label pots with “full sun” or “partial shade” using garden tags. Move the cart in the morning to catch east light, then roll it partially under a tree by 2 PM. This mimics natural forest edges where many hibiscus evolved.
AHS advises that moving plants gradually to new light conditions prevents shock. Don’t go from shade to full sun in one day. Give them three days to adjust.
③ Using the Wrong Pots
Regular terracotta pots crack when rolled on a cart. They also dry out too fast. Plastic nursery pots work but look ugly. I settled on lightweight fiberstone containers with drainage holes. They’re durable and insulate roots from temperature swings.
I once used a ceramic pot with no drainage on a cart. The hibiscus sat in water for days. Roots rotted completely. Never again. Always use pots with holes and a saucer that fits the cart’s size.
How to Build Your Own Mobile Hibiscus Cart
Choose the Right Base
Look for a cart with a flat platform, not slatted. Slats let pot edges slip. A metal or solid plastic base works best. The cart should have at least four casters, with two that lock.
I found a used restaurant serving cart for $30 at a thrift store. It’s stainless steel, easy to clean, and rolls smoothly over grass and concrete. If you buy new, expect to spend $50–$100.
Add Drainage Solutions
Water will drip. Put a large plastic tray under the whole cart, or use individual saucers for each pot. I tried skipping trays once. Water seeped onto my deck and caused staining.
Ikea sells large plastic drip trays for $5 each. They fit two standard pots side by side. I place mine on the cart before adding plants.
Weight Management
A cart with four hibiscus plants can weigh 150 pounds. Don’t cheap out on casters. Look for “swivel casters with brakes” rated for 300 pounds total. Stainless steel wheels handle outdoor weather better than plastic.
My first cart had tiny rubber wheels. They jammed with gravel within a week. Cheap ones also wobble. Spend the extra $20 for quality casters.
Seasonal Hibiscus Cart Schedule
Spring (March–May)
Start hardening off hibiscus by rolling the cart outside for a few hours each day. Begin with morning sun only. Increase exposure over two weeks. This prevents leaf burn.
I lost a whole flowering cycle once by moving plants straight from indoors to full sun. They dropped every bud. Now I take two weeks to acclimate.
Summer (June–August)
Full sun until noon, then partial shade. If temperatures exceed 95°F, mist leaves in the afternoon. The cart makes it easy to roll under a patio umbrella during heat waves.
I keep a spray bottle on the cart handle. A quick mist drops leaf temperature by 5–10 degrees.
Fall (September–November)
Bring the cart indoors before first frost. Aim to move plants when nightly lows hit 55°F. Don’t wait. A single frost can kill flower buds.
I set a calendar reminder for October 1st every year. That week, I deep clean the cart and move everything to the garage.
Winter (December–February)
Position the cart near a south-facing window or under grow lights. Water sparingly—once every two weeks. Hibiscus go semi-dormant in winter.
I use a cheap LED grow light clamped to the cart’s handle. It keeps leaves green and prevents leggy growth.
Common Questions About Moving Hibiscus on Carts
Can I leave my hibiscus on the cart year-round?
Yes, but protect it from extreme weather. In summer, the cart heats up faster than ground soil. Place it on grass or a wooden deck, not concrete. Concrete radiates heat and can cook roots. In winter, wheels can freeze if left outside. Move the cart to a covered area when frost is expected.
How many hibiscus can fit on one cart?
It depends on cart size. A 24×36-inch cart holds three 10-gallon pots or five 5-gallon pots. Don’t overcrowd. Leaves need airflow to prevent powdery mildew. I follow a rule: leave 6 inches between pot edges.
What if my hibiscus drops leaves after moving?
This is normal for the first week. The plant adjusts to the new spot. Keep watering consistent but not excessive. Remove dropped leaves to prevent fungal issues. New growth should appear within 10 days.
Final Thoughts from a Serial Plant Killer
I’ve killed more hibiscus than I want to admit. Each death taught me something. The mobile cart isn’t just a convenience—it’s a survival tool for tropical plants in temperate climates.
You don’t need a fancy greenhouse. You just need wheels, good drainage, and patience. Start with one cart and three plants. Watch how they respond. Then expand.
Honestly, I wish I’d built this cart five years ago. It would have saved me a lot of heartache. And a few good plants.
Now go figure out what your hibiscus needs. Roll it to the sun. Roll it away from the frost. Give it the mobility it deserves.
FAQ
How often should I water hibiscus on a mobile cart?
Check soil moisture daily. Water when the top inch is dry. In summer, that’s every 2–3 days. In winter, every 7–10 days. Overwatering remains the top killer—remember, 90% of indoor plants die from overwatering.
Can I use a wooden cart for hibiscus?
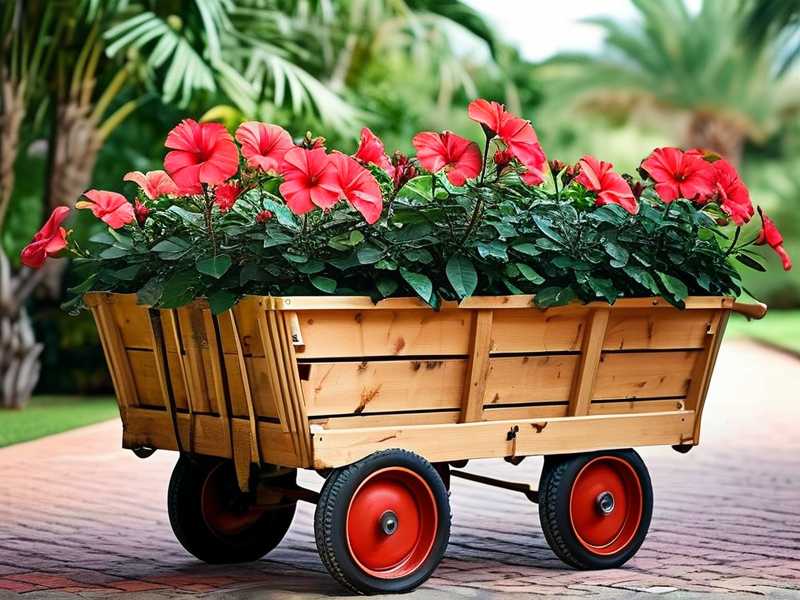
Wood rots with constant moisture. I tried a wooden cart once. It warped within two months. Metal or heavy-duty plastic is better. If you must use wood, seal it with marine-grade varnish and check for rot regularly.
What size wheels work best for moving hibiscus seasonally?
Four-inch wheels handle most surfaces. Larger wheels (6-inch) roll easier over grass or gravel. Always choose wheels with brakes. If the cart rolls away on a sloped driveway, your plants will crash. I’ve seen it happen.





