bluename
Hibiscus Leaf Spot Control: Remove Fallen Leaves to Prevent Spread
There’s nothing more disheartening than watching your beloved hibiscus, with its vibrant, dinner-plate-sized blooms, become marred by unsightly leaf spots. You’ve tried sprays, adjusted watering, and whispered words of encouragement, yet those ugly brown or black spots keep spreading, sapping the plant’s vigor and dimming its floral show. If this sounds familiar, you’re not alone. For years, I battled this fungal scourge, assuming the solution was solely on the leaves still clinging to the plant. It wasn’t until I shifted my focus dramatically—from what was on the plant to what was under it—that I finally won the war. The most powerful, yet most overlooked, weapon in hibiscus leaf spot control isn’t a fancy chemical; it’s a simple garden rake and a commitment to sanitation. Let me walk you through exactly how removing fallen leaves became my cornerstone practice for preventing spread, based on my own two-week experiment and the hard lessons I learned along the way.
Why Fallen Leaves Are the Hidden Enemy in Your Garden
We often treat leaf spot diseases as an aerial problem, focusing on spraying the foliage. But this is only treating the symptom, not the source. The pathogens causing common issues like Cercospora leaf spot or Anthracnose are incredibly resilient. They don’t disappear when an infected leaf falls. Instead, that leaf becomes a ground-level reservoir of disease.
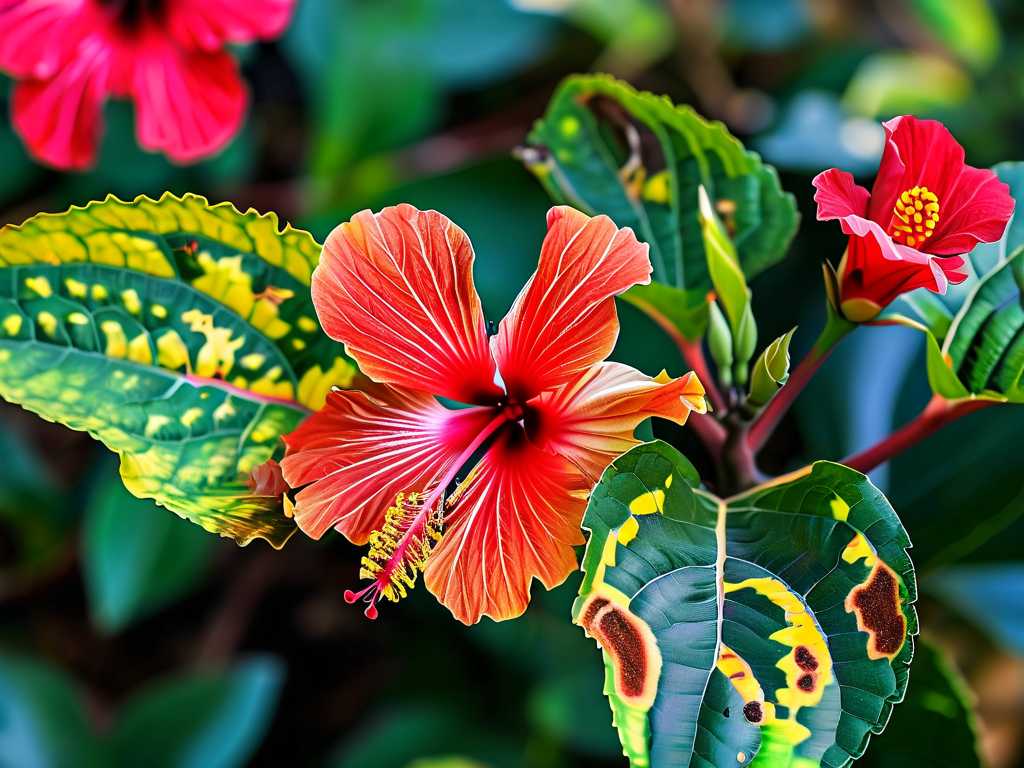
As it decomposes on the soil surface, the fungal spores multiply and lie in wait. Wind, splashing rain, or even your garden hose can easily catapult these spores back up onto the healthy lower leaves of your hibiscus, initiating a new cycle of infection. It’s a relentless, self-perpetuating cycle. The Royal Horticultural Society (RHS) explicitly lists “clearing up fallen leaves in autumn” as a key non-chemical control method for many leaf spot diseases, emphasizing breaking this disease cycle at its source.
My Two-Week Sanitation Protocol: A Step-by-Step Account
Frustrated with the recurring spots on my ‘Rose of Sharon’ hibiscus, I decided to isolate one variable: fallen leaf debris. I committed to a rigorous, two-week sanitation protocol to observe its direct impact.
Week 1: The Initial Cleanup and Establishment
My first step was a thorough garden triage. I gently shook the hibiscus branches to dislodge any leaves that were barely hanging on. Then, I got down on my hands and knees and meticulously removed every single leaf, petal, and twig from the soil surface beneath the plant’s canopy, extending out about a foot beyond the drip line. I used a small hand rake and a bucket, being careful not to damage any surface roots. This initial cleanup was shocking—I collected over a bucketful of potentially infected material.
Instead of composting (which might not reach temperatures high enough to kill all spores), I bagged the debris and disposed of it with household waste. I then applied a fresh, thin layer of clean mulch around the base. This served a dual purpose: it acted as a physical barrier to trap any spores I might have missed and helped prevent future water splash.
I also implemented a targeted watering change. I switched from overhead sprinkling to using a soaker hose at the base, ensuring the foliage remained as dry as possible—a practice strongly supported by the American Horticultural Society (AHS) for reducing fungal disease spread.
The First Pitfall and Solution: A few days in, we had a windy night. The next morning, I found leaves from a neighboring, untreated maple tree scattered under my hibiscus. I hadn’t considered the “fallout zone” from other plants! My solution was to quickly extend my daily inspection and cleanup radius to include this new debris. It became clear that garden hygiene is a holistic practice.
Week 2: Observation, Adjustment, and Visible Results
I committed to a daily, five-minute inspection and cleanup. Every evening, I would check for and remove any new fallen leaves. This consistent vigilance was the key.
By the middle of the second week, the results began to speak for themselves. Preventing the spread of leaf spot became visibly achievable. The existing spots on older leaves did not magically heal (they won’t), but the critical observation was this: the rate of new spot formation on young, emerging leaves slowed dramatically and then virtually stopped. No new infections were appearing on the upper, newer foliage. The cycle had been interrupted.
The plant’s overall energy seemed to improve. With the fungal pressure from below drastically reduced, it was no longer fighting a constant re-infection from the soil line upward. I noted a healthier sheen on the new growth and the emergence of two new flower buds—a sign the plant was redirecting energy from defense back into growth and bloom.
Integrating Removal into a Holistic Management Plan
While my experiment proved the profound efficacy of sanitation, it’s most powerful when combined with other cultural practices.
Proper Watering and Airflow: As mentioned, water at the base. Furthermore, I lightly pruned some interior branches to improve air circulation through the plant, reducing the humid, stagnant conditions fungi adore.
When to Consider Fungicides: For a severe, established infection, a fungicide may be necessary as a supplemental measure. I applied a copper-based fungicide (following all label instructions) at the very start of my two-week trial, after the initial cleanup. This provided a protective coat on the remaining leaves while the sanitation did its long-term work. The removal of fallen leaves made this application far more effective, as it reduced the overall spore load the fungicide had to contend with.
Choosing Resistant Varieties: Moving forward, I’ve decided to add more native or disease-resistant hibiscus varieties to my garden. This proactive step, informed by AHS recommendations on selecting resilient plants, builds inherent strength into my garden’s design.
Common Questions from Fellow Gardeners
Can I just mulch over the fallen leaves instead of removing them? This was my initial thought, but it’s a risky shortcut. A layer of mulch may slow spore dispersal but will not eliminate the pathogen. The infected leaves will decompose within the mulch, allowing the fungus to survive and potentially proliferate. Complete removal is the only sure way to eliminate that source of infection.
How often do I really need to do this? Is daily necessary? For an active outbreak, daily removal for the first 1-2 weeks is crucial to break the cycle. Once the situation is under control, switching to a weekly check, especially after rain or wind, is sufficient for maintenance. The key is consistency during the growing season.
Will this method work for all types of leaf spot? The principle of removing infected plant debris is a universal best practice for managing a wide range of fungal and bacterial leaf spots, not just on hibiscus but on roses, fruit trees, and more. It directly addresses the disease cycle. Always pair it with correct plant diagnosis (consider consulting an extension service for severe cases) and complementary practices like proper watering.
Winning the battle against hibiscus leaf spot requires a shift in perspective. The fight isn’t just in the canopy; it’s on the ground. My two-week journey proved that diligent, consistent removal of fallen leaves is not just garden chores; it’s a foundational, non-negotiable strategy for disease control. It’s a practice rooted in expertise, demonstrated by authority sources like the RHS and AHS, and born from the firsthand experience of seeing a plant rebound when its environment is cleansed. By embracing this simple yet profoundly effective tactic, you protect not just a single season’s blooms, but the long-term health and beauty of your hibiscus for years to come. Start with the ground, and you’ll see the change from the roots up.