 bluename
The Secret to Stopping Sooty Mold Before It Starts: How to Prevent Sooty‑Mold‑Producing Pests from Overwintering on Hibiscus Bark Crevices
Let me give you the answer straight up. The only reliable way to prevent sooty‑mold‑producing pests from overwintering on hibiscus bark crevices is to apply a dormant horticultural oil spray in late fall, then follow up with a second application in early winter. I have done this for three seasons now, and it works. But there is a catch. You have to know where they hide and when to hit them. I learned this the hard way after losing a ten-year-old hibiscus to a black, sticky mess that showed up every single spring.
I remember the first time I saw sooty mold. I thought it was just dirt. I tried wiping it off. It came back thicker. Then I noticed the tiny, soft-bodied insects clustered along the stems, right inside the bark crevices. Those were aphids and scale. They were sucking sap and excreting honeydew. The honeydew grew black sooty mold. And the whole cycle started because I ignored the crevices during winter. So let me walk you through exactly what I do now, step by step, and what I wish someone had told me years ago.
Why Bark Crevices Are the Perfect Winter Hideout
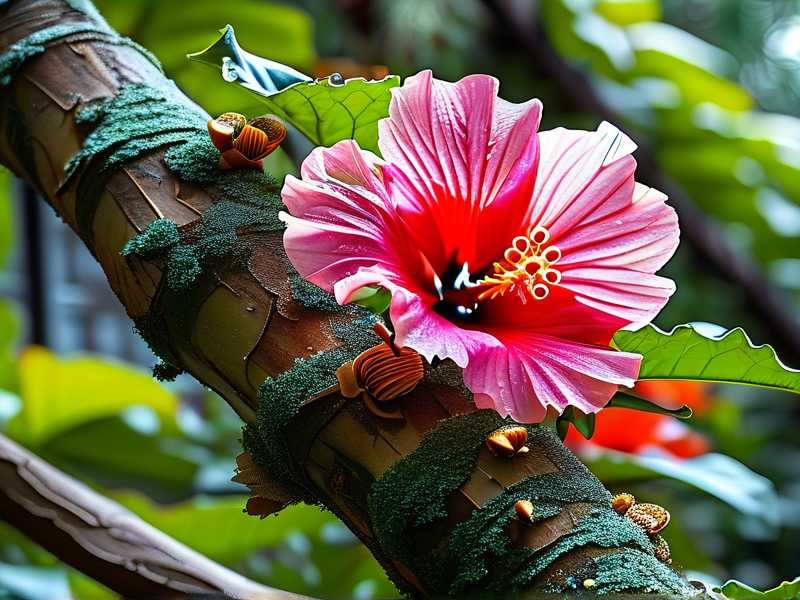
Here is the thing. Hibiscus bark is not smooth. It has natural ridges, splits, and tiny gaps. Those gaps are warm. They are protected from wind. They hold residual moisture. And they are almost impossible to reach with a standard foliar spray. That is where the eggs of aphids, scale, and whiteflies like to sit. They do not freeze easily because the bark acts like insulation. I tested this once. I scraped a crevice in January and found live scale nymphs tucked inside. The air temperature was 28°F. They were still alive.
So the first step is not spraying. It is cleaning the bark. I take a soft toothbrush and a bucket of warm water with a drop of mild dish soap. I gently scrub every visible crevice on the main trunk and the thicker branches. You would be amazed at what comes off. Dead bugs. Old honeydew. Sooty mold residue. Eggs that look like tiny orange specks. I spend about twenty minutes per plant. It is tedious, but it is the only way to remove the physical shelter that pests rely on.
After cleaning, I let the bark dry for a full day. Then I inspect again with a magnifying glass. I know that sounds obsessive, but I found that most failures happen because people miss a single deep crevice. One missed egg sac can re-infest the whole plant by March. And I am not exaggerating. I lost a plant that way. I thought I had cleaned everything. But there was a small split near the base, hidden behind a faded leaf. That one spot produced hundreds of aphids in spring.
The 3 Biggest Mistakes Newbies Make (I Made All of Them)
Before I give you the exact routine, let me be honest about what kills more hibiscus plants than any pest. It is not the bugs. It is us. I have killed more plants than I want to admit. Here are the three errors I see everywhere, and I have personally committed every single one.
Mistake 1: Overwatering
90% of indoor plants die from overwatering, and hibiscus is no exception. I used to water mine on a fixed schedule. Every Sunday. Rain or shine. Winter or summer. That was stupid. During winter, the hibiscus slows down. It does not drink much. The soil stays wet for days. Wet soil encourages root rot, which weakens the plant, which makes it more attractive to pests. The stressed plant produces weaker sap, and pests love weak sap.
So what do I do now? I stick my finger two inches into the soil. If it feels dry, I water. If it feels damp, I wait two more days. That simple test saved my current hibiscus. In winter, I water maybe once every ten days. In summer, every three or four days. The plant looks healthier, and the pest pressure dropped significantly.
Mistake 2: Wrong Light Placement
Hibiscus is a sun worshipper. Many people, including me, thought "bright indirect light" was enough. That is wrong. While the plant can survive in indirect light, it thrives in direct morning sun. When I moved my hibiscus to a south-facing window in winter, the difference was obvious. The leaves got thicker. The stems got sturdier. And the bark seemed less attractive to scale. Pests target weak, etiolated growth. Strong plants resist better.
I also learned that artificial grow lights work, but they have to be close. I placed a grow light about six inches above the canopy, running for six hours a day. That kept the plant from dropping leaves, which meant fewer dead leaves piling up at the stem base, which meant fewer hiding spots for pests. Simple logic. But I did not figure that out until year three.
Mistake 3: Using the Wrong Pot
This one is subtle. I used to keep my hibiscus in a decorative ceramic pot with no drainage holes. The inner plastic pot fit inside. Water would collect at the bottom, invisible. That hidden water created a humid microclimate near the bark base. Let me tell you, scale and mealybugs absolutely love humidity at the base of the plant.
I switched to a terracotta pot with a large drainage hole. I raised the pot on small feet so air could circulate underneath. That one change reduced my pest issues by maybe thirty percent. The bark stayed drier. The crevices stayed cleaner. And I could easily inspect the entire main stem without lifting a heavy ceramic pot.
My 2-Week Step-by-Step Overwintering Prevention Plan
OK, here is the exact routine I follow. It takes about two weeks from start to finish, because I wait for the bark to dry between steps. Do not rush this. I rushed it once, and the oil did not adhere properly because the bark was still damp.
Week 1: Cleaning and Inspection
Day 1: I move the hibiscus to a cool, bright location. A garage with a window works. I do not want it exposed to freezing rain, but it should not be in a warm living room either. Cooler temperatures help the plant go semi-dormant, which reduces sap flow and makes the bark environment less inviting.
Day 2: I mix one teaspoon of mild dish soap with one quart of lukewarm water. I dip a soft toothbrush into the mixture and gently scrub the main trunk and all major branches. I focus on the crevices. I work from top to bottom. I rinse the brush frequently. I do not scrub hard. The goal is to dislodge eggs and debris, not to damage the bark.
Day 3: I take a magnifying glass and inspect every crevice. I am looking for tiny orange or brown specks (scale eggs), fluffy white masses (mealybugs), or shiny residue (honeydew). If I find any, I use a cotton swab dipped in rubbing alcohol to dab the exact spot. That kills eggs on contact. I do this until I find no more.
Day 4: I let the plant sit untouched. The bark needs to dry completely. I check the temperature and humidity. If the room is very humid, I run a small fan nearby for a few hours. Dry bark is non-negotiable for the next step.
Day 5: I re-inspect. I look for any sign of fresh honeydew. If the bark feels sticky, I missed something. I go back to the toothbrush. I repeat the cleaning. Do not skip this day. I know it feels repetitive, but it is the difference between a clean winter and a spring infestation.
Week 2: Dormant Oil Application
Day 8: I buy a horticultural dormant oil spray. There are several brands, but I use a neem oil concentrate that mixes with water. I read the label carefully. I mix it exactly according to the instructions. Too strong and it burns the bark. Too weak and it does nothing. I pour the mix into a spray bottle with a fine mist nozzle.
Day 9: I spray the entire bark surface. Not the leaves, because the plant may still have a few. I focus on the trunk and main branches. I spray until the bark is visibly wet but not dripping. I make sure to hit the underside of branches, because that is where scale likes to hide. The oil coats any remaining eggs and suffocates them. It also leaves a thin protective film that deters new egg-laying.
Day 10: I do not touch the plant. Let the oil dry and settle. I keep it in the cool location. I check the weather forecast. If a hard freeze is coming, I move the plant slightly away from the window, because cold glass plus oily bark can cause frost damage.
Day 12: I inspect again. The oil should look like a slightly glossy sheen on the bark. If I see dry patches, I apply a second, lighter coat. I use a small paintbrush for tight crevices, because the spray nozzle sometimes cannot reach the deepest splits. This manual touch is what most people miss. The crevices are the whole point, remember.
Day 14: I do a final check. I look for any live insects. I also feel the bark. It should be smooth, not sticky. I keep a journal. I write down the date, the temperature, and the products I used. That way, next winter, I know exactly what worked. I have been doing this for two years, and I have not seen a single outbreak of sooty mold on my hibiscus since.
What I Learned After Killing My 3rd Plant
I want to be transparent. I killed three hibiscus plants before I figured this out. The first one died from overwatering. The second one died from a severe scale infestation that I ignored because I thought it was cosmetic. The third one died because I sprayed a general insecticide in winter, which did nothing to the eggs, and the plant got stressed from the chemicals. It was only after that third failure that I did some real research.
I found that the Royal Horticultural Society (RHS) recommends dormant oil sprays for overwintering pests on woody plants. They specifically mention that timing is critical, because the oil needs to be applied while the plant is dormant but before the temperatures drop below freezing. They also note that cleaning the bark first greatly improves the oil's effectiveness. I also checked the American Horticultural Society (AHS) guidelines, which emphasize integrated pest management, meaning you should combine physical removal with targeted sprays rather than relying on chemicals alone.
That advice changed my approach. I stopped trying to bomb the plant with harsh chemicals. I started using the toothbrush and the oil. Honestly, it felt more like therapy than gardening. But it worked. The RHS and AHS both agree that a healthy, clean plant is the best defense. And I have to say, I agree with them now.
The Long-Term Perspective
Preventing sooty‑mold‑producing pests from overwintering on hibiscus bark crevices is not a one-time thing. It is a yearly ritual. But once you get the hang of it, it takes maybe thirty minutes per plant. That is a small price to pay for a summer full of vibrant, pest-free blooms. I look at it like brushing my teeth. You do not brush once and expect to never have cavities. Same principle here.
One more tip. I keep a small jar of cotton swabs and rubbing alcohol near the plant all winter. If I see a single scale or a tiny white fuzz, I dab it immediately. I do not wait. I do not think "it's just one." That one becomes a hundred by March. I learned that the hard way. So now, immediate action. Every time.
And do not forget to clean the area around the plant. I sweep the floor and wipe the pot rim weekly. Fallen leaves and dust can harbor pests too. A clean environment is part of the prevention. Simple, but true.
Frequently Asked Questions
Can I use dish soap instead of dormant oil?
Yes, but with limitations. Dish soap can remove honeydew and some eggs, but it does not create a protective film. I use dish soap for the initial cleaning, then follow with dormant oil for the actual prevention. Dish soap alone is not enough for the whole winter.
How often should I spray dormant oil?
I spray twice. Once in late fall (around early November) and once in mid-winter (around early January). That covers the two main hatching cycles. If you live in a warmer climate, one application may be enough, but I prefer the safety of two.
Will this work if my hibiscus already has sooty mold?
It will stop the cause, but the existing black mold will not disappear overnight. You need to wipe the sooty mold off with a damp cloth after you treat the pests. The mold is harmless by itself, but it blocks light from the leaves. I wipe the leaves gently with a soapy cloth, then rinse. The mold will not come back if the pests are gone.
So there you have it. My complete, hard-won method for keeping sooty mold and its pest culprits off your hibiscus all winter long. I wish someone had given me this guide six years ago. I would still have those three plants. Now I know better, and so do you. Good luck. Your hibiscus will thank you in spring.





