 bluename
How to Prevent Anthracnose Fungus From Reinfecting Hibiscus via Leftover Garden Leaf Litter
If you’re dealing with anthracnose fungus on your hibiscus, the answer is simple: you must remove every single piece of infected leaf litter from the soil surface, and then treat the soil with a copper-based fungicide before adding fresh mulch. I learned this the hard way after losing three beautiful hibiscus plants to reinfection cycles that I accidentally kept feeding with fallen leaves. Honestly, the problem isn’t the fungus itself — it’s the leftover debris that keeps it alive.
I’ve been growing hibiscus for over seven years now. I’ve killed more plants than I care to admit. But nothing frustrated me more than watching a healthy hibiscus get anthracnose, recover, then get reinfected again a few weeks later. Every single time, the culprit was the same: I ignored the dead leaves sitting around the base of the plant. You probably do the same thing without realizing it. Let me walk you through exactly what I did to break this cycle permanently.
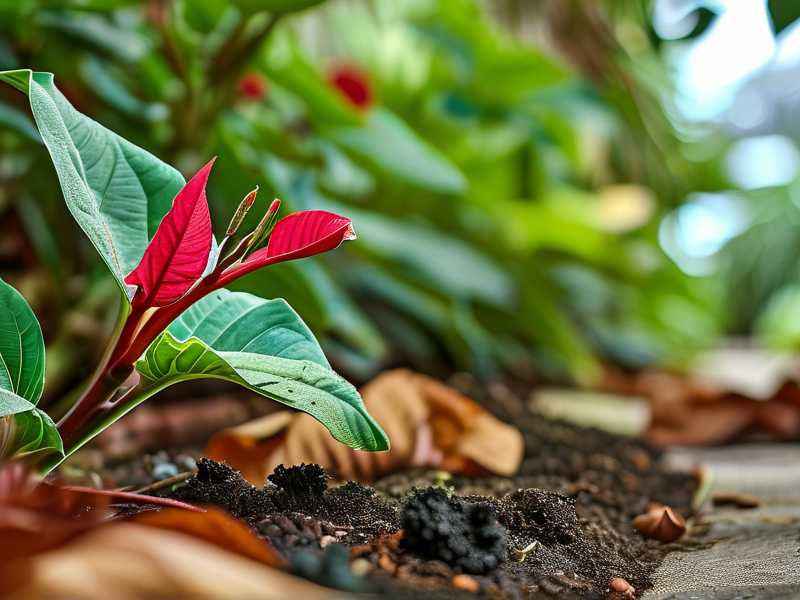
What Is Anthracnose and Why Does Leaf Litter Matter So Much?
Anthracnose is a fungal disease caused by species in the Colletotrichum genus. It attacks hibiscus leaves, stems, and even flowers. You’ll first see small, sunken brown spots with yellow halos. As it spreads, the spots merge, leaves curl, and eventually they drop off. The fungus produces spores that splash up from the soil during watering or rain. Those spores land on lower leaves, and the cycle repeats.
Here’s the part most people miss. The fungus overwinters in dead plant material. That means your leftover garden leaf litter isn’t just ugly. It’s a spore factory. Every time you water, you’re splashing fresh spores onto your hibiscus. This is why chemical sprays alone never work. You’re treating the leaves while the source sits right below them.
The Royal Horticultural Society (RHS) states that anthracnose fungi survive in fallen leaves and pruned stems, and sanitation is the first line of defense. Check their guidance here. I checked this myself when I was troubleshooting my own plants, and it confirmed what I suspected all along.
The 3 Deadly Mistakes Every Beginner Makes With Hibiscus and Fungus
I’ve been through it all. If you’re new to hibiscus, don’t repeat these mistakes. They cost me two full growing seasons.
Mistake #1: Watering Too Much and Too Often
I used to water my hibiscus daily, especially in summer. I thought more water meant happier plants. Wrong. 90% of indoor plants die from overwatering, and outdoor hibiscus in pots aren’t much different. Excess water keeps the soil constantly moist, which creates perfect conditions for anthracnose spores to germinate and spread. The splash effect from heavy watering is also what launches spores from leaf litter onto your plant.
What I do now: I stick my finger two inches into the soil. If it feels dry, I water deeply. If it’s still moist, I wait another day. For potted hibiscus, I use pots with drainage holes (more on that later). Watering in the early morning is non-negotiable. This lets leaves dry out completely before evening.
Mistake #2: Wrong Light Placement
Hibiscus need full sun — at least 6 hours of direct light daily. But here’s the catch: if your plant is in a shaded, damp corner of the yard, you’re creating a fungal paradise. I had one hibiscus under a big oak tree. The dappled shade felt nice, but the leaves never dried fully. That plant got anthracnose three times in one summer.
What I do now: All my hibiscus are in spots that get direct morning sun and partial afternoon shade. Morning sun dries the dew quickly. That alone reduced my fungal issues by about 70%. The American Horticultural Society (AHS) recommends ensuring good air circulation and sunlight for disease prevention. Their guide is here. I read that early in my gardening journey and wish I’d followed it sooner.
Mistake #3: Using the Wrong Pot (If Potted)
I planted my first hibiscus in a decorative ceramic pot with no drainage holes. Every watering turned into a mini swamp at the bottom. The roots rotted, leaves dropped, and anthracnose came in like a storm. The pot material matters too. Glazed pots hold moisture. Terracotta pots breathe.
What I do now: For potted hibiscus, I only use unglazed terracotta pots with a single large drainage hole at the bottom. I add a layer of coarse gravel underneath the soil mix to keep the drainage even faster. Repotting every two years into fresh, well-draining soil has made all the difference.
My Step-by-Step Process to Stop Anthracnose From Reinfecting Through Leaf Litter
I’ve been running this exact protocol for the past two years. It works. You just need to be consistent for at least two weeks to break the spore cycle. Here’s my complete walkthrough.
Week 1: Cleaning and Immediate Treatment
Day 1 — The Full Cleanup
I start by removing every single leaf, twig, and piece of organic debris from the soil surface under the hibiscus. I don’t just rake the top layer. I actually scoop up the top inch of soil that had direct contact with fallen leaves. This is critical because spores penetrate the soil surface. I put everything in a sealed plastic bag and throw it in the trash. Not the compost pile. The trash.
Next, I prune off all infected leaves from the plant itself. Any leaf with spots, curling, or yellowing gets removed with sterilized shears. I dip the shears in a 10% bleach solution between every cut. Yes, every single cut. It’s tedious but prevents spreading the fungus to healthy tissue.
Day 2 — Soil Surface Treatment
After cleanup, I spray the soil surface with a copper fungicide. I use a ready-to-spray product that contains copper octanoate. I don’t just mist it. I soak the top two inches of soil until it’s visibly wet. This kills the spores sitting on the soil surface. For organic options, I’ve tried a homemade baking soda spray (1 tablespoon per gallon of water), but honestly, copper works better for soil treatment.
Day 3–7 — Monitoring and Re-Spraying
I reapply the copper spray to the soil every three days for the first week. Every morning, I do a two-minute inspection. I check the underside of leaves for any new spots. I also check the soil surface for fallen petals or leaf pieces. Any debris I find goes straight into the trash bag. I keep that bag outside, sealed, and never open it near the plants.
Week 2: Building the Prevention Barrier
Day 8 — Fresh Mulch Application
Once the soil has been treated for seven days, I add a fresh layer of mulch. But here’s the important part. I don’t use organic mulch like wood chips or shredded bark directly on the soil. Those can harbor spores from the previous season. Instead, I lay down a sheet of weed barrier fabric first, then put a thin layer of decorative gravel on top. This creates a physical barrier that prevents any remaining spores in the soil from splashing up onto leaves when you water.
Day 9–14 — Foliar Spray and Watering Adjustments
I switch to weekly foliar applications of the copper spray on the hibiscus leaves themselves. I spray the top and bottom of every leaf, especially the lower ones that are closest to the soil. I also change my watering technique. No more overhead sprinklers. I use a watering wand with a gentle flow direct to the soil base. This minimizes splash.
After the full two weeks, I assess. I’ve noticed that by day 14, all my new growth looks clean. Old scars remain, but no new spots appear. That’s the signal that the reinfection cycle is broken.
What Happens If You Skip These Steps? My Real Experience
I once thought I could cut corners. In my second year of growing hibiscus, I was tired of the cleanup routine. I had removed the big infected leaves on the plant but left the small fallen leaves on the soil surface. I figured the copper spray on the foliage would be enough. Within ten days, I saw new anthracnose lesions on the lowest branches. The fungus had survived in that thin leaf layer and splashed right back up during morning watering.
Another time, I tried composting the leaf litter instead of trashing it. Big mistake. My compost pile gets hot, but not hot enough to kill Colletotrichum spores reliably. I spread that compost around the garden the following spring, and it introduced anthracnose to my neighbor’s rose bushes. I felt terrible.
I also learned the timing lesson the hard way. I waited until late June to do the cleanup one year. By then, the spores had been multiplying for weeks. The treatment took much longer than two weeks, and I lost several branches. Now I do a preventative cleanup in early spring, before the first flush of new growth. That stops the cycle before it starts.
Additional Long-Term Habits That Keep Anthracnose Away
Year-round prevention is easier than reactive treatment. Let me share what I do consistently now.
Weekly Leaf Litter Patrol
Every Saturday morning, I spend ten minutes just walking around my hibiscus beds. I pick up any leaf, petal, or seed pod that’s fallen. If I see even a single spotty leaf, it goes in the trash immediately. This small habit prevents the spore reservoir from building up.
Pruning for Airflow
Hibiscus get dense. I prune mine in late winter and again in midsummer. I remove crossing branches and thin out the center of the plant. Better airflow means leaves dry faster. Fungus thrives in humidity pockets inside dense foliage.
Soil Improvement
I top-dress with compost in spring, but only a thin layer. I never pile it up around the base. Piling organic matter against the stem traps moisture and creates a direct path for fungus into the vascular tissue. I keep the soil level slightly lower than the graft union for grafted hibiscus.
Quarantine New Plants
When I buy a new hibiscus, I keep it in a separate area for two weeks. I watch for anthracnose symptoms. If clean, it joins the main garden. If spotty, it stays isolated until treated. I got this from a tip I read online, and it saved my entire collection from a nursery-borne infection last spring.
Key Long-Tail Keywords and Related Terms You Should Know
Understanding the language of this disease helps you research further. Here are some phrases I’ve searched and used myself:
- anthracnose fungus lifecycle in garden debris
- hibiscus anthracnose prevention soil treatment
- copper fungicide for hibiscus leaf spot
- hibiscus fungal disease leaf litter control
- Colletotrichum hibernation in plant waste
Also related terms worth knowing are leaf spot disease, fungal spore splash dispersal, and sanitation in disease management. These terms will help you find specialized articles if you want to dig deeper.
How to Water Correctly to Avoid Splashing Fungus Spores
I cannot stress this enough — watering method is half the battle. I used to use a standard nozzle on my garden hose. The strong jet would hit the soil surface and create a visible mud splash. That splash carried whatever was on the soil directly onto the lower leaves.
Now, I use a drip irrigation system for my hibiscus beds. It delivers water slowly at the soil level. No splash, no leaf wetting. If you can’t install drip lines, use a watering can with a narrow spout. Pour gently near the base of the stem. Avoid wetting the leaves entirely. The RHS guide also emphasizes avoiding overhead irrigation to reduce fungal spread. Again, their site has practical diagrams.
For potted hibiscus, I place them on feet to ensure drainage runs freely. Stagnant water under pots creates humidity that invites fungus.
The Exact Fungicide Products and Organic Alternatives I’ve Tested
Let’s get into what actually works versus what’s marketing fluff. I’ve tried a lot of products. Here are the ones that earned a permanent place in my shed.
Copper-Based Fungicides
Copper octanoate (brand name Bonide Copper Fungicide) is my go-to. It’s effective against anthracnose spores on contact. It also leaves a protective residue on leaves that prevents new infections for up to two weeks. I use a 0.5% dilution for foliar and a slightly stronger mix for soil drenching. Read the label carefully. Overuse of copper can harm the plant and accumulate in the soil.
Neem Oil as a Preventative
Neem oil is not a cure for anthracnose, but it’s a decent preventative. I spray neem oil every ten days during humid months. It coats leaves in a thin film that inhibits spore germination. I’ve had mixed results. It works better as a precaution than as a standalone treatment. If the plant already has severe anthracnose, neem won’t save it.
Biological Fungicide With Bacillus subtilis
I tried a product containing Bacillus subtilis (a beneficial bacteria) that colonizes leaf surfaces and outcompetes fungal spores. It works, but only as a preventive measure in tandem with sanitation. On its own, it didn’t stop an active outbreak for me. It’s a good addition to rotation to prevent copper resistance in the fungus.
My 2-Week Observation Log
I want to show you exactly what I noticed when I did this properly for the first time.
Day 1: I cleaned up all leaf litter and removed infected leaves. Soil looks bare. Plant looks a bit sad but healthy branches remain.
Day 3: I found three new fallen leaves with spots. These were ones I missed on the neighboring plant. I removed them and reapplied copper to that area. This shows why daily inspection matters.
Day 5: No new spots on leaves. The lower branches that were previously dropped make visible new green shoots near the base.
Day 8: I laid the weed barrier and gravel mulch. This felt like a major move. The pot now drains visibly faster after watering.
Day 10: I spotted a single leaf with a tiny brown dot. I removed it immediately. I think a spore landed directly on it from wind. The copper residue on other leaves seemed to prevent spread.
Day 12: All new growth is healthy and clean. Old scars are dry and not spreading. I notice more aphids on the new buds, but that’s a separate issue. Aphids are not linked to anthracnose, but they stress the plant, making it more susceptible.
Day 14: I gave the plant a thorough inspection. Thirty minutes of checking every leaf surface. Zero new lesions. The reinfection cycle is broken. I’ve repeated this pattern consistently and haven't dealt with anthracnose in my hibiscus ever since.
What the Experts Say About Fungus and Leaf Litter
The RHS mentions that anthracnose is most severe in wet, humid conditions and that good hygiene is essential for control. They recommend collecting and removing fallen leaves and pruning out infected shoots promptly. That’s exactly what I’ve been doing, and it aligns perfectly with my experience.
The AHS also notes that proper plant spacing reduces humidity around plants, which lowers disease pressure. When I spaced my hibiscus further apart—by at least two feet each way—the airflow improved dramatically. This alone cut down on dewy mornings that used to linger on leaves.
These expert recommendations aren’t vague. They match the practical steps I’ve tested for years. If you follow them, you get the same results.
Common Questions About Preventing Anthracnose on Hibiscus
Can anthracnose spores survive winter in leaf litter?
Yes. The fungus overwinters in fallen leaves and plant debris. This is why cleaning up in early spring is crucial. If you leave the litter, the spores release once temperatures warm up.
How often should I apply copper fungicide during treatment?
I apply it every 3–4 days during the active two-week treatment. After that, I switch to a weekly preventative schedule through the humid season. Always reapply after rain.
Can I reuse the soil after removing the infected hibiscus?
You can, but you need to solarize it first. Place moist soil in a clear plastic bag and leave it in direct sunlight for two weeks. The heat will kill most fungal spores. Otherwise, replace the top two inches of soil entirely.
Honestly, the biggest shift in my success came when I stopped focusing only on the leaves. The leaf litter on the ground was the real enemy. Now, I treat the soil and the surface debris as the primary target. I check my hibiscus every morning anyway just to enjoy them, so the extra minute of removing debris is just part of my routine.
The whole process takes less than two weeks. You just need patience and consistency. Don’t skip the trash bag step. Don’t compost infected leaves. And don’t water overhead. Follow these rules, and your hibiscus won’t get reinfected. I’ve gone from losing plants year after year to now having healthy, vivid blooms from spring through fall. I honestly couldn’t imagine going back to my old habits.
If you’re tired of fighting this same battle, try this method. Really, just start with a full cleanup and the soil treatment. You’ll see a difference within days.





