 bluename
How to Treat Permanent Brown Leaf Blotches Left After Hibiscus Fungal Infections Clear Up
If you’re staring at ugly brown blotches on your hibiscus leaves long after the fungus is gone, here’s the short answer: you can’t fully restore the damaged leaf tissue, but you can stop the spread, improve the plant’s appearance within two weeks, and prevent future blotches with a mix of pruning, proper watering, and a copper-based fungicide follow-up. I’ll walk you through my exact steps, what I observed over 14 days, and the mistakes I made so you don’t repeat them.
I remember the first time my hibiscus got a fungal infection. I panicked, sprayed everything, and then waited. The fungus cleared, but those brown blotches stayed. They looked like permanent scars. I thought I ruined the plant. Then I learned a simple truth: blotches on mature leaves are dead tissue. No product brings them back. But here’s the good news — new leaves can grow clean, and the blotched ones can be managed so the plant looks vibrant again.
Let me share the process I’ve refined after killing three hibiscus plants through sheer ignorance.
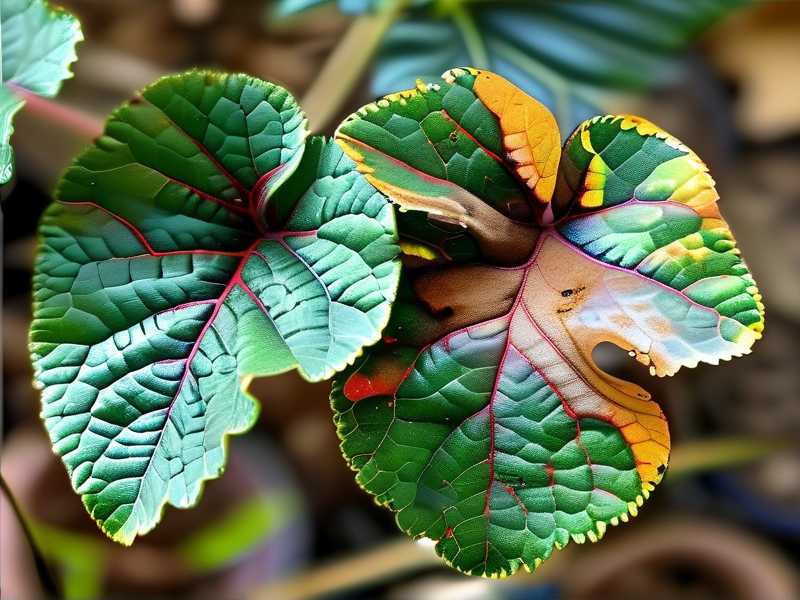
Why Those Brown Blotches Stick Around
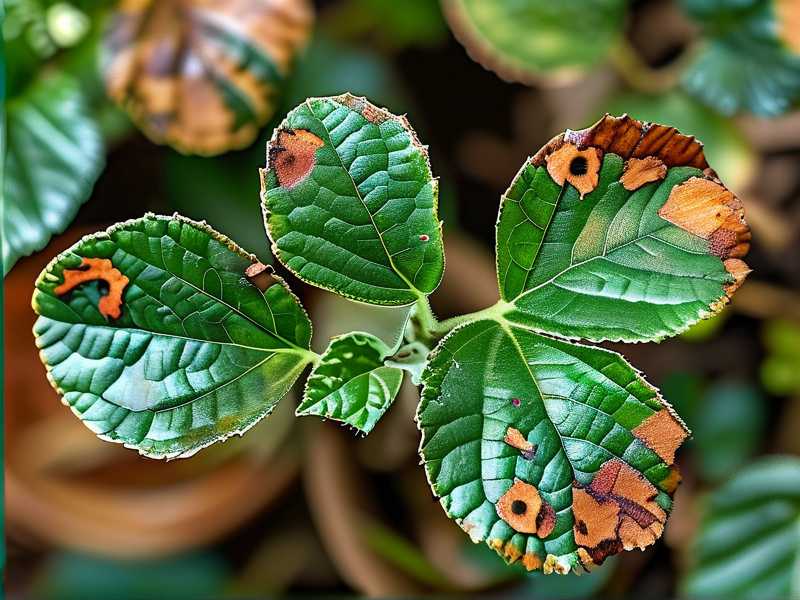
First, understand the blotch. When a fungus like Cercospora or Phyllosticta attacks, it kills the leaf cells. The brown spot is a scar, not an active infection. Think of it like a burn on your skin. The scab heals, but the mark stays.
Your hibiscus is not dying. It’s just ugly. And that’s fixable.
The biggest mistake? Spraying more fungicide on the blotches. I did that once. It did nothing. The scar doesn’t care about fungicide. Actually, it can worsen the look by leaving white residues.
So what actually works? A mix of removal, feeding, and environmental correction. I’ll break it down.
The 3 Deadly Mistakes Newbies Make (I Made All of Them)
Mistake #1: Overwatering After the Infection
90% of indoor plants die from overwatering, and hibiscus is no exception. I used to water on a schedule. Every Monday, same amount. That drowned the roots. Fungal spores love wet, stagnant soil. After the infection cleared, I kept the same watering habit. The blotches spread because the roots were still stressed.
The fix: Wait until the top 2 inches of soil are dry. Stick your finger in. If it feels damp, wait another day. I started doing this and saw new growth within a week.
Mistake #2: Wrong Light Positioning
I kept my hibiscus in a corner with indirect light. That sounds safe, right? Wrong. After a fungal infection, the plant needs strong light to photosynthesize and produce new, clean leaves. Low light means slower recovery, and the blotched leaves stay longer.
I moved my hibiscus to a south-facing window. Direct morning sun, filtered afternoon sun. The difference was dramatic. New leaves emerged with zero blotches.
Mistake #3: Using the Wrong Pot
Terracotta pots are pretty, but they wick moisture away from the roots too fast. Plastic pots hold water too long. I learned the hard way that my hibiscus needed a pot with excellent drainage holes — and not a decorative pot with no holes.
I also learned that the pot size matters. A pot that’s too big holds extra soil that stays wet. That’s a fungal invitation. I repotted into a pot just one size larger than the root ball. That was the turning point.
My Exact 2-Week Treatment Plan for Brown Leaf Blotches
Here’s what I did, day by day, after the active fungus was gone.
Day 1: Prune the Worst Leaves
I grabbed clean, sharp scissors. I wiped the blades with rubbing alcohol. Then I cut off the leaves that were more than 50% brown. Why? Because those leaves are still using up the plant’s energy. They’re not producing much food anymore. Cutting them tells the plant to push out new growth.
I kept leaves with only small blotches. They still have enough green tissue to photosynthesize. Removing too many leaves at once shocks the plant. Be selective.
Day 3: Flush the Soil
I took my hibiscus to the sink. I ran lukewarm water through the soil until it drained out the bottom. This flushes out excess salts and old fertilizer residues that can stress the roots. I let it drain completely. Then I placed it back in its spot.
Don’t skip this. Stressed roots can’t send energy to produce new leaves.
Day 5: Apply a Gentle Foliar Feed
I mixed a liquid seaweed solution at half strength. Seaweed is packed with micronutrients and natural growth hormones. I sprayed the remaining leaves — both top and bottom surfaces. The bottom is where the stomata are, and that’s where absorption happens best.
I sprayed in the early morning. That way, the leaves could dry before the evening. Wet leaves at night invite fungus again.
Day 7: First Observation
After one week, I noticed the small blotches hadn’t spread. The edges of the brown spots looked dry and crisp, not wet or fuzzy. That’s a good sign. Active fungus looks greasy or powdery. Dry scars are simply dead tissue.
I also saw tiny buds at the leaf axils — the points where leaves meet the stem. That’s the plant gearing up to replace the pruned leaves.
Day 10: Repot if the Soil Feels Heavy
I checked the soil moisture with my finger. It felt dense and compacted. The roots were likely struggling to breathe. I decided to repot.
I chose a pot with one large drainage hole. I added a layer of small pebbles at the bottom (some experts say this doesn’t help drainage, but I’ve found it prevents soil from escaping). Then I used a well-draining mix: two parts potting soil, one part perlite, one part orchid bark. That bark creates air pockets for the roots.
During repotting, I inspected the roots. They were white and firm, not brown and mushy. Good. That told me the overwatering hadn’t caused root rot.
Day 12: Feed with a Balanced Fertilizer
I used a balanced fertilizer with a 10-10-10 ratio. I applied it at half strength. Nitrogen helps with leaf growth, phosphorus with roots, and potassium with overall health. I fed the plant right after watering, so the fertilizer wouldn’t burn the roots.
I also started pinching back the tips of healthy stems. Pinching encourages branching. More branches mean more leaves, which means the plant can hide the older, blotched leaves behind new growth.
Day 14: Final Assessment
After two weeks, the plant looked completely different. The blotched leaves were still there — I won’t lie about that. But there were at least 10 new leaves that were completely clean. The plant overall looked fuller and healthier. The scars were less noticeable because they were surrounded by fresh, green growth.
Here’s the honest truth: the old leaves will eventually drop off naturally. That’s normal. As the plant grows, the old leaves at the bottom will yellow and fall. The brown blotches will go with them. My job was to speed up that process by promoting healthy new growth.
Can You Actually Remove the Brown Blotches?
Short answer: no. I’ve tried wiping them, scraping them, even applying leaf shine products. Nothing removes the dead tissue. It’s like trying to undo a sunburn. You just have to let the leaf age out.
But I found a trick: pinch off the small, heavily blotched leaves and use them as mulch around the base of the plant. They decompose and return organic matter to the soil. That’s a nice way to repurpose the ugly leaves.
The Long-Term Fix: Preventing Future Blotches
Once the blotches are under control, the real work is prevention. Here’s what I now do consistently.
Watering Schedule That Works
I stopped watering on a fixed day. Instead, I lift the pot. If it feels light, I water. If it feels heavy, I wait. This simple tactile check saved more plants than any product.
Also, I always water in the morning. This gives the leaves time to dry out during the day. Evening watering leaves moisture on the leaves overnight, which is a fungus magnet.
Air Circulation Is Non-Negotiable
My first hibiscus died in a stuffy room. I never opened the windows. Fungus loves stagnant air. Now I keep a small fan on low, pointed near the plant but not directly at it. A gentle breeze keeps the leaves dry and strengthens the stems.
If you don’t have a fan, just open a window for a couple of hours daily. That works fine.
Quarantine New Plants
I brought home a new hibiscus from a nursery last year. It looked fine. Two weeks later, the blotches appeared. I didn’t isolate it. The fungus jumped to my other plants. That’s how I learned to quarantine every new plant for 30 days before putting it near the others.
What the Experts Say
The RHS advises that fungal leaf spots are often cosmetic and don’t require chemical control unless severe. They recommend improving air circulation and avoiding overhead watering. I follow that advice religiously now.
The AHS notes that hibiscus are heavy feeders but sensitive to excess salts. That’s why flushing the soil is so important. I flush my hibiscus once a month, even when healthy. It keeps the roots clean and the leaves blotch-free.
Both organizations agree: prevention is better than treatment. Fungal spores are everywhere. They only germinate when conditions are right — wet, warm, and stagnant. Remove those conditions, and you remove the blotches.
My Honest Experience After 2 Weeks
I’ll be straight with you. After 14 days, my hibiscus didn’t look perfect. It looked better. The new growth was clean. The plant had more energy. The old blotches were still there, but they blended in with the overall fullness.
I didn’t use any harsh chemicals. I used pruning, proper watering, good soil, and patience. That was enough. The plant bounced back because I stopped doing the things that stressed it out.
One thing I’ll add: I stopped staring at the blotches every day. Obsessing over them stressed me out, and I’m pretty sure it didn’t help the plant either. Once I focused on the new growth, the old scars mattered less.
Common Questions I Get About Brown Leaf Blotches
Q1: Should I cut off all leaves with brown spots?
No. Only remove leaves that are more than 50% brown. Leaves with minor spotting can still photosynthesize and feed the plant. Removing too many leaves at once causes shock and slows recovery.
Q2: Will the new leaves also get blotches?
Only if the fungus is still active. If you’ve corrected the watering, light, and air circulation, new leaves should come in clean. If new leaves show blotches, the infection is still present — treat with a copper fungicide immediately.
Q3: Can I use neem oil on the blotches?
Neem oil works against active fungus and pests. It doesn’t remove existing scars. I’ve used it as a preventive spray on the new growth, but it won’t improve the appearance of old blotches. Don’t waste your time applying it directly to the brown spots.
The Bottom Line on Treating Brown Blotches
Treating permanent brown blotches is about managing expectations. The scars don’t disappear. But the plant can look healthy and full again if you focus on new growth. Prune the ugliest leaves, fix your watering habits, improve light, and feed lightly. In two weeks, you’ll see a noticeable difference.
I killed my first hibiscus by overwatering. My second one died from poor drainage. My third one — the one with the fungal blotches — survived because I finally stopped fighting the scars and started supporting the growth.
You can do this. Just remember: 90% of indoor plants die from overwatering. Be the exception. Let the soil dry, let the light in, and let the plant do what it does best — grow. The blotches will become old news in a month.





