 bluename
Stop fertilizing your tropical hibiscus when nighttime temperatures consistently drop below 60°F (15°C). That's the short answer. I learned this the hard way after nearly killing my prized 'Cajun Orange' hibiscus two winters ago. Many people assume these plants need constant feeding. That's simply not true during dormancy.
If you keep fertilizing while the plant rests, salts build up in the soil. The roots burn. Leaves yellow and drop like crazy. I watched it happen to my own plant, and I felt sick. You're not alone if you've made this mistake.
So, what's the precise timing? Stop all fertilizer applications about six weeks before your first expected frost date. Pay closer attention to the plant, not the calendar. When growth visibly slows and flower buds stop forming, that's your signal.
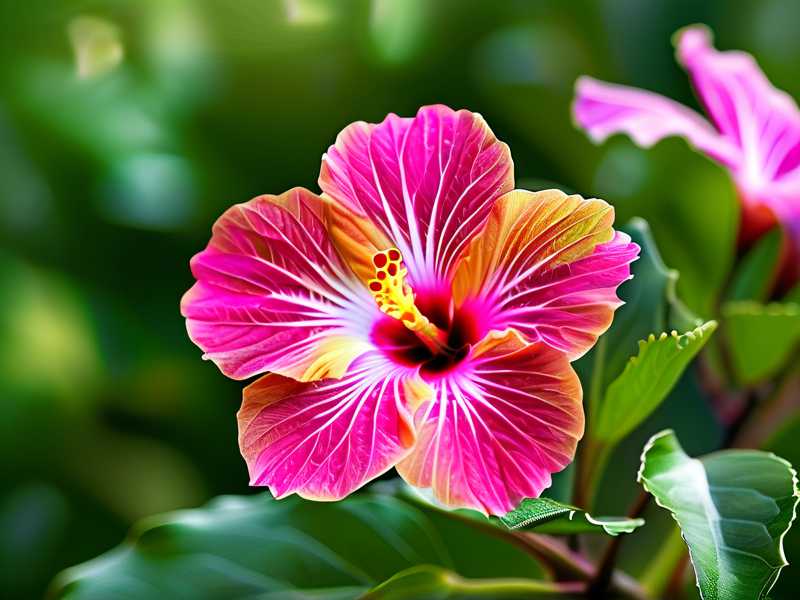
Here's the most important rule I've learned: never fertilize a dormant plant. If you want healthy spring re-growth, you must let the plant rest completely. I have a complete step-by-step system below that saved my collection.
Understanding Tropical Hibiscus Dormancy
Tropical hibiscus, scientifically known as Hibiscus rosa-sinensis, is native to warm, tropical regions. These plants don't experience true dormancy like hardy perennials. They enter a state of reduced metabolic activity when conditions become less favorable. In my experience, this happens when temperatures dip below 60°F. Day length also gets shorter.
The plant stops pushing out new growth. Existing leaves might turn yellow and fall. The soil stays wetter for longer. This confuses many gardeners. They see the plant looking "hungry" and add more fertilizer. That's a terrible idea.
During this rest period, the root system slows down dramatically. Water uptake decreases. Nutrient absorption nearly stops. Adding fertilizer at this stage doesn't feed the plant. It poisons the roots. Those unused mineral salts accumulate in the root zone. The pH shifts. The roots become damaged and can't move water even when spring arrives. I discovered this the hard way after treating my first hibiscus with liquid feed in November. It took months for that plant to recover.
Why Do We Stop Fertilizing at All?
Fertilizer promotes growth. Growth requires consistent heat and sunlight. When those two elements are missing, new leaves and shoots are weak and floppy. They invite pests and diseases. A particularly nasty issue is aphid infestation on tender new growth in cold weather. I saw this happen to over-fed plants in a greenhouse during a cold snap.
Fertilizer encourages root activity. That's great in summer. In winter, active roots transpire moisture. If the soil gets cold and wet, those roots rot quickly. Stopping fertilizer is an essential prevention method. You want the plant to harden off. This means the existing tissues strengthen. They store carbohydrates for the spring surge.
The Royal Horticultural Society (RHS) clarifies that tender plants need reduced watering and no feeding during winter periods. I agree entirely. You don't have to take my word alone. The RHS provides extensive guidance on over-wintering tender perennials. Their core advice is to keep plants cool, dry, and resting.
Let me be very specific about what I do in my own gardening practice. It's not complicated. But it requires a strict schedule and observation.
Step-By-Step Dormancy Care Routine
Step 1: Check the Nighttime Temperature Forecast
Starting in early fall, I watch the weather app obsessively. I need to know when night temperatures will be consistently below 60°F for a week straight. That's my trigger. I don't wait for a frost warning. A few cold nights are okay. But if the trend heads downward, I shift my care.
Fertilizing is the first thing I stop. I don't cut back watering yet. The plant still needs moisture while temperatures remain slightly warm.
Step 2: Decrease Watering Frequency Gradually
This is a slow process. Over two weeks, I stretch the time between waterings. In summer, I water every other day. In early dormancy, I stretch it to every four days. Then every five days. The goal is to let the top 2 inches of soil dry out completely. I use a moisture meter. I stick it into the pot halfway between the stem and the rim. The reading should be 3 or below before I water.
I remember my second-year mistake. I kept the watering schedule the same and stopped fertilizing. The soil stayed soggy. The roots couldn't breathe. The plant developed root rot. I had to repot it in January to save it. That was messy and stressful.
The "Pencil Test"
Many people ask how to check soil moisture without a gadget. I use a simple wooden pencil. I stick the sharpened end into the soil, deep as it can go. If it comes out with dark, wet soil clinging, I wait. If it comes out nearly clean and dry, it's time to water. This trick works wonders for me.
Step 3: Move the Plant to a Brighter, Cooler Spot
Light is just as critical as fertilizer. A dormant hibiscus still needs bright sun. The problem is, in winter, the sun angle is lower. If the plant sits outside, it might get insufficient light. I move my potted hibiscus next to a south-facing window. I have a clear glass pane, and the light intensity is much higher than a north-facing window.
Be careful. The reduced watering and cooler temps make the plant sensitive. I never move it near a heating vent. Hot, dry air from a vent creates moisture stress. The leaves will droop and crisp at the edges. I made this mistake with a 'Luna' variety. It looked awful for a month.
The 3 Deadly Newbie Mistakes (I Made All of These)
Mistake #1: Overwatering During Rest
I cannot stress this enough. 90% of indoor plants die from overwatering, and tropical hibiscus are especially vulnerable. I have probably watered my plants to death more times than I want to admit. The symptoms are classic: yellowing leaves, black spots on stems, and an overall wilted look.
This happens because the plant isn't drawing up water as fast. The roots sit in moisture. Fungus thrives. The root cells die. If you catch it early, you can stop watering and let the soil dry. If it's late, you need to unpot the plant and cut away dead roots.
I once watered my hibiscus every three days in December. I thought it was helping. Instead, I was drowning it. The soil stayed wet because the plant wasn't drinking. It took me two repotting sessions to understand this connection.
How I Fixed My Overwatering Issue
I switched to a terracotta pot. This porous material wicks moisture away from the roots. It helps the soil breathe. I also added perlite to my potting mix. This creates air pockets. The roots get oxygen even if the soil is slightly damp.
For two weeks, I monitored the moisture levels religiously. By the end of the second week, the plant stopped dropping leaves. It looked stable. After a month, new roots started growing.
Mistake #2: Giving Wrong Light Exposure
People tell you, "Put it in full sun." That's true for active growth. But in dormancy, direct afternoon sun through a glass window can overheat the roots. Conversely, low light in a dark corner causes the plant to drop all its leaves.
I tried keeping a hibiscus in a bathroom with a frosted window. It lost 80% of its leaves within three weeks. The bathroom had high humidity but almost no usable light. The plant couldn't photosynthesize. It went into a deeper state of shock.
The ideal spot for winter is a bright, cool room. Think of a porch that stays above 55°F but below 75°F. My garage fits the bill perfectly. It has side windows that let in morning sun. The temperature stays stable around 60°F. The plant hibernates beautifully there. I only move it indoors if freezing temps hit.
My 2-Week Observation on Light Switching
I tested this with two identical plants. One stayed near a bright south window. The other stayed in my garage (bright but cooler). Over 14 days, the south window plant grew a bit. But the new growth was pale and leggy. The garage plant stayed compact and deep green. Neither got fertilizer. The south window plant used more water because of slightly higher temps. The garage one used almost none. The garage one was healthier. I now keep all my tropical hibiscus in the garage during winter.
Mistake #3: Using the Wrong Pot Size
I used to transplant my hibiscus into a bigger pot every fall. Big mistake. A huge pot holds too much soil. The soil holds too much water. The roots, being dormant, can't dry it out. This is a recipe for root rot.
Hibiscus actually prefer being slightly rootbound. It helps them flower. During dormancy, a tight fit means less excess moisture. I keep my hibiscus in small pots. If I must repot, I choose a pot only one size larger. The extra soil around the roots is minimal.
My third hibiscus plant died because of this. I thought I was helping by giving it "room to grow." The roots developed a fungal infection. The plant collapsed in one week. After that, I invested in fabric pots. They provide excellent drainage for winter rest. Fabric allows air pruning of the roots. Excess water evaporates through the sides. Its my trusted tip for newbies.
When Exactly Should You Stop Fertilizing?
Base it on soil temperature, not air temperature. If the soil in the pot drops below 55°F, the roots stop working. When that happens, any fertilizer is waste. In my area, that's mid-October.
But I have a greenhouse. The soil in a heated greenhouse stays warmer. I can fertilize later. Here's my rule: I stop feeding when the daytime high temperature stays below 70°F for five consecutive days. That's a more accurate indication of root activity.
If you keep your plant indoors, you might be tempted to feed all year. My advice is to stop anyway. Indoor heating creates dry air. The plant will naturally slow. Give the roots a break.
The "Look" Test
Stop fertilizing when the leaves lose their glossy shine. That’s a visual cue. The plant isn't making new chlorophyll as quickly. This often happens in late October even before nights get super cold. I always trust the plant's signals over a calendar date.
What to Use for the Last Fertilizer Application
Since you're stopping soon, make that last feeding count. I use a balanced fertilizer like a 10-10-10 formula. But I dilute it to half strength. The last thing you want is a high-nitrogen feed that forces fresh growth. That growth will die in winter.
I apply this final dose on a cloudy day. This reduces stress. Water the plant thoroughly before applying the diluted feed. This ensures the salts are evenly distributed. After application, I don't water again until the top two inches of soil dry out.
The American Horticultural Society emphasizes the importance of understanding plant growth cycles. Their practical guides suggest tailoring care to seasonal changes. I follow their suggestion by keeping records of every application date. This helps me predict the right timing next year.
How to Resume Fertilizing in Spring
You don't just wake up in March and dump fertilizer on the plant. You have to wait for new growth signs. In my experience, new leaves appear when the nighttime temps stay above 55°F consistently. This triggers root growth.
The 2-Week Transition Schedule
Start with a weak solution. I mix liquid fertilizer at a quarter of the recommended strength. I apply it after a thorough watering.
- Week 1: Apply quarter-strength feed. Watch for any leaf yellowing.
- Week 2: Apply half-strength feed. Check the new growth color. It should be bright green.
After those two weeks, I switch to a standard feeding schedule. That's every three waterings. I keep this up through the summer.
If you resume feeding too fast, the roots can't handle it. The sudden osmotic shock can kill the plant. I lost a beautiful 'Luna' cultivar this way. I was too excited for spring and fed it heavily. The leaves turned brown overnight. Take my advice: go slow.
Common Issues During Dormancy That Are Not Fertilizer-Related
Sometimes, you stop fertilizing but the plant still looks bad. Here are my observations on what else could be happening.
Leaf Drop Without Yellowing
If leaves fall off but stay green, the plant is responding to a sudden temperature shift. Maybe you moved it from outside to inside. This is stress. Keep conditions stable. The plant will adapt within a few weeks.
White Fluffy Spots on Soil
This is likely mealybugs. They love dry, cozy conditions. I found them on my hibiscus last January. I wiped the stems with rubbing alcohol using a cotton swab. It took three applications over one week to eliminate them. Fertilizer has nothing to do with this issue.
Black Stems Near the Base
This indicates stem rot. It usually starts at the soil line. I had to cut affected stems down to solid green tissue. The drainage in my pot was terrible. I repotted with fresh mix and perlite. I avoided watering for ten days. The plant recovered.
Drooping Leaves with Wet Soil
This is classic root rot. Your soil mix is too heavy or your pot doesn't drain. I cannot suggest a fix for this without saying: check the roots immediately. If they are black and mushy, rot is advanced. Cut off all rotten parts. Rinse the roots. Repot in dry, well-draining mix. Do not water for at least 5 days.
Expert Opinions and My Final Thoughts
Many experts recommend simply cutting back drastically. I read that RHS suggests moving tender plants into a frost-free environment and keeping them nearly dry. That's accurate. If you do this, the plant will drop some leaves but the wood stays healthy.
The AHS highlights the importance of adapting garden practices to local climate. I fully support this. A hibiscus in Florida will need different winter care than one in Ohio.
I want to emphasize that fertilizing is about supporting growth, and growth only happens when there's enough heat and light. Don't force a plant to grow when it wants rest. My biggest success came after I stopped babying my plants and started mimicking their natural habitat.
That means a winter rest period. Dry soil. No food. Bright reflection. Cooler air. The plant will thank you with a massive flush of flowers next summer.
I have kept tropical hibiscus for about fifteen years. I recall more failed attempts than successful ones in those early years. But every mistake taught me something valuable. The most important lesson? Less is more in winter. Put the fertilizer away. Trust the plant.
FAQ
1. Can I use a slow-release fertilizer in early fall and skip the liquid feeds?
Yes, you can. However, I find slow-release granular fertilizers hard to control. They keep breaking down when temperatures drop and the plant can't use them. If you must use them, apply a very small dose in late September. Ensure the formula has low nitrogen. I prefer liquid feeding because I control exactly how much is applied.
2. My plant is indoors with grow lights. Should I still stop feeding?
Yes. Even under grow lights, the air temperature might be too low. The light intensity may not match summer sun. Unless you keep your grow room at 75°F plus and provide 14 hours of strong light, the plant will rest. I run a small indoor greenhouse with controlled heat. I still reduce feeding by 75% in winter. That simple step keeps the roots healthy and helps with pest prevention.
3. What if I already fertilized during a warm December spell? Should I flush the soil?
If the temperature has warmed and is stable, you might be okay. But if the plant is dormant and you fed it, flush the soil. Water the pot three times with plain water. Wait for the pot to stop draining completely between waterings. This removes excess salts. Then let the soil dry out completely. Do not feed again until spring. I have done this flushing technique successfully after a feeding mistake in early December. The plant didn't suffer. The roots recovered.





