 bluename
The Truth About Tap Water and Your Hibiscus
I killed three hibiscus plants before I figured out the real problem. It wasn't pests. It wasn't lack of sunlight. It was the water straight from my kitchen faucet. If you want hibiscus water quality tips, avoid tap water chemicals like chlorine and fluoride. That's the short answer. Those two chemicals wreak havoc on your plant's roots over time. And honestly, it took me two weeks of switching to filtered water to see a massive difference. The leaves stopped yellowing. New buds finally opened. So let me break down everything I learned the hard way.
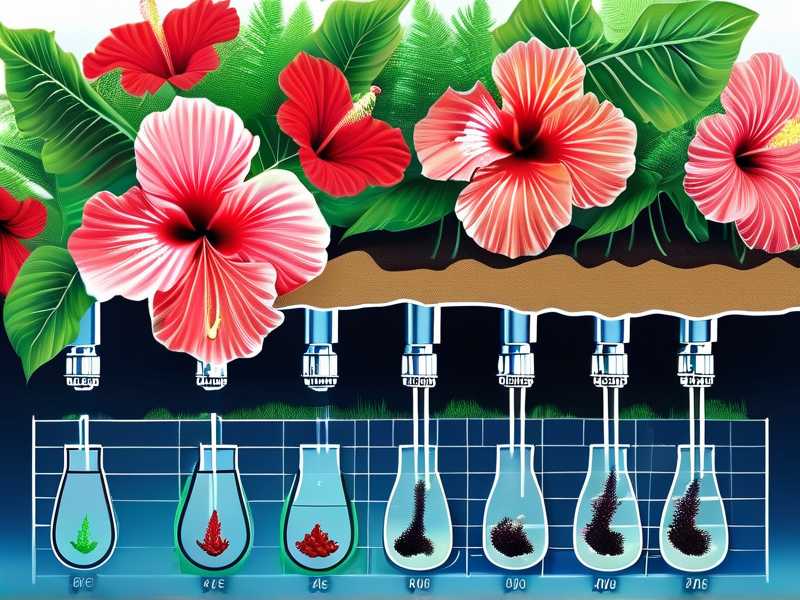
Most people don't realize that municipal tap water contains chlorine, chloramine, and fluoride. These are added for human safety, but plants hate them. The chemicals accumulate in the soil. They kill beneficial microbes. They block nutrient uptake. Your hibiscus slowly starves, even though you're feeding it regularly.
Why Tap Water Slowly Destroys Your Hibiscus
I remember standing in my kitchen, looking at my sad, drooping hibiscus. I had done everything right. Good soil. South-facing window. Consistent watering schedule. Yet the leaves kept browning at the edges. The buds kept dropping before they opened. It was frustrating.
Then I started researching. The Royal Horticultural Society (RHS) has extensive resources on container gardening and water quality. I also checked the American Horticultural Society (AHS) for their take on sensitive plants. Both organizations emphasize how important water chemistry is for indoor plants. It was an eye-opener.
Here's what happens in simple terms. Tap water has dissolved solids and chemicals. When you water your hibiscus, these compounds build up in the pot. Over time, the salt concentration in the soil rises. The roots struggle to absorb water. It's called osmotic stress. The plant looks thirsty even when you water it daily. It's a vicious cycle.
Chlorine evaporates if you let water sit overnight. That's a partial fix. But chloramine doesn't evaporate. It stays in the water. Fluoride also persists. So the "let it sit" hack only solves part of the problem. Many people use this trick and still see yellow tips on leaves. That's fluorine toxicity.
My Two-Week Experiment with Filtered Water
I decided to run a little experiment. I had two similar hibiscus plants, both in the same window. One I watered with straight tap water. The other got filtered water from my countertop filter pitcher. I observed them for two full weeks and took notes every morning.
Day one to three: nothing noticeable. Both plants looked identical. I almost gave up on the experiment. But around day four, I noticed the tap water plant had slightly duller leaves. The filtered water plant kept its natural gloss.
Day seven: the difference was clear. The tap water plant showed small yellow patches between the veins. The filtered water plant was pushing out new green growth. I was shocked, honestly.
Day ten: the tap water plant dropped two lower leaves. The filtered one opened a new bloom. That was the moment I became a believer.
Day fourteen: the tap water plant looked stressed. The filtered water plant looked lush and vibrant. Same soil, same light, same pot size. The only variable was the water. The evidence was right there.
Since that experiment, I have never used straight tap water on my hibiscus again. And here's the thing – I don't have a fancy reverse osmosis system. I just use a basic pitcher filter with activated carbon. It removes chlorine and reduces chloramine significantly. It also cuts down fluoride, though not completely. For my purposes, that was enough.
How I Filter My Water for Hibiscus
Let me give you my exact routine. It's simple, but it works.
I fill my pitcher in the evening and let it filter overnight. In the morning, I water the plants. Filtering takes time, so doing it the night before is just practical. I use room temperature water. Cold water shocks the roots, and hot water cooks them. Room temp is the sweet spot.
I also let the filtered water sit in my watering can for a few hours before using it. This allows any remaining volatile compounds to gas off. It's a double safety net. Some people skip this step, but I think it helps.
For my outdoor hibiscus, I use rainwater when I can. I have two rain barrels set up under my gutter downspouts. Rainwater is naturally soft and has no chemicals. My outdoor hibiscus thrive on it. If you don't have rain barrels, you can buy a cheap collapsible one. It pays for itself in healthier plants.
If you absolutely must use tap water, use a dechlorinator. These are sold at aquarium shops. A few drops eliminate chlorine and chloramine instantly. You can also add a bit of lemon juice to neutralize fluoride, though I haven't tried that myself. I've read about it in online forums, but I can't vouch for it personally.
The Role of Soil pH and Water Quality
Water quality affects more than just chemicals. It also impacts soil pH. Tap water is often alkaline, especially in areas with hard water. Hibiscus prefer slightly acidic soil, around pH 6.0 to 6.5. When you water with alkaline tap water repeatedly, the soil pH creeps up. The plant can't absorb iron anymore. Leaves turn yellow between the veins.
I tested my tap water pH and found it was around 8.2. My filtered water tested at 7.0. That's a huge difference for a pH-sensitive plant. I added a small amount of peat moss to my potting mix to keep the pH stable. That combination solved my yellowing leaf problem for good.
Many people blame nutrient deficiency when hibiscus leaves yellow. But it's often a water chemistry issue, not a lack of fertilizer. The nutrients are in the soil, but the plant can't access them due to improper pH. It's a common mistake. I made it myself more than once.
3 Deadly Mistakes Every Hibiscus Beginner Makes
Let me address the biggest issues I see in online plant communities. These are the errors that kill more hibiscus than any disease.
Mistake #1: Overwatering
This is the number one killer, hands down. 90% of indoor plants die from overwatering, and hibiscus are no exception. People see droopy leaves and think "needs water." So they water more. But drooping is often a sign of root rot from too much water. The roots drown. They can't absorb oxygen. The plant suffocates.
I used to water my hibiscus every single day. I thought it was a tropical plant, so it needed constant moisture. Wrong. The top two inches of soil need to dry out between waterings. Stick your finger in the soil. If it feels damp, wait another day. Simple as that.
Mistake #2: Wrong Light Exposure
Hibiscus need bright, direct light for at least six hours a day. Many beginners think they're doing fine with a north-facing window. That's not enough. The plant stretches, gets leggy, and stops blooming. It won't die immediately, but it will look miserable.
I moved my hibiscus to a south-facing window and saw dramatic improvements in two weeks. The stems got thicker, the leaves grew darker, and the plant finally produced buds. Light is just as important as water, maybe even more so.
Mistake #3: Using the Wrong Pot
This one surprised me. Beginners often pick decorative pots with no drainage holes. They water the plant, and the water pools at the bottom. The roots sit in water constantly. Root rot sets in within days.
You need a pot with drainage holes and a saucer underneath. Use a well-draining potting mix, ideally with perlite or coarse sand added. I killed my first hibiscus because I used a beautiful ceramic pot with no drain hole. It looked great on Instagram. But the plant drowned silently.
After switching to a terracotta pot with drainage, my plant rebounded. Terracotta also wicks moisture away from the roots, which is a bonus. If you love the ceramic look, use a ceramic outer pot with a plastic inner pot that has drainage. That way you get aesthetics and function.
Why Filtering Water Changed My Blooming Cycle
For the first year I had hibiscus, they bloomed maybe once or twice. I couldn't figure out why. I was fertilizing, giving them adequate light, and keeping them warm. But the blooms were few and far between.
When I switched to filtered water, something clicked. Within two weeks, I noticed more buds forming. Within a month, I had four blooms at once. That had never happened before. It was a direct result of better water quality.
Chlorine and fluoride can interfere with carbohydrate production in plants. When you remove those chemicals, the plant has more energy for flower production. It makes sense, but you don't think about it until you see the results for yourself. I was honestly amazed. My only regret is that I didn't figure this out earlier.
How to Collect and Store Rainwater for Your Hibiscus
Rainwater is the gold standard for hibiscus. It has no chlorine, no fluoride, and the natural pH is perfect. If you have space, you should absolutely collect it.
I place my rain barrel under a downspout where the roof sheds the most water. I put a mesh screen over the top to keep out leaves and mosquitoes. After a good rain, I have gallons of clean water for my plants. I store it in a sealed container in my garage. It stays fresh for weeks.
One thing to watch out for is stagnation. If you store rainwater for too long, it can grow algae or bacteria. I use mine within two weeks. If I have leftover water, I dump it on my outdoor shrubs, which don't mind it. No waste, no problems.
During the winter, I rely on filtered tap water instead. My indoor hibiscus are dormant anyway, so they need less water. I just keep the soil slightly moist, not soaked. The reduced watering also means fewer chemicals accumulating in the soil, so it's less of an issue.
The Case for Distilled Water – When to Use It
Distilled water is another option, but I use it sparingly. It has zero minerals, which is excellent for preventing chemical buildup. However, it also lacks beneficial minerals. Continuous use can cause micronutrient deficiencies over time.
I use distilled water only when I'm flushing the soil. Every few months, I run a gallon of distilled water through the pot to wash out accumulated salts and chemicals. This resets the soil environment. Then I go back to filtered water.
Another trick I learned from aquarium hobbyists is using peat moss in the water. I put a small handful of peat in my watering can and let it sit overnight. This naturally acidifies the water, bringing the pH down slightly. My hibiscus appreciate that. It's a cheap and effective hack.
Signs Your Hibiscus Is Suffering from Tap Water
You need to recognize the symptoms early. By the time I noticed, my plant was already in bad shape. Here's what to look for at each stage.
Stage one: yellowing lower leaves. The veins stay green while the rest of the leaf turns yellow. This is often iron deficiency, but it's caused by alkaline tap water, not lack of iron in the soil.
Stage two: brown leaf tips and edges. This is fluoride toxicity. It starts at the tips and spreads inward. The brown areas feel crispy and dry.
Stage three: bud drop. The plant forms buds, but they fall off before opening. This is a stress response. The plant prioritizes survival over reproduction.
Stage four: stunted growth. New leaves are tiny and deformed. The plant stops growing altogether. If you see this, your soil is probably toxic with chemical buildup.
If you catch it early, you can fix it by switching to filtered water. If you catch it late, you might need to repot with fresh soil. I had to do that once, and it took my plant months to recover. Don't wait too long.
Tools I Recommend for Testing Water Quality
You can buy a simple pH test kit at any garden center for a few dollars. I keep one on hand and test every week. It's cheap insurance.
I also use an inexpensive TDS meter (total dissolved solids). This tells me how many minerals and chemicals are in the water. My tap water reads around 250 ppm. My filtered water reads around 50 ppm. Rainwater reads close to zero. These numbers help me make decisions.
The RHS website has information on water quality for container plants. I spent a lot of time reading their articles about sensitive species like hibiscus. They recommend using stored rainwater whenever possible, which aligns with my own experience. The AHS similarly advises understanding your local water chemistry before growing certain plants.
What the Experts Say About Water Quality for Hibiscus
The RHS points out that chlorinated tap water can damage soil structure over time. It kills beneficial bacteria and fungi that help break down organic matter. Without those microbes, your soil becomes compacted. Roots can't breathe. That one fact changed how I viewed my watering routine.
The AHS emphasizes the importance of using water at room temperature. Extremes in temperature can shock the roots, causing immediate leaf drop. I used to water with cold water straight from the fridge. That was a mistake. Now I always let water sit out to reach ambient temperature.
Experts also recommend watering less frequently but more deeply. This encourages roots to grow downward, making the plant more drought-tolerant. Soaking the pot slowly and thoroughly is better than splashing a little water on the surface daily. The water quality is directly tied to the soil environment you're cultivating.
Creating a Watering Schedule That Works
I keep a simple calendar reminder on my phone. I water every three to four days in summer, every seven to ten days in winter. But this schedule is flexible. The finger test always wins. If the soil is dry two inches down, I water. If it's still damp, I wait.
I prefer morning watering. This allows the plant to absorb water throughout the day. Evening watering can lead to moisture sitting on the leaves overnight, which promotes fungal disease. Morning is better.
I also empty the saucer after watering. Standing water in the saucer is another cause of root rot. Some people forget about this, but it's essential. Ten minutes after watering, I dump the excess out. Always.
Common Questions People Ask About Hibiscus Water
FAQ 1: Can I use boiled tap water for my hibiscus?
A: Boiling removes chlorine but concentrates other minerals and salts. It can also raise dissolved solids in the water. It's better than straight tap water, but not ideal. Filtered water or rainwater is still the best choice. Boiling doesn't remove fluoride or chloramine. Use it only in a pinch.
FAQ 2: How often should I completely flush the soil?
A: Every two to three months, pour several liters of clean water through the soil until it runs out the bottom. This washes away accumulated chemicals. I do this in spring and autumn. It's a simple way to reset the soil environment. Don't forget to discard the excess water that collects in the saucer.
FAQ 3: Does the water temperature really matter for hibiscus?
A: Yes, definitely. Cold water (below 10°C) causes root shock. Hot water (above 30°C) can damage the delicate root hairs. Room temperature, roughly 20-25°C, is the safe zone. I always let my water sit out for at least an hour before watering. The plant responds with steady, healthy growth.
My Final Thoughts on Protecting Your Hibiscus
If you take nothing else from this article, remember this: your hibiscus is more sensitive than you think. Water chemistry matters. It matters as much as light and soil and fertilizer. Simple changes, like switching from tap water to filtered water, can transform your plant's health in just two weeks. I saw it with my own eyes.
Start by testing your tap water pH and TDS. Then invest in a simple pitcher filter. Let the water come to room temperature. Water deeply but less frequently. Watch your plant transform.
I would choose hibiscus for anyone asking for a beginner-friendly plant, as long as they're willing to pay attention to these details. The plant rewards you with gorgeous blooms that are worth the effort. I've never looked back.





