 bluename
If your hibiscus has roots creeping out of the drainage holes, or the soil dries out within a day, it’s time to move it to a larger pot. I recommend sizing up by just 2 inches in diameter, and you must do this in spring or early summer. I learned this the hard way after stunting a beautiful tropical hibiscus for an entire season by moving it into a pot that was way too big.
I have been growing hibiscus for over a decade now. In that time, I have killed more plants than I care to admit. But the biggest breakthrough came when I finally understood root-to-soil ratios. Most people, including myself, assume a bigger pot means a happier plant. That is dead wrong.
Here is the thing. The "one-pot-size-up" rule is not a suggestion. It is a survival requirement. When you put a small plant in a massive pot, the excess soil holds onto water like a sponge. This water has nowhere to go because the roots aren't there to drink it yet. The result? Root rot. I have lost a gorgeous ‘Cajun Sunrise’ hibiscus to this exact mistake. It looked fine for two weeks, then the leaves turned yellow and dropped overnight. When I pulled it out of the pot, the roots were brown mush.
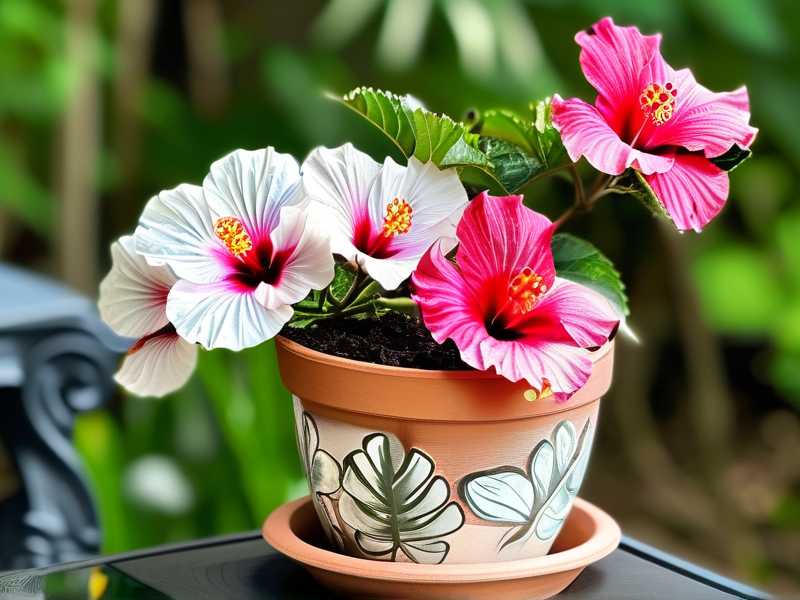
So, let me walk you through everything I know about hibiscus pot size upgrades. We will cover timing, the exact steps, and the mistakes that will kill your plant.
When Is the Right Time for a Hibiscus Pot Size Upgrade?
Timing is everything. I used to repot whenever I felt like it. That was mistake number one. Hibiscus plants are sensitive to disturbance. If you repot in the middle of the blooming cycle, you will lose all the buds. They will turn yellow and fall off. I have seen it happen to my own plants. Every single bud dropped, and I was left with bare stems for two months.
The ideal window is early spring. This is right before the active growing season kicks in. The plant is waking up from its winter rest. It stores energy in the roots. When you move it now, the roots have time to grow into the new space before the heat arrives.
You can also repot in early summer. But I try to avoid that unless the roots are seriously bound. Summer repotting stresses the plant because it is already channeling energy into blooming. You might get leaf drop or a temporary pause in flowering.
Here is a simple checklist I use to decide if it is time:
- Roots are visible through the drainage holes at the bottom.
- Soil dries out completely within 24 to 48 hours after watering.
- The plant looks top-heavy. It tips over easily.
- Water pools on the surface because the soil is so old and decomposed.
- Growth has slowed or stopped completely, even during the growing season.
If you check any two of these boxes, you need a pot size upgrade.
The Dreaded 3 Mistakes That Kill New Hibiscus Growers
I want to save you the heartbreak I went through. After killing seven hibiscus plants, I finally figured out the pattern. Here are the three fatal errors that almost every beginner makes.
① Overwatering (The Silent Killer)
Honestly, this is the big one. I cannot stress this enough. 90% of indoor plants die from overwatering. Hibiscus is no exception. They hate wet feet. They want moist, but not soggy, soil.
When you upgrade the pot size, the risk multiplies. A larger pot holds more soil. More soil holds more water. If you water on your old schedule, you will drown the roots. I did this exact thing with my first indoor hibiscus. I watered it every Sunday like clockwork. The top layer of soil looked dry, so I watered. But the bottom was still soaking wet. The roots rotted within three weeks.
The fix: Do not water on a schedule. Stick your finger an inch into the soil. If it feels dry, water. If it feels damp, wait. After I repot, I actually wait three to four days before the first watering. This allows any damaged roots to callus over.
② Light Mislocation (The Leaf Burner)
People think hibiscus loves all light. It doesn't. It loves bright, indirect light indoors. I had mine on a south-facing windowsill with full sun. The leaves got crispy on the edges, and the color faded. It looked like a sunburn. I didn't realize that indoor plants cannot handle the same direct sun intensity as outdoor plants, especially through a window, there is an amplification of heat.
The fix: Place the upgraded pot in a spot with bright but filtered light. A sheer curtain over a sunny window is perfect. If the leaves start turning pale green or yellow, move it back a bit. I have my best hibiscus about three feet away from a south-east window. It gets morning sun, then bright shade for the rest of the day.
③ Wrong Pot Choice (The Hidden Cage)
I once planted a hibiscus in a decorative ceramic pot with no drainage holes. It was beautiful. The pot was huge and shiny. I thought it looked great on my patio. But every time I watered, the water pooled at the bottom with no escape. The roots sat in water. This is the root cause of so many deaths. The pot is not a decoration; it is a vessel for root health.
The fix: Only use pots with drainage holes. Plastic nursery pots are fine. Terracotta pots are better because they are porous and allow the soil to dry out faster. I tend to use a plastic liner inside a decorative cachepot. This gives me the best of both worlds. I can lift the liner to water, let it drain, then put it back.
My Exact 2-Week Observation Process After Upgrading
Once I repot, the work is not done. The next two weeks are critical. I remember the first time I did this properly, I thought I had made a mistake. The plant looked terrible. But I stuck with my process, and it bounced back. Here is a day-by-day breakdown of what I observed, so you know what is normal and what is not.
Day 1-3: The Adjustment Phase
Immediately after the upgrade, the plant is in shock. I water it thoroughly until water drains out the bottom. Then I move it to a shadier spot. No direct sun for the first 48 hours. I do not fertilize during this time. The roots are recovering, and fertilizer can burn them.
I noticed on day two that a few bottom leaves turned slightly yellow. This is normal. The plant is shedding the oldest leaves to save energy. I do not panic and I do not water again. The top inch of soil still feels moist.
Day 4-7: The Root Exploration Phase
By day four, the soil is starting to dry on the top. I check with my finger. It feels dry at the top, but I know it is still moist an inch down. I hold off on watering.
By day five, I move the plant back to its bright spot. I see a tiny bit of new growth at the tips. This is a great sign. The roots are settling in. On day seven, I water again if the top two inches of soil feel dry. In my experience, this is usually about a cup and a half of water for a 12-inch pot. I pour it slowly around the perimeter, not right at the stem base.
Day 8-14: The Growth Phase
Around day nine, I see visible new leaves. They are small and pale, but they are there. This is the plant telling me the shock is over. I start to rotate the pot a quarter turn each day so it doesn't lean towards the light.
On day ten, I do my first light feeding. I use a liquid fertilizer diluted to half strength. This is important. You never go full strength on a freshly repotted plant. I use a balanced formula, like a 10-10-10.
By day fourteen, the new leaves have matured and turned a deep, glossy green. The plant looks more robust. The roots are now established in the new soil. I know the upgrade was successful. The plant has settled in and will start producing buds soon.
What Soil Should You Use for the Upgrade?
I get this question a lot. People think any potting mix works. It doesn't. Hibiscus needs a soil that drains fast but holds some moisture. I have tried the cheap big-box store mix several times. It always compacted and turned hard. The roots struggled.
I recommend using a lightweight, high-quality potting mix. I actually prefer a mix designed for container plants. The ingredients matter. Look for peat moss, perlite, and composted bark. I often mix in a handful of perlite to an all-purpose mix. This makes it even more airy.
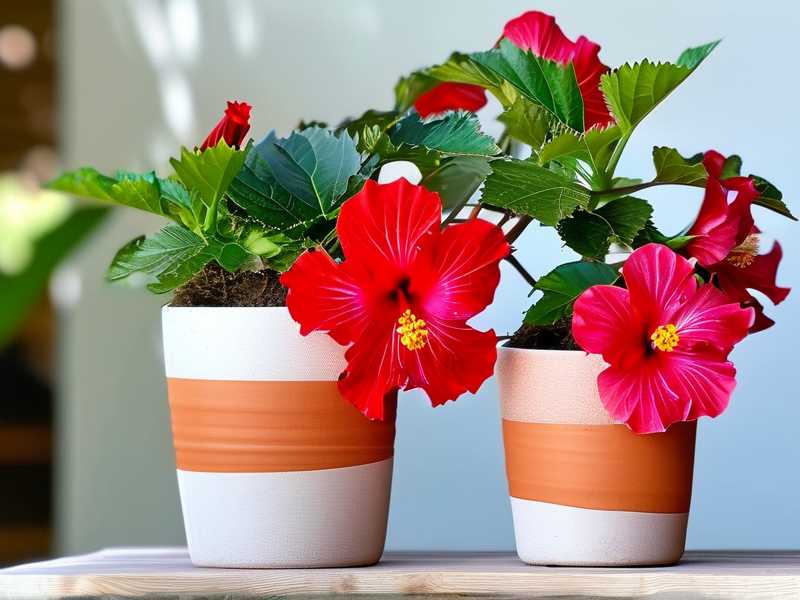
If you want to make your own, here is my ratio:
- 2 parts quality potting soil
- 1 part perlite
- 1 part orchid bark
This mix is chunky and allows oxygen to reach the roots. Root oxygenation is crucial for hibiscus. They are not like cacti; they do need moisture, but they need it to flow through.
The Step-by-Step Repotting Process
I always prepare everything before I touch the plant. This minimizes the time the roots are exposed to air. Here is my exact process:
-
Water the plant the day before. This helps the roots slide out of the old pot easier. I have found that dry roots get brittle and break off. Hydrated roots are pliable.
-
Gently remove the plant from its old pot. Tap the sides of the pot. If it won't budge, run a butter knife along the inside edge. Turn the pot upside down, holding the plant's stem base between two fingers. It should slide right out.
-
Inspect the root ball. I always do this. I look for any dark, mushy roots. Those are dead. I snip them off with clean scissors. If it is a tightly bound root ball, I scarify it. That means I use my fingers to gently pull apart the roots at the edges. This encourages them to grow outwards into the new soil.
-
Add soil to the new pot. I place about an inch of fresh mix at the bottom of the new pot. I set the root ball on top of this layer. I adjust the height so the top of the root ball sits about an inch below the rim of the pot. This gives the plant room to breathe and keeps water from spilling over.
-
Fill in the sides. I pour fresh soil around the root ball. I tap the pot on the table gently to settle the soil. I never press the soil down hard with my hands. This compacts it and removes air pockets. Air is vital for root respiration.
-
Water thoroughly. This is the first flush. The water will remove any trapped air pockets. If the soil settles too much after this, I add a little more.
Container Selection: Material Matters
I mentioned this briefly, but let's get deeper into materials. I have used plastic, terracotta, glazed ceramic, and fabric pots.
-
Plastic pots: They are light and cheap. They keep moisture in. This is great for hot climates, but dangerous for indoor growers who might overwater. I use them as liners inside nicer pots.
-
Terracotta pots: This is my personal favorite for hibiscus. The clay is porous. It wicks moisture out of the soil, allowing the root zone to dry out evenly. It helps prevent soil-borne fungus. The downside is that they dry out quickly in summer. You will water more often. But for a plant that hates wet feet, this is a good trade-off.
-
Glazed ceramic pots: They look great, but they act like plastic. They hold water. If you use these, be extra careful with watering.
-
Fabric pots (Grow Bags): These are excellent for root aeration. The fabric allows air pruning. When roots hit the edge of the bag, they stop growing and branch out. This creates a denser, healthier root system. I use these for my outdoor hibiscus in the summer. They are not the prettiest, but the plants love them.
What About Pot Size? How Big is Too Big?
Rule of thumb. You only go up 2 inches in diameter for small pots. If your plant is in a 6-inch pot, move to an 8-inch pot. If it is in a 10-inch pot, move to a 12-inch pot. Never jump 4 inches or more.
I made this mistake once. I moved an 8-inch plant into a 14-inch pot. The plant looked small and lost in the soil. It took almost three months for the leaves to perk up. The root system was too small to absorb the water in that giant soil mass. The soil stayed wet for weeks, and the roots began to sit in stagnant water. I nearly lost the plant.
The ultimate thing to understand is that the pot should match the canopy of the plant. If the plant is 18 inches tall, a 6-8 inch pot is plenty. As the plant matures and the canopy grows, you increase the pot size. Mature hibiscus plants, those over 3 years old, often do best in a 12 to 14-inch pot. They don't need much more than that. A RHS guide on container growing confirms that most shrubs, including hibiscus, prefer snug quarters. They actually bloom better when slightly root-bound.
The Role of the AHS in Understanding Growth
The AHS has long advocated for understanding the micro-environment of container plants. Their research points out that soil temperature fluctuates more in small pots than in the ground. This is why you need a pot that buffers against heat. A terracotta pot is about 5-10 degrees cooler than a black plastic pot in direct summer sun. This cooler root zone keeps the plant metabolizing nutrients properly. I noticed this myself. My terracotta plants never had the heat-stressed yellow leaves that my plastic ones did.
How to Water After the Upgrade
Watering is tricky here. Most people water too much after the repot. Here is my schedule:
- Week 1: Water once, on day 1.
- Week 2: Water when the top 2 inches of soil are dry.
I check the weight of the pot too. This is underrated. Pick up the pot. A dry pot is significantly lighter than a wet one. After a few weeks, you will know the weight difference by feel. When the pot feels light, it's time to water.
Fertilizing: Slow Down
Do not fertilize right after upgrading. The fresh potting mix has fertilizers if it's a commercial brand. The roots are also delicate. I wait two weeks before adding my own fertilizer. And I use half-strength. I use a high-potassium fertilizer to encourage blooming. The middle number in the N-P-K ratio should be lower than the first and third, or similar. I use a ratio like 17-7-28. The potassium helps with flower size and root durability.
Light Adjustments After Moving Pots
When you move a hibiscus to a bigger pot, you often move it to a different location. Bigger pots are heavier. It changes your layout. If you move it from high light to lower light, the plant will suffer. I had a hibiscus on my back deck. I upgraded to a bigger pot and moved it to the front porch because it looked better there. The front porch only got 4 hours of sun, compared to 6 hours on the deck. The plant dropped all its buds within a week.
Always try to offer the same amount of light before and after the pot upgrade. If you must move it, do it gradually. A week in a shadier spot before moving it to the new area helps it adapt.
Recognising the Signs of Trouble
Even with perfect technique, things can go wrong. Here is what I watch for:
- Yellowing lower leaves: This is normal if it's just one or two. If it's many, you are watering too much.
- Drooping leaves: This could be a sign of root damage during the repot. It usually recovers in a few days. Keep the soil slightly moist but not wet.
- Stunted new growth: The leaves stay tiny and curled. This might be a lack of light or a mineral imbalance. Check your light condition first.
- Mold on the soil surface: This means poor air circulation and overwatering. I scrape off the mold and let the soil dry out completely before the next watering.
Why You Should Skip Repotting During Winter
I know it is tempting to repot when the plant looks ugly indoors in December. Don't. The plant is in a semi-dormant state. The roots are not actively growing. If you disturb them, they can rot. The plant has no energy to heal. I tried this once because I had time off work. The plant languished for months. It finally died in February. The pot size upgrade is a spring activity. Period.
My 14-Day Wrap Up
After two weeks, my hibiscus has usually put out at least three new leaves. The root system has filled the new space. The color is a deep green. When the new growth emerges, I know it is time to resume normal care. This means consistent watering, monthly fertilization, and plenty of sun.
Looking back, my success rate with hibiscus skyrocketed when I stopped thinking about bigger pots and started thinking about the correct pot. It is all about balance.
Frequently Asked Questions
1. How long can a hibiscus stay in the same pot?
Most hibiscus need repotting every 12 to 18 months. After the first couple of years, you can slow down to every 2 years. If it is a dwarf variety, it might stay in one pot for 3 years. The growth rate dictates this. If you see roots coming out the top, you waited too long.
2. Can I repot a blooming hibiscus?
Yes, but I strongly advise against it. The plant will shed its blooms and buds due to stress. If you must do it, be extremely careful with the roots. Do not disturb them more than necessary. You should also cut back the watering immediately to prevent root shock. I only do this as a last resort, like if the pot is cracked.
3. What is the best pot material for a hibiscus indoors?
I recommend plastic or glazed ceramic for indoor use. The lower light and cooler temperatures inside make the soil dry out slower. A terracotta pot might dry out too quickly, causing the plant to stress. Match the pot to your indoor climate. If your home is warm and dry, stick with plastic. If it is cool and humid, terracotta is a good choice.





