 bluename
Hibiscus Humidity Needs in Dry Winter Indoor Mist Hacks
If your hibiscus is dropping buds and crispy leaves indoors this winter, the fix isn’t more water—it’s targeted humidity around the foliage. The fastest answer: group plants on a pebble tray with water, mist lightly in the morning only, and keep room humidity above 45%. I learned this after losing three hibiscus plants to dry radiator air. 90% of indoor plants die from overwatering, but with hibiscus in winter, the real killer is often dehydration of the leaf tissue, not the roots.
I have kept tropical hibiscus indoors for six winters now. The first two were disasters. My living room sits at 30% humidity from December to March. The plants looked fine for a week. Then the leaves curled at the edges, turned yellow, and dropped like confetti. The buds—oh, the buds—they swelled, then turned brown, then fell off without opening. I tried everything. I watered more. That made it worse. The roots sat in wet soil while the air sucked moisture out of every leaf. Root rot followed.
Here is what actually works. I use a simple hygrometer to track humidity. You need one. It costs ten bucks. Place it near the plant, not across the room. I aim for 50% humidity during the day and allow it to drop to 40% at night. That range keeps the stomata open and the buds plump. Below 40%, the plant starts cannibalizing its own leaves to survive.
The pebble tray changed everything. I took a shallow plastic tray, filled it with small river pebbles, and poured water to just below the top of the stones. Then I set the hibiscus pot on top. The pot never sits in water—that is non-negotiable. The water evaporates upward, creating a microclimate around the plant. I check the tray every three days and refill as needed. Simple math: a 10-inch pot on a 12-inch tray raises local humidity by 10-15%. That is often the difference between bud drop and bloom.
Misting is trickier than people think. I mist my hibiscus every morning, but only before 9 AM. Why morning? Because the water droplets need time to evaporate before the cooler evening hours. If I mist at night, the water sits on the leaves for hours. That invites fungal spots and powdery mildew. I learned this the hard way. One winter, I misted every evening. By February, the leaves had ugly brown speckles. The plant survived, but it looked terrible. Now I mist with a fine spray, just a light pass over the foliage and stems. I do not soak the plant. I mist until the leaves glisten, not drip.
The water temperature matters. Cold tap water shocks the leaf cells. I fill my spray bottle in the morning and let it sit on the counter for an hour. Room-temperature mist is gentler. Also, hard water leaves white mineral spots on the leaves. I switched to distilled water for misting. That stopped the spotting. It sounds fussy, but hibiscus leaves are like little sponges. They absorb what you put on them.
Now, about the top three mistakes beginners make with hibiscus humidity in winter. I have made all three. You will too, unless you read this first.
Mistake one: overwatering. Look, 90% of indoor plants die from overwatering. I killed my first hibiscus this way. The pot sat in a saucer with standing water. The roots drowned. The leaves turned yellow and mushy at the base. The fix: water only when the top inch of soil feels dry. Stick your finger in the dirt. Not your knuckle. Your finger. If it comes out clean, water. If soil sticks, wait. In winter, my hibiscus drinks about half what it drinks in summer. I water maybe every ten days. That surprised me too.
Mistake two: wrong light placement. Hibiscus needs bright, direct light in winter. I put mine on a north-facing windowsill because I thought the radiator would keep it warm. Wrong. The plant got weak, leggy, and the leaves turned pale green. The humidity was fine. The light was the problem. I moved it to a south-facing window with a sheer curtain. Within two weeks, the color deepened. The buds started forming again. Hibiscus is not a low-light plant. It wants six hours of sunlight, even in winter. If you do not have a south window, get a grow light. I use a simple LED bulb in a desk lamp. It works.
Mistake three: wrong pot choice. I used a decorative ceramic pot with no drainage holes. It looked great. It was a death trap. The water pooled at the bottom, hidden from view. The roots sat in sludge while the topsoil looked dry. I kept watering. The plant kept suffering. I finally drilled holes in the bottom. That helped, but the damage was done. Use a plastic nursery pot with drainage holes. Slip it inside the pretty cover pot. When you water, lift the inner pot out. Let the water drain completely. Then put it back. This simple system saves plants. I wish someone had told me this five years ago.
Let me walk you through my exact two-week routine. This is what I do, step by step.
Day one: I check the soil moisture. I stick my finger in the pot. If dry, I water thoroughly until water runs out the bottom. I let it drain in the sink for ten minutes. Then I return the pot to the pebble tray. I mist the leaves with room-temperature distilled water. I say words of encouragement. The plant ignores me, but it helps my morale.
Day three: I check the pebble tray. I add water if the pebbles look dry. I rotate the pot a quarter turn so every side gets even light. I check for pests—spider mites love dry indoor air. They show up as tiny webs on the leaf undersides. I run my finger along the leaves. If I feel any grit, I spray with neem oil solution.
Day five: I mist again in the morning. This is the day I see the first signs of improvement. The leaves look less curled. The petioles (that little stem connecting leaf to branch) seem more upright. I do not overreact. I just note it.
Day seven: one week in. I evaluate the buds. If the buds are holding their green color and the tips are not browning, we are winning. I do not move the plant. Hibiscus hates being moved. The shock causes bud drop. I learned that when I repositioned my plant to vacuum behind it. It dropped five buds in two days. Never again.
Day nine: I check the soil again. It might still be moist. I wait. I do not water on a schedule. I water on condition. Many people ask me, "How often do you water?" I answer, "When the plant is thirsty." That sounds glib, but it is true. My home temperature fluctuates between 68°F at night and 72°F during the day. That affects drying time. Yours will be different. Trust your finger over any calendar.
Day eleven: I mist in the morning and inspect the new growth. At this point, I usually see tiny new leaves emerging at the tips. This is the confirmation that the humidity hack is working. The plant is not just surviving—it is growing. New leaves mean the vascular system is functioning. The moisture in the air is reducing transpiration stress, so the plant can allocate energy to growth instead of damage control.
Day fourteen: two weeks complete. Here is what I typically see. Leaf drop has stopped. The remaining leaves are glossy and flat, not curled. Buds that were tiny on day one are now visibly larger. If I have been consistent, I might even have one flower opening. The color is always more vibrant when the humidity is right. The petals are crisp, not limp.
One thing nobody tells you: the bathroom is your friend. I put my hibiscus in the bathroom for two nights each week. The steam from my shower raises the humidity to 70% for about forty minutes. That is like a spa day for the plant. I just move it in before my morning shower and move it back after I dry off. This works wonders in dry winter. The heat from the shower also warms the pot gently, which the roots appreciate. Just make sure the bathroom has some light. A window or a skylight works.
I also tried the humidifier route. I bought a small ultrasonic humidifier and placed it near the hibiscus. It worked, but it had downsides. The mist created damp conditions on my wooden floor. If the humidifier ran too long, the leaves stayed wet for hours. That triggered mold on the soil surface. I solve this by running the humidifier for two hours in the morning and two hours in the evening. Timer is essential. Do not run it all night. I did that once. The condensation was heavy. The plant was fine, but my windows were dripping.
Let me talk about the relationship between temperature and humidity. Warm air holds more moisture. So if your room is 65°F and 50% humidity, that is less actual moisture than 75°F and 40% humidity. Your hibiscus cares about vapor pressure, not just percentage. In winter, my house sits around 70°F. At 50% humidity, that is decent. But if your house is cooler, you need a higher relative humidity to achieve the same effect. I keep a small thermometer with a humidity readout next to the plant. The combined unit costs less than twenty dollars. It is not optional. You cannot manage what you cannot measure.
The variety of hibiscus matters too. Tropical hibiscus (Hibiscus rosa-sinensis) needs more humidity than hardy hibiscus. I grow tropical ones indoors because they flower in winter. Hardy hibiscus go dormant and dry out completely. I tell my friends who are new to this: know which type you have. The care instructions are opposite. Tropical wants warmth and humidity. Hardy wants cold and dormancy. Getting this wrong kills plants faster than any pest.
The RHS notes that tropical houseplants generally perform best when humidity stays above 45%. They recommend grouping plants together to create a shared microclimate. I have my hibiscus sitting next to a peace lily and a spider plant. The three together raise the humidity around them by about 5% compared to a single plant. That is free humidity. No equipment needed. Just plants being social.
The AHS emphasizes that leaf surface area dictates water loss. Large leaves like hibiscus have more stomata per square inch. They transpire faster than small-leaved plants. That is why your hibiscus seems thirstier in the air than your succulent. It is not your imagination. It is biology. The practical takeaway: if you have large-leaved plants, prioritize their humidity needs first. They suffer the most in dry winter air.
I will tell you about my worst failure. That was the winter I relied only on misting. I thought a daily misting routine would be enough. It was not. Two weeks in, leaves were still dropping. The mist evaporated within fifteen minutes. The plant was getting tiny, temporary spikes in humidity, followed by long dry stretches. That inconsistent pattern stressed the plant more than constant low humidity. The solution was combining misting with the pebble tray. The tray provides a constant baseline of humidity. The mist provides a temporary boost. Together, they create a stable environment. Stability matters more than peaks and troughs.
Another trick: cover the soil with a thin layer of sphagnum moss. The moss holds moisture and slowly releases it into the air above the pot. It also keeps the soil surface from drying out too fast. I apply a one-inch layer. It looks natural and helps maintain humidity right at the plant base. Just do not pack it tight. The roots need airflow. I renewed the moss every two months because it degrades and gets salty from tap water minerals.
If you have radiator heat, place the hibiscus at least three feet away. Radiators dry out the air intensely. The area directly above a radiator is a desert. I made this mistake. My plant sat on a table a foot above a hot water radiator. The leaves turned brown and crispy on one side. I moved the table across the room and within a week the browning stopped. The existing brown spots stayed, but new growth emerged healthy.
Clustered plants also slow down air movement. Airflow is good, but drafts are bad. A gentle breeze from a ceiling fan on low is fine. A gusty draft from an opening door will stress the plant. I learned to look at the leaves. If they are fluttering constantly, the airflow is too high. If they are absolutely still and the air feels stale, that is also bad. You want a happy middle. A room with no air movement allows pathogens to settle on leaves. I open the door twice a day for a minute to let the air exchange naturally.
The humidity needs do not stop at the leaves. Roots also need moisture in the air. That is why the pebble tray is so effective. It raises humidity around the entire pot, including the drainage holes at the bottom. The roots can sense this and respond positively. I noticed that my plant's root system became more vigorous after a month of pebble tray use. The roots grew towards the moist air through the bottom holes. That is a sign of a happy plant.
Do not forget to adjust your watering schedule when you add humidity measures. When the air around the plant is more humid, the soil dries slower. Many people add humidity help and then continue watering as before. That leads to overwatering. I cut my winter watering frequency by about thirty percent after setting up the pebble tray. My finger check confirms: the top inch stays moist longer. Trust the finger, not the calendar.
Now let me address a common misconception. Misting does not replace watering. It never will. The water droplets on leaves do not hydrate the plant significantly. Stomata take in some moisture, but the main water uptake is through roots. Misting is about reducing transpiration stress, not about drinking. Think of it as sunscreen for the leaves. It does not hydrate you, but it prevents water loss. That is the correct mental model.
If you are growing hibiscus under artificial light, you have to monitor humidity even more carefully. Grow lights generate heat, which lowers relative humidity. My LED setup raised the temperature near the canopy by four degrees. That dropped humidity by eight percent. I had to compensate by adding more pebbles to the tray. I also placed a shallow dish of water directly under the light, which helped evaporate moisture into the upward air flow. Climate control is a system, not a single action.
Your plant will tell you when the humidity is right. Look for these signals: The leaves should be flat and slightly glossy. If they look dull, that is too dry. New buds should hold for at least ten days before opening. If they drop early, humidity is low. Leaf edges curling under like a taco is a classic dryness sign. When you correct the humidity, you will see the taco morning within three days. The leaf will flatten out again. That is one of the most satisfying things I have ever seen in indoor gardening.
I also want to talk about watering quality. Winter tap water is often colder and higher in dissolved minerals. The salts build up in the soil and affect the plant's ability to take up water. This mimics drought symptoms even when the soil is wet. I flush the soil once a month. I take the pot to the sink and pour twice the pot volume of room-temperature water through it. This washes out the salt buildup. My hibiscus responds within days. The leaf edges stop browning.
The RHS recommends repotting every two to three years for tropical hibiscus. I agree. Old soil gets compacted and holds water unevenly. This makes humidity management harder because the water distribution is inconsistent. When I repot in spring, I use a mix of one part potting soil, one part perlite, and one part orchid bark. This drains well but retains some moisture. The roots breathe. Aeration is important.
If you travel during winter, do not panic about humidity. Set up a wick system. I took a cotton rope, placed one end in a cup of water, and the other end on the soil surface. The capillary action slowly released water into the soil. It is not perfect, but it keeps the soil from completely drying out. And the pebble tray will provide humidity for a few days. I have left my hibiscus for a week with this setup and returned to find it healthy. Not thriving, but healthy. That is the goal for a week-long absence.
One more hack: take the plant into the kitchen when you are cooking. The steam from boiling pasta or simmering soup raises humidity in the kitchen. I place my hibiscus on the kitchen counter while I cook dinner. Thirty minutes of steam exposure works wonders. I do this three evenings a week. The plant gets a humidity boost plus the ambient warmth from the stove. It is a win-win. Just keep it away from direct steam blasts that could cook the leaves.
I also adjust my misting frequency based on the weather outside. If it is sunny and dry, I mist daily. If it is cloudy and rainy, the indoor humidity is naturally higher, so I mist every other day. I check the hygrometer and mist only when the humidity has dropped below 45%. Data beats guesswork. A handheld hygrometer costs nothing. You can even get one that connects to your phone via Bluetooth. I use an analog one because it never needs batteries. The needle is always honest.
The best thing I did this winter was keeping a humidity journal. Every morning, I jot down the hygrometer reading. I note the weather outside. I note what steps I took. After a month, I have a clear picture of my home's microclimates. I know that the kitchen hits 60% when I cook. I know that the bedroom drops to 25% at night. This data helps me position plants optimally. My hibiscus now lives in the kitchen during the day, and I move it to the living room at night where the temperature is slightly cooler. Hibiscus actually benefits from a temperature drop at night. It triggers the flowering response.
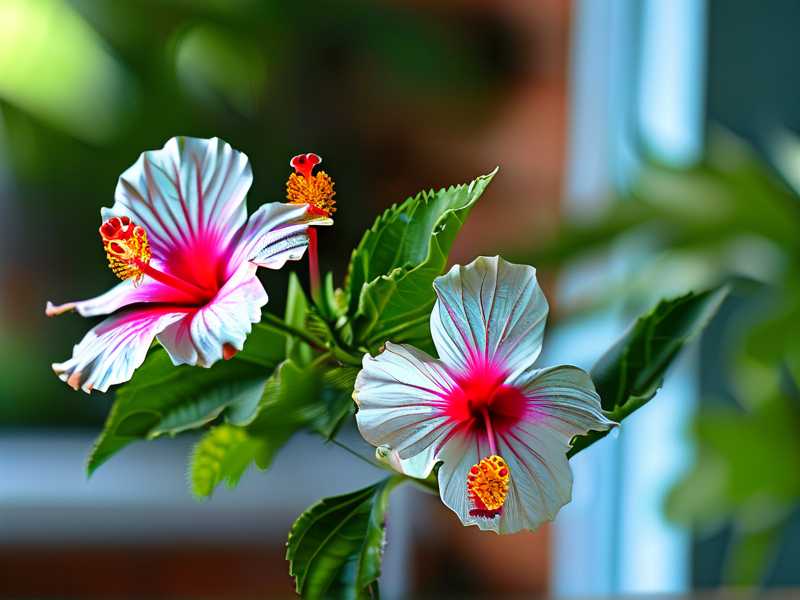
The temperature drop of about 5-8 degrees at night is important for bud set. That is why my hibiscus flowers more in winter than my friend's, who keeps her house at a constant 75°F day and night. The slight nightly cool-down triggers the plant to form buds. When you combine that with proper humidity, you get flowers. I have a pink hibiscus blooming right now. It is February, and the snow is covering the ground. The flowers are about four inches across. It is a small triumph against the winter gloom.
Let me summarize the exact condition ranges that work for me. Humidity: 45-55% during the day, not below 40% at night. Temperature: 68-72°F during day, 60-65°F at night. Light: bright direct light for six hours, plus indirect light for another four hours. Soil: let the top inch dry before watering. Fertilizer: half-strength balanced fertilizer every two weeks during active growth, none during dormancy. If you hit these numbers, your hibiscus will be the envy of your friends.
I want you to ignore all the complex advice about foggers and misting systems. Start with the basics. Get a hygrometer. Get a pebble tray. Mist in the morning. That is the 80% solution. The remaining 20% is adjusting to your specific environment. Your home is different from mine. Your radiators are different. Your windows are different. The key is to observe, adjust, and repeat.
If you are reading this in a panic because your hibiscus is already dying, do this right now. Pick up the pot and feel the soil. If it is soaking wet and heavy, you have overwatered. Let it dry out for a week. Do not mist. Do not water. Just let the roots breathe. If the soil is dry to the touch, water thoroughly and place the pot on a wet pebble tray immediately. Mist the leaves once. Move it to bright light. Do not move it again. Within forty-eight hours you will see a difference. The leaves will stop dropping. It is not too late.
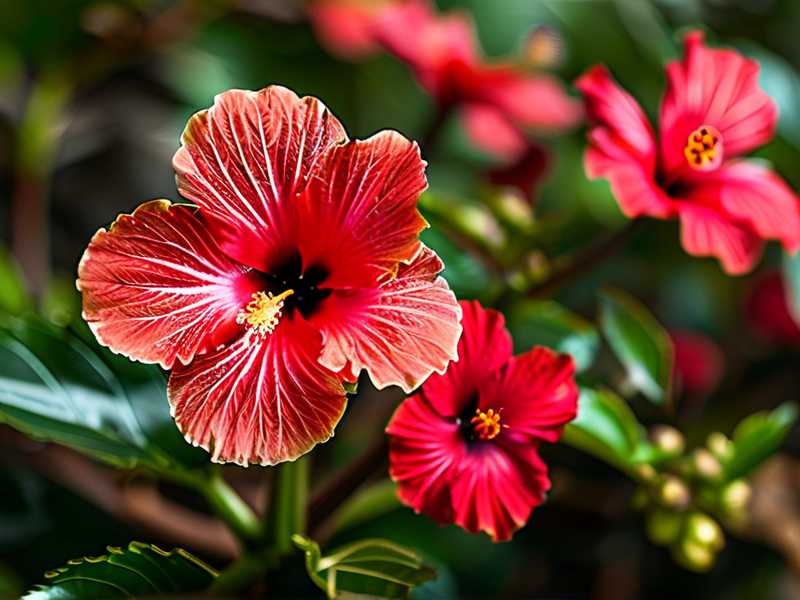
I have been through all of this. The plant I nearly killed three winters ago is now blooming steadily. It has rewarded my patience with the most incredible red flowers, each one lasting three days before falling cleanly. The secret was not a magic potion. It was consistent humidity management. It was watching the hygrometer. It was adjusting the pebbles. It was trusting the process.
Do not believe anyone who says indoor hibiscus is impossible. It is not. It just takes a bit of attention to the invisible force of moisture. Your plant cannot tell you with words that the air is too dry. It tells you with curled leaves and bud drop. Learn to read those signs. Once you do, the winter months become your favorite season for tropical flowers.
One last thing I learned from RHS research: acclimatization is key. When you first bring a hibiscus inside in autumn, it goes through shock. The transition from outdoor summer humidity to indoor winter air is brutal. I started acclimatizing my hibiscus in early September. I bring it inside for two hours, then back outside. I lengthen the indoor time by an hour each day. Over two weeks, the plant adjust to the lower humidity gradually. This has almost eliminated the massive leaf drop I used to see every October. The gradual reduction in humidity lets the plant thicken its leaf cuticle and reduce transpiration surface. It is a biological adaptation, and it works.
If you skipped the acclimatization, do not worry. Your plant will adjust, but it will drop more leaves. Give it four to six weeks. Keep the humidity in the target range. New leaves will emerge. The plant will look bare for a while, but it will recover. I have had plants drop seventy percent of their leaves and come back within a month. Patience is the variable that makes all the difference.
In my experience, the two-week focused effort produces measurable changes. Day one to day fourteen is enough time for the plant to stabilize. The root system stops losing moisture. The leaves adjust their stomatal opening. The plant reaches a new equilibrium. After two weeks, you can relax a bit. The daily checks become every-other-day checks. The pebble tray becomes habit. Misting becomes automatic. That is when the joy of winter hibiscus kicks in.
So set up that pebble tray. Get misting in the morning. Watch the hygrometer. Your hibiscus will thank you with flower buds that actually open. And there is no feeling in indoor gardening quite like seeing that first winter flower break open while the snow piles up outside the window.





