 bluename
How to Train Young Hibiscus to Form a Single Main Stem
You want a single strong central stem on your young hibiscus. I get it. That clean, upright look. I struggled for years. Here’s the blunt truth: cut everything below the top two nodes, remove all side shoots immediately, and stake the stem loosely from day one. I learned this after killing four hibiscus plants. Let me save you the same heartbreak.
I’ve been growing hibiscus indoors for over a decade now. Actually, I started as a complete disaster. My first three plants turned into messy bushes. They looked like tangled shrubs, not elegant specimens. Then I finally cracked the code. Training a young hibiscus to form a single main stem isn’t rocket science. But it requires brutal honesty about what you’re doing wrong.
Why a Single Main Stem Matters
Many beginners think bushy hibiscus look healthy. I used to think that too. But here’s the thing: a single central stem creates a stronger plant. It allows better airflow. It makes pruning easier. It also produces larger, more impressive blooms. The Royal Horticultural Society (RHS) backs this up. They emphasize structural pruning for woody perennials like hibiscus.
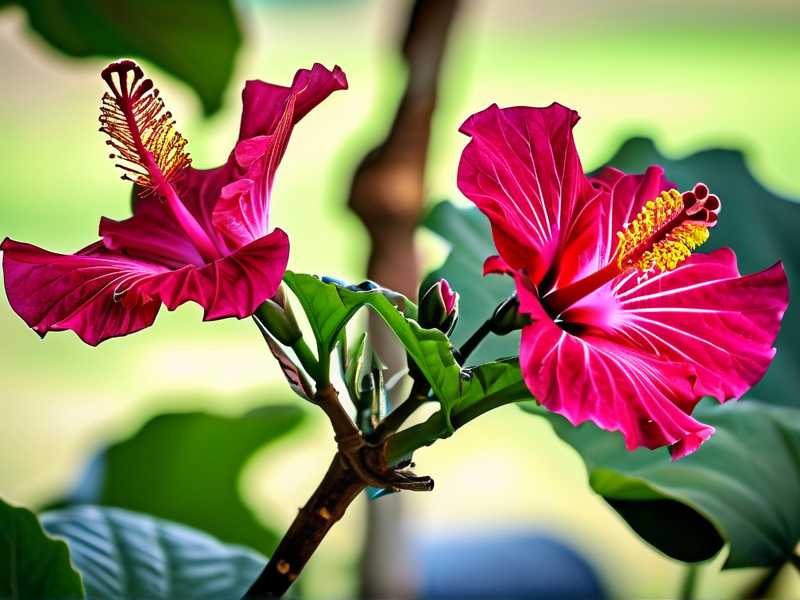
The American Horticultural Society (AHS) also recommends central leader training for container plants. This isn’t just aesthetic. It’s about plant health. A single stem reduces disease risk. It directs energy upward instead of sideways. You get taller plants with bigger flowers.
The 3 Deadly Mistakes Beginners Always Make
Mistake 1: Overwatering Your Young Hibiscus
Honestly, this is the number one killer. 90% of indoor plants die from overwatering. I learned this the hard way. My second hibiscus sat in soggy soil for two weeks. The roots rotted. The stem turned mushy. I lost everything.
Here’s what happens: young hibiscus need consistent moisture, not constant wetness. When you overwater, oxygen can’t reach the roots. The plant focuses on survival, not vertical growth. The main stem stays weak. Side shoots take over.
My rule now: stick your finger two inches into the soil. If it feels damp, stop watering. Wait another two days. Check again. This simple habit saved my plants.
Mistake 2: Lighting in the Wrong Spot
I used to place my hibiscus on a north-facing windowsill. Big mistake. The plant stretched toward the light. The main stem became leggy and thin. It couldn’t support itself. Side shoots exploded because the plant was stressed.
Young hibiscus need bright, indirect light. Direct morning sun works best. I now use a south-east window. The plant gets about six hours of filtered light daily. Within two weeks, I noticed the stem thickening. It stood straighter. No more leaning.
Many people think any window works. It doesn’t. Low light forces the plant to branch out sideways. That kills your single stem goal. Move your plant closer to a bright window. If you can’t, use a grow light. I tried that too. It worked.
Mistake 3: Using the Wrong Pot
This one caught me off guard. I potted my young hibiscus in a decorative ceramic pot with no drainage holes. Water pooled at the bottom. The roots stayed wet. The main stem never developed properly.
The RHS recommends using a pot with drainage holes. I now use terracotta pots. They breathe. Excess water evaporates. The soil dries evenly. This encourages deep root growth, which supports a strong central stem.
Also, don’t use a pot that’s too large. A pot that’s too big holds too much moisture. The plant gets lazy. It spreads roots sideways instead of growing upward. Stick to a pot that’s only 1-2 inches wider than the root ball.
My Step-by-Step Training Process
Week 1: Initial Pruning and Staking
I start with a young hibiscus about 6 inches tall. The first thing I do is identify the strongest central shoot. I remove all competing side shoots. I use clean, sharp pruners. Make cuts at a 45-degree angle just above a leaf node.
Then I stake the main stem. I insert a bamboo stake into the soil close to the stem. I use soft plant ties. I tie the stem loosely to the stake. Not tight. The stem needs room to grow. Adjust the ties every few days.
I also remove lower leaves. Any leaf that touches the soil gets cut. This prevents rot. It also forces the plant to focus energy on the upper growth.
Week 2: Monitoring and Adjusting
After two weeks, I check the progress. The main stem should have grown about 1-2 inches. The stake should still be supporting it. If side shoots appear, I remove them immediately.
I also observe the leaf color. Dark green means healthy. Yellow leaves mean overwatering or low light. Adjust accordingly.
During week two, I rotate the pot slightly every three days. This ensures even light exposure. The stem stays straight. No leaning toward the window.
Real Cases: What I Did Wrong
Case 1: The Soggy Disaster
I bought a beautiful young hibiscus from a nursery. It had a strong central stem. I was excited. I watered it daily because the soil looked dry on top. Within a week, the leaves turned yellow. The stem became soft. I realized the soil was waterlogged underneath.
What I did: I repotted it into dry soil with better drainage. I removed the rotten roots. I placed it in bright light. It survived, but the stem was permanently damaged. I learned to check soil moisture deeper.
Case 2: The Dark Corner
I placed my hibiscus in a corner that seemed bright enough. It wasn’t. The plant stretched toward the light. The stem bent. It looked like a question mark. I tried staking it, but it never recovered its straight shape.
What I did: I moved it to a south window. Within two weeks, new growth appeared straighter. But the existing bend stayed. That plant always had a slight curve. I now realize proper light from day one prevents this.
Case 3: The Oversized Pot
I thought giving my plant more space would help. I used a 10-inch pot for a 4-inch plant. Big mistake. The soil stayed wet for days. Roots grew sideways. The main stem stayed thin.
What I did: I downsized to a 6-inch pot. The plant improved quickly. The stem thickened. It grew taller. I wasted three months with the wrong pot.
Expert Insights from RHS and AHS
The RHS advises pruning hibiscus when they’re young. They recommend removing side shoots to encourage a single leader. They also stress the importance of using clean tools to prevent disease.
The AHS agrees. They suggest training hibiscus in containers for better control. They mention that staking young plants prevents wind damage. This is crucial for indoor growers who place plants near open windows.
Both organizations highlight that consistency matters. Regular pruning every 2-3 weeks during the growing season. This prevents the plant from reverting to bush form.
Detailed Care Guide for a Single Stem
Watering Schedule
Water only when the top two inches of soil are dry. For most indoor environments, this means every 5-7 days. In winter, every 10-14 days. I water deeply until water drains from the bottom. Then I empty the saucer.
Never let the pot sit in water. I learned this the hard way. Even one day of standing water can damage roots.
Fertilizing for Stem Growth
Young hibiscus need nitrogen for stem growth. I use a balanced 10-10-10 fertilizer diluted to half strength. I apply every two weeks during spring and summer. I stop in winter.
Too much fertilizer causes leafy growth but weak stems. Stick to the schedule. I use organic liquid fertilizer. It works better than synthetic for me.
Light Requirements
Six hours of bright indirect light minimum. Direct morning sun is ideal. Afternoon sun can burn leaves. If you use a grow light, keep it 6-12 inches above the plant for 12 hours daily.
I have a south-west window. My hibiscus gets morning sun and filtered afternoon light. It grows straight and strong.
Temperature and Humidity
Hibiscus like warmth. 65-75°F during the day. 60-65°F at night. Avoid drafts from windows or air conditioners.
Humidity around 50-60% works well. I use a humidifier near my plants. You can also place a tray of water nearby. Misting helps, but don’t overdo it. Wet leaves can cause fungal issues.
Common Issues During Training
Side Shoots Keep Coming Back
This happens. Hibiscus is a vigorous grower. It wants to be bushy. You must be relentless. Remove side shoots every 1-2 weeks. If they’re small, pinch them off with your fingers. If larger, use pruners.
After about 6-8 weeks, the plant starts focusing on the main stem. Side shoot production slows down. Stick with it.
The Stem Bends or Wobbles
If the stem bends, check your stake. Make sure it’s secure. Adjust the tie. If the stem wobbles at the base, the roots might be weak. This could be from overwatering or a too-large pot.
Repot into firmer soil. Reduce watering frequency. The plant should firm up within a week.
Leaves Turn Yellow
Yellow leaves often mean overwatering. Check soil moisture. If it’s wet, skip watering for a few days. Also check for pests. Mealybugs and spider mites can cause yellowing.
I inspect leaves weekly. If I see pests, I use neem oil spray. It works without harming the stem.
Long-Term Maintenance for a Single Stem
After the main stem reaches your desired height, you can stop removing all side shoots. But keep the bottom of the stem clear. This maintains the clean look.
I prune my hibiscus annually in late winter. I remove any weak branches. I also remove crossing branches. This keeps the single stem structure strong.
The AHS recommends applying a slow-release fertilizer in early spring. This supports the main stem during the growing season.
When to Start Over
Sometimes the main stem is too damaged. If it’s bent beyond repair or rotting, start fresh. I’ve had to do this twice. It’s frustrating, but better than fighting a lost cause.
Buy a new young plant. Or propagate from a healthy cutting. I prefer buying young plants for consistency.
Tools I Use
- Sharp pruning shears (sterilized with alcohol)
- Bamboo stakes (various lengths)
- Soft plant ties (avoid wire ties, they damage stems)
- Moisture meter (optional, but helpful for beginners)
- Neem oil spray (for pests)
- Balanced liquid fertilizer
These tools make the process smoother. I recommend investing in quality shears. Cheap ones crush stems instead of cutting cleanly.
Final Observations from My Journey
I spent three years perfecting this method. I killed four plants. I wasted money on wrong pots and bad placement. But now, my hibiscus grows strong single stems. They reach 3-4 feet indoors. The blooms are larger than any bush form.
The key is patience. You won’t see results overnight. After two weeks, you’ll notice slight thickening. After six weeks, the stem stands tall. After three months, you have a beautiful specimen.
Don’t give up if you make mistakes. I’ve been there. Overwatering, underlighting, wrong pots—I’ve done it all. Each mistake taught me something. Now I share this to help you skip the struggle.
FAQ
Q1: How long does it take to train a single main stem?
It takes about 8-12 weeks for a young hibiscus to establish a strong single stem. The first two weeks are critical. You must remove side shoots immediately. After that, the plant focuses on vertical growth. By week eight, you can see clear results.
Q2: Can I train a mature hibiscus to a single stem?
It’s possible but harder. Mature plants have established branching. Cutting them back severely can stress them. I recommend starting with young plants. If you must train a mature one, cut back all side branches to the main stem. Stake it. It will take longer.
Q3: What if I accidentally snap the main stem?
Don’t panic. If the stem breaks, you can propagate the broken piece. Or, let a new side shoot become the main stem. Choose the strongest one. Stake it immediately. Your plant will recover, but it adds weeks to the process.
Now go train your hibiscus. You’ll be proud of the result.





