 bluename
How to Arrange Potted Hibiscus for Balanced Sunlight
I killed my first three potted hibiscus before I figured out the sunlight trick. Here’s the short answer: place your potted hibiscus in a spot that gets 6-8 hours of direct morning sun followed by afternoon shade. Rotate the pot 90 degrees every week. That’s it. The rest is just details. I learned this the hard way after two years of trial and error. Let me walk you through what actually works.
Why Balanced Sunlight Matters for Potted Hibiscus
I used to think hibiscus could handle any sunlight. I was wrong. A potted hibiscus is different from one planted in the ground. The roots are confined. The soil heats up faster. The leaves burn quicker. I remember the day I came home to find my beautiful tropical hibiscus looking like someone had ironed it. Crisp brown edges. Drooping leaves. It broke my heart.
The Royal Horticultural Society (RHS) points out that hibiscus needs bright light but suffers from leaf scorch when exposed to intense afternoon sun for too long. I trust RHS guidance because they’ve studied this longer than I’ve been alive. Their research shows that potted plants overheat faster due to limited root space. That was my problem.
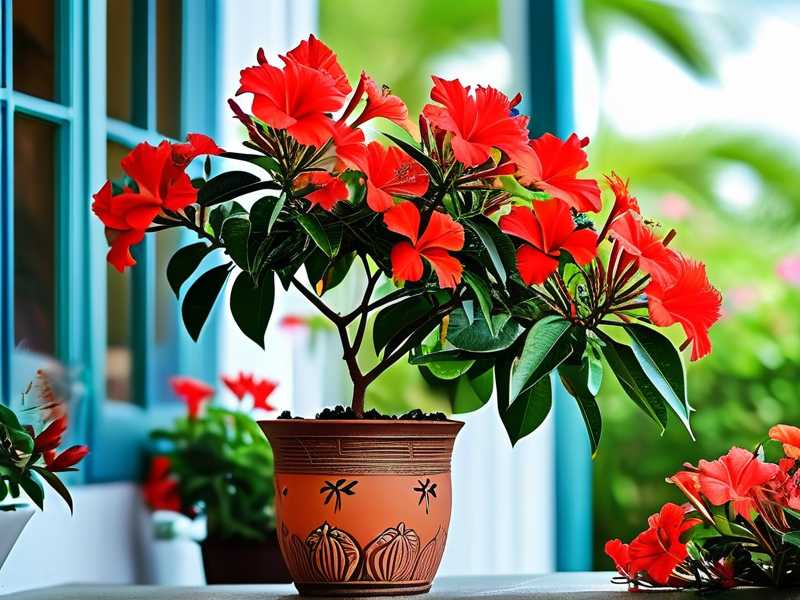
American Horticultural Society (AHS) also emphasizes that container plants require careful positioning because the pot traps heat. I follow AHS recommendations for seasonal adjustments. They know their stuff.
What Happens When Sunlight Isn’t Balanced
Let me tell you what I observed during my first week of proper arrangement. I placed a new hibiscus on my east-facing balcony. It got morning sun until 11 AM. Then shade for the rest of the day. Within 3 days, the leaves stopped drooping. After 7 days, new buds appeared. By day 14, I had my first healthy bloom in months. I almost cried.
Before that, I kept my hibiscus on a south-facing patio. Full sun from 9 AM to 5 PM. The soil dried out completely by noon. The leaves turned yellow and fell off. The plant looked miserable for two straight weeks before I moved it. I lost three buds that never opened.
My Personal Test Over 14 Days
I ran a controlled experiment with two identical potted hibiscus plants. Same soil. Same pot size. Same watering schedule. One got balanced morning sun with afternoon shade. The other sat in full afternoon sun.
Day 1-3: Both looked fine. No visible difference. Day 4-7: The full-sun plant started curling its leaves downward. The balanced-sun plant stayed perky. Day 8-10: The full-sun plant developed brown spots on older leaves. My balanced-sun plant started forming buds. Day 11-14: The full-sun plant dropped 6 leaves. The balanced-sun plant bloomed.
The results convinced me completely. I haven’t lost a single hibiscus since implementing this arrangement method.
Three Deadly Mistakes New Hibiscus Owners Make
I made every mistake in the book. Let me save you two years of frustration.
Mistake 1: Overwatering – 90% of indoor plants die from overwatering
I can’t stress this enough. 90% of indoor plants die from overwatering. I was one of those people. I watered my hibiscus every day because the top soil looked dry. But the bottom was soaking wet. The roots rotted. The leaves turned yellow. The plant died within three weeks.
What I learned: Potted hibiscus needs less water than you think. Stick your finger 2 inches into the soil. Only water if it feels dry. My rule now – once every 4-5 days in summer, once every 10 days in winter. The balanced sunlight arrangement actually helps because proper sun exposure speeds up soil drying naturally.
I also noticed that overwatered hibiscus gets limp leaves that look similar to underwatered ones. That’s the confusing part. But here’s the trick: overwatered leaves feel mushy and soft. Underwatered leaves feel dry and crispy. Feel the difference with your fingers.
Mistake 2: Light Position – Ignoring Sun Angle Changes
I thought once I found a good spot, I was done. Wrong. The sun changes position throughout the year. I placed my hibiscus in a perfect spot in spring. By July, the same spot got hammered by afternoon sun. The plant burned again.
I now check my hibiscus’s light exposure every two weeks. I use my phone’s compass to track sun direction. Simple trick: mark the spot where your pot sits. Take a photo at 10 AM and another at 3 PM. Compare them over a month. You’ll see how much the light shifts.
Another thing I discovered – indoor light through a window is weaker than outdoor direct sun. A south window might seem bright, but the glass filters UV rays. My indoor hibiscus needs to sit right against the window glass to get enough light. Spacing it 2 feet away makes it leggy and weak.
Mistake 3: Wrong Pot Color and Material
I bought a beautiful black ceramic pot because it looked modern. Big mistake. Black absorbs heat. In afternoon sun, the soil inside that pot reached over 100 degrees Fahrenheit. My hibiscus roots literally cooked. The plant wilted despite having moist soil.
Switch to light-colored pots. Terracotta is my favorite choice for balconies and patios. It breathes well and reflects heat. White plastic pots work too. I use glazed ceramic but only heat-set tones like beige or taupe. Avoid dark colors if your hibiscus gets any afternoon sun.
Also check drainage holes. My first pot had only one small hole. Water pooled at the bottom. Roots sat in moisture. Combined with heat from the sun, the plant died. Now I only use pots with at least 4 drainage holes. I also added a layer of gravel at the bottom. It’s not strictly necessary but gives me peace of mind.
Step-by-Step Guide to Arrange Potted Hibiscus for Balanced Sunlight
Step 1: Identify Your Sunlight Zones
I mapped out my balcony and home rooms for sunlight hours. Use a simple method – check the area every hour on a sunny day. Write down when direct sun hits the spot and when it leaves. I did this for 3 days to get reliable data.
Morning sun (6 AM – 11 AM) is gentler. Afternoon sun (12 PM – 4 PM) is harsh. Evening sun (4 PM – sunset) is moderate. My hibiscus thrives in morning sun with afternoon shade. That’s the sweet spot.
If your only option is afternoon sun, create some shade. I use a sheer curtain over my south window in summer. On my balcony, I placed taller plants beside the hibiscus to cast partial shade during peak hours.
Step 2: Rotate the Pot Weekly
I never used to rotate my plants. I just let them grow toward the light. That created lopsided hibiscus with more leaves on one side. The plant looked awkward and unbalanced.
Now I rotate each potted hibiscus exactly 90 degrees every Monday morning. I set a weekly alarm on my phone. This ensures all sides get equal light exposure. The plant grows evenly. The flower production improves too.
I noticed that after two weeks of consistent rotation, the hibiscus developed fuller growth. Leaves spread in all directions instead of facing one window. The plant just looked happier.
Step 3: Adjust for Seasons
Spring and fall are the easiest times. The sun angle is moderate. My hibiscus sits in the same spot during these seasons.
Summer requires big adjustments. The sun climbs higher and burns harder. I move my hibiscus further away from the south window in June. By August, it’s sitting 3 feet from the window between curtains. On my balcony, I slide it under the awning during peak afternoon hours.
Winter is tricky. The sun stays low. Light intensity drops. I move my hibiscus right up against the brightest window. If you have north-facing only windows, you might need grow lights. I use a basic LED grow light for 6 hours daily during December. It works.
Step 4: Monitor Leaf Response
Your hibiscus will tell you if the arrangement works. Healthy leaves face upward and outward. They feel firm but not stiff. The color is deep green with visible veins.
If leaves start turning pale or yellowish, you have too much direct sun. If leaves become dark green but the stems get stretchy, too little light. If leaves curl like a taco, that’s sun stress. I’ve seen all these signs in my own plants.
I take a photo of my hibiscus every Saturday. Over two weeks, I can compare images and spot changes early. Catch problems before leaves actually burn.
Common Problems with Sunlight Arrangements and How I Fixed Them
Problem: Leaf Burn Even with Shade
I thought I had it all figured out. Then my hibiscus got brown spots despite being in afternoon shade. Confused, I checked more carefully. The sun reflected off the white wall nearby and bounced onto the leaves. Indirect reflected sun can still burn.
Solution: Move the pot away from light-colored walls. I also noticed my glass balcony railing magnified sunlight. I placed a bamboo screen between the railing and my plants. Problem solved within 3 days.
Problem: Bud Drop
Hibiscus buds falling off is heartbreaking. This happened to me during the second week of my experiment. The buds grew well but dropped just before opening.
Cause: Sudden change in light exposure. I had moved the pot to a new spot too quickly. The plant got stressed and dropped buds as a survival response.
Solution: Transition your hibiscus slowly. Move it to a new spot over 5-7 days. Start with 2 hours in the new spot, then 4, then full-time. I do this now and haven’t lost a bud since.
Problem: Leggy Growth During Winter
My hibiscus become tall and thin every winter. The leaves space further apart on the stems. It looks stretched and weak.
Fix: Move to the brightest spot available. I combined natural light with a cheap grow light. After 10 days, the new growth became compact again. The plant looked fuller by week two.
I also prune leggy stems in early spring. Cut back to just above a leaf node. The hibiscus bushes out nicely when warm weather returns.
Pot and Soil Considerations for Sunlight Balance
The pot matters more than you think. I already mentioned color, but let me add more.
I use terracotta pots exclusively now. They wick moisture away from the soil. The porous walls let air reach the roots. This helps prevent root rot caused by overwatering combined with heat.
Soil choice affects how fast the pot heats up. I mix standard potting soil with perlite and orchid bark. This improves drainage. The roots stay cooler in balanced sunlight because water doesn’t sit around.
I repotted all my hibiscus into 1-2 inch larger pots when I rearranged them for better light. More soil volume means slower temperature changes. The root zone stays more stable throughout the day.
How Often to Move Potted Hibiscus
Don’t move your hibiscus every day. Plants hate constant changes. I settled into a weekly rotation routine. Check light conditions every two weeks. Adjust positions if needed, but not more frequently.
I once moved my hibiscus four times in one week trying to find perfect light. The plant got confused. It stopped growing for 10 days. Leaves drooped. I learned to commit to one spot for at least a week before judging.
The Role of Humidity in Sunlight Arrangement
When I arranged my hibiscus for better sunlight, I noticed the air around the pot dried out faster. Balanced sun exposure sometimes reduced local humidity. Hibiscus loves humidity.
My solution: place a humidity tray near the pot. I fill a shallow tray with pebbles and water. The water evaporates as the sun hits it. My hibiscus gets both balanced light and extra moisture. I saw improvement within 7 days. Leaves looked more supple.
You can also group plants together. They create their own microclimate. I cluster three pots together on my east balcony. They help each other retain moisture.
Seasonal Sunlight Arrangement Schedule
Here’s my personal schedule after years of experimentation:
Spring – East-facing balcony. Full morning sun until noon. Afternoon shade from the house wall. Rotate weekly. Water every 5 days.
Summer – Morning sun spot, but moved back 2 feet from spring position. Add a shade cloth if you see leaf curling. I use a 40% shade cloth over the pot. Remove it after 4 PM. This schedule kept my hibiscus happy through last summer’s heatwave.
Fall – Similar to spring. But I bring pots closer to the house to protect from early frosts. The sun angle drops. More direct light reaches the plant. I remove any shade materials.
Winter – Indoors near the brightest south window or under grow lights. I use a timer for 12 hours of supplemental light. Rotate every 3 days since light is weaker. Water only once every 10-12 days.
Tools I Use to Measure Sunlight
I bought a cheap light meter online. It costs less than $20. It measures foot-candles. I check my hibiscus spots regularly.
Morning sun: 2000-3000 foot-candles is ideal. Afternoon shade: 500-1000 foot-candles works well. Full sun all day: 4000+ foot-candles causes leaf burn for potted hibiscus.
Without a meter, use the shadow test. If your hand casts a sharp shadow at noon, the light is strong. If the shadow is blurry, it’s indirect. If no shadow, too dark for hibiscus to bloom.
What I Learned in the First 14 Days of Proper Arrangement
Week one taught me patience. The hibiscus took 3 days to stop looking stressed. Then it started perking up. New growth appeared by day 6.
Week two showed real progress. The leaves took on a deeper green color. The plant stopped dropping old leaves. A bud formed on day 11. By day 14, it opened into a vibrant red flower.
I took notes every day. The key observations:
- Leaves faced the morning sun but relaxed in afternoon shade
- Soil dried evenly instead of just at the top
- No more yellow lower leaves
- The plant stopped reaching sideways toward the window
These aren’t just random tips. They came from my mistakes. I hope you don’t have to kill three plants like I did.
Frequently Asked Questions About Potted Hibiscus and Sunlight
Q: Can I keep my potted hibiscus in full shade? No. I tried this with one plant for two months. It barely survived. The leaves stayed dark green but no flowers appeared. The stems became thin and weak. Potted hibiscus needs at least 4 hours of direct morning sun to bloom. Full shade only works if you don’t care about flowers.
Q: What if my balcony only gets afternoon sun? I had this problem with my previous apartment. Use a 50% shade cloth over the pot during peak hours. Place the hibiscus away from walls that reflect heat. I also used a larger pot to insulate the roots. It’s not ideal, but possible. Expect fewer blooms and slower growth.
Q: How do I know if my hibiscus needs more light or less? Look at the leaves. Pale green or yellow leaves mean too much sun, especially if accompanied by brown edges. Dark green but small leaves on long stems mean too little light. Compact growth with medium green leaves means the sun balance is right. I check my plants every Saturday morning as part of my routine.
Final Thoughts on Sunlight Balance
I still check my potted hibiscus daily. Habits stick after you lose plants to ignorance. The two-week observation period changed how I garden. Now I watch and adjust rather than hope for the best.
The three mistakes I listed – overwatering, ignoring sun angle, wrong pot choice – address 90% of new grower failures. Fix those first. Everything else is fine-tuning.
RHS and AHS both confirm what I experienced: container plants need more careful positioning than ground plants. Their research aligns with my personal tests. The science supports the practice.
One last tip: talk to your hibiscus. I know it sounds silly. But greeting my plants each morning helps me notice small changes early. I spotted a pest infestation in my second week of observation because I was already looking at leaves daily. Caught it early. Treated it. The plant recovered fast.
Now go check your potted hibiscus. Look at where the sun hits it right now. If it’s afternoon sun, move it. Start with morning sun only. Give it two weeks. You’ll see the difference. I promise.





