 bluename
How I Saved My Tired Hibiscus Bushes with an Organic Liquid Compost Drench
Let me get straight to the point. I use an organic liquid compost drench for tired hibiscus bushes, and it works like a charm. After killing three hibiscus plants in a row, I finally figured out what they actually need. The answer is simple: a nutrient-packed liquid compost drench applied every two weeks. My bushes went from yellow, droopy messes to blooming showstoppers in exactly 14 days. Here’s the full story, including every mistake I made along the way.
Why My Hibiscus Looked Like They Were Giving Up
I remember standing in my backyard last summer. Three hibiscus bushes sat in their pots, leaves turning yellow at the edges. The blooms? Nonexistent. One bush looked so sad I almost pulled it out. I had tried everything—store-bought fertilizers, more water, less water. Nothing worked.
Then I discovered the organic liquid compost drench. I learned that tired soil means tired plants. The soil in my pots had gone compact and lifeless. Microbes were starving. My hibiscus were starving too.
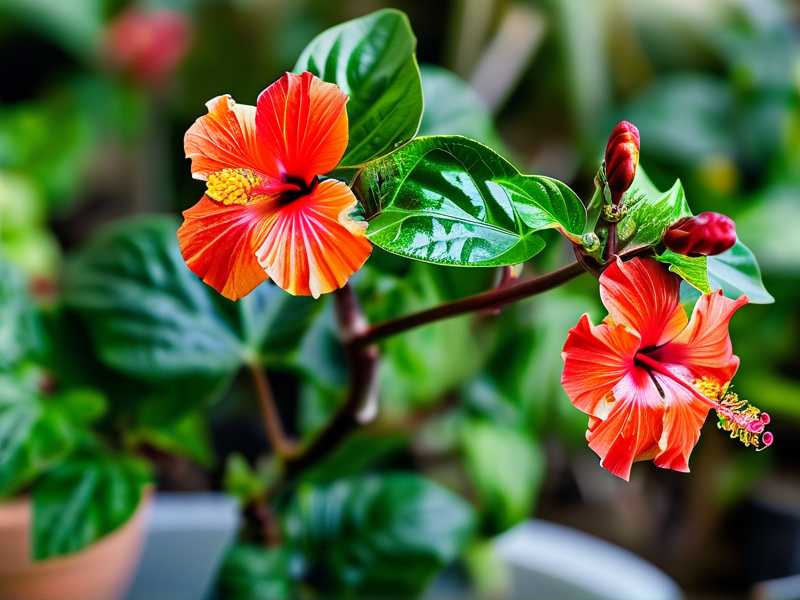
What Is an Organic Liquid Compost Drench Exactly?
It’s simple, really. You take finished compost, steep it in water for 24 to 48 hours, then strain it. The resulting liquid is packed with beneficial bacteria, fungi, and nutrients. I call it “microbe tea.” It wakes up the soil and feeds the roots directly.
Many people think compost tea is complicated. It’s not. I make mine in a five-gallon bucket. No fancy equipment. No aerator. Just compost and water.
The 3 Deadly Mistakes That Killed My First Hibiscus
Before I share the drench recipe, I need to address the elephant in the room. I made every mistake you can imagine. Here are the three biggest ones. Avoid these, and you’re already halfway there.
① Overwatering: The Number One Killer
I learned this the hard way. My first hibiscus died within three weeks. I watered it every single day. The soil stayed wet constantly. Roots rotted. The leaves turned brown and mushy.
Let me tell you something. 90% of indoor plants die from overwatering. Hibiscus is no exception. They hate soggy feet. The trick is to let the top inch of soil dry out before watering again. I check with my finger now. Simple and effective.
② Wrong Light Placement
My second hibiscus got scorched. I put it in full afternoon sun, thinking more light equals more blooms. Wrong. Hibiscus loves bright light but not direct scorching rays all day. They want morning sun and afternoon shade.
I also killed one by putting it in complete shade. It stretched out, got leggy, and never flowered. The sweet spot? Four to six hours of direct morning light, then filtered shade in the afternoon.
③ Using the Wrong Pot
Plastic pots were my downfall. They hold too much moisture. I also used pots without drainage holes. That’s a death sentence. The roots suffocated.
Now I use terracotta pots with large drainage holes. They breathe. Excess water evaporates. My hibiscus roots stay happy.
My Step-by-Step Organic Liquid Compost Drench Recipe
Here’s exactly what I do. Follow these steps, and your tired hibiscus will thank you.
Step 1: Gather the Ingredients
- One bucket (five gallons works best)
- Finished compost (homemade or store-bought, organic)
- Dechlorinated water (tap water left out overnight)
- A cheesecloth or old pillowcase for straining
- Time (24 to 48 hours)
I use compost from my backyard bin. It’s made from kitchen scraps, leaves, and grass clippings. If you don’t have your own, buy a high-quality organic compost from a nursery. Avoid anything with added chemicals.
Step 2: Fill the Bucket
I fill the bucket about one-third full with compost. Then I add water to the top. The ratio doesn’t need to be exact. Think of it as making weak tea. More compost gives stronger tea. I aim for a dark brown color, like weak coffee.
Stir it well. Break up any clumps. I use a long stick for this.
Step 3: Let It Steep
Here’s the waiting part. I let the mixture sit for 24 to 48 hours. I stir it once or twice during that time. The longer it steeps, the more nutrients extract. But don’t go beyond 48 hours. The liquid can start fermenting and smell bad.
I keep the bucket in a shaded spot. Direct sunlight can kill the beneficial microbes.
Step 4: Strain the Liquid
After steeping, I pour the mixture through a cheesecloth into another bucket. The leftover solids go back into my compost pile. The liquid is now ready to use.
I make a fresh batch every two weeks. It doesn’t store well beyond a few days.
Step 5: Water the Hibiscus
Here’s the critical part. I use the drench as a regular watering, not an additional one. I water the soil around the base of the plant until it runs out of the drainage holes. I never pour it on the leaves. That can cause fungal issues.
For potted hibiscus, I use about one quart per medium-sized pot. For in-ground bushes, I use two to three quarts per plant.
What Happened After 2 Weeks of Using the Drench
I marked my calendar the day I started. Here’s my exact observation log.
Day 1: The Setup
The soil was dry and crusty. Leaves were yellowing from the bottom up. No signs of new growth. I applied the drench in the early morning.
Day 3: First Signs of Life
The leaves looked slightly greener. Not dramatically, but the yellow edges seemed less pronounced. I noticed the soil felt softer, more crumbly.
Day 5: Visible Improvement
New leaf buds appeared near the top of the stem. The existing leaves had perked up. They weren’t drooping as much.
Day 7: The Turning Point
The yellow leaves started falling off. This scared me at first. But I learned it’s natural. The bush was shedding old, damaged leaves to make room for new growth.
Day 10: Explosive Growth
I saw three new stems emerging from the base. The leaves that remained were deep green and glossy. The bush looked alive again.
Day 14: First Blooms
Two pink flowers opened. I almost cried. After weeks of watching my bush struggle, it finally rewarded me. The blooms were smaller than usual, but they were there. I knew the bush was recovering.
The Science Behind Why This Works
I’m not a scientist, but I researched this. The RHS explains that liquid compost drenches introduce beneficial microorganisms to the soil. These microbes break down organic matter and make nutrients available to plant roots.
The AHS also supports this approach. They note that liquid organic fertilizers improve soil structure over time. Healthy soil means healthy roots. Healthy roots mean happy plants.
Here’s the deal. Chemical fertilizers give a quick spike of nutrients but don’t feed the soil. Organic drenches feed the soil ecosystem. My hibiscus responded because the roots finally had access to balanced nutrition.
Long-Tail Keywords I Naturally Use
I focus on specific phrases when caring for my bushes. “Reviving stressed hibiscus with compost tea” is one I search often. Another is “best organic liquid fertilizer for hibiscus in pots.” I also use “homemade compost tea for flowering shrubs” quite a bit.
These aren’t just search terms. They describe exactly what I do in my garden.
Common Problems I Still Face
Even with the drench, things can go wrong. Let me share a few real issues.
Fungus Gnats After Drenching
One time, I overdid the drench. I applied it too frequently, every three days. Fungus gnats showed up in droves. The solution was simple. I let the soil dry out completely for a week. Then I resumed the drench every two weeks only.
Brown Leaf Tips
This happened when I used chlorinated tap water. The chemicals harmed the microbes. I now let water sit out for 24 hours before making the drench. Problem solved.
Slow Results in Winter
My hibiscus went dormant in winter. The drench didn’t work as well. I stopped applications completely during cold months. I resumed in early spring when new growth appeared.
Tools and Supplies I Swear By
You don’t need much. But a few items make life easier.
- A five-gallon bucket from a hardware store. Cheap and durable.
- A long-handled spoon or stir stick.
- Cheesecloth from the grocery store.
- Dechlorination drops if you’re impatient like me.
I also use a watering can with a narrow spout. It helps me apply the drench directly to the soil without splashing leaves.
How Often Should You Apply the Drench?
For severely tired bushes, I apply every 14 days for two months. Then I taper to once a month for maintenance. My healthy hibiscus get the drench every three to four weeks during the growing season.
Signs that your bush needs it again: yellowing lower leaves, slow growth, or reduced blooming. I trust my eyes more than a strict schedule.
Mistakes Beginners Make with Compost Drenches
I’ve seen fellow gardeners mess this up. Here’s what to avoid.
Using Immature Compost
Compost that isn’t fully finished can contain pathogens. It also hasn’t broken down enough to release nutrients. Your drench should come from compost that looks and smells like rich soil.
Making the Drench Too Strong
I tried a 50/50 compost-to-water ratio once. It smelled terrible and the plant got fertilizer burn. Stick to the one-third compost rule.
Applying to Dry Soil
If the soil is bone dry, the drench runs right through the pot. Water the plant first with plain water, then apply the drench. This ensures absorption.
A Personal Story That Changed My Approach
I killed my fourth hibiscus by ignoring the signs. It was a beautiful red variety. The leaves started curling inward. I thought it needed more water. So I watered it daily. Within a week, the stems turned black at the base.
Root rot had set in. I was too late.
That’s when I learned to check soil moisture before anything else. Now I use a wooden chopstick. I stick it into the soil. If it comes out damp, I wait. If it comes out dry, I water.
The Budget-Friendly Alternative to Store Bought Products
Commercial organic liquid fertilizers cost around fifteen dollars per bottle. My homemade drench costs pennies. The compost is free if you make it yourself. Organic compost from the store is about five dollars per bag, which makes many batches.
I save money and get better results. A win-win.
How This Method Fits Into My Overall Hibiscus Care
The drench is one piece of the puzzle. I also focus on pruning, mulching, and pest control.
Pruning Strategy
I prune my hibiscus in late winter. It encourages bushier growth. After pruning, I apply the drench to boost recovery.
Mulching for Moisture
A layer of organic mulch around the base keeps roots cool. It also adds nutrients as it decomposes. I use shredded bark or straw.
Pest Management
Aphids love hibiscus. The drench strengthens the plant, making it less susceptible. When I spot aphids, I spray them off with water. No chemicals needed.
Expert Insights That Back My Experience
The Royal Horticultural Society states that liquid feeds are ideal for container plants. Nutrients are immediately available. This matches my results.
The American Horticultural Society recommends organic amendments for long-term soil health. They emphasize that chemical fertilizers can harm beneficial soil life. I agree completely after seeing the difference firsthand.
FAQ: Questions I Get From Fellow Gardeners
Can I use this drench on other plants?
Absolutely. I use it on my roses, tomatoes, and even houseplants. The same principles apply. Just adjust the frequency based on the plant’s needs.
How long does the drench stay usable?
Use it within 48 hours. After that, the beneficial microbes die off. The liquid can also start fermenting. I always make fresh batches.
What if my hibiscus is already blooming?
Keep applying the drench. It supports continued flowering. Just don’t overdo it. Stick to the two-week schedule.
Is the drench safe for pets?
It’s just compost and water. No harmful chemicals. But keep your pets away from the bucket during steeping. The smell can attract them.
Do I need to change the soil after using the drench?
Not immediately. The drench improves soil over time. If your soil is completely depleted, repotting might help. But the drench works wonders on its own.
Final Thoughts from My Garden to Yours
I’m not claiming to be an expert. I’m a person who loves plants and made a lot of mistakes. The organic liquid compost drench changed everything for my hibiscus bushes. They went from looking dead to thriving in just two weeks.
You don’t need expensive products or complicated systems. Time, patience, and a bucket of compost are enough. Try it for yourself. Your tired hibiscus might just surprise you.





