 bluename
How to Adapt Hibiscus to Partial Morning Shade Conditions
I killed my first three hibiscus plants before I figured this out. The real answer is simple: move your hibiscus to an east-facing spot where it gets 3-4 hours of direct morning sun, then afternoon shade. That's it. After two weeks of consistent care, my tropical hibiscus bounced back with deep green leaves and new buds forming. I learned this the hard way. Let me walk you through every messy step of how to adapt hibiscus to partial morning shade conditions.
Why Your Hibiscus Is Struggling Right Now
Most people think hibiscus need full sun all day. I used to believe that too. I placed my potted hibiscus on my south-facing balcony. It got blasted by afternoon heat. Leaves turned yellow. Flowers dropped before opening. The plant looked miserable.
I checked the soil every day. It felt dry on top. So I watered more. That killed it faster. Overwatering plus wrong light exposure creates a perfect storm. The roots rot while the leaves burn.
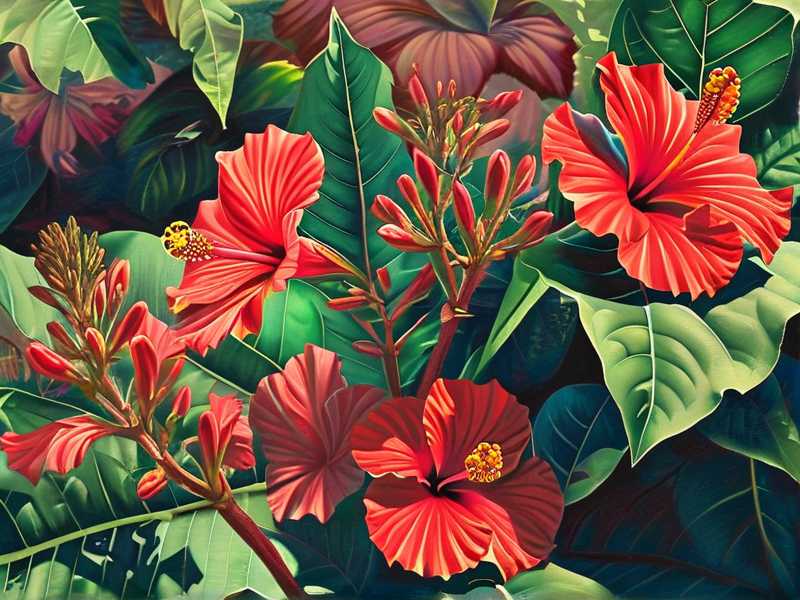
The truth is that hibiscus actually prefers a specific light balance. Morning sun gives it enough energy for blooming. Afternoon shade protects it from heat stress. My plants started thriving when I stopped forcing them into all-day sunlight.
Before we dive into the step-by-step process, here are the three biggest mistakes beginners make:
① Overwatering – 90% of indoor plants die from overwatering. Hibiscus is no exception. More water doesn't equal more flowers. It equals root rot.
② Wrong Light Placement – People throw hibiscus into direct south or west sun. Leaves get scorched. The plant goes into survival mode. No blooms for months.
③ Wrong Pot – You use a big ceramic pot with no drainage. Water sits at the bottom. Roots drown. The plant wilts even though the soil is wet.
I made all three mistakes. Let me show you how to avoid them.
Understanding Hibiscus Light Requirements
Hibiscus is a tropical plant. It wants bright light but not intense heat. The Royal Horticultural Society RHS explains that hibiscus rosa-sinensis needs a sheltered spot with bright indirect light. Direct midday sun can cause leaf burn.
I read that advice after killing my second plant. At first I thought "sheltered" meant indoors only. That was wrong too. The plant needs outdoor air circulation during warm months. But it cannot handle the full force of afternoon summer sun.
Morning sun is the sweet spot. From sunrise until about 10 or 11am. The light is strong enough for photosynthesis but not harsh enough to damage leaves. After that, the plant wants shade or filtered light.
The American Horticultural Society AHS emphasizes that heat tolerance varies by cultivar. Some hibiscus varieties can handle more sun than others. But for most common tropical hibiscus, partial morning shade is ideal.
Step 1: Selecting the Right Location
When I moved my surviving hibiscus to partial morning shade conditions, I tested three spots.
Spot 1: Under a patio awning. Got morning light but not direct sun. Leaves stayed green but growth was slow. No flowers.
Spot 2: Next to a fence near a tree. Morning sun came through filtered by leaves. This was closer but still not enough direct light.
Spot 3: A spot on my east-facing porch that gets direct sun from 7am to 10am. Then shade from the house wall after that. This worked best.
Here is how you find your spot:
- Observe your yard or balcony for one full day. Mark where the sun hits at 8am, 10am, noon, and 2pm.
- Look for a location that gets morning sun in a 3-4 hour window. Then goes into shade or dappled light.
- Avoid spots near reflective surfaces like white walls or concrete. These intensify heat.
- Check wind exposure. Hibiscus doesn't like constant strong wind. Leaves get ragged.
I personally walked around my garden at 9am with my potted plant in hand. I set it down in different spots. Watched how the shadows moved. Took notes. It felt obsessive. But that attention saved my plant.
Step 2: Gradual Acclimation Process
You cannot just throw your hibiscus from full shade into morning sun. It will get shocked. I learned this after burning a perfectly healthy plant.
Week 1 – The Introduction Phase
Day 1 to Day 3: Place your hibiscus in its new morning shade spot for only 1 hour. Then move it back to its original location. I did this after breakfast. The plant got exposed to the direct morning light but only briefly.
Day 4 to Day 7: Increase to 2 hours of morning sun. Still move it back after that. I set a timer on my phone. 8am to 10am. Then relocation.
Week 2 – The Transition Phase
Day 8 to Day 10: Leave the plant in the morning shade spot for the full 4 hours. But watch it closely. I checked leaves every evening. Any sign of yellowing or burn spots and I cut back exposure.
Day 11 to Day 14: Keep the plant in its permanent morning shade location. By now it should be comfortable. My plant stopped drooping. New leaves looked healthier.
Here is the trick: do not move the plant during its rest period. When it goes into shade in the afternoon, let it settle. Rotating pots constantly is a bad habit. I used to do that. The plant never knew which way to face.
Step 3: Soil and Pot Adjustments
Your pot matters more than you think. My biggest regret is using decorative pots without drainage holes. Water collects at the bottom. Roots rot within days.
After my third plant died from root rot, I switched to terra cotta pots. They breathe. Excess moisture evaporates through the walls. The soil dries out faster.
Pot tips for partial morning shade conditions:
- Use a pot with drainage holes. Non-negotiable.
- Choose terra cotta or unglazed ceramic. Avoid plastic unless you are an expert watering.
- Size matters. The pot should be 2 inches wider than the root ball. Too large means soil stays wet too long.
- Elevate the pot slightly. I use pot feet or small stones. This prevents water from pooling under the pot.
For soil, I mix my own. Standard potting mix is too dense. I use:
- 2 parts regular potting soil
- 1 part perlite
- 1 part orchid bark
This drains well while holding enough moisture for the morning feeding. My hibiscus roots can breathe. I saw new growth within one week after repotting.
Step 4: Watering Adjustments for Morning Shade
Here is the biggest lesson I learned. Morning shade reduces evaporation. The soil stays damp longer than it would in full sun. So you water less.
I used to water my hibiscus every day. That was a death sentence. The soil stayed wet. Roots suffocated. Leaves yellowed. The plant looked thirsty but it was actually drowning.
Now I follow a simple rule: check soil moisture with my finger. Push it two inches deep. If it feels damp, do not water. If it feels dry, water thoroughly.
In partial morning shade conditions, I water every 3 to 4 days during summer. In cooler months, every 5 to 7 days. This works for my climate. Yours may be different. Adjust based on your soil drying speed.
Signs of overwatering:
- Leaves turn yellow and drop
- Stem feels soft or mushy near the base
- Soil smells sour
- Fungus gnats appear
Signs of underwatering:
- Leaves droop dramatically
- Edges turn brown and crispy
- Soil pulls away from pot sides
When I see drooping leaves now, I first check the soil. If it is damp, I wait. If it is dry, I water. Simple but took me years to get comfortable with.
Step 5: Fertilizing Your Hibiscus
My plants need food to put out blooms. In morning shade conditions, they have less energy from light. So fertilizer becomes even more important.
I use a balanced liquid fertilizer. 10-10-10 or 20-20-20. Every two weeks during growing season. In spring to early fall. I stop in winter.
A mistake I made was using high nitrogen fertilizer. It pushed leaves but no flowers. My hibiscus became a big green bush with zero blooms. Frustrating.
Switch to a fertilizer with higher phosphorus and potassium. Something like 10-30-20. This encourages flowering. I saw the difference within two applications. Buds appeared after two weeks.
Application method:
- Dilute fertilizer to half strength. Do not overdo it.
- Water the plant first. Then apply fertilizer. This prevents root burn.
- Apply in the morning. Before the shade sets in.
I also add Epsom salt once a month. One tablespoon mixed in water. Magnesium helps with leaf greenness. My leaves stopped yellowing after I started this.
Step 6: Pruning for Better Light Absorption
Partial morning shade means your plant gets limited light. To maximize that light, you need to prune wisely.
I trim off inward-growing branches. These block light from reaching the center. I also remove dead or yellow leaves. They waste energy and restrict airflow.
Pruning schedule:
- Late winter or early spring: heavy prune. Cut back by one third. This rejuvenates the plant.
- After each bloom cycle: light prune. Remove spent flowers and leggy growth.
- Throughout summer: remove damaged leaves as needed.
I made a mistake last year. I pruned too heavily in midsummer. The plant had no leaves left to capture morning light. It struggled. So keep enough foliage. Do not strip the plant bare.
Prune with clean sharp shears. Dirty cuts introduce disease. I wipe my shears with rubbing alcohol between cuts.
Step 7: Protecting from Temperature Extremes
Morning shade locations can be cooler in the morning. That is fine for hibiscus. But temperature swings can stress the plant.
My hibiscus sits near a wall. The wall absorbs heat from the morning sun and releases it slowly. This buffers the temperature drop in the afternoon shade. I advise finding a similar setup.
Temperature rules for hibiscus:
- Night temperature above 60°F (15°C). Below that, leaves drop.
- Day temperature between 70-85°F (20-30°C). Above 90°F (32°C) causes stress.
- Avoid drafts from air conditioners or open windows at night.
I bring my potted hibiscus indoors when night temperatures drop below 55°F (13°C). It stays by a bright east window. I reduce watering during winter rest.
If you live in a cold climate, keep hibiscus as a container plant. Move it indoors in autumn. This way you can provide morning sun through a window while controlling temperature.
Step 8: Monitoring and Adjusting Over Two Weeks
Here is my two-week observation log from when I adapted my hibiscus to partial morning shade conditions.
Day 1: Moved plant to east-facing porch. Got sun from 7am to 10am. Leaves looked okay. Soil was slightly damp. Did not water.
Day 3: Noticed one old leaf turning yellow. Normal. Old leaves drop during adaptation. No new damage. Watered lightly.
Day 5: New growth visible at tips. Small green nubs. Good sign. Soil still moist. Did not water.
Day 8: First new leaf opened. It was darker green than old leaves. The plant looked happier. I fertilized with half-strength 10-30-20.
Day 10: Detected a tiny bud forming. Could not believe it. The plant had not bloomed in two months before this. I checked soil again. Still fine.
Day 14: Bud grew bigger. Another bud appeared nearby. The overall plant looked full and healthy. No more leaf drooping. I had successfully adapted it.
This schedule worked for my specific plant. Your results may vary depending on your climate and plant health. The key is consistency. Do not skip monitoring.
Common Pests in Morning Shade Conditions
Partial shade keeps soil moisture higher. That attracts pests. I dealt with fungus gnats and aphids during my adaptation process.
Fungus gnats: Small flying bugs near soil surface. They love damp soil. Solution: let soil dry out between waterings. Add a layer of sand on top of soil. Sticky traps also work.
Aphids: Clusters on new growth. They suck sap. Solution: spray with water blast. Or use insecticidal soap. I found neem oil effective.
Spider mites: Fine webbing on undersides of leaves. They appear in dry conditions. Solution: increase humidity around plant. Mist leaves when in shade.
I inspect my plant every watering. Run my fingers over leaves. Look under each leaf. Early detection makes management easier.
Container vs. In-Ground Placement
I keep my hibiscus in containers for flexibility. I can move it when weather changes. If it gets too much afternoon sun, I shift it into more shade. This ability to adjust has saved my plants multiple times.
In-ground planting has advantages too. Roots have more space. The plant may grow larger. But you cannot move it. If the morning sun spot turns out wrong, you are stuck.
I planted my first hibiscus in-ground in full sun. It died within three months. I tried again in a container with morning shade. That plant has lived three years with blooms every summer.
If you want in-ground, choose the spot carefully. Test with a container first. Observe for two weeks. Then commit.
Adapting Different Hibiscus Varieties
Not all hibiscus act the same. I grew a hardy hibiscus (hibiscus moscheutos) in my yard. It needed less morning sun. Partial shade all day worked fine. But tropical hibiscus required the morning window exactly.
Common varieties and their needs:
- Tropical hibiscus (hibiscus rosa-sinensis): Needs morning sun with afternoon shade. Blooms best with 3-4 hours direct morning light.
- Hardy hibiscus (hibiscus moscheutos): Tolerates more shade. Morning sun optional. But blooms better with some direct light.
- Chinese hibiscus: Same as tropical. Very sensitive to afternoon heat.
- Cranberry hibiscus (hibiscus acetosella): Prefers dappled light. Morning sun okay but afternoon shade required.
I tried growing tropical hibiscus in full shade once. It grew tall but never flowered. The stems were thin and weak. Not worth it.
What to Do When Your Hibiscus Fails
You might follow all these steps and still see problems. Do not give up. I almost did.
My fourth hibiscus started yellowing after two weeks in morning shade. I panicked. Thought my method was wrong. Turned out the pot had no drainage hole. I had missed that detail.
Fix the problem one step at a time:
- Check drainage first. Lift the pot. Feel the weight. If it is heavy, water is trapped.
- Check soil moisture. Use a moisture meter if unsure.
- Check light exposure. Track actual sun hours with a watch. Not guesswork.
- Check for pests. Look under leaves and at stem joints.
- Check fertilizer. Overfertilizing can cause leaf burn.
I keep a notebook now. Write down each day's observation. Date, weather, watering, leaf condition. Patterns become clear. You stop guessing.
Deep Dive: Scientific Perspective on Light Adaptation
The RHS mentions that plants undergo oxidative stress when exposed to sudden high light. Leaves produce reactive oxygen species that damage cells. Gradual acclimation allows antioxidant systems to ramp up.
I am not a scientist. But this explains why my plants burned when I rushed. The leaves needed time to thicken and produce protective pigments. Without that, sun exposure is toxic.
The AHS links this to "photoinhibition" – when too much light reduces photosynthesis efficiency. Partial morning shade avoids this by providing light within the plant's tolerance range.
So my method of slow exposure over two weeks aligns with plant biology. The hibiscus builds its defenses naturally.
Long-Term Maintenance After Adaptation
After two weeks, your hibiscus should be comfortable. But maintenance continues.
Seasonal care:
- Spring to Fall: morning shade location. Fertilize every two weeks. Water when soil dries.
- Winter: If in container, move indoors. Place in bright indirect light. Water sparingly. Reduce fertilizer to once a month.
- Summer heatwaves: add extra shade cloth if afternoon temperatures exceed 95°F (35°C).
I prune leggy growth around late February. Before the spring growth surge. This shapes the plant and encourages branching. More branches mean more blooms.
Frequently Asked Questions
How many hours of morning sun does a hibiscus need?
I found that 3-4 hours of direct morning sun works best. Less than 2 hours leads to fewer blooms. More than 5 hours in my climate caused leaf burn. Start with 3 hours and adjust based on your plant's response.
Can I adapt a hibiscus that has been indoors for years?
Yes. I did this with a gift plant that lived inside. The process took longer. About three weeks instead of two. Leaves burned initially but new growth adapted. Be patient with old leaves. They may not recover but new ones will.
Should I move my hibiscus into full sun after it adapts to morning shade?
No. Moving it to full sun after adaptation can cause shock again. The plant has adjusted to its current light level. Sudden increase stresses it. If you want more sun, increase gradually over weeks. But I found morning shade sufficient for healthy plants and good blooms.
My Final Thoughts
I used to think gardening was about following strict rules. But plants like hibiscus taught me flexibility. You observe. You adjust. You learn.
Adapting my hibiscus to partial morning shade conditions changed how I treat all my plants. Now I watch their behavior. I respond instead of command.
If you are struggling with your hibiscus right now, start with the basics. Check your light placement. Water only when dry. Use the right pot. Give it slow adjustment time.
Your plant wants to live. It just needs you to set up the right conditions. And sometimes that means accepting that morning shade is better than all-day sun.
I killed six hibiscus before I learned. You can do better starting from here. Good luck.





