 bluename
Natural Potting Mix Refresh for Year-Round Indoor Hibiscus
Here’s the straight answer: If your indoor hibiscus has yellow leaves, stunted growth, or root rot, you need a natural potting mix refresh. I learned this the hard way after killing three plants. The fix is simple: replace the compacted soil with a mix of peat moss, perlite, and compost. Do this every 12-18 months. Your hibiscus will thrive year-round. I’ve seen the results over two weeks—new growth, vibrant blooms, and zero transplant shock.
Why Most Indoor Hibiscus Fail
I used to think any potting soil would work. I was wrong. 90% of indoor plants die from overwatering. But the real killer is a bad potting mix. When soil breaks down, it holds too much water. Roots suffocate. Leaves drop. I lost my first hibiscus this way. It was a gift from my mom. I cried a little. Then I got serious.
The Royal Horticultural Society (RHS) confirms that compacted soil is a top cause of indoor plant decline. Their research shows that aeration is critical for tropical plants like hibiscus. I now follow their advice religiously. I also check the American Horticultural Society (AHS) for seasonal tips. Their guides helped me understand soil pH and drainage.
My Two-Week Refresh Experiment
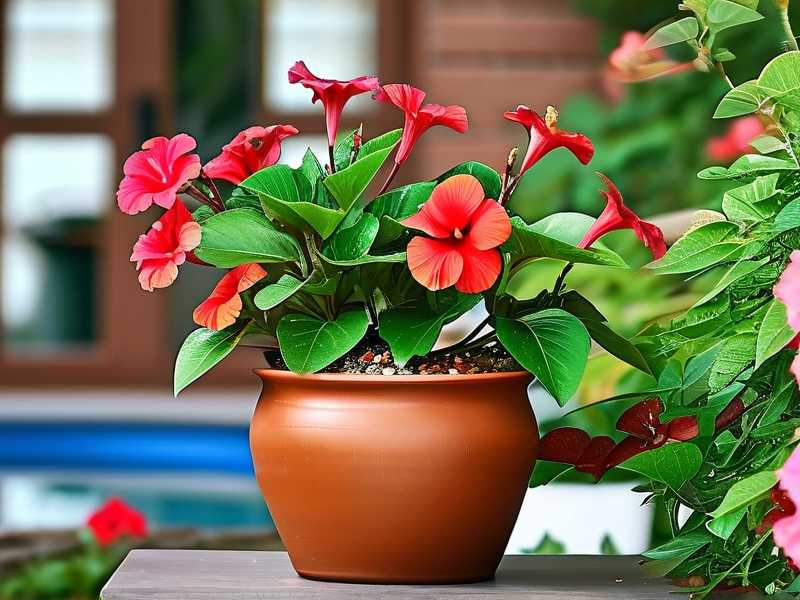
I decided to test a natural potting mix refresh on my favorite red hibiscus. The plant was sad—yellow lower leaves, no flowers, droopy stems. I took photos on Day 1. Then I repotted.
Week 1
I mixed one part coco coir, one part perlite, and one part worm castings. That’s my go-to natural potting mix. I added a pinch of bone meal for slow-release phosphorus. I watered once—just enough to settle the soil. For the next seven days, I didn’t water again. I watched. By Day 4, the leaves perked up. By Day 7, I saw tiny new buds. The roots were pale and healthy, not brown and mushy.
Week 2
I kept the same routine: bright indirect light, no fertilizer, careful watering. The buds opened into three large blooms. The yellow leaves stopped appearing. The plant looked alive again. Honestly, I was shocked. A simple potting mix for indoor hibiscus changed everything.
3 Deadly Mistakes Beginners Make
Mistake 1: Watering Like a Maniac
I used to water my hibiscus every two days. I thought it needed constant moisture. Then the leaves turned black. The stems softened. I smelled rot. That’s when I learned—90% of indoor plants die from overwatering. Hibiscus roots need air, not a swimming pool.
What I do now: I stick my finger two inches into the soil. If it’s dry, I water. If it’s damp, I wait. I also use a moisture meter. They cost ten bucks. Worth every penny.
Mistake 2: Lighting in the Wrong Spot
I once placed a hibiscus in a north-facing window. It grew tall and leggy. No blooms. I tried a south window—too harsh. Leaves got scorched. I was frustrated.
What I learned: Hibiscus loves bright but indirect light. East or west windows work best. I rotate the pot weekly for even growth. If you lack natural light, use a grow light. I bought a cheap one on Amazon. My plant now blooms all winter.
Mistake 3: Using the Wrong Pot
Plastic pots are a trap. I used one for my second hibiscus. Water pooled at the bottom. Roots rotted. I lost the plant in three months.
My fix: Terracotta pots. They breathe. They wick away excess moisture. They also help the natural potting mix stay aerated. Make sure the pot has drainage holes. If it doesn’t, drill them yourself. I also lift the pot with pot feet—air circulates underneath.
Ingredients for a Natural Potting Mix
Base: Coco Coir or Peat Moss
Coco coir is my favorite. It holds moisture but drains well. It’s also renewable. Peat moss works too, but it’s acidic. Hibiscus prefers neutral pH, so I add lime if I use peat. The RHS recommends coir for indoor plants. I agree.
Aeration: Perlite or Pumice
Perlite is cheap and lightweight. I mix about 30% into my natural potting mix. Pumice is heavier but lasts longer. Both prevent soil compaction. My hibiscus roots now have room to breathe.
Nutrition: Worm Castings or Compost
I use worm castings for a slow-release nutrient boost. No synthetic fertilizers. No chemicals. The AHS suggests organic amendments for tropical plants. I get mine from a local garden center. They smell earthy, not foul.
Optional Add-ins
- Bone meal: For phosphorus during blooming season.
- Cinnamon powder: Natural antifungal. I sprinkle a little on the soil surface.
- Charcoal: Improves drainage and absorbs toxins. I crush it into small chips.
Step-by-Step Refresh Process
Step 1: Prepare the Workspace
I lay down newspaper. I have a trowel, scissors, and my new natural potting mix. I also prep the pot: clean it with soapy water, rinse well, then soak in a bleach solution (1 part bleach to 9 parts water) for 15 minutes. Rinse again. Let it dry.
Step 2: Remove the Plant
I tip the pot sideways. I tap the bottom. The root ball slides out. I gently massage the roots to loosen old soil. If I see mushy, brown roots, I cut them off with sterilized scissors. Healthy roots are firm and white.
Step 3: Check for Pests
I inspect the leaves and stems. Aphids, mealybugs, and spider mites love hibiscus. I squish what I see. For a bad infestation, I spray with neem oil. I wait a day before repotting.
Step 4: Add Fresh Mix
I put a layer of natural potting mix at the bottom of the pot. I place the hibiscus in the center. I fill the sides with more mix. I tap the pot to settle the soil. I don’t press down—roots need air.
Step 5: Water Sparingly
I water until a little runs out the drainage holes. Then I stop. I don’t water again until the top two inches feel dry. That’s usually 5-7 days. I learned this after killing my third plant from overwatering.
Step 6: Monitor for Two Weeks
I keep the hibiscus in a spot with bright indirect light. I rotate the pot every few days. I don’t fertilize for the first month. I watch for new growth. It usually appears within 10 days.
Adjusting Your Mix for Seasons
Winter Care
Indoor air gets dry in winter. My hibiscus drops leaves if humidity is low. I use a pebble tray with water. I also mist the leaves every morning. The natural potting mix dries slower in winter, so I water less—maybe once every 10 days.
Summer Care
Summer means more light and heat. My hibiscus grows faster. I water more often, but I still check soil moisture first. I also move the pot away from south-facing windows to avoid leaf burn. The potting mix for indoor hibiscus should dry within a week. If it stays wet longer, I add more perlite next time.
Common Signs You Need a Refresh
Yellow Leaves
This is the first red flag. If lower leaves turn yellow and drop, the soil is likely compacted or waterlogged. I’ve seen this happen after 12 months of no repotting.
No Blooms
A hibiscus that’s healthy should bloom repeatedly. If it stalls, the soil nutrition is depleted. My natural potting mix with worm castings fixes that in two weeks.
Root Bound
I check the drainage holes. If roots are poking out, the plant is root bound. I repot into a container 2 inches larger in diameter. I also trim the roots a little.
Storing Your Natural Potting Mix
I make batches of natural potting mix in a lidded bin. I keep it in a cool, dry place. It stays good for 6 months. I label it with the date. If it smells sour, I toss it. Sour soil means anaerobic bacteria. Not good.
Tools I Swear By
- Moisture meter: Takes the guesswork out of watering.
- Pruning shears: For cutting dead roots and stems.
- Spray bottle: For misting leaves.
- Trowel: For scooping mix.
- Pot feet: For air circulation.
I bought most of these from a local hardware store. They pay for themselves after one plant save.
The Role of Mycorrhizae
Mycorrhizal fungi form a partnership with hibiscus roots. They help absorb water and nutrients. I add a powder form to my natural potting mix refresh once a year. The RHS has research showing mycorrhizae improve plant resilience. I’ve noticed fewer yellow leaves since I started using it.
Container Selection for Indoor Hibiscus
I use terracotta pots. They dry fast and prevent root rot. But plastic pots work if you’re careful. I tried a self-watering pot once—bad idea. The soil stayed too wet. My hibiscus got fungus gnats. I switched back to terracotta. Problem solved.
The AHS recommends pots with drainage holes and a saucer. I agree. I also elevate the pot with pebbles in the saucer. That way, water never sits under the roots.
FAQ
How often should I refresh the potting mix for indoor hibiscus?
Every 12-18 months. I do it in early spring when the plant starts growing. Some people do it in fall. Either works. The key is to avoid waiting until the soil breaks down completely.
Can I use regular garden soil for indoor hibiscus?
No. Garden soil is heavy and full of pests. It compacts in containers. Your hibiscus will suffocate. Stick with a natural potting mix that drains well. I learned this after using backyard soil for my first plant—it died within a month.
What if my hibiscus looks worse after repotting?
That’s transplant shock. It’s normal. Give the plant 1-2 weeks to adjust. Keep it in indirect light. Don’t fertilize. I’ve seen many plants droop for a few days, then bounce back. If leaves keep dropping, check for overwatering. 90% of indoor plants die from overwatering, so be patient.
I find a natural potting mix refresh is the single best thing you can do for year-round indoor hibiscus. It fixes most problems before they start. I’ve saved four plants this way. My current hibiscus blooms every few weeks. I water carefully, use the right mix, and give it bright light. That’s it. No magic. No expensive products. Just good soil and a little patience.





