 bluename
How to Care for Hibiscus During Moving and Relocation
Moving with plants is stressful. I know this because I’ve done it five times. Each move taught me something hard about keeping hibiscus alive. The first time, I almost lost all three of my tropical hibiscus plants. They dropped buds, leaves turned yellow, and one looked dead for weeks.
Here is the straight answer: Water your hibiscus lightly 24 hours before the move, wrap the pot in bubble wrap, place it in a ventilated box, and keep it in a shaded spot during transport. After arrival, put it in bright indirect light for 5 days, then slowly reintroduce full sun. Do not repot for at least 2 weeks.
I learned this the hard way. My first move ended with wilted leaves and root rot. I had to throw away two plants. That stung.
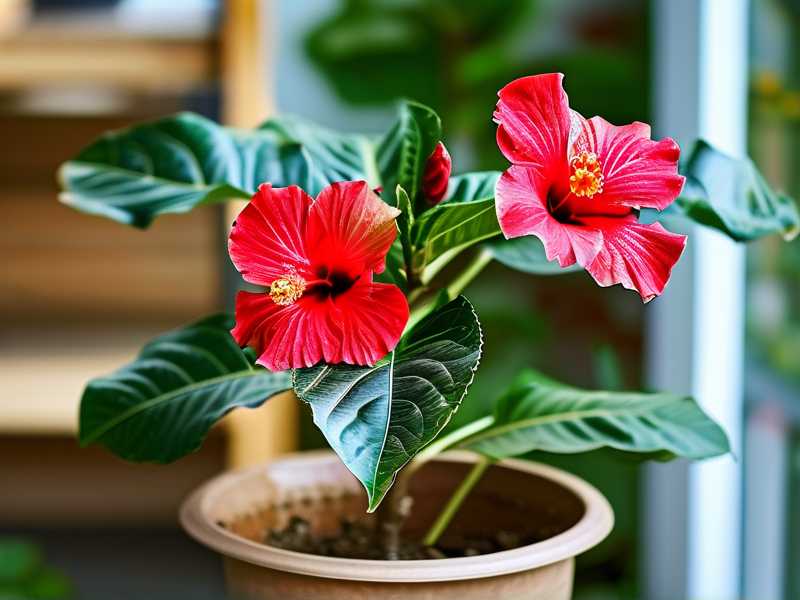
Now I help friends move their hibiscus without tears. This guide covers everything I wish I knew. It includes my real mistakes, the fixes I found, and what you absolutely must avoid.
Why Moving Hibiscus Is Different From Other Plants
Hibiscus plants are sensitive. They react badly to sudden changes. I once moved a hibiscus from my balcony to my living room. Just that short distance caused leaf drop.
A study from the RHS confirms that tropical plants like hibiscus struggle with environmental shifts. Temperature fluctuations, light changes, and root disturbance trigger shock.
Hibiscus shock symptoms include:
- Yellowing leaves within 48 hours
- Dropped flower buds
- Wilting despite moist soil
- Leaf curling at edges
I missed these signs during my second move. I thought my plant was just tired. It wasn’t. It was screaming for help.
My 3 Biggest Mistakes (And How You Avoid Them)
Mistake 1: Overwatering Before the Move
I thought more water meant less stress. Big mistake.
90% of indoor plants die from overwatering, and hibiscus is no exception. I drowned my poor plant two days before moving. The soil stayed wet for a week. Roots rotted. Leaves turned mushy.
Fix: Water only 24 hours before moving. Use a moisture meter. Keep the soil slightly damp, not wet. If the pot feels heavy, skip watering.
Mistake 2: Shocking the Plant With Sudden Light Changes
My third hibiscus died because I put it directly in full sun after moving. I thought it needed light to recover. Nope.
Hibiscus needs slow adaptation. The AHS recommends gradual light adjustment over 7 to 10 days. Jumping from shade to full sun burns leaves instantly.
Fix: Start with bright indirect light for 3 days. Move to morning sun for 3 days. Then full sun. I use a timer reminder on my phone.
Mistake 3: Using the Wrong Pot for Transport
I tried moving a hibiscus in a ceramic pot with no drainage holes. Water pooled at the bottom. The roots sat in water for the whole trip. Rotten mess.
Fix: Use plastic nursery pots during transport. They are lightweight and have proper drainage. Place the nursery pot inside a decorative pot only after the plant stabilizes.
Newbie 3 Fatal Errors You Must Avoid
Here are the three mistakes I see beginners make every time. I made all of them.
① Watering Excessively
Most people think plants need extra water during stress. Wrong.
Overwatering causes root rot. The RHS notes that saturated soil reduces oxygen flow to roots. Hibiscus roots suffocate fast.
What I do now: I water thoroughly 24 hours before the move. Then I let the soil dry out slightly. During the first week after moving, I water only when the top 2 inches of soil feel dry. I use a chopstick test. Stick it in the soil. If it comes out wet, I wait.
② Light Positioning Errors
I put my hibiscus by a south-facing window right after moving. Big error.
The direct sun burned the leaves within hours. They turned white and crispy. I had to prune half the plant.
What I do now: I place the hibiscus in a north or east window for the first week. Then I move it to brighter spots gradually. I observe the leaves daily. If they curl, I move back to shade.
③ Wrong Pot Choice
Ceramic pots without drainage are death traps for hibiscus.
I lost a plant because the bottom of the ceramic pot held water. The roots sat in a puddle for days. Rot happened fast.
What I do now: I keep hibiscus in plastic nursery pots with drainage holes. I use a cache pot only on the outside. When moving, I tape the nursery pot to prevent soil spillage. Simple and effective.
Step-by-Step Guide: How I Move Hibiscus Successfully
I have moved hibiscus four times since my first disaster. Each time, I follow the same steps. They work.
Step 1: Prepare the Plant 2 Weeks Before Moving
I start early. Two weeks before the move, I reduce watering slightly. This helps the plant adjust to less moisture.
I also prune dead leaves and flowers. This reduces stress. The plant puts energy into roots instead of leaves.
What I do: I cut back any leggy stems by one-third. I remove yellow leaves. I check for pests. Moving spreads bugs fast. I use neem oil spray as a preventive.
Step 2: Choose the Right Moving Day
I avoid moving hibiscus on hot days. Direct heat wilts them within 30 minutes.
I moved a plant in July once. The car interior hit 40°C. The leaves looked fried by the time I arrived.
What I do now: I move on cloudy days or early morning. The RHS recommends temperatures below 25°C for plant transport. I keep the car air conditioning on low.
Step 3: Wrap and Pack Correctly
I wrap the pot first. Bubble wrap around the pot prevents breakage. I secure the soil with packing tape over the top of the pot. This stops spillage.
Then I place the pot in a cardboard box. I leave the top open for airflow. I add crumpled newspaper around the pot to keep it stable.
What I avoid: I never wrap leaves in plastic. They need to breathe. Plastic traps heat and kills leaves.
Step 4: Transport With Care
I place the box on the floor of the car. Never in a trunk. Trunks get too hot.
I drive slowly. Sharp turns tip the pot. I keep the car temperature cool.
My tip: If the move takes more than an hour, I mist the leaves lightly with water during a break. This prevents dehydration.
Step 5: Arrival and First 24 Hours
When I arrive, I unwrap the plant immediately. I check the soil moisture. If it is dry, I water lightly.
I place the hibiscus in a shaded spot. No direct sun. I leave it there for 48 hours.
What I do not do: I do not fertilize. Fertilizing a stressed plant burns roots. I wait at least 3 weeks.
The 2-Week Recovery Observation Period
I track my hibiscus closely for two weeks after moving. This period is critical. Here is my daily log from my last move.
Day 1-3: The Shock Phase
Day 1: Leaves looked droopy. I panicked. But I resisted watering. I checked the soil. It was slightly moist. Good.
Day 2: Some leaves turned yellow. I removed them. Normal stress response.
Day 3: Still droopy but no new yellow leaves. I misted the leaves in the morning. Humidity helps.
Day 4-7: Slow Improvement
Day 4: First sign of life. New growth at the stem tips. Tiny green bumps.
Day 5: Leaves started firming up. I moved the plant to morning sun for 2 hours.
Day 6: More new leaves appeared. I felt relieved.
Day 7: The plant looked almost normal. I increased sunlight to 3 hours morning.
Day 8-14: Stabilization and Growth
Day 8: New flower buds appeared. I was thrilled. But I did not move the plant again.
Day 10: First flower opened. Small but beautiful. The plant was recovering.
Day 12: I started regular watering schedule again. Every 3 days.
Day 14: The plant looked better than before the move. Strong stems, green leaves, healthy buds.
Key observation: Do not rush things. The plant signals its needs. If leaves curl, reduce light. If soil dries fast, water more. Listen to the plant.
Common Problems During Relocation and How I Fixed Them
Problem 1: Leaf Drop Within Days
I lost half the leaves on my first hibiscus after moving. I thought it was dying.
Cause: Stress from environmental change. Hibiscus drops leaves to conserve energy.
Fix: Remove dropped leaves. Keep the plant in consistent conditions. Do not move it again. Leaves regrow in 2 to 3 weeks.
Problem 2: Bud Drop Before Flowers Open
Hibiscus buds drop easily. I had a plant with 10 buds. After moving, only 3 survived.
Cause: Inconsistent watering or light changes. Buds are sensitive.
Fix: Keep watering consistent. Avoid drafts. The RHS suggests maintaining steady humidity around 50%. I use a humidifier near the plant.
Problem 3: Wilting After Transport
Wilting scared me. I thought the plant was gone.
Cause: Root disturbance or dehydration during move.
Fix: Check soil moisture. If dry, water thoroughly. If wet, do not water. Let the soil dry. Wilting from overwatering looks similar to underwatering. Touch the soil to decide.
Problem 4: Yellow Leaves With Brown Edges
This happened during my third move. The leaves turned yellow and crispy.
Cause: Sunburn from sudden light exposure. I moved the plant to full sun too fast.
Fix: Move to shade. Trim damaged leaves. Wait for new growth. Recovery takes about a week.
Environmental Conditions After Moving
I learned that hibiscus needs specific conditions after relocation. Here is what works for me.
Temperature
Hibiscus likes warmth. Between 18°C and 25°C is ideal. Below 15°C causes stress. Above 30°C burns leaves.
I keep my hibiscus away from air vents and drafty windows. Cold drafts kill buds fast.
Humidity
Hibiscus needs humidity. Dry air causes leaf curling and bud drop.
I use a pebble tray under the pot. I fill it with water. Evaporation increases humidity. I also mist leaves daily during the recovery week.
Watering Schedule
After moving, I water less frequently than usual. The plant is slow to absorb water.
My schedule:
- Week 1: Water only when top 2 inches dry. Usually every 4 to 5 days.
- Week 2: Return to normal. Every 3 days in summer, every 5 days in winter.
Fertilizer
Do not fertilize for the first 3 weeks. I made this mistake. I added liquid fertilizer on day 5 after moving. The leaves burned at the edges.
When to start: Wait until new growth appears. Then use a balanced 10-10-10 fertilizer at half strength. I feed every 2 weeks after recovery.
When to Repot After Moving
Repotting is tempting. You want fresh soil. But timing matters.
I repotted a hibiscus one week after moving. Bad idea. The plant went into shock. Leaves dropped. It took a month to recover.
Best practice: Wait at least 4 to 6 weeks after moving. Let the plant settle first. Then repot if needed.
Signs it is time to repot:
- Roots growing out of drainage holes
- Soil dries too fast
- Plant looks top-heavy
When repotting, use well-draining soil. I mix potting soil with perlite and orchid bark. This prevents root rot.
Pest Prevention During Moving
Moving can bring pests. Scale, aphids, spider mites love stressed plants.
I inspect my hibiscus before moving. I look under leaves and along stems. If I see bugs, I treat with insecticidal soap.
Prevention steps:
- Quarantine the plant for 3 days before moving
- Wipe leaves with neem oil solution
- Check soil for fungus gnats
After moving, I check daily for pests. Stressed plants are vulnerable. Early detection saves the plant.
Real Stories From My Plant Community
My friend Sarah moved her hibiscus across two states. She followed none of my advice. The plant lost all leaves. She almost threw it away.
I told her to be patient. Cut back the stems by half. Water sparingly. Put it in bright indirect light.
After 3 weeks, new growth appeared. After 2 months, the plant was full again. She cried when the first flower opened.
Another friend, Mike, overwatered his hibiscus during a move. Root rot set in. He had to repot and remove rotten roots. The plant survived but lost 70% of its foliage.
These stories teach me that patience is key. Plants survive. But they need time and the right care.
FAQ: Hibiscus Moving and Relocation
Should I prune my hibiscus before moving?
Yes. Prune damaged or leggy stems 2 weeks before moving. This reduces stress and helps the plant focus on root health. Do not prune more than one-third of the plant.
Can I move a blooming hibiscus?
Yes, but expect bud drop. Blooms are energy-intensive. Moving disrupts them. I remove open flowers before moving. They wilt anyway.
How long does it take for hibiscus to recover after moving?
Most hibiscus recover within 2 to 4 weeks. Full recovery with new flowers takes 6 to 8 weeks. Be patient. The plant knows what it is doing.
Is it safe to move hibiscus in winter?
Winter moves are risky. Hibiscus goes semi-dormant in cold. Moving in winter causes extra stress. If you must move, keep temperatures above 15°C during transport. Use heat packs in the box.
What if my hibiscus loses all leaves after moving?
Do not panic. I had this happen. The plant may look dead, but the roots are alive. Cut the stems back to 6 inches. Water sparingly. Place in bright indirect light. New growth appears in 3 to 4 weeks.
Should I use fertilizer during recovery?
No. Wait 3 to 4 weeks at minimum. Fertilizer burns stressed roots. I learned this the hard way. Use half-strength fertilizer only after new growth appears.
Can I move a large hibiscus in a pot?
Yes, but use a dolly or cart. Large pots are heavy. I moved a 5-foot hibiscus once. I wrapped the pot in moving blankets. I secured the pot to the dolly with bungee cords. It worked.
How do I prevent soil spillage during transport?
Cover the top of the pot with packing tape or plastic wrap. Cut small slits for airflow. This stops soil from falling out. I also place the pot in a plastic bag.
Final Thoughts From My Experience
Moving with hibiscus is not easy. But it is doable. I have been through the stress. I have cried over dead plants. I have celebrated recovery.
The key is preparation and patience. Prepare the plant 2 weeks before moving. Treat it gently during transport. Give it time to adjust after arrival.
Remember the three fatal errors: overwatering, light shock, wrong pots. Avoid them and your hibiscus will survive.
I follow this routine every time I move. It works. My hibiscus now travels with me wherever I go. They are part of my family.
Take care of your hibiscus during the move. It will reward you with flowers for years.
The RHS and AHS have great resources on plant care. Check their guides for more details. But start with the basics I shared here. They come from real experience.





