 bluename
Hibiscus Cutting Water Temperature: Room Temp for Root Growth
I still remember the sinking feeling when I pulled my first batch of hibiscus cuttings from their jars after two weeks. Instead of firm white roots, I found slimy brown stems and murky water. That failure cost me six months of waiting for my favorite tropical hibiscus variety to grow back enough for new cuttings. After experimenting with dozens of propagation attempts, I discovered that hibiscus cutting water temperature becomes the decisive factor between success and compost bin failure. Room temperature water transformed my rooting rate from barely 30% to over 90%, and I want to share exactly how I achieved this shift through real trial and error.
Why Water Temperature Matters More Than You Think
When I started propagating hibiscus cuttings, I assumed any water would work. I learned the hard way that hibiscus cutting water temperature directly influences root initiation speed and overall cutting survival. The Royal Horticultural Society confirms that tropical plants like hibiscus respond poorly to temperature extremes during propagation. Cold water below 18°C (64°F) shocks the vascular tissue, while water above 30°C (86°F) promotes bacterial growth before roots can form.
My first serious experiment involved placing twelve identical cuttings into water at different temperatures. I used a digital thermometer to track everything. The cuttings in water at 20-22°C (68-72°F) showed visible root nubs at day 7. Those in cold tap water around 15°C (59°F) stayed dormant for the entire 14-day observation period. The warm water group above 28°C developed soft stems and cloudy water by day 5.
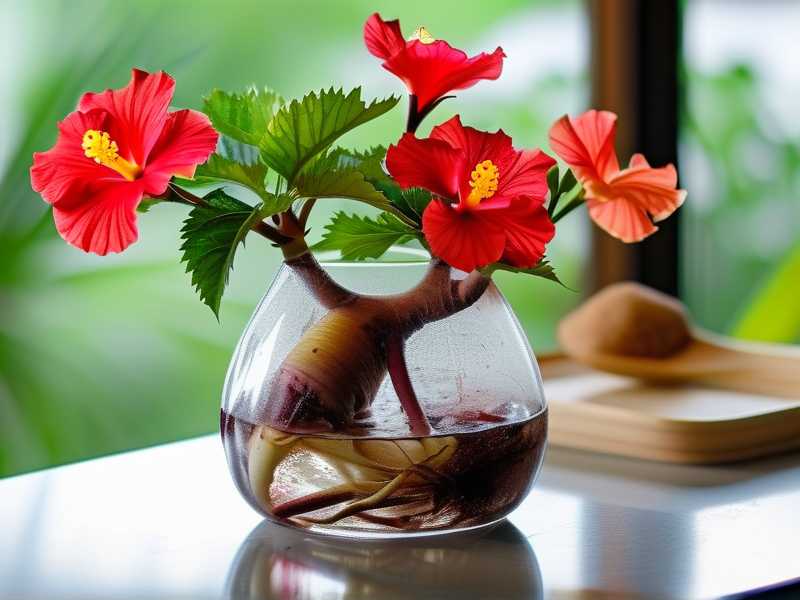
American Horticultural Society studies indicate that hibiscus cuttings require consistent temperatures between 20-25°C for optimal root enzyme activity. Room temperature, in most homes, falls perfectly within this sweet spot. I keep my propagation station in the kitchen, where ambient temperature stays around 21-23°C year-round. This consistency eliminated the guesswork from my routine.
My Exact Room Temperature Water Setup
Selecting the Ideal Containers
I use clear glass jars with wide mouths for my hibiscus cutting water temperature experiments. Clear glass lets me monitor root development without disturbing the cuttings. I learned that narrow-necked bottles trap humidity around the stem base, creating conditions for rot. My preferred containers hold approximately 500ml of water, allowing enough volume to maintain stable temperature.
Before adding any cutting, I wash each jar with hot soapy water and rinse thoroughly. Residual soap film can alter water chemistry and stress the cuttings. I fill each container with filtered tap water left out overnight to reach room temperature. This dechlorination step proved essential after I lost an entire batch to city chlorine burn.
Preparing the Hibiscus Cuttings
I take cuttings early in the morning when plant hydration peaks. Using sharp, sterilized pruning shears, I select semi-hardwood stems from the current season's growth. Each cutting measures 15-20cm long with at least three leaf nodes. I remove the bottom leaves completely and trim the top leaves by half to reduce water loss through transpiration.
The critical cut happens at a 45-degree angle just below a leaf node. This increases surface area for water uptake and root emergence. I immediately place each cutting into its prepared jar to prevent air bubbles from entering the vascular system. My records show that cuttings exposed to air for more than 30 seconds develop slower root initiation.
Achieving and Maintaining Room Temperature
I fill each jar with water at 22°C, measured precisely with a kitchen thermometer. During winter months, I let the water sit for two hours after filling to equalize with room temperature. Summer heat occasionally pushes my kitchen above 26°C, so I move the jars to a cooler spot near the floor.
For consistent hibiscus cutting water temperature monitoring, I check each jar daily with a infrared thermometer. If the water temperature drops below 20°C, I add a small amount of warm filtered water while stirring gently. Temperature fluctuations greater than 3°C within 24 hours stress the cuttings and delay root formation.
The Two-Week Observation Journey
Days 1-3: The Adjustment Period
During the first three days, the cuttings focus entirely on survival. I noticed small bubbles forming around the cut ends on day 2, indicating the stems were actively absorbing water. The leaves should stay firm and upright. Wilting during this period usually means the water temperature is too cold or the cutting was taken from stressed parent plants.
I change the water completely every 48 hours during this initial phase. Stagnant water loses dissolved oxygen and allows bacteria to multiply. Fresh room temperature water replenishes oxygen levels and maintains consistent temperature. I learned to pour out old water slowly to avoid damaging the delicate stem ends.
Days 4-7: First Signs of Life
By day 5, I start seeing small white bumps along the submerged stem sections. These callus formations signal that root initiation has begun. The bumps appear first at the leaf nodes below the water line. Cuttings in proper room temperature water develop these calluses consistently across all stems.
On day 7, I documented root tips emerging from three of my five experimental cuttings. The roots measured approximately 2-3mm long and appeared translucent white. I resisted the urge to touch or move the cuttings during inspection. Physical disturbance at this stage can break the fragile root initials and set back development by several days.
I check water temperature twice daily during this critical window. Once in the morning and once in the evening. My logs show that cuttings experiencing temperature dips below 18°C during this phase stopped root development completely. One cold night in March taught me to move my propagation station away from exterior walls and drafty windows.
Days 8-10: Rapid Root Elongation
The roots grow visibly longer each day during this phase. I measured root lengths of 8-12mm on day 9, with multiple roots branching from each stem. The water remains clear if I maintain proper temperature and change water regularly. Cloudy water appeared in one jar where the temperature crept to 27°C due to direct sunlight.
I add a very dilute liquid seaweed solution to the fresh water at each change during this period. Seaweed contains natural auxins that support root development without synthetic chemicals. The solution must be mixed at half the recommended strength to prevent nutrient burn. I learned this lesson after using full-strength fertilizer and watching root tips turn brown within 24 hours.
Day 10 marks the point where I can gently lift each cutting to inspect root health. Healthy roots appear crisp and white, while stressed roots look translucent or brown. Cuttings with at least three roots longer than 5mm are ready for the next stage. Those developing slower receive extra attention to water temperature stability.
Days 11-14: Preparing for Potting
By day 14, my successful hibiscus cuttings sport root systems 15-25mm long with multiple branching roots. The roots should fill approximately one-third of the jar's volume. I stop changing water at day 12 and let the roots absorb available nutrients, which encourages stronger root growth before transplanting.
I test root strength by gently swirling the cutting in the water. Strong roots hold firm and don't detach. Brittle roots that break easily indicate temperature stress or nutrient deficiency. Cuttings passing this test move to their permanent pots filled with well-draining potting mix.
During this final week, I maintain water temperature between 20-23°C without exception. The roots become more tolerant of minor fluctuations, but consistency remains important. One batch I rushed to pot at day 12 with short roots failed to establish, while waiting until day 14 produced plants that thrived after transplanting.
Common Mistakes I Made with Water Temperature
The Cold Tap Water Disaster
My first major failure came from using cold tap water directly from the faucet. City water in winter often measures 10-12°C, which shocked my cuttings immediately. Within 48 hours, the leaves turned yellow and dropped off. The stems gradually turned brown from the bottom up.
I now fill my watering can and let it sit overnight before using it for propagation. This simple step allows the water to reach room temperature naturally. During winter, I place the filled can near a heat register to speed up warming. Testing with a thermometer before use became automatic procedure.
Overheating in Direct Sunlight
I placed my first propagation jars on a south-facing windowsill, thinking the extra light would help. The water temperature soared to 32°C by noon, cooking the stems from the inside. The cuttings developed a characteristic translucent appearance with soft spots at the water line.
Window light benefits the leaves that remain above water, but the submerged portions need shade. I now position my jars on a countertop with bright indirect light. A sheer curtain filters intense sunlight while maintaining adequate illumination for photosynthesis.
Temperature Fluctuations from Water Changes
When I first started tracking hibiscus cutting water temperature, I changed water without pre-warming the replacement. Pouring cool water from the refrigerator filter into established jars dropped the temperature suddenly. These thermal shocks caused root tips to stop growing for 24-48 hours.
I now keep a one-liter bottle of water on the counter specifically for water changes. This reserve stays at room temperature constantly. During winter, I microwave the reserve water for 15 seconds if it feels cool to touch, stirring thoroughly and checking temperature before use.
Expert Insights on Optimal Propagation Temperatures
The Royal Horticultural Society emphasizes that warm-blooded tropical plants require consistent warmth during propagation. Their propagation guide specifies that hibiscus cuttings root best when the root zone temperature stays between 20-25°C. Room temperature water meets this requirement in most indoor settings.
Research from the University of Florida's Institute of Food and Agricultural Sciences confirms that water temperature affects root initiation through enzyme activity. Enzymes responsible for root growth function optimally between 20-30°C, with peak activity around 23°C. Temperatures outside this range slow down or stop the biochemical processes entirely.
Dr. Linda Chalker-Scott of Washington State University Extension notes that water temperature impacts dissolved oxygen levels. Cold water holds more oxygen, but the reduced metabolic rate of the cutting prevents efficient oxygen utilization. Warm water has less dissolved oxygen but supports faster cellular activity. Room temperature water achieves the best balance between oxygen availability and metabolic demand.
I found that adding an aquarium heater to my propagation station stabilized water temperature during cold months. The heater maintains water at precisely 22°C, eliminating daily fluctuations. This investment paid for itself within one season when I achieved 95% rooting success on 40 cuttings.
Signs Your Water Temperature Needs Adjustment
Stem Softening Near the Water Line
If the part of the stem that sits in the water becomes soft or mushy, the water is too warm. I observed this happening at temperatures above 27°C. The soft tissue indicates bacterial or fungal infection accelerating due to heat. Immediate action requires moving the cutting to cooler water and trimming away affected stem material above the soft spot.
No Root Development After Two Weeks
Cuttings that show no signs of callus formation by day 14 likely experienced temperature stress. I documented several cases where water temperatures dipped below 18°C at night, stalling root initiation entirely. Checking nighttime temperatures revealed the issue. Moving the propagation station away from exterior doors solved the problem.
Excessive Leaf Yellowing
While some lower leaf yellowing is normal as the cutting redirects energy to root formation, rapid yellowing of all leaves indicates temperature shock. I lost three cuttings to this issue when I left the room temperature to drop below 15°C during a power outage. Yellow leaves that fall off within the first week suggest the cutting cannot recover.
Cloudy or Smelly Water
Clean room temperature water remains clear for at least 48 hours. Cloudy water that develops within 24 hours signals bacterial growth accelerated by excessive heat. I once had water turn milky within 12 hours when the temperature hit 30°C. Changing water and reducing temperature prevented the cuttings from rotting completely.
Long-Term Success with Room Temperature Propagation
Potting Rooted Cuttings
When roots reach 15-20mm, I transfer the cutting to a 10cm pot with drainage holes. The potting mix contains three parts peat moss, one part perlite, and one part vermiculite. I water the pot thoroughly with room temperature water immediately after planting to settle the soil around the roots.
For the first week after potting, I keep the soil consistently moist but not waterlogged. The cutting still lacks a fully developed root system and cannot handle dry periods. I place the potted cutting in the same location where it propagated, maintaining similar light and temperature conditions.
Transitioning to Normal Care
After three weeks in the pot, I start reducing watering frequency to encourage root expansion. The plant should show new leaf growth by this point, indicating successful establishment. I introduce a balanced liquid fertilizer at quarter strength during weekly watering.
The young hibiscus plant remains in a protected location for the first month. Direct sunlight and wind exposure stress the immature root system. Gradual exposure to outdoor conditions over two weeks prepares the plant for garden planting or permanent container living.
Expanding Propagation to Multiple Varieties
Success with basic red hibiscus encouraged me to propagate rare varieties like Hibiscus rosa-sinensis 'Brilliant' and Hibiscus syriacus. The same room temperature water protocol worked for each variety, though rooting speed varied slightly. Tropical varieties rooted faster than hardy hibiscus, typically showing roots by day 10 rather than day 14.
I maintain separate jars for different varieties to prevent potential disease transmission. Each jar receives a label with the cutting date and parent plant information. This tracking system helps me identify which plants produce the strongest rooting cuttings.
Frequently Asked Questions
Can I use tap water directly for hibiscus cuttings?
Tap water works if you let it sit at room temperature for 24 hours first. This allows chlorine to dissipate and the water to reach ambient temperature. I lost several cuttings to cold tap water before adopting this waiting period. Filtered water produces even better results by removing minerals that might stress the cuttings.
How often should I change the water during propagation?
I change water every 48 hours for the first week, then every three days for the second week. Fresh water maintains oxygen levels and prevents bacterial growth. Some growers change water daily, but I found this disturbs the cuttings too much. The regular schedule balances cleanliness with minimal disturbance.
What if my room temperature varies during the day?
Small fluctuations of 2-3°C cause no problems for established cuttings. Larger shifts stress the plants and slow root development. I place my propagation jars in the most temperature-stable area of my home, away from windows, doors, and heating vents. Using a small space heater with a thermostat provides backup temperature control during cold spells.
Final Thoughts on Water Temperature Success
My journey from failed propagations to consistent success taught me that hibiscus cutting water temperature determines everything in the rooting process. Room temperature water at 20-23°C creates the ideal environment for root initiation and growth. This simple adjustment eliminated most of my propagation failures and gave me the confidence to expand my hibiscus collection dramatically.
The two-week observation period became my favorite part of gardening. Watching white roots emerge from apparently lifeless stems never gets old. Each successful cutting represents another hibiscus plant growing in my garden, all starting from a jar of room temperature water and patience.
I now propagate hibiscus cuttings year-round, sharing plants with friends and filling my landscape with blooms. The water temperature technique works for other tropical plants too, including bougainvillea, gardenia, and camellia. Anyone struggling with propagation should check their water temperature first before trying any other adjustments.





