 bluename
How to Prevent Die-Back Fungus from Spreading Down into Main Hibiscus Shrub Trunks
I learned the hard way that die-back fungus on hibiscus is not a cosmetic problem. Left unchecked, it travels from a small branch tip straight down into the main trunk. Once it reaches the trunk, you are not pruning a branch anymore. You are watching the structural heart of the plant rot from the inside. The good news is that you can stop it. You need to cut early, cut clean, seal the wound, and change how you water. I have saved two large hibiscus shrubs this way. One took me three seasons to fully recover. The other bounced back in a single summer. The difference came down to how fast I acted.
If all you want is the direct answer: prune infected stems at least 4 to 6 inches below the last visible dark streak. Disinfect your pruners between every single cut. Apply a pruning sealant to cuts larger than a pencil. Stop overhead watering. Improve airflow. Remove every fallen leaf and twig from the soil surface. Do this before the discoloration reaches the main trunk.

The rest of this article walks through the full method I use now. I will also share the mistakes that cost me two hibiscus plants before I figured out what actually works.
What Die-Back Fungus Looks Like on Hibiscus
Die-back is not one single pathogen. It is a term gardeners use for a group of fungal problems that kill shoots from the tip backward. On hibiscus, I usually see darkened, sunken bark near the tip of a branch. The leaves above that point turn limp, then brown, then crispy. But they stay attached for weeks. That is a big clue. Frost damage usually makes leaves drop fast. Fungal die-back holds them like little brown flags.
The danger sits inside the stem. Cut into an infected branch and you will see a brown or gray ring just under the bark. Sometimes there are black specks. That discoloration tells you how far the infection has moved. If you cut only the dead tip and leave that stained tissue behind, the fungus keeps travelling down the branch. Then it reaches the crotch where the branch meets the main trunk. From there it moves into the trunk itself.
I have split open a dead hibiscus trunk after losing a plant. The inside was streaked with dark brown lines. That was the fungus. The outside looked mostly fine two weeks before the plant collapsed. By the time I saw the trunk cracking, there was nothing left to save.
The Royal Horticultural Society has solid guidance on managing fungal die-back on ornamental shrubs. Their general advice lines up with what I use at home: cut back to healthy white or pale green wood, remove debris, and avoid wounding plants in wet weather.
Why Hibiscus Is So Vulnerable
Hibiscus has soft, fast-growing wood. That is what makes it bloom so heavily. It is also what makes it easy for fungi to enter. Every pruning cut, broken branch, or freeze crack is an open door. Wet weather and poor airflow do the rest.
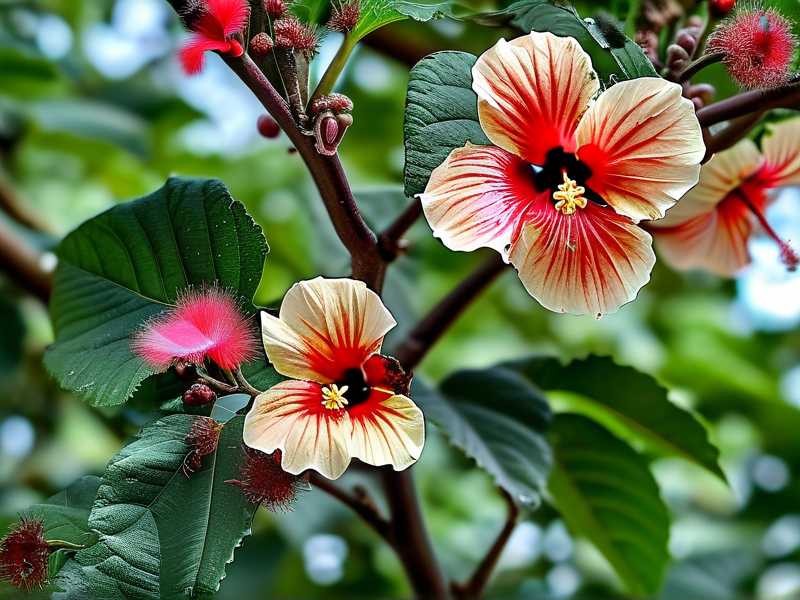
I grow hibiscus in both pots and the ground. The potted ones get die-back more often. The reason is simple stress. A potted hibiscus dries unevenly, sits in soggy soil after rain, or gets moved into darker spots. Stressed plants produce weaker bark. Weaker bark cracks easier. Fungus moves in.
The main trunk is the plant's lifeline. All the major vascular tissue runs through it. If die-back fungus spreads down into the main trunk, the plant may still leaf out for a while. It may even flower. Then one hot afternoon, the whole shrub wilts. By then the trunk is so compromised it cannot move water.
I now treat any die-back on hibiscus as an emergency. Not next weekend. Not when I have time. The same day I notice it.
How I Diagnose How Far the Fungus Has Spread
My first step is always tracing the infection. I start at the dead tip. I follow the branch down toward the trunk. I look for changes in bark color. Healthy hibiscus bark is usually green on young wood and light tan or gray on older wood. Infected bark looks darker. Sometimes it develops a water-soaked look. Sometimes it shrivels.
Then I make a small test cut. I cut an inch below the visible damage. I look at the wood. Healthy hibiscus wood is white or very pale green. If I see brown, gray, or purple staining, I cut lower.
I repeat this until the cut surface is clean. In warm weather, the fungus can be an inch or more beyond the visible damage. My rule is to remove at least 4 to 6 inches below the last sign of staining. Some people say 2 inches is enough. I have had die-back return when I cut too close. Six inches below clean wood has never failed me.
The American Horticultural Society emphasizes sanitation more than most home gardeners realize. A quick wipe with rubbing alcohol between cuts can mean the difference between stopping the spread and accidentally moving fungal spores from an infected branch to a healthy one.
Step-by-Step: Cutting Out Die-Back Before It Reaches the Trunk
My pruning kit for this job is simple. I use sharp bypass pruners, a small folding saw for thick branches, rubbing alcohol, paper towels, and a pruning sealant. I do not use anvil pruners. They crush the wood and create more damage.
First I locate the main trunk and mark it mentally. My job is to protect that trunk at all costs. Any branch showing die-back gets removed. I do not leave stubs. Stubs die and invite more fungus.
I cut at an angle. The cut faces away from the main stem so water drains off the wound. For branches under half an inch, a clean pruner cut is enough. For anything larger, I use the saw with short smooth strokes.
I disinfect between every cut. Not just between plants. Between every single branch. This feels excessive. I thought so too. Then I ran an experiment after losing my second hibiscus. I pruned one infected plant while disinfecting between cuts. I pruned another while only cleaning the blades at the end. The first plant stopped spreading within two weeks. The second developed new die-back lower on the same branches. That convinced me.
After cutting, I seal wounds larger than a pencil with a pruning sealant. This is debated in gardening circles. Some experts say sealants trap moisture. On hibiscus in humid climates, I still use a thin coat. It keeps rain out while the plant forms callus. For small cuts I leave them open to dry naturally.
Stop Overhead Watering Right Now
The single biggest environmental change that helped me was stopping overhead watering. Water sitting on hibiscus leaves and stems creates exactly what die-back fungus loves. Warm and wet.
I used to water my hibiscus every evening with a sprinkler. The whole plant got wet. Leaves, flowers, stems, trunk. It felt refreshing. It was also spreading fungal spores from branch to branch. Splashing water moves spores. It also keeps bark damp overnight.
Now I water at the base. My hose goes under the canopy. I soak the root zone slowly. No spray hits the leaves or main trunk. In rainy climates this is harder, but I still try to plant hibiscus where morning sun can dry the canopy quickly after overnight rain. The American Horticultural Society recommends the same general approach for fungal disease management on broadleaf ornamentals. Dry leaves are healthy leaves.
If I must water in the evening, I water even more carefully at the base. But morning watering is better. The soil gets moisture. The canopy stays dry. The plant drinks all day without sitting in humidity all night.
Improving Air Flow Around the Main Trunk
Dense hibiscus shrubs trap moisture. The center of the plant never gets air movement. That is where the main trunk lives. If the trunk stays damp and shaded, any fungal spore that lands there has a chance to grow.
I thin my hibiscus once or twice a year. I remove inward-growing branches first. Then I remove crossing branches. I open the center slightly so you can see the main trunk through the canopy. This goes against the instinct to leave a thick full shrub. But a dense hibiscus with die-back is worse than a slightly open one that stays healthy.
The main trunk needs some light and air. Not direct hot sun all day. Just enough airflow to dry the bark after rain. I noticed a huge drop in die-back cases after I started thinning.
I also keep mulch away from the trunk. Wet mulch pressed against the bark keeps it soft and vulnerable. I leave a gap of two to three inches between mulch and the trunk. Same rule I use for trees. Hibiscus trunks rot just like tree trunks.
Managing Fallen Leaves and Twigs
Fungal spores survive on dead plant material. Every fallen leaf, twig, or old flower under the hibiscus is a source of reinfection. I used to leave them as mulch. That was another mistake.
Now I clean under my hibiscus every week during the growing season. I especially remove anything that shows dark spots or fuzzy growth. I do not compost infected hibiscus material in a cold pile. Home compost rarely gets hot enough to kill all fungal spores. I either bag it for municipal green waste or burn it where allowed.
This one habit probably saved my oldest hibiscus. The plant had die-back in three branches. I pruned them out, sealed the cuts, and cleaned the soil surface. The fungus never reached the trunk. Within two months the plant pushed out healthy new growth from below the cuts.
What I Do After Pruning: The Two-Week Watch
I watch the pruned hibiscus closely for two weeks. Every day or two, I check the cut ends. I look for dark staining forming at the cut surface. I look for new die-back below the cut. I also watch for sap flow. Healthy cuts callus over and dry cleanly. If I see any black dots, gray fuzz, or oozing, I recut lower immediately.
My saved hibiscus usually shows clean callus within ten to fourteen days. The plant also pushes tiny green buds near the cut. That tells me the remaining branch is alive and moving water. If no buds appear after three weeks, I check the wood again. No buds plus dry brittle wood means I missed some infection.
During those two weeks I do not fertilize. Fertilizer pushes soft new growth. Soft growth is more vulnerable to fungus. I wait until I see healthy buds, then I feed lightly. Keeping the plant slightly dry during recovery also helps. Not bone dry. Just not constantly wet.
Protecting the Main Trunk When Die-Back Has Already Started Nearby
If a branch with die-back grows directly from the main trunk, I remove the entire branch. I cut it flush but not into the trunk. The goal is to leave a small branch collar intact. That collar is where the plant forms healing tissue.
I have seen people carve into the trunk to remove every trace of brown wood. Do not do that. You will create a large wound in the main trunk. That wound becomes a new entry point for fungus. Cut the branch at the collar. Seal it. Let the plant compartmentalize the damage.
If the trunk itself already shows a dark sunken lesion, you still have a chance if it is small. I use a clean sharp knife to remove the discolored bark and just a thin layer of wood below it. Then I let it dry. Then I seal it. This is a last resort. I have only done it twice. It worked once. The other time the trunk was already too far gone internally.
In both cases, the dark lesion on the trunk looked like a small bruise. The first plant had clean wood under the bruise. The second plant had brown streaking running deep into the trunk. I could not tell until I opened it. That second plant died three weeks later. If you open a trunk lesion and find brown streaks, the plant is likely not savable. Take cuttings from clean branches before it is too late.
Soil and Watering Changes That Reduce Die-Back Risk
Overwatering is not just about giving too much water. It is about soil that stays soggy and reduces oxygen to the roots. Stressed roots lead to stressed wood. Stressed wood leads to fungus. The math is simple.
90% of indoor plants die from overwatering. But the same principle applies to potted hibiscus outdoors. Soggy soil breeds root rot. Root rot weakens the whole plant. Then die-back fungus has an easy time.
My potted hibiscus now grows in a fast-draining mix. I use about two parts quality potting soil, one part perlite, and one part coarse bark. That mix drains fast but holds just enough moisture. The pot has drainage holes. I never let it sit in a saucer full of water.
For in-ground hibiscus, I check drainage before planting. I dig a hole and fill it with water. If it does not drain within a few hours, I build a raised mound or add coarse organic matter. A hibiscus sitting in heavy clay is a die-back time bomb.
I water deeply but less often. I check the soil with my finger before turning on the hose. If the top two inches are still moist, I wait. When I water, I give enough to reach the full root zone. Then I let the soil dry slightly before watering again.
Using Fungicide: What I Actually Recommend
I do not reach for fungicide as a first step. Pruning, sanitation, and dry canopy solve most early cases. But I do keep a copper-based fungicide on hand for stubborn infections.
I use it after pruning infected branches. I spray the remaining nearby stems and the lower part of the main trunk. I do not soak the plant. A light coating is enough. I repeat according to the label, usually every 7 to 14 days during wet weather.
Copper fungicide is not a cure for wood that is already infected. It is a protectant. It keeps new spores from establishing. If the fungus is already inside the trunk, spraying the outside will not help. That is why early pruning matters so much.
The Royal Horticultural Society notes that most fungicides work best as preventive treatments rather than cures. I have found that to be true in my own garden. I now spray vulnerable hibiscus lightly at the start of rainy periods if die-back has appeared before. That has reduced my annual cases to almost zero.
Seasonal Timing for Die-Back Prevention
Spring is when I do my big inspection. I wait until new growth starts so I can clearly tell dead wood from living wood. Then I prune every suspicious branch. I thin the center. I clean the ground underneath. I apply a slow-release fertilizer to push healthy growth.
Summer is when die-back spreads fastest. Warm humid nights are perfect for fungal growth. I check the canopy every few days. I remove any branch tip that looks off. I keep the base clean. I water in the morning only.
Fall is when I reduce nitrogen. Soft late growth is highly vulnerable. I let the plant slow down naturally. I clean up all dropped leaves more aggressively. This removes the spore load before winter.
Winter is when I protect the main trunk. In colder zones, hibiscus trunks crack in freeze-thaw cycles. Those cracks are where fungus enters in spring. I wrap the lower trunk with burlap or frost cloth in marginal zones. I keep the plant dry. I never let wet soil freeze around the roots.
My Three Biggest Mistakes
I killed my first hibiscus with overwatering. I thought more water meant more blooms. The roots rotted quietly. Then die-back appeared in the upper branches. By the time I noticed, the main trunk was soft at the base. Nothing I did after that mattered.
I killed my second hibiscus with misplaced cutting. I saw die-back and pruned only the dead tips. I left brown wood behind. The fungus travelled down and entered the trunk at a branch collar. I did not check the cut surfaces. The plant leafed out in spring, then collapsed in June.
I almost killed my third hibiscus by using the wrong pot. It had no drainage hole. The saucer was attached. Rain filled the pot. The soil stayed waterlogged for weeks. Die-back showed up on three branches. That time I caught it. I repotted into a proper container. The plant recovered.
New Gardener Checklist: Three Deadly Mistakes to Avoid
Overwatering is the first one. If the soil feels damp, do not water. Hibiscus likes moisture but not saturation. Potted hibiscus in particular rots fast when roots sit in water. Root health is what keeps the main trunk strong enough to resist fungus.
Light placement is the second one. Hibiscus blooms best in full sun. But a weak plant in baking afternoon sun gets stressed. Stress leads to cracks and die-back. Give it morning sun and light afternoon shade in very hot climates. Too little light is just as bad. Shade-grown hibiscus stays damp longer after rain, which increases fungal pressure on the trunk.
The wrong pot is the third mistake. No drainage hole is a death sentence. Pots that are too large hold too much moisture. Pots that are too small dry out unevenly and stress the plant. Choose a pot one to two inches larger than the root ball. Make sure water flows out freely.
Die-back fungus spreads down into main hibiscus shrub trunks when small infections are ignored. It spreads when water sits on leaves, when pruners carry spores from cut to cut, when fallen leaves rot under the plant, and when the canopy is so dense the trunk never dries. You stop it by cutting infected wood far below the staining, cleaning your tools constantly, sealing large cuts, watering at the base, thinning the center, and removing debris. I have used these exact steps to save hibiscus shrubs that were days away from trunk infection. The method works. But it only works if you act before the discolored streaks reach the base of the branch.
Frequently Asked Questions
Can a hibiscus survive if die-back reaches the main trunk?
Sometimes yes, but only if the infection is small and caught early. A shallow lesion on the trunk can be cut out and sealed. If brown streaking runs deep inside the trunk, the plant cannot move water well. Most hibiscus with deep trunk infection decline within weeks. Take cuttings from healthy branches immediately if you suspect deep infection.
Should I use cinnamon or honey instead of commercial pruning sealant?
Cinnamon has mild antifungal properties and honey can seal small wounds. I have used cinnamon on tiny cuts with decent results. But for cuts larger than a pencil, I stick with a proper pruning sealant. It lasts longer and forms a more reliable barrier against rain and fungal spores.
How often should I check my hibiscus for die-back?
During warm wet weather, I check every two or three days. In dry weather, once a week is enough. Early detection is everything. A small dark tip is easy to prune. By the time branches look fully dead, the infection has already moved much further down than you think.





