 bluename
If you’ve noticed fresh hibiscus leaves coming in twisted, bubbled, or crinkled, there’s a good chance early-season aphids are behind it. The damage is usually cosmetic, but it can slow down flowering and make your plant look stressed for weeks. The fix starts with washing off the aphids, pruning the worst distorted growth, and then supporting the plant with steady care so the next flush of leaves comes in clean. I’ve dealt with this more than once in my own garden, and the plant almost always bounces back faster than you’d expect.
How to Treat Hibiscus Leaf Crinkling Produced by Early-Season Aphid Feeding Activity
Hibiscus is one of those plants that gives you a huge return for relatively little effort. Big, tropical-looking blooms, deep green foliage, and a long flowering season. It is not a hard plant to grow at home, but it does have a few quirks. One of the most confusing is when new leaves show up crinkled, cupped, or almost blistered looking. You didn’t overwater. You didn’t fertilize wrong. It just looks odd. In most cases, especially in spring and early summer, the culprit is early-season aphid feeding activity.
Aphids are tiny, soft-bodied insects that love tender new growth. They pierce the leaf tissue and suck out sap. When they do that while the leaf is still developing, the leaf grows unevenly. The result is a warped, puckered, crinkled leaf that never fully flattens out. The plant itself may be fine. But the leaves look rough, and if the aphids keep feeding, flowering can suffer too.
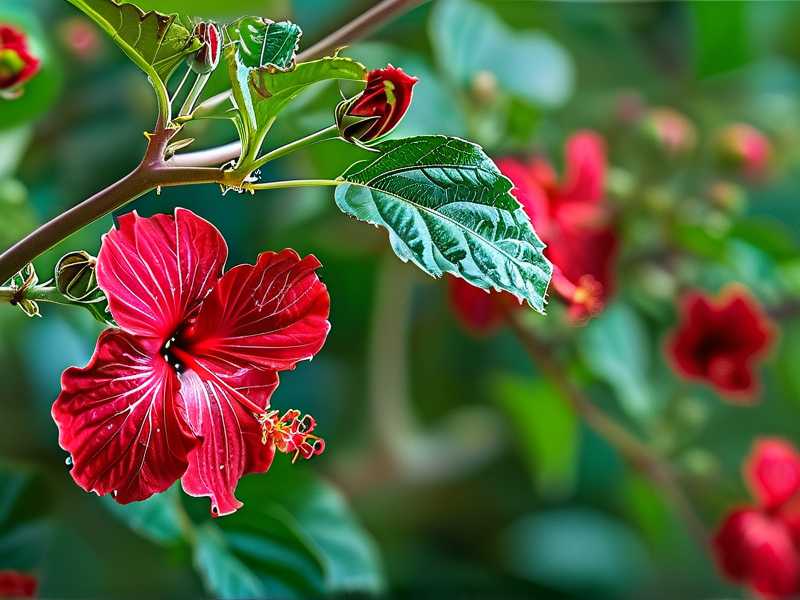
I’ve seen this on tropical hibiscus, hardy hibiscus, and even my potted patio plants. The good news is that treatment is straightforward, and you don’t need anything exotic. Let me walk you through what worked for me, including the mistakes I made along the way.
Why Early-Season Aphids Cause That Crinkled Look
Aphids appear almost as soon as the weather warms up. They feed on the softest, newest shoots and leaves. Hibiscus pushes out a lot of fresh growth in spring, so it’s like an open buffet for them.
The insects insert their mouthparts into the plant cells. Then they drink the sap. As they feed, they also inject saliva. That saliva can interfere with normal cell division. If the leaf is still tiny, the damage becomes permanent. The leaf may curl downward, crinkle in the middle, or have a rough, leathery texture.
I used to think crinkled leaves meant a virus or a nutrient problem. I spent weeks adjusting fertilizer and checking soil pH. Then I found clusters of aphids hidden inside the curled leaves. That was the real issue.
Sometimes the aphids are gone by the time you notice the crinkling. Their feeding activity causes the leaf to grow distorted, and then natural predators or rain wash the aphids away. You see the damage but not the pest. That is common. It does not mean the plant is doomed.
First Step: Look for Aphids on New Growth
Before treating hibiscus leaf crinkling produced by early-season aphid feeding activity, you need to confirm or rule out active pests. Check the undersides of new leaves. Look at the tips of stems and around flower buds.
Aphids can be green, black, yellow, or even pink. They are small but visible. They cluster together, often near the veins. You may also see a sticky residue. That is honeydew. Ants are often nearby because they feed on it.
If you see live aphids, start with water. A strong spray from a garden hose knocks most of them off. Do this in the morning so the leaves dry during the day. I have done this many times. It’s simple and effective for light infestations.
For heavier infestations, I use insecticidal soap or neem oil. I mix according to the label and spray every 5 to 7 days. You need to hit the undersides of the leaves. That is where aphids hide. I missed that the first time. I sprayed the tops and saw no improvement. After a week, I flipped the leaves over and found a whole colony still alive.
Prune the Worst Affected Leaves and Shoots
Once the aphids are gone or mostly controlled, prune the crinkled leaves. You don’t have to remove every single one. But the heavily distorted growth will never straighten out. It just saps energy and looks bad.
I cut back the affected stems to just above a healthy leaf node. The hibiscus responds with new growth. In about two to three weeks, you’ll see clean, flat leaves if the aphids are under control.
I have also learned not to do this in the middle of a heatwave. Wait for a cooler stretch or do it in the early evening. Hibiscus handles pruning well, but extreme heat plus heavy pruning can stress it more.
Over two weeks of treatment, I usually do one hard rinse on day one, apply insecticidal soap on day three, and prune on day five or six. Then I watch the new growth. By day fourteen, the plant starts pushing out healthier leaves. If you still see crinkling on the newest leaves after two weeks, check again for aphids. They may have returned from nearby plants.
Light Matters More Than You Think After Aphid Damage
Hibiscus love light. Most varieties do best with at least six hours of direct sun per day. In very hot climates, some afternoon shade can help. But if your plant is in too much shade, it will grow weak and leggy. The new growth will be soft and extra appealing to aphids.
I’ve kept hibiscus in partial shade before. The leaves got crinkled more often, and the plant bloomed less. After I moved it into full sun, the growth was sturdier. Aphids still appeared, but the plant was more resilient.
Too much light can also be a problem if the plant was recently pruned or if temperatures are extreme. A potted hibiscus in full afternoon sun can suffer leaf scorch. The leaves may turn yellow or brown at the edges. That is not aphid damage. It is heat and light stress.
A good rule is to give morning sun and some afternoon shade in very hot zones. In cooler regions, full sun is usually fine. The stronger the light, the firmer the new leaves. That reduces the visual impact of any early aphid feeding.
Watering the Right Way After Aphid Treatment
Watering hibiscus is all about consistency. The soil should feel like a wrung-out sponge. Not bone dry. Not soggy.
After treating aphids, I keep the soil evenly moist. The plant needs to recover. If the soil dries out completely, the roots get stressed. If the soil is too wet, root rot sets in and the plant declines quickly.
A lot of people ask me why their hibiscus drops leaves or turns yellow after aphid treatment. It’s often watering, not the insects. Overwatering is the most common mistake. In fact, 90% of indoor plants die from overwatering. Potted hibiscus on a patio can suffer the same fate if there is no drainage.
I check the top inch of soil with my finger. If it’s dry, I water slowly until it runs out of the bottom. If it’s still damp, I wait another day. In hot summer weather, I may water daily. In cool spring weather, every two to three days is enough for a potted plant.
For hibiscus planted in the ground, deep watering twice a week works in most climates. You want the roots to grow down, not stay shallow. Shallow watering makes the plant weaker and more attractive to pests.
Soil and Pot Choices That Help Prevent Repeat Aphid Issues
Hibiscus likes rich, well-draining soil. A mix of quality potting soil, perlite, and a little compost works well for containers. I avoid heavy garden soil because it compacts and holds too much water.
The pot itself matters too. Terracotta breathes but dries out faster. Plastic holds moisture longer. Glazed ceramic is somewhere in between. I use plastic for convenience, but I make sure there are drainage holes. No holes, no hibiscus. It really is that simple.
If you are repotting, do it in early spring before heavy growth starts. Move up only one pot size. Too big a pot means too much wet soil around the roots. That leads to root rot and more stress.
I have killed a hibiscus by putting it in a huge pot with no drainage. The leaves turned yellow, then the whole plant collapsed. By the time I realized the roots were rotting, it was too late. Now I always check drainage first.
For garden beds, loosen the soil and mix in organic matter. Hibiscus roots like air. Compacted soil makes the plant struggle, and struggling plants attract more aphids.
Fertilizing After Aphid Damage: Go Gentle
After you prune crinkled leaves, you might be tempted to push the plant with fertilizer. I’ve done that. It backfired.
Heavy nitrogen causes a flush of soft, fast growth. Aphids love that. You end up with a bigger aphid problem and more crinkled leaves.
Instead, use a balanced, slow-release fertilizer or a diluted liquid feed. If you use a liquid, go at half strength every two to three weeks during active growth. Reduce or stop in late summer and fall, especially if you bring the plant indoors for winter.
I also use a light dose of seaweed extract after pruning. It seems to help the plant recover without forcing excessive growth. I can’t prove it with a lab report, but in my garden, the leaves come in cleaner and firmer.
Never fertilize a bone-dry plant. Water first. Then feed. Otherwise you can burn the roots. I learned that the hard way with a potted hibiscus that dropped all its buds after I fertilized dry soil.
Spring Care: The Most Important Season for Crinkled Leaves
Spring is when early-season aphid feeding activity is most likely. The plant wakes up, pushes new growth, and aphids appear with the warmer weather.
I start checking my hibiscus once nighttime temperatures stay above 50°F. That’s usually when new shoots appear. I inspect the tips every two to three days. At the first sign of aphids, I rinse the plant with water.
Spring is also the time to prune lightly, repot if needed, and start a gentle fertilizing schedule. If you had crinkled leaves the previous year, be proactive. Don’t wait for the damage to show up. A simple weekly inspection can prevent most of it.
I also thin out crowded stems. Good airflow makes it harder for aphids to settle in. Plus, the plant looks better and blooms more.
Summer Care: Heat, Water, and Aphid Control
Summer is when hibiscus blooms the most. It’s also when water needs go up. Keep the soil evenly moist but not soggy. Mulch helps in garden beds.
In very hot weather, potted hibiscus may need watering daily. Check twice during heatwaves. A plant that wilts at midday but recovers at night is just telling you it’s hot. If it stays wilted in the morning, water it deeply.
Summer also brings more aphids in some regions. But you’ll also get ladybugs, lacewings, and other natural predators. If you spray a broad-spectrum insecticide, you kill those helpers too. I stick with water sprays and insecticidal soap. That keeps most pests in check without wiping out the good bugs.
Good ventilation is important. Don’t crowd pots together. Air movement reduces humidity around the leaves. It also makes it harder for fungal issues to start.
Fall Care: Easing into Dormancy
In fall, growth slows down. You can ease off fertilizing. In colder zones, stop feeding altogether by early fall. You don’t want soft new growth going into winter. That growth is weak and more susceptible to cold damage and pests.
I start reducing water slightly as temperatures drop. The plant still needs moisture, but not as much. For potted hibiscus, I move them closer to the house or into a sheltered spot before the first frost.
Fall is a good time to do a final check for aphids. Their numbers can spike again in early fall when the weather is mild. Treat them before you bring plants indoors.
Winter Care: Indoor and Outdoor Strategies
In cold regions, tropical hibiscus must come inside. Hardy hibiscus can stay outdoors, but potted plants need protection.
Indoors, place the plant near a bright window. A south or west facing window is best. Water less often. The plant isn’t growing much. Overwatering in winter is the fastest way to kill it.
I stop fertilizing completely in winter. I also keep the plant away from heating vents. Dry, warm air encourages spider mites and can stress the plant.
Check any overwintering hibiscus for aphids every week. If you missed a few in fall, they can multiply indoors. A gentle shower or insecticidal soap works. I’ve used a damp cloth to wipe leaves when I didn’t want to spray indoors.
Outdoor hardy hibiscus should be cut back after frost. Add a layer of mulch around the crown. In very cold areas, extra mulch helps protect the roots. Don’t fertilize and don’t water unless the soil is completely dry.
Common Problems That Mimic Aphid Damage
Not every crinkled leaf is from aphids. A few other issues can look similar.
Spider mites cause stippled, yellowing leaves. They are tiny and make fine webbing. Leaves may look dull and dirty. Treat with insecticidal soap or horticultural oil.
Nutrient problems can cause puckering. Calcium or boron issues, but these are less common in container plants with regular feeding. In garden beds, a soil test can help.
Herbicide exposure can cause twisted, cupped leaves. If you sprayed weed killer nearby, drift could be the cause. There is no fix for that. You just wait for new growth.
Viral infections are rare but possible. If the leaves are mottled, streaked, or the plant’s growth is severely stunted, it could be a virus. There is no cure. Remove the plant to protect others.
For most home gardeners, aphids are the most likely cause of early leaf crinkling. The damage is temporary. The plant recovers with basic care.
How I Treated My Own Hibiscus Over Two Weeks
I want to share exactly what I did with a potted hibiscus that had crinkled leaves last spring. It was bad. Almost every new leaf was puckered and twisted.
Day 1: I saw clusters of green aphids on the growing tips. I took the plant to the yard and sprayed it hard with the hose. That knocked off most of them.
Day 2: I checked again. A few remained. I mixed insecticidal soap and sprayed every leaf, top and bottom. The plant was in shade while I did this.
Day 3: I noticed the worst leaves were still crinkled. I pruned the top few inches off each affected stem. I cut just above a leaf node.
Day 5: I applied a second round of insecticidal soap. I also wiped down the pot and the rim because ants were still hanging around.
Day 7: New growth started to appear. It looked clean. I gave the plant a light dose of seaweed extract.
Day 10: A few aphids came back on one stem. I sprayed that area only. I didn’t want to overdo it.
Day 14: New leaves were coming in flat and green. The plant looked much better. The old crinkled leaves slowly yellowed and dropped on their own.
That two-week period taught me more than any label. The key was persistence. One treatment wasn’t enough. I had to inspect and repeat. But I also didn’t need harsh chemicals. Soap and water did the job.
Three Fatal Mistakes New Hibiscus Growers Make
1. Overwatering
I have to say it again: 90% of indoor plants die from overwatering. Hibiscus hates sitting in wet soil. If the leaves are yellow, soft, and dropping, check the roots. They may be brown and mushy. That’s root rot.
The fix is to let the soil dry slightly between waterings. Use a pot with drainage. Don’t let it sit in a saucer full of water.
2. Wrong Light
Too little light makes hibiscus weak and spindly. Too much hot afternoon sun can scorch leaves. I’ve done both. The plant tells you with its leaves. Pale growth means not enough light. Brown, crispy edges mean too much.
Adjust gradually. Don’t move a plant from shade to full sun in one day. I did that once and the leaves were damaged within hours.
3. Wrong Pot
No drainage holes is a death sentence. A pot that is too large holds too much soil and water. A pot that is too small dries out constantly. I’ve used all three. Now I match the pot to the root ball and always check for holes.
The RHS and AHS Perspective on Aphid Management
The RHS recommends regular inspection of new growth, especially in spring, and suggests using non-chemical controls first. That includes water sprays, encouraging natural predators, and using organic sprays only when needed. This matches what I’ve seen in my own garden. The simplest approach often works best.
The AHS also emphasizes good plant care as the first line of defense. A healthy hibiscus is less attractive to pests and recovers faster. Proper light, watering, and soil all play a role. These are not quick fixes, but they make a long-term difference.
What You Should Do Right Now
If you see crinkled new leaves on your hibiscus, don’t panic. Check the growing tips for aphids. Rinse the plant well. Prune the worst leaves. Then keep the soil evenly moist and give the plant good light. Check every few days for new pests. That’s it.
Hibiscus leaf crinkling produced by early-season aphid feeding activity looks worse than it is. The plant will grow out of it. You just need to break the pest cycle and let the new leaves develop cleanly.
Frequently Asked Questions
Can crinkled hibiscus leaves recover on their own?
No. Leaves that have already grown distorted from aphid feeding will not flatten out. The damage is permanent for those leaves. But the plant will produce new leaves that grow normally once the aphids are gone.
Do I need to use chemical insecticides for aphids on hibiscus?
Most of the time, no. A strong water spray, insecticidal soap, or neem oil is enough. Use chemicals only if the infestation is severe and nothing else works. Always follow the label and avoid spraying open flowers where bees visit.
How often should I check my hibiscus for aphids?
During spring and early summer, check every two to three days. Look at the tips of new growth and the undersides of leaves. After that, a weekly check is fine. If you catch aphids early, you can usually avoid major leaf cr





