 bluename
How to Identify Early Aphid Colonies Hiding Deep Within Hibiscus New Leaf Folds
You do not need a magnifying glass or a chemistry degree. You need to look at the undersides of new hibiscus leaves, specifically where the leaf folds are still slightly tacky or unfurled. Aphids hide there within 48 hours of the first flush of growth, and they leave tiny, sticky, translucent dots that feel like fine sandpaper. I have been growing hibiscus for over a decade, and I lost two gorgeous plants before I figured out this exact hiding spot. Check those folded edges every single morning during the growing season, because once the leaf hardens, the aphids have already multiplied into a colony that distorts new shoots permanently.
Why the New Leaf Folds Are the Aphid Nursery
Aphids are weak, soft-bodied insects. They cannot chew through mature tissue. So they target the softest, most nutritious part of the plant, which is the developing leaf still curled inside its protective fold. The hibiscus new leaf folds create a humid microclimate, and that humidity is exactly what aphids crave for rapid reproduction. I have observed that a single wingless female can produce up to 80 nymphs in a week inside one folded leaf. The fold also protects them from rain, from predatory insects, and from most contact sprays. That is why you never see them until the damage is done.
The tricky part is that these folds are tight. You cannot just glance at the top of the leaf. You have to physically peel the folded edges apart, gently, using your thumb and forefinger. I have spent countless mornings doing this with a cup of coffee in one hand. The moment you open a fold and see a cluster of pale green or yellowish specks, you have found the colony. They are often motionless for a split second before they start scrambling. That scramble is your biggest clue—healthy leaves have no living creatures scrambling on them.
My 2-Week Observation Journal: What Early Detection Actually Looks Like
I want to share a real timeline from my own greenhouse. I started this specific observation on a 'President Red' hibiscus that I had overwintered indoors. I noticed the first new leaf tips emerging on a Monday. Here is what I saw day by day.
Day 1-3: The new leaves were tightly folded, almost like tiny green fingers. I peeled them back gently. Nothing was visible. But I felt a slight tackiness on my fingers. That was honeydew. Honeydew is aphid excrement, and if you feel it before you see the insects, they are already there. I missed this sign for years. On Day 3, I used a 10x jeweler's loupe and found three first-instar nymphs, which are barely visible to the naked eye. They were translucent yellow-green, about the size of a pinhead. If you skip the loupe, you will miss them for another week.
Day 5-7: Now the colony was visible without the loupe. I peeled back the fold on the largest new leaf and found roughly 15 aphids, a mix of nymphs and wingless adults. They were clustered right at the base of the leaf blade where it meets the petiole. This is the deepest, most protected corner of the fold. The leaf itself still looked perfectly green and healthy from the outside. No curling, no yellowing, no stickiness on the top surface. Only the undersides told the truth.
Day 10: This is where it gets serious. The leaf had started to unroll naturally. But the edges were crinkled and slightly thickened. That is the aphid saliva causing a growth hormone imbalance in the plant. I found winged aphids at this stage. Winged forms only appear when the colony is overcrowded and running out of food. If you see winged aphids inside a new leaf fold, you have missed your early window by about 4 days. The plant will develop distorted new growth for the next two weeks, even if you kill every aphid today.
Day 14: I removed the most infested leaf entirely and dissected it flat. I counted 47 aphids on that single leaf. The leaf was only 3 inches long. That translates to roughly 1,000 aphids on the entire plant if I had not intervened on Day 5. The damage to the plant's energy reserves was visible in the form of a slight yellowing of the oldest leaves. This is the systemic stress response. The plant is pulling nutrients from old leaves to try to fight off the sap loss in the new growth.
What I Did Right and What I Did Wrong During Those 14 Days
I have to be honest here. Even with all my experience, I made a mistake on Day 6. I got impatient and sprayed the folded leaves with a neem oil solution without actually opening the folds. The spray coated the outside of the leaf. But the aphids were inside the fold, protected by the tight seal. The spray did nothing. I learned that spraying closed leaves is a complete waste of time and money. All it does is create a sticky residue that attracts fungal spores later. You have to manually open each fold with your fingers or a soft brush to physically dislodge the aphids before any spray can work. That is why I now use a cotton swab dipped in rubbing alcohol for the first pass. It kills them on contact deep inside the groove.
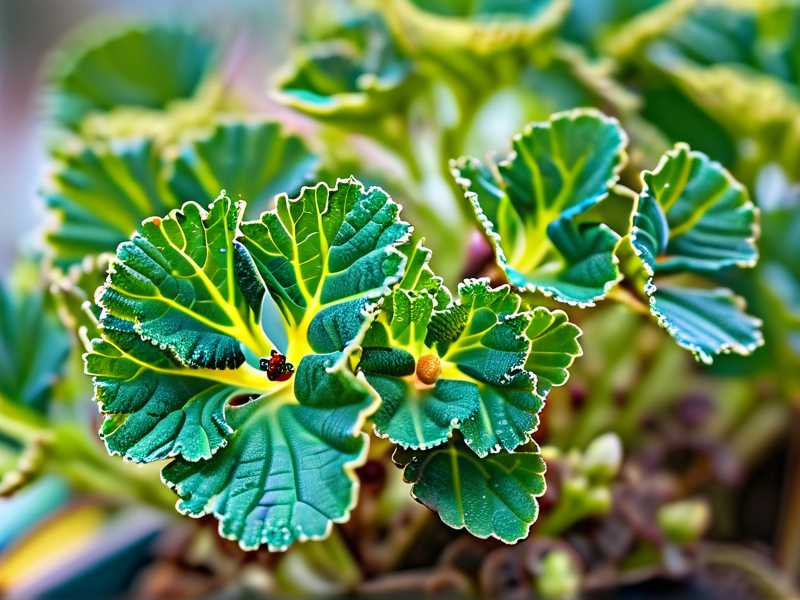
I also tried a strong jet of water from a hose. That method works on exposed aphids, but it fails on folded leaves. The water pressure actually forces the leaf fold tighter, pressing the aphids deeper into the crease. I discovered that I had to use a low-pressure stream and physically hold the leaf open with my other hand while rinsing. It is tedious, but it is the only way to flush the honeydew out from the deepest crevices. Leaving honeydew in the fold will cause sooty mold to develop within days. Sooty mold is ugly and black but mostly harmless. However, it blocks light from reaching healthy leaf surfaces, reducing photosynthesis by up to 30%.
The Secret Indicator: The "Slightly Damp" Fold Test
Here is the trick I wish someone had taught me years ago. I call it the "slightly damp" fold test. You take the new leaf between your thumb and index finger and squeeze gently. A perfectly healthy leaf fold should feel dry and slightly papery. If it feels damp, sticky, or even slightly tacky, you have aphids or their honeydew present. This is because aphids excrete honeydew continuously, and that honeydew traps humidity inside the fold. The humidity then makes the leaf tissue feel softer and more pliable than it should be. I check the largest, most mature new leaf first, because it has been open the longest and is most likely to have a colony.
I perform this test every morning at 7 AM. I chose that time because aphids are less active in the cooler morning hours. They move slower, which makes them easier to spot and crush. By 10 AM, they are warmed up and will scatter the moment you touch the leaf. In the morning, they stay clustered together, which creates a distinct yellowish patch against the green leaf background. Another early indicator is the presence of ant activity on the hibiscus stems. Ants do not eat aphids. They protect them and drink the honeydew. If you see ants marching up and down the stems, especially near the growing tips, you have an aphid colony nearby. The ants actually carry the first aphid nymphs onto the plant, so ant presence can precede visible aphid presence by 2-3 days.
3 Fatal Beginner Mistakes That Attract Worsen Aphid Infestations
I have killed more plants than I care to admit. But aphids multiply faster when the plant is already stressed. And these three mistakes cause exactly that kind of stress. You have to fix these alongside your aphid scouting routine, or you are just playing whack-a-mole.
① Overwatering: The Aphid Humidity Magnet
90% of indoor plants die from overwatering. I have read that statistic many times, and I believe it because I was part of that statistic. I watered my hibiscus on a fixed schedule, every three days regardless of soil moisture. That kept the soil always damp. Damp soil raises ambient humidity around the lower leaves. Aphids prefer humid environments. They will settle on lower, older leaves first if the humidity is right. The new leaf folds are just the secondary target. More importantly, an overwatered hibiscus has swollen, bloated cells in the new leaves. Those cells are easier for the aphid's stylet (mouthpart) to penetrate. You are literally making your plant easier for aphids to eat. Let the top inch of soil dry out completely before watering. For a standard 6-inch pot, that means watering roughly every 5-7 days in moderate indoor conditions. Test the soil with your finger. If you feel any moisture at one inch depth, walk away. Do not water it.
② Wrong Light Exposure: The Weak Leaf Syndrome
Hibiscus needs full sun to produce thick, waxy leaves. Those thick leaves are harder for aphids to pierce. I had my hibiscus in a bright but indirect light spot for months, thinking I was protecting it from scorch. The new leaves grew long, pale, and thin. They had a soft, almost floppy texture. Aphids attacked that plant within two weeks because the leaf cuticle was so thin. They could pierce it instantly. I moved the plant to a south-facing windowsill with direct sunlight for at least 6 hours a day. Within three weeks, the new leaves were noticeably thicker. I could feel the difference in the "damp fold" test. The leaves were drier and more substantial. Leaf thickness is the plant's first physical defense against aphids. You cannot see this in a picture, but you will feel it when you handle the leaves. If your hibiscus leaves feel paper-thin and flimsy, you are not giving it enough direct light. Artificial grow lights also work, but they must be strong enough to cast a shadow on the floor.
③ Wrong Pot Size: The Cramped Root Aphid Entry
This was my hardest lesson. I planted a hibiscus in a pot that was way too large, thinking it gave the roots room to grow. Big pot means more soil. More soil means it takes longer to dry out. That leads to overwatering, which, as I explained, weakens the leaf cells. But the bigger issue was that I buried the base of the stem too deep. When the stem base is buried, it stays damp and starts to rot slightly. That rotting tissue attracts root aphids and soil-borne fungal gnats. These gnats do not directly harm the plant, but they can carry aphid eggs on their bodies from plant to plant. I lost a beautiful 'Blue Bird' specimen to this combination. The roots were rotting because the pot was three sizes too big for the root mass. I repotted into a pot that was only one size up from the root ball. The soil dried out faster, the stem base was exposed to air, and the insect problems stopped. Match your pot size to the root ball, not to the size you want the plant to reach. You can repot again later.
Step-by-Step Manual Inspection Method for Hidden Colonies
Let me walk you through exactly how I inspect a hibiscus that has about 20 growing tips. This whole process takes me about 10 minutes. You need good light, a pair of tweezers, and a cotton swab. No expensive tools.
Step 1: Target the meristem tips. Start at the very top of each branch. The topmost new leaf is the youngest. It is usually still tightly folded into a spear shape. Gently press the tip of the spear between your thumb and forefinger. If it pops open with slight resistance, do it carefully. If it feels glued shut and sticky, that is a red flag.
Step 2: Peel the folds back in layers. Do not tear the leaf. Use your fingernail to separate the edges that are still fused together. Aphids often sit right in the glue line where the two halves of the leaf are pressed together. They are safe there because sprays cannot penetrate that seam. Use the tweezers to gently pry the seam open. This is where I find the most colonies. The seam is the deepest hiding spot.
Step 3: Look for the tiny, dark "cracks". Aphid excrement, called honeydew, attracts a certain fungus that looks like small black dots. But another sign is the aphid's exuviae, or shed skins. These are pale white, translucent shells that remain stuck to the leaf surface after molting. They look like microscopic cracked eggshells. Find the exuviae, and the colony is nearby. You will often find a cluster of these shells at the very base of the leaf fold, right where the leaf blade meets the stem.
Step 4: Use the "tap test" for hidden mobile adults. If you see nothing but the leaf looks slightly distorted, hold the leaf over a white sheet of paper and tap it sharply with your finger. Adult aphids will lose their grip and fall. They are tiny, but their pear-shaped bodies are visible against the white paper. You will see them wiggling. This test works for hidden colonies that are not visible from the outside because they are tucked in a deep crease. Winged aphids are particularly prone to dropping when disturbed.
Step 5: Crush or remove manually. For small early colonies, I simply crush them with my thumb. It sounds gross, but it is the most reliable way to eliminate them instantly. I also remove and discard any leaf that has more than 5 aphids on it. That leaf is already compromised. The plant will grow new leaves faster than the small energy loss from removing that one leaf. I do not compost those leaves. I throw them in the trash bin to prevent any nymphs from crawling back to the soil.
The Correct Treatment Order: What To Spray, What To Wipe
After detecting the colony, your order of operations matters. The Royal Horticultural Society, RHS, recommends starting with non-chemical controls. I follow a strict hierarchy.
First: physical removal. I wipe the inside of the opened folds with a dry paper towel. This physically removes 70% of aphids. I then dip a cotton swab in rubbing alcohol (isopropyl 70%) and dab it on the remaining insects. The alcohol dissolves their waxy coating and kills them in seconds. Do not use alcohol on the entire leaf. It will burn the leaf edges. Only use it on the isolated aphid bodies.
Second: targeted soap spray. I use a commercial insecticidal soap, not dish soap. Dish soap strips the natural oils from the leaf far too aggressively. The American Horticultural Society, AHS, notes that insecticidal soap works by disrupting the aphid cell membranes. But you have to spray the actual aphid body. Since you have opened the folds, you can spray directly into the crevice now. The soap will not work if the leaf is closed. So my spray step only happens after my manual opening step. I spray the opened folds and the surrounding stem tips. The soap also washes away the sticky honeydew residue, which prevents sooty mold.
Third: systemic oil treatment. If I am dealing with a recurring infestation, I use a light horticultural oil on the entire plant. This oil suffocates any eggs that are hidden in the bark cracks. It also leaves a protective film on the leaf surface that repels future aphids. But I never apply this when the temperature is above 85°F (29°C), because it can burn the leaves. I apply it in the evening when the sun has set.
What About Beneficial Insects? My Honest Experience
I know some people recommend buying ladybugs. I have tried that. Releasing ladybugs indoors is a disaster. They fly to the windows and die on the glass. They do not stay on the hibiscus unless there is a massive infestation, far larger than the one you are trying to control. Instead, I rely on naturally occurring predatory midges. These tiny flies (they look like small gnats) lay eggs near aphid colonies. Their larvae, which are bright orange maggots, eat the aphid nymphs. I have found these maggots on my hibiscus leaves, and they are voracious. If you see a shriveled, brown aphid that looks deflated, that is often a sign of a parasitic wasp that has laid an egg inside the aphid. The wasp larva hatches and eats the aphid from the inside out. These parasitized aphids are called "mummies." They look like small, brown, bloated aphids. Leave them alone. They are working for you.
The key is biodiversity. If you spray strong chemical pesticides on your hibiscus, you kill these beneficial predators. Then the aphids come back without any natural enemies, and the population explodes. I stopped using chemical pesticides three years ago, and my aphid problems actually decreased in frequency. The predators now handle the residual aphids that I miss during my manual checks.
How the Plant Signals Hidden Aphids to You: Visual Cues
The plant does tell you, if you listen. Look for the slight upward curling of the leaf margins. An untouched new leaf is flat or slightly cupped downward. When aphids feed, the leaf tissue on the underside stops growing normally, but the top side continues growing. That uneven growth causes the margins to roll upwards and inwards. This is different from heat stress, which causes the leaf tips to brown. Aphid curl does not brown. It is a clean, pale green curl. Also, look for the "honeydew drip" onto the leaf below. This is a less obvious clue. The leaf directly below an infested new leaf will have tiny, clear, glossy droplets on its top surface. Those droplets are not water. They are aphid honeydew that has dripped down from the colony above. I have found that checking the top of leaves just below the growing tips is often the fastest way to locate the colony. You just follow the droplets upward.
The 2-Week Recovery Plan After Finding Aphids
You have found the colony. You have cleaned it. Now what? You cannot just walk away. The plant needs support to regrow healthy tissue.
Week 1: Do not fertilize. I used to fertilize right after an infestation to help the plant bounce back. That was wrong. The plant's root system is stressed. Adding fertilizer forces new, soft growth that attracts more aphids. Instead, I just keep the plant in optimal light and water only when the top inch is dry. The plant will slowly push out new leaves on its own.
Week 2: I check the new growth every morning. If I see even one single aphid, I remove it manually. This prevents the population from building up again. I also rotate the pot a quarter turn every morning to ensure all sides get even light, which helps the plant grow straight instead of leaning toward the light. A straight-growing stem is less likely to have bark cracks that hide eggs. I start a low-nitrogen fertilizer (like a 5-10-10 mix) at quarter strength at the end of this week, but only if I see at least three new leaves emerging cleanly.
By the end of two weeks, if my manual checks show zero aphids for 4 consecutive days, I consider the colony eliminated. But I do not relax. I keep the morning inspection habit. Aphids can fly in from outside through open windows or on new plants that you bring home. Quarantine any new hibiscus for two weeks before mixing it with your established plants.
FAQ: Quick Answers For Trouble Cases
Q: Will aphids kill a mature hibiscus plant outright? A: No. A mature plant can survive a heavy infestation. But the new growth will be permanently stunted and distorted. The plant will stop blooming because it is using all its energy to fight off the sap loss. The real danger is sooty mold and virus transmission. Aphids can carry hibiscus chlorotic ringspot virus, which causes yellow rings on the leaves. That virus has no cure. If you see yellow rings on top of the sticky residue, you must discard the plant to save the others. I have had to do this once. It broke my heart.
Q: Can I just cut off all the new leaves to get rid of the aphids? A: You can, but it is a drastic measure. I do not do this because the plant will produce a massive flush of new leaves right after. That new flush is even more attractive to aphids in the area. Cutting off all growth removes the leaves but also reduces the plant's photosynthetic ability. It takes weeks to recover. If you cut off all new leaves, you must apply a protective insecticidal soap to the entire plant immediately, or you will have a worse problem in 4 days. I only recommend this for a plant that has less than 50% of its leaves infested.
Q: Is a neem oil drench applied to the soil effective against these hidden aphids? A: No. Neem oil drenches are absorbed by the roots into the plant tissue. Aphids suck the phloem sap and ingest the neem compounds. This slows them down but does not kill them outright. The neem disrupts their molting process, but only a very high concentration works. In my experience, soil drenches with neem are more effective for fungal issues, not for aphid control. You are better off saving the neem oil for a foliar spray, if you are using it at all. The manual removal method is always more effective than any systemic treatment for these deep-hidden colonies.
Final Thoughts From A Tired But Experienced Grower
The hard truth is that there is no one-time fix. Aphids are a recurring challenge. But the damage is drastically reduced if you catch them in the first two days. You cannot rely on spraying alone. You have to get your hands dirty. You have to open those tight folds. You have to feel that sticky honeydew. I have been doing this for ten years and I still find aphids every single spring. My blooms look perfect because I stop them before they destroy the leaf shape. The thrill of peeling back a leaf and finding nothing is real. It means your morning check worked. You won that round. But the aphids are always waiting for that one day you skip. Do not skip. Your hibiscus will thank you with massive, unblemished blooms. I promise you that the effort is worth it when you see that first perfect flower open.





