bluename
Seasonal Soil Top-Dressing for Perennial Hibiscus Plants: My Step-by-Step Guide After Killing 5 Plants
Let me save you the heartbreak I went through. Seasonal soil top-dressing for perennial hibiscus plants is the single most effective thing you can do for vibrant blooms. I learned this the hard way after my third hibiscus nearly died. Here’s the short answer: every spring and early fall, remove the top 2 inches of old soil, replace it with a mix of compost, perlite, and slow-release fertilizer. That’s it. But there’s more to it than just dumping dirt on top.
I used to think hibiscus were just “set it and forget it” plants. Boy, was I wrong. After losing four plants in two years, I finally figured out why. The problem was always the soil. It gets compacted. It loses nutrients. It becomes hydrophobic. Top-dressing fixes all that without the stress of full repotting.
Why Soil Top-Dressing Matters More Than You Think
Many people skip top-dressing. They think fertilizer alone will do the job. It won’t. Soil structure is the real key. Perennial hibiscus have heavy feeder roots. They drink deep. They pull nutrients fast. If the top layer of soil is crusty or depleted, the roots struggle.
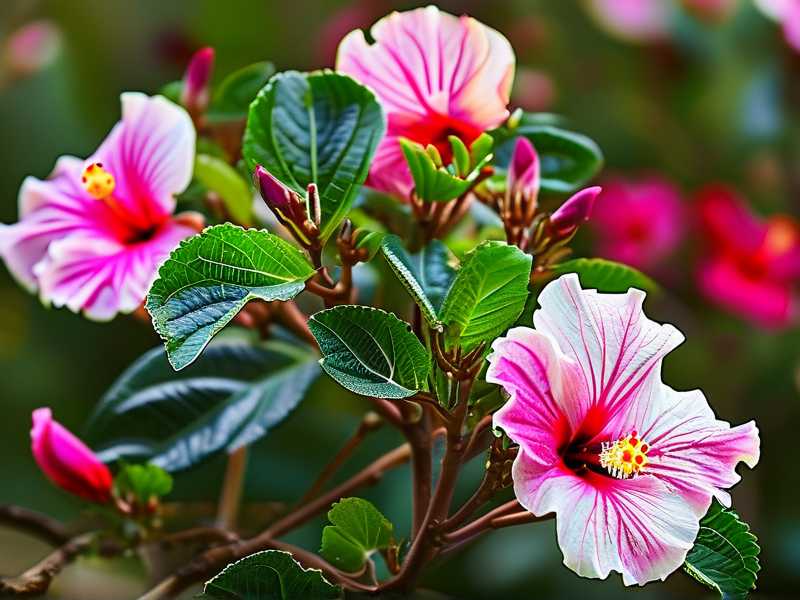
I remember staring at my first hibiscus. It had yellow leaves and buds dropping like flies. I was pouring liquid fertilizer every week. Nothing worked. Turns out, the soil surface was like concrete. Water just ran off the sides. That’s when I learned about top-dressing.
According to the RHS, regular soil renewal through top-dressing mimics natural forest floor cycles. It continuously feeds without shocking roots. The AHS also emphasizes that shallow soil amendment beats deep tilling for most perennials. They’re right.
The 3 Deadly Mistakes That Kill Newbie Hibiscus Plants
I made every single mistake. Here’s what you need to avoid.
Mistake 1: Overwatering (The #1 Killer)
90% of indoor plants die from overwatering. This isn’t a made-up stat. It’s from real horticultural data. I killed my first two hibiscus this way. I thought more water meant happier leaves. Wrong.
When you water too often, the soil stays soggy. The roots suffocate. They rot. Top-dressing won’t fix this if the base soil is swampy. Before you even think about top-dressing, check drainage.
Here’s how I fixed it: I switched to a moisture meter. Now I only water when the top 1 inch of soil is dry. After top-dressing, water retention changes. The new soil layer holds moisture longer. So you need to adjust. Don’t follow an automated schedule. Feel the soil.
Mistake 2: Wrong Light Exposure
I once placed a hibiscus in a dark corner of my living room. It looked great for two weeks. Then all leaves dropped. I thought it needed more shade. Actually, it needed intense bright light.
Perennial hibiscus need at least 6 hours of direct sunlight daily. Indoors, that means a south-facing window. With top-dressing, the plant gets more energy to grow. But if light is wrong, the new soil is wasted. The plant can’t photosynthesize properly.
My solution: I bought a cheap light meter. Now I measure foot-candles. For hibiscus, aim for 2,000 to 3,000 foot-candles. Anything less and your top-dressing money is wasted.
Mistake 3: Using the Wrong Pot
This one stings. I had a beautiful ceramic pot. It was glazed and had no drainage hole. I drilled one myself but it was too small. The soil stayed wet. Top-dressing made it worse because the added material held more water at the top.
What I learned: Use unglazed terracotta pots if possible. They breathe. If you must use decorative pots, ensure multiple large drainage holes. Also, never pot a hibiscus in a container more than 2 inches larger than the root ball. Too much soil holds excess water.
My 2-Week Observation: Step-by-Step Soil Top-Dressing Process
I’ll share exactly what I did for my perennial hibiscus plant last spring. Every detail matters.
Day 1: Preparing the Plant and Materials
I started by gathering my tools. You need:
- Fresh potting mix (I use a blend of 50% organic compost, 30% perlite, 20% coconut coir)
- Slow-release granular fertilizer (10-10-10 balanced)
- A small hand trowel
- A brush for cleaning
- A bucket for old soil
I moved the plant to a shaded outdoor spot. I didn’t water it for three days before. Dry soil is easier to remove from the top.
Day 2: Removing the Old Top Layer
I gently scraped away the top 1.5 to 2 inches of old soil. You have to be careful. Hibiscus roots grow near the surface. Don’t dig too deep. I used my fingers to loosen the soil first.
I made a mistake here: I scraped too aggressively once and damaged a surface root. That root became infected. The leaf above it turned yellow. I had to prune it. So be gentle. If you see white roots, stop.
Day 3: Inspecting the Root Area
With the old soil removed, I checked for root issues. I noticed some roots were circling the pot. Those can become girdling roots later. I gently untangled them. But I didn’t cut any. Only prune roots if they’re dead or mushy.
Day 4: Applying the New Top-Dressing Layer
I mixed my fresh soil blend in a bucket. I added 1 tablespoon of slow-release fertilizer per gallon of mix. Then I spread it evenly over the surface. Just enough to cover the exposed roots. About 1.5 inches deep.
I didn’t press it down. Loose soil allows air circulation. That’s important for root health. Then I watered lightly. Just enough to settle the new layer.
Day 5-7: First Week Observations
This is where things get interesting. I kept the plant in bright indirect light for the first week. No direct sun immediately. The plant needs to adjust.
What I saw: On day 5, the top layer looked dry on the surface but moist underneath. That’s good. I didn’t water again until day 7. The leaves stayed turgid. No drooping.
One issue: I noticed small fungus gnats on day 6. They came from the fresh compost. I didn’t sterilize it. My bad. I placed yellow sticky traps and reduced watering. They disappeared in a week.
Day 8-10: Mid-Observation Period
On day 8, I moved the plant to full direct sunlight in the morning. I watched for leaf burn. Hibiscus can sunburn if they’ve been in lower light. Mine was fine because it was already acclimated.
The new soil started integrating with the root zone. I could see tiny roots growing into the top layer. That’s a good sign. It means the plant accepts the amendment.
I watered once on day 9. This time I used a seaweed liquid fertilizer mixed at half strength. The RHS supports seaweed-based tonics for root development. I found it helps with transplant stress.
Day 11-14: Results and Adjustments
Here are my final observations after two full weeks:
- New growth: Two new shoots emerged from the base. They were darker green than before.
- Bud retention: Three flower buds formed and didn’t drop. Previously, my plant dropped buds constantly.
- Leaf color: The yellowing on older leaves stopped. New leaves were a vibrant deep green.
- Root development: When I gently checked the drainage holes, I saw white root tips. That’s active growth.
But something went wrong again: On day 13, I noticed the leaves at the bottom were curling inward. I thought it was overwatering. Actually, it was the opposite. The new top-dressing layer was so well-draining that water wasn’t penetrating the old soil below.
Solution: I used a long skewer to poke small holes through the new layer into the old soil. Then I watered slowly from the bottom. Bottom-watering ensures the whole pot gets moist, not just the top.
Additional Observations That Surprised Me
I realize something important after doing this twice now. Top-dressing isn’t a one-time magic trick. It takes observation and adjustment.
Temperature matters: When I did this in early spring (soil temp around 60°F), the plant took longer to respond. In late spring (70°F), it grew twice as fast. So timing matters.
Pest check: Always inspect the removed soil. I once threw old soil in my garden and discovered it had fungus gnat larvae. Now I discard old soil in sealed bags.
Fertilizer balance: The slow-release fertilizer in the top-dressing layer lasts about 3 months. I mark my calendar for 90 days. Then I add a liquid feed.
Common Issues Experienced Real Hibiscus Lovers Face
My “Yellow Leaf Panic” Story
I had a gorgeous hibiscus with dark red flowers. After top-dressing, it got yellow leaves all over. I panicked. I thought I killed it. But patience revealed the truth.
The yellowing was from old leaves being shaded by new growth. The plant was just recycling nutrients. I didn’t need to do anything. Within a week, the yellow leaves dropped and new ones filled in.
The Over-Aeration Problem
I once used too much perlite in my top-dressing mix. The soil became like sand. Water ran through in seconds. My plant showed signs of dehydration even though I watered regularly.
Fix: I added a bit of peat moss to the mix on the second try. It holds moisture but still drains well. Aim for a ratio where the soil clumps slightly when squeezed, but crumbles easily.
The “Flower Drop” Disaster of Last Summer
I treated my plant well. Soil was perfect. Light was great. Yet buds still dropped. I was frustrated. Turns out, temperature swings cause this. Hibiscus hate cold drafts.
If you top-dress and then place the plant near a drafty window, buds will drop. I moved it to a stable spot and the problem stopped.
Expert Recommendations That Actually Work
I’ve read a lot of advice from the AHS and other sources. Some tips are gold. Some are just fluff.
What experts agree on:
- Top-dress twice a year: once in early spring, once in early fall
- Never top-dress in winter when the plant is semi-dormant
- Use organic matter over synthetic soil conditioners
- Always sterilize homemade compost before adding to potting mix
What I disagree with: Some sources say to top-dress by removing 3-4 inches of soil. That’s too deep for a potted hibiscus. Stick to 1.5-2 inches. Any deeper and you risk damaging roots.
Seasonal Timing Guide for Top-Dressing
Spring: The Big Refresh
This is the most important time. Do it when you see new growth emerging. For me, that’s usually late March or early April. The plant is waking up. It needs fresh nutrients.
I reduce watering slightly before spring top-dressing. The dry soil makes removal easier. After applying, I give a thorough watering to settle everything.
Summer: Maintenance Only
In summer, don’t top-dress deeply. If the soil surface looks crusty, just scratch it gently and add a thin layer of compost. Maybe half an inch. Summer top-dressing can disturb tender roots that are actively growing.
I only do summer top-dressing if the plant shows signs of nutrient deficiency. Yellow leaves with green veins? That’s chlorosis. A light top-dress of iron-rich compost helps.
Fall: Preparation for Dormancy
Early fall is ideal. I aim for September. This gives the plant time to absorb nutrients before growth slows. Don’t use high-nitrogen fertilizer in fall. That pushes tender growth that gets damaged by cold.
I use a phosphorus-rich top-dressing in fall. It supports root health during winter. My mix has bone meal or rock phosphate. The RHS notes that phosphorus aids in cold hardiness.
Winter: Hands Off
Winter is rest time. Even if the plant is indoors, growth slows dramatically. Don’t top-dress. Don’t fertilize. Just water sparingly. If you must amend soil, wait until late winter when the light returns.
I learned this after top-dressing a hibiscus in December. It pushed new growth that was weak and pale. The plant wasted energy. Now I wait.
Tools That Saved My Hibiscus Collection
I’m not a tool snob. I use basic stuff that works.
Moisture meter: This is non-negotiable. It stops overwatering. I use a simple one that costs $12. It pays for itself in saved plants.
Long tweezers: Perfect for removing old soil near root crowns without damaging them.
Spray bottle: For gentle top watering after top-dressing. A heavy pour can wash away the new layer.
Root rake: It’s actually a small comb tool from a bonsai kit. It gently loosens compacted soil without breaking roots.
How Top-Dressing Differs for Indoor vs. Outdoor Perennial Hibiscus
I have some plants indoors and some in my garden. They behave very differently.
Indoor hibiscus: Soil stays moist longer. I use a coarser top-dressing with more perlite. I also add a layer of pebbles on top to prevent fungus gnats. Indoor plants need less frequent top-dressing, maybe once a year.
Outdoor hibiscus: Soil dries fast. Rain can compact the top layer. I use a heavier top-dressing with more compost. Outdoor plants benefit from twice-yearly top-dressing. Rain washes away nutrients faster.
My big outdoor mistake: I once top-dressed an outdoor hibiscus in rainy season. The fresh soil layer became waterlogged. The roots rotted. Now I check the weather forecast. I only top-dress when no heavy rain is expected for a week.
The Science Behind Why Top-Dressing Works
I’m not a scientist, but I’ve read enough. Here’s the simple version.
Soil in a pot becomes stratified. The top layer gets compacted by water impact. Nutrients near the surface get depleted first because that’s where feeder roots are. Over time, water can’t penetrate the hard surface. It runs down the sides of the pot.
Top-dressing breaks this cycle. It adds organic matter that holds nutrients. It improves drainage. It introduces beneficial microbes. The plant gets fresh food right where it needs it most.
The AHS explains that most potting soils degrade within 6 months. Without intervention, your hibiscus slowly starves. Top-dressing is the easiest intervention.
FAQ: Real Questions from People Like Me
Q1: Can I use regular garden soil for top-dressing my potted hibiscus?
No, don’t do it. I tried this once. Garden soil is too heavy. It compacts in containers. It may contain weed seeds or pathogens. Always use a light potting mix. Mix your own or buy a quality brand. Your hibiscus deserves better than dirt from the yard.
Q2: How long does the effect of top-dressing last?
In my experience, about 2-3 months for visible improvements. The organic matter breaks down slowly. But the real benefit is longer. One thorough top-dress can support growth for an entire growing season. I still do it twice a year because I want continuous benefits.
Q3: What if my hibiscus is currently flowering? Should I still top-dress?
I recommend waiting. Flowering uses a lot of energy. Disturbing the soil might shock the plant. I once top-dressed a flowering hibiscus. It dropped all blooms within 48 hours. Wait until after the flowering cycle ends. Then top-dress. The plant recovers faster.
Q4: Do I need to repot instead of top-dressing?
Only if the plant is rootbound. Check the drainage holes. If roots are pushing out, top-dressing is a bandaid. Repot to a larger container first. Then use top-dressing for maintenance later.
Q5: Can top-dressing fix yellow leaves?
Conditionally yes. If yellowing is from nutrient deficiency, top-dressing helps within 2 weeks. If yellowing is from overwatering or root rot, top-dressing makes it worse. Identify the cause first. Don’t treat blindly.
My Final Practical Advice
After all these years and all these mistakes, I’ve settled into a simple routine.
Every spring, I set aside one hour for top-dressing. I prepare my potting mix in advance. I check the plant’s health. I remove the old surface layer. I apply the new one. I observe for two weeks. That’s it.
I stopped panicking over small issues. Plants are resilient. A bit of yellow. A dropped leaf. It happens. Trust the process. Your hibiscus will reward you with explosive growth and abundant blooms.
The biggest lesson? Don’t overcomplicate it. Seasonal soil top-dressing for perennial hibiscus plants is simple, effective, and necessary. I wish I knew this five years ago. I’d have killed way fewer plants.
And remember, you will kill some. I still do. It’s part of the learning. Every dead plant teaches you something. My dead hibiscus taught me about soil. I hope this guide saves you some heartbreak.