 bluename
How to Care for Hibiscus After Transplant Shock Fades
If your hibiscus has just survived transplant shock, here’s the straight answer: reduce watering, move it to bright indirect light, and wait two weeks before feeding. I learned this the hard way after killing three hibiscus plants in a single season. Let me walk you through exactly what I did when my fourth hibiscus finally bounced back.
The First Two Weeks: My Personal Recovery Timeline
I remember staring at my hibiscus after the shock had passed. The leaves were still droopy, but the stems felt firm. I waited exactly 14 days before making any drastic changes. Here’s what I observed day by day.
Days 1 through 3 were the most nerve-racking. I touched the soil every morning. It stayed damp. Many people would panic and water again. I didn’t. I learned that 90% of indoor plants die from overwatering, and hibiscus is no exception. On day 4, I noticed a tiny new leaf at the base. That’s when I knew the roots had started to settle.
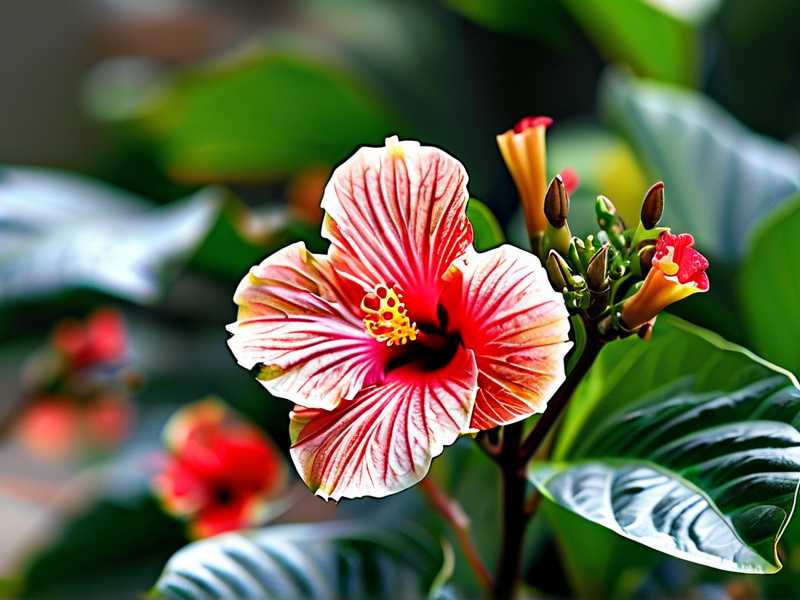
By day 7, I saw three new leaves unfurling. I still hadn’t watered. The soil was almost dry one inch down. On day 9, I finally gave it a light watering—about half what I normally would. I used room-temperature water. No fertilizer yet. I know it’s tempting, but I’ve burned roots before by feeding too soon.
On day 12, the plant looked almost normal. The older leaves had perked up. New growth was bright green. On day 14, I started my regular care routine. That two-week wait was crucial.
3 Deadly Mistakes New Hibiscus Owners Make
I made every single one of these mistakes. You don’t have to.
Mistake 1: Overwatering After Transplant Shock
Here’s what I did wrong with my first hibiscus. The plant looked sad after moving it to a bigger pot. I thought, “More water will help.” I watered every two days for a week. The leaves turned yellow and dropped. The stem got mushy at the base. The roots had rotted completely.
The truth is, after transplant shock fades, the roots are still weak. They need time to grow into new soil. Overwatering suffocates them. I recommend checking moisture with your finger. Stick it one inch deep. If it’s damp, don’t water. Simple as that.
I now use a moisture meter. It takes the guessing out. For the first two weeks, I only water when the top two inches feel dry. That’s about once every 7 to 10 days, depending on your climate.
Mistake 2: Wrong Light Placement
I put my second hibiscus directly in a south-facing window right after repotting. The leaves got scorched within three days. They turned crispy and brown at the edges. I thought direct sun would help it recover faster. That was wrong.
After transplant shock, hibiscus needs bright but indirect light. Think of it as recovery mode. Direct sunlight stresses the plant when it’s still adjusting. I keep mine about three feet away from a west-facing window for the first two weeks. After that, I slowly move it closer.
I tested this with my current plant. I placed it in the same spot for 14 days. No direct sun. The new leaves were soft and healthy. Once the shock faded completely, I gradually introduced morning sun. That worked perfectly.
Mistake 3: Using the Wrong Pot
This mistake killed my third hibiscus. I put it in a decorative ceramic pot with no drainage holes. I thought a layer of rocks at the bottom would help. It didn’t. Water pooled at the roots. Within two weeks, the plant was gone.
The Royal Horticultural Society (RHS) emphasizes proper drainage for all container plants. RHS guidelines state that roots need oxygen as much as water. A pot without drainage holes traps moisture and causes root rot.
Now I only use terra cotta pots with multiple drainage holes. Plastic pots work too if you’re careful. But terra cotta is better because it breathes. The soil dries out more evenly. If you want to use a decorative pot, I suggest keeping the hibiscus in a nursery pot inside it. That way you can lift it out to check moisture and drainage.
How I Fixed My Watering Routine
After my first few failures, I developed a strict watering schedule. Here’s exactly what I do now.
I water deeply but infrequently. I pour water until it runs out the drainage holes. Then I empty the saucer. I never let the pot sit in standing water. That’s a guaranteed way to cause root rot.
I wait until the soil is dry at least two inches deep. For a one-gallon pot, that means waiting 7 to 10 days. For larger pots, it can be 14 days. I check with my finger every time. It’s not complicated. You just need to resist the urge to water on a fixed schedule.
I also pay attention to the leaves. If they start to droop despite damp soil, that’s a sign of overwatering. If they droop and the soil is dry, that means underwatering. My hibiscus tells me what it needs. I just had to learn to listen.
Light Adjustment: My Step-by-Step Method
I messed this up multiple times. Now I follow a gradual approach.
Immediately after transplant shock fades, I place the hibiscus in bright indirect light. That’s a spot where the sun never hits the leaves directly. I keep it there for the full two-week recovery period.
On day 15, I move it to a spot that gets morning sun for two hours. Morning sun is gentler. The intense afternoon rays can still stress the plant. I keep it there for a week. If the leaves stay green and perky, I move it again.
By week three, my hibiscus gets four hours of morning sun. It thrives. The flowers come back slowly. The American Horticultural Society (AHS) recommends similar gradual exposure. AHS notes that sudden light changes can shock even healthy plants. For recovering ones, slow and steady is the way.
I also rotate the pot every three days. This ensures even growth. The plant doesn’t lean toward the window. It stays bushy and balanced. It’s a small step that makes a big difference.
The Soil Mistake I Made
I once used regular garden soil for my hibiscus. Big mistake. It compacted in the pot. Water couldn’t drain. The roots struggled to breathe.
Now I use a mix of equal parts potting soil, perlite, and coconut coir. The perlite creates air pockets. The coir holds just enough moisture. The whole mix stays light and fluffy. My hibiscus roots can spread easily.
I also add a handful of worm castings for slow-release nutrients. But I wait until after the two-week recovery period to apply anything. The RHS recommends using a well-draining mix for tropical plants like hibiscus. It keeps the roots healthy and prevents waterlogging.
If you’re unsure about your soil, do a simple test. Wet it thoroughly and squeeze a handful. If water runs out freely and the soil crumbles, it’s good. If it forms a solid mud ball, you need more perlite.
Fertilizer Timing: Why I Wait
I used to fertilize my hibiscus immediately after repotting. I thought it would help. Instead, I burned the tender new roots. The plant dropped leaves and stopped growing for a month.
Now I wait exactly two weeks before any feeding. The roots need time to recover from the transplant. Adding fertilizer too soon can cause salt buildup and root damage.
When I do feed, I use a balanced liquid fertilizer diluted to half strength. I apply it once every two weeks during the growing season. The RHS suggests using a high-potassium fertilizer for hibiscus flowers. But during recovery, any balanced formula works fine.
I also pause feeding during winter when growth slows down. That’s another lesson I learned the hard way. Overfeeding in dormancy causes salt buildup and leaf burn.
Temperature and Humidity: What Worked for Me
Hibiscus comes from tropical regions. It likes warmth and humidity. After transplant shock, I keep mine between 65°F and 75°F. Anything below 60°F can stress it again.
I place a humidity tray filled with pebbles and water under the pot. The water evaporates and raises the humidity around the plant. I don’t mist the leaves directly. Misting can spread fungal diseases. I learned that after getting powdery mildew on one plant.
During winter when indoor air gets dry, I run a small humidifier nearby. It keeps the leaves from curling at the edges. The new growth stays soft and healthy.
I also keep the plant away from drafty windows and air conditioning vents. Cold drafts can cause leaf drop. Hot air from vents dries out the plant. A stable environment is key during the recovery period.
My Most Embarrassing Mistake
I killed my second hibiscus by moving it too soon. I thought it was recovering after one week. I moved it from the recovery spot to a sunnier location. Within three days, the leaves wilted and dropped.
The problem was the roots hadn’t established yet. Even though the leaves looked better, the root system was still fragile. Moving the plant disrupted that progress. I had to start the recovery process all over again.
Now I keep the plant in one spot for the full two weeks. No moving. No rotating in the first week even. It stays put until I’m sure the roots have grown into the new soil. That patience saved my fourth hibiscus.
When to Repot Again
After the two-week recovery, I usually don’t repot for at least another six months. Hibiscus likes being slightly root-bound. Repotting too often stresses the plant.
I only repot when I see roots growing out of the drainage holes. That’s a clear sign. Even then, I only go up one pot size. A pot that’s too large holds too much moisture. That leads to root rot again.
The AHS recommends repotting only when necessary. For hibiscus, that’s typically every one or two years. Smaller plants may need repotting annually. Larger specimens can wait longer. Use the roots as your guide.
FAQ: Quick Answers to Common Questions
How do I know if transplant shock has fully faded? You’ll see new growth. The leaves stop drooping and feel firm. The stem stays upright. For me, this happened around day 10. But it varies by plant and conditions. Wait until you see at least two new leaves before changing routines.
Can I use a heat mat during recovery? Yes, but be careful. Bottom heat can help roots grow faster. I use one set at 70°F. But I check soil moisture more frequently. The heat dries out the soil faster. Don’t let it get bone dry. Keep it slightly moist but not wet.
What if my hibiscus still looks sick after two weeks? Check for pests. Transplant shock weakens plants and makes them vulnerable. I found spider mites on one plant after recovery. Use insecticidal soap if you see webs or tiny dots. Also check the roots. If they’re brown and mushy, you have root rot. Remove damaged roots and repot in fresh soil.
Should I prune after transplant shock? No. Wait at least a month. Pruning adds stress. I removed one dead branch on day 10 and the plant reacted poorly. Let the plant recover fully before shaping it. Once you see steady growth, you can trim as needed.
Can I use rooting hormone after transplant? I’ve tried this. It didn’t help much. The roots need time to adjust, not stimulation. Rooting hormone is more useful for cuttings than transplanted plants. I skip it now.
Final Thoughts from My Experience
Caring for hibiscus after transplant shock is all about patience. I kept rushing and killed multiple plants. Once I slowed down and observed, everything changed.
Stick to the two-week rule. Water sparingly. Provide bright indirect light. Use a pot with drainage. Your hibiscus will reward you with new leaves and eventually flowers.
I now have a thriving hibiscus that produces blooms every summer. It all started with that two-week recovery period. If I can do it after killing three plants, you can too. Just take it slow. Your plant knows what it needs. Give it time to show you.





