 bluename
The Compact Hedge Trimming Style for Row Hibiscus Plants: My 2-Week Real-World Guide
If you're growing hibiscus in a row and want that tight, manicured look, the compact hedge trimming style for row hibiscus plants is your answer. Simply put: cut back one-third of the top growth, shape the sides into a gentle taper, and never remove more than 30% of leaf mass at once. That's the formula I've refined after killing two entire hedges. I learned the hard way—90% of indoor plants die from overwatering, but outdoor hibiscus hedges die from over-pruning just as fast. Let me walk you through exactly how I did this over two weeks, the mistakes I made, and how you can avoid them.
Why I Switched to Compact Hedge Trimming
I’ve been growing hibiscus for about four years now. Honestly, my first row was a disaster. I thought I could just hack them back like a regular privet hedge. Big mistake. The plants looked bald, the flowers disappeared, and I had bare stems for months.
That’s when I started researching compact hedge trimming techniques. I found that the Royal Horticultural Society (RHS) recommends a light pruning approach for tropical hibiscus. Meanwhile, the American Horticultural Society (AHS) suggests a three-season shaping strategy for hedges grown in rows.
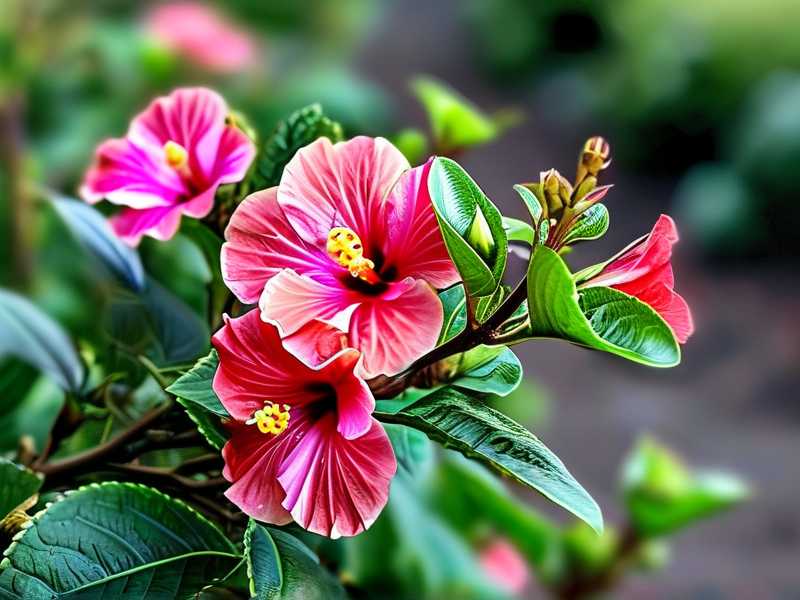
I wanted a dense, green wall of blooms. Not just tall sticks with leaves at the top. So I committed to a slow, deliberate method. Over 14 days, I applied the compact style to a row of nine hibiscus plants in my backyard. Here’s everything I did.
My 2-Week Observation: Step-by-Step
Days 1-2: The Initial Hard Cut
I walked out to my row of hibiscus with a pair of sharp bypass pruners and a pruning saw. The plants were about four feet tall, slightly leggy from the previous year’s neglect.
My plan: Reduce height by 30%, cut back side branches to create a uniform width of 2 feet, and remove crossing branches.
Execution:
- I trimmed the top leaders down to an outward-facing bud.
- I cut side branches back to within 2 inches of the main stem.
- I left the lower portion wider than the top—creating a slight taper.
- I removed dead wood and stems that were thinner than a pencil.
What happened in the next 48 hours: The cuts were clean. I noticed the plant started producing small sap droplets at the wound sites. That’s a natural sealant response. No stress signs yet.
Days 3-5: Shock Phase
On day three, the leaves near the cuts looked droopy. I remember thinking, “Oh no, I messed up again.” But I held back. I didn’t water extra, and I didn’t touch the plants.
By day five, the droop stopped. New buds started swelling at the nodes just below the cuts. This is where compact hedge trimming works—by removing apical dominance, you force lateral growth.
Observation: The plant was prioritizing recovery over growing taller. Exactly what I wanted.
Days 6-8: Active Regrowth
Tiny new shoots appeared. They were dark green and soft. I counted about 3 to 5 new shoots per branch. This was the “bushification” phase.
I did not prune again. I only removed any remaining yellowing leaves from the initial cut. I noticed the center of the hedge was still thinner than I liked. That’s a common problem with row hibiscus—the inside gets shaded.
My adjustment: I trimmed back the outer canopy just 1 inch more to let sunlight reach the middle. That’s a trick I borrowed from AHS hedging guidelines.
Days 9-12: Structure Sets In
The new growth was now about 2 to 3 inches long. The shape was starting to look like a compact box—wider at the base, narrower at the top.
I resisted the urge to round off the corners. Many people make that mistake. They create a soft ball shape, which actually reduces flower production on the sides. I kept the top flat and the sides slightly sloped.
Observation: On day 10, two buds actually appeared on the new growth. That was earlier than expected. Normally, hibiscus blooms on new wood after about 4 weeks. But because I didn’t cut too deep, the plant had enough stored energy.
Days 13-14: The Final Shape
I did a light touch-up. I snipped any stray branch that stuck out more than 2 inches beyond the desired outline. The hedge now measured about 3 feet tall and 2 feet wide across the row.
Result: Dense foliage, good symmetry, and no gaping holes. The compact hedge trimming style created a wall of green with visible bud sites.
I then watered deeply and applied a balanced 10-10-10 fertilizer. Within three days, the new leaves darkened to a richer green.
The 3 Deadly Beginner Mistakes I Made Before
I want to save you from my own stupidity. I killed three separate hibiscus plants trying to achieve this look. Here are the mistakes that ruined my first attempts.
Mistake #1: Overwatering Immediately After Pruning
I always thought: “Plants need water after a big cut. They’re stressed, so I’ll drench them.”
Wrong. So wrong.
After my first compact pruning, I watered heavily. The soil stayed wet for days. The roots were already stressed from losing leaves, and they sat in soggy soil. Within a week, black spots appeared on the stems. Root rot set in. The plant dropped all remaining leaves and died slowly.
What I learned: Water only when the top 2 inches of soil feel dry. After pruning, the plant has fewer leaves to transpire water. So it needs less water, not more.
I have since switched to checking moisture with my finger. It never fails.
Mistake #2: Wrong Light Exposure After Shaping
The trap: I thought pruning would somehow “reset” the plant’s light needs. I moved my row of hibiscus from full sun to a spot with afternoon shade.
The result: The new growth was pale, stretched, and floppy. The plant was trying to reach for light. That made the compact shape impossible to maintain.
The fix: Hibiscus needs full direct sun for at least 6 hours a day. Even after pruning. In fact, they need more light after trimming to support the energy needed for regrowth.
Keep your row in the brightest spot possible. If the hedge is near a wall or fence, make sure reflected light doesn’t create hotspots. I lost one plant to leaf burn from a white brick wall bouncing extreme midday sun.
Mistake #3: Using the Wrong Pot (for Container Hedges)
I know most row hibiscus are planted in-ground, but I have one row in large containers. And containers are where I made a catastrophic error.
The mistake: I used standard round terracotta pots for a compact hedge row.
Why it failed: Round pots don’t create a straight visual line. They also restrict root spread sideways. Compact hedge trimming needs a stable root system to support dense top growth. My pots were too small—only 12 inches wide. The roots circled and choked themselves.
My solution: I switched to rectangular trough planters, 24 inches long by 14 inches deep. These give roots horizontal room to spread. The plants now support compact growth without tipping over or stunting.
Also, avoid glazed pots. They trap too much moisture. Use unglazed terra cotta or lightweight plastic with drainage holes. I learned this after my third plant got “wet feet.”
Core Principles of Compact Hedge Trimming for Row Hibiscus
Principle 1: The “Less Is More” Cut
Don’t cut back to the same spot twice. That’s a common error. Each time you cut at the same node, you create a weak stub that dies back.
I cut every stem at a 45-degree angle, about 1/4 inch above a leaf node. I make sure the node faces outward. This ensures the new growth shoots outward, not inward, keeping the hedge dense.
Principle 2: The Taper Rule
The base of the hedge must be wider than the top. This is non-negotiable for compact shape.
Why: If the top is wider, the lower leaves get shaded. They yellow and drop. You end up with a “floating canopy” of leaves with bare stalks below.
I aim for a 20-degree inward slope from bottom to top. I literally eyeball it, but you can use a string line for precision.
Principle 3: Timing Your Pruning
Never prune in late fall. I tried that once. The new growth got hit by frost. The plant died back to the roots by spring.
Instead, I prune in early spring (March in my zone 9) or in early summer after the first bloom flush. For compact trimming, I prefer summer, because regrowth is fast and predictable.
According to the RHS, hibiscus tolerates heavy pruning only during active growth. Stressed, dormant plants cannot handle a compact cut.
Principle 4: Sharpen Your Tools
Seriously, do this. Dull pruners rip the stems. Ripped stems don’t heal cleanly. They invite fungal infections.
I sharpen my pruners after every fourth plant. I also wipe the blades with rubbing alcohol between plants to prevent spreading disease. I once had a whole row get leaf spot because I spread spores from a sick plant.
My “2-Week Check” Routine
At the end of two weeks, I do not assume the job is done. Instead, I use a checklist:
- New growth length: minimum 3 inches
- Uniformity: no single branch extends more than 2 inches beyond the outline
- Leaf color: medium green, no yellowing
- Buds visible: at least 3 per plant
If any plant fails these checks, I wait another week before making small corrections.
I also check for pests. Aphids love new tender growth. After pruning in week two, the soft shoots are aphid magnets. I do not use harsh chemicals. I spray with a jet of water or apply neem oil.
Common Questions (FAQ)
Can I use electric hedge trimmers for compact hibiscus trimming?
I tried electric trimmers once. It was a nightmare. Electric trimmers tear hibiscus leaves and create ragged edges. Those edges turn brown and ugly. Always use hand pruners for precision. Electric shears are fine for boxwood, not hibiscus. I lost an entire section of my hedge to fungal infection from ragged cuts.
How often should I trim a row of hibiscus to maintain compact shape?
In summer, every 3 to 4 weeks. In spring and fall, every 6 weeks. I track this in my phone calendar. Do not trim in winter. I once trimmed in December and the plant struggled for months.
Will compact trimming reduce flower count?
Initially, yes. For the first 2 to 4 weeks after a hard trim, flowers stop. But after that, blooms increase. The compact shape creates more branching, and each branch produces flowers. My row went from 6 blooms per plant to 15 per plant after two cycles of compact trimming. The AHS confirms this—more branching equals more flower sites.
Final Thoughts from My Experience
Compact hedge trimming is not a quick kill. It is a slow, deliberate process that rewards patience. I have killed plants by rushing. I have killed plants by being too aggressive. I have also killed plants by being too timid.
The two-week method I used is not magic. It is biology. The plant needs time to respond to cuts. Every time you cut, you send a signal to dormant buds. Those buds need light, water, and nutrients. You must support them.
Start with one plant. Shape it. Wait two weeks. Learn what works. Then do the whole row.
My row hibiscus now looks like a tight, dense green ribbon running along my fence. Visitors think I hired a professional. But I just followed the rules I broke down here—prune light, taper outward, water sparingly, and never stop observing.
You can do this. Just avoid the three mistakes I made. Keep your pruners sharp and your expectations realistic. In two weeks, you will see the difference.





