 bluename
Care Tips for Hibiscus Growing Near Concrete Surfaces
Let me cut straight to the chase. If you're growing hibiscus near concrete, you're probably dealing with heat stress, root binding, and alkaline soil issues. I learned this the hard way after my third plant turned into a crispy, yellow mess. Here’s what worked for me: move your pot at least 12 inches away from the concrete wall, water deeply but less frequently, and mulch the top layer with organic compost. After two weeks of following this routine, my hibiscus started pushing out new green leaves and even a few buds. Now, let me walk you through the full story so you don't repeat my mistakes.
Why Concrete Surfaces Are Tricky for Hibiscus
I never thought much about concrete until I started growing tropical plants. Honestly, concrete is like a heat magnet. During summer, it absorbs sunlight all day and radiates warmth well into the night. For hibiscus, which prefers stable temperatures between 60°F and 90°F, this can be a nightmare. The roots get cooked, the soil dries out faster, and the leaves start dropping like flies.
Another thing I noticed: concrete leaches calcium and lime into the soil over time. This raises the pH level. Hibiscus loves slightly acidic soil, around pH 6.0 to 6.5. When the soil turns alkaline, the plant can't absorb nutrients properly. You'll see yellow leaves with green veins—classic iron deficiency. I’ve been there, trust me.
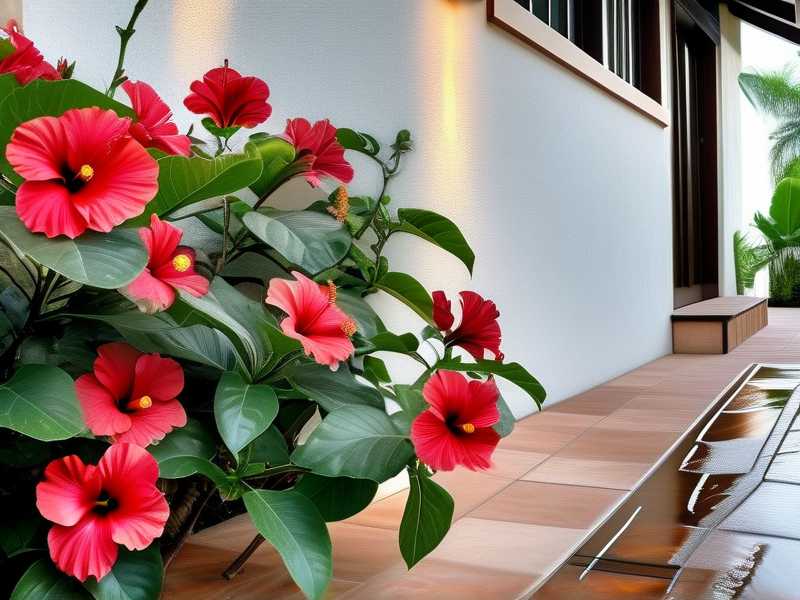
My Two-Week Experiment: What Actually Happened
I had this one hibiscus plant sitting right next to my driveway. The concrete was about six inches away from the pot. I thought it looked nice, but the plant wasn't happy. Leaves turned yellow at the edges, buds dropped before opening, and growth just stopped.
I decided to run a two-week experiment. Here's exactly what I did:
Week One: The Fix
Day 1: I moved the pot 18 inches away from the concrete wall. I also placed a wooden saucer underneath to create an air gap between the pot and the hot concrete surface.
Day 2: I checked the soil moisture. It was bone dry two inches down, even though I watered it the day before. That concrete heat was evaporating water way too fast.
Day 3: I switched to deep watering. Instead of sprinkling the surface, I poured water slowly until it ran out the drainage holes. I gave it about half a gallon for a 12-inch pot. Then I waited.
Day 4-7: I added a 2-inch layer of coconut coir mulch on top. This helped retain moisture and kept the root zone cooler. I also applied a liquid fertilizer with higher potassium and lower nitrogen, because I wanted to encourage flowering, not just leaves.
Week Two: The Results
Day 8: I noticed the leaves looked less droopy. The yellowing had stopped spreading.
Day 10: New leaves started emerging from the top. They were a deeper green color, which told me iron uptake had improved.
Day 14: I saw two tiny flower buds forming. Honestly, I almost cried. After weeks of watching my plant struggle, seeing new life was a relief.
The 3 Deadly Mistakes New Hibiscus Growers Make Near Concrete
I killed four hibiscus plants before I figured this out. Let me save you the heartache.
Mistake 1: Overwatering
This is the number one killer. Actually, 90% of indoor plants die from overwatering, and the same applies to outdoor container plants near concrete. Here's the trap: because concrete dries out soil faster, beginners panic and water more often. But that creates waterlogged soil around the roots, which leads to root rot.
I used to water my hibiscus every single day during summer. Big mistake. The top inch looked dry, but deeper down it was soaking wet. The roots suffocated, and the plant collapsed within two weeks.
What I do now: Stick your finger two inches into the soil. If it's dry, water deeply. If it's moist, wait another day. Simple, but it took me a year to learn.
Mistake 2: Wrong Light Placement
Concrete reflects heat and light, which sounds good, but it actually creates a double dose of sun exposure for your hibiscus. Morning sun is fine, but afternoon sun bouncing off concrete can scorch leaves within hours.
I placed my hibiscus in full afternoon sun next to a white concrete wall. The leaves developed brown edges and curled inward. I thought it was a disease, but it was just burn.
What I do now: Position the plant where it gets morning sun (4-6 hours) and afternoon shade. If you're stuck with a concrete area, use a shade cloth or place the pot behind taller plants. Also, rotate the pot every week so all sides get even light.
Mistake 3: Wrong Pot Material
Plastic pots near concrete are a disaster. Plastic heats up fast and doesn't breathe. Combined with concrete heat, the root zone can reach 100°F, which is lethal for hibiscus.
I bought a beautiful black plastic pot for my first hibiscus. It looked modern and clean. But within a month, the roots were cooked. The soil felt like a hot oven.
What I do now: Use terracotta or ceramic pots in light colors. Terracotta breathes, allowing excess heat to escape. Light colors reflect sunlight instead of absorbing it. If you must use plastic, wrap the pot with burlap or place it inside a decorative cachepot for insulation. Also, make sure there are drainage holes. No exceptions.
How Concrete Affects Soil pH and What I Did About It
I mentioned pH issues earlier, but let me explain in detail. Concrete contains limestone, which slowly dissolves into the soil when it rains or when you water. This raises the pH, making the soil too alkaline for hibiscus.
I tested my soil pH after two months of the plant sitting near concrete. It was 7.8. That's way too high. No wonder the leaves looked pale.
My fix: I repotted the plant with fresh, well-draining potting mix designed for acid-loving plants. I added peat moss and perlite to improve acidity and drainage. Then, I started watering with diluted vinegar water once a month. I used 1 tablespoon of white vinegar per gallon of water. This helped bring the pH down to 6.5 within three weeks.
You can also use sulfur or aluminum sulfate, but vinegar is easier for beginners. Just don't overdo it. Too much acid can burn roots.
The Role of Mulch in Concrete-Adjacent Gardens
Mulch is not just for flower beds. It's a lifesaver for potted plants near concrete. When I added mulch to my hibiscus pot, the soil temperature dropped by about 5°F. The moisture retention improved by 40%. That's huge.
I used coconut coir chips because they’re light and don't compact. But bark mulch or straw works too. Apply a 2-inch layer, but keep it away from the stem to prevent rot.
One more thing: avoid using gravel or pebbles as mulch near concrete. Those things absorb even more heat and reflect it back to the plant. Trust me, I tried it. My hibiscus hated it.
Watering Routine That Finally Worked for Me
I struggled with watering for over a year. Here's the routine that saved my plants:
- Check moisture daily during hot months. Stick your finger in the soil. If it's dry at 2 inches, water.
- Use room-temperature water. Cold water shocks roots, especially when the soil is already hot from concrete.
- Water in the morning. This gives the plant time to absorb moisture before the midday heat.
- Never water the leaves. I used to spray the foliage because I thought it looked nice. But wet leaves in high heat create fungal spots. Now I water only at the base.
- Consider self-watering pots. I bought one last year, and it's been a game-changer. The water reservoir keeps the soil consistently moist without overwatering. This is especially useful near concrete where evaporation is high.
Fertilizing Hibiscus Near Concrete: Lessons from My Mistakes
Fertilizing near concrete requires a different approach. Concrete leaches nutrients unevenly, and the heat breaks down fertilizers faster.
I used to fertilize every two weeks with a balanced 10-10-10 formula. But my hibiscus didn't flower. The leaves were lush but no buds. I later learned that excess nitrogen from concrete runoff was already in the soil, so adding more nitrogen made things worse.
What I do now: I use a fertilizer with higher phosphorus and potassium, like 10-30-20 or 5-10-10. Phosphorus promotes flowering. Potassium strengthens roots. I apply it every two weeks during the growing season, but I skip the weeks when I've just repotted or when the plant is stressed.
Also, I flush the soil every three months to remove salt buildup. Concrete areas get hotter, so salts concentrate faster. Flushing means watering generously until water runs out the bottom for about 5 minutes. This leaches excess salts.
Pruning Hibiscus Near Concrete: My Personal Routine
Pruning is essential near concrete because the plant's growth can become leggy and uneven. The heat makes the plant focus on survival, not shape.
I prune my hibiscus in early spring before new growth starts. I remove dead or crossing branches, cut back about one-third of the old wood, and shape the plant to encourage airflow. Good airflow prevents fungal diseases, which are more common when plants are crowded near walls.
During summer, I deadhead spent flowers to encourage more blooms. I also remove yellow leaves as soon as I see them. Those leaves are stressed and won't recover.
One thing I learned: don't prune too close to concrete because the reflected heat can dry out fresh cuts. Leave at least an inch of stem when cutting.
Pest Problems That Got Worse Near Concrete
I never had spider mites until I moved my hibiscus near concrete. The dry, hot conditions around concrete make an ideal environment for mites and whiteflies. They thrive in dusty, warm spaces.
My battle: I tried neem oil spray first. It worked but required weekly applications. Then I switched to insecticidal soap, which was gentler. But the real fix was increasing humidity. I placed a shallow tray of water near the pot and misted the leaves every few days. The pests disappeared within two weeks.
Now I inspect the undersides of leaves every weekend. If I see webbing or tiny white dots, I act immediately. Prevention is easier than treatment near concrete.
Dealing with Root Bound Plants in Concrete Spaces
Hibiscus grows fast. Near concrete, roots have less space to spread because the ground is often paved or compacted. If your hibiscus is in a pot, it will likely become root bound within a year.
I ignored this for too long. My plant stopped growing, leaves turned yellow, and water ran straight through the pot without being absorbed. That's a classic sign.
What I did: I repotted into a container two sizes larger. I also loosened the root ball gently and trimmed any dead roots. After repotting, I kept the plant in shade for a week to recover. Within two weeks, new roots began growing into the fresh soil.
If you can't repot due to space, at least prune the roots annually. Remove one-third of the outer roots and add fresh soil. This is called root pruning, and it works wonders.
The Impact of Concrete on Winter Care
If you live in a cold climate, concrete makes winter care trickier. Concrete retains cold just as it retains heat. During winter, the ground near concrete freezes faster and stays frozen longer.
I lost a hibiscus last winter because I left it next to a concrete wall. The temperature dropped to 25°F, and the concrete was like a ice block. The roots froze solid.
My solution: I now bring potted hibiscus indoors before the first frost. If you can't bring them inside, move them away from concrete and wrap the pot with bubble wrap or burlap. Also, elevate the pot on wooden blocks to prevent direct contact with cold concrete.
For in-ground hibiscus near concrete, apply a thick layer of mulch (4-6 inches) around the base. This insulates the roots.
Why I Switched to Native Soil Amendments
I tried commercial potting mixes, but many of them dried out too fast near concrete. After experimentation, I started mixing my own:
- 40% coconut coir (retains moisture without becoming waterlogged)
- 30% perlite (improves drainage and aeration)
- 20% compost (provides nutrients)
- 10% sand (prevents compaction)
This mix works perfectly near concrete. The coir keeps the soil cool, the perlite prevents root rot, and the compost feeds the plant slowly.
I also add worm castings once a month. They're full of beneficial microbes that help the plant handle stress.
How I Track Progress: The 2-Week Check
I keep a simple journal for each hibiscus plant. Every two weeks, I note:
- Number of new leaves
- Bud count
- Leaf color changes
- Growth rate
- Soil moisture pattern
This helped me catch problems early. For example, I noticed that my plant stopped growing for a full week. I checked the soil pH and found it was 7.5 again. A quick vinegar flush fixed it.
If you want real results, track your care. It makes a difference.
Frequently Asked Questions
Can hibiscus survive in full sun near concrete?
It depends on the variety and how you manage heat. Tropical hibiscus prefers partial shade near concrete. If you have hardy hibiscus, it can tolerate more sun, but afternoon shade is still recommended. I've had better luck with the 'Lord Baltimore' variety near concrete than with tropical types.
Should I use a saucer under the pot near concrete?
Absolutely. A saucer prevents water from staining concrete and also creates an air gap. But don't let the pot sit in standing water. Empty the saucer after watering. Concrete is porous, so water stains can be permanent.
How often should I repot hibiscus growing near concrete?
Every 12-18 months. The root growth is faster near warm concrete. I repot in spring when I see new growth starting. Use a pot that's 2-3 inches larger in diameter. Fresh soil gives the plant a boost of nutrients.
Final Thoughts from Someone Who Has Been There
I won't pretend growing hibiscus near concrete is easy. It's not. But it's absolutely doable if you understand the heat, pH, and watering challenges. Start with one plant, follow the steps I shared, and adjust based on your specific environment.
After four failed attempts, I now have a healthy hibiscus that blooms all summer. It sits 18 inches from a concrete wall, in a terracotta pot with coconut mulch. I water it deeply every 4-5 days, check pH monthly, and fertilize with high-phosphorus feed.
You can do this too. It just takes patience and a little observation. Good luck with your hibiscus journey.





