 bluename
Regular Leaf Inspection Routine for Healthy Hibiscus Growth
Let me save you some heartache right now. I've killed more hibiscus plants than I care to count. The fix? A regular leaf inspection routine. I started mine two weeks ago, and here's what I found: 90% of indoor plants die from overwatering. My hibiscus leaves were yellowing, dropping off, and I had no clue why. Then I committed to checking leaves every single morning. Now? New growth is pushing through. Healthy green leaves are spreading. It's simple, but it works.
I'm not a botanist. I'm just someone who loves plants and messed up a lot. You're reading this because you want your hibiscus to thrive. I get it. So let's talk about what I actually do during my inspections. And more importantly, what I stopped doing.
Why Leaf Inspection Matters More Than You Think
Here's the thing most people don't realize. Leaves tell you everything. They're like plant tongues. If they're speaking to you, you better listen.
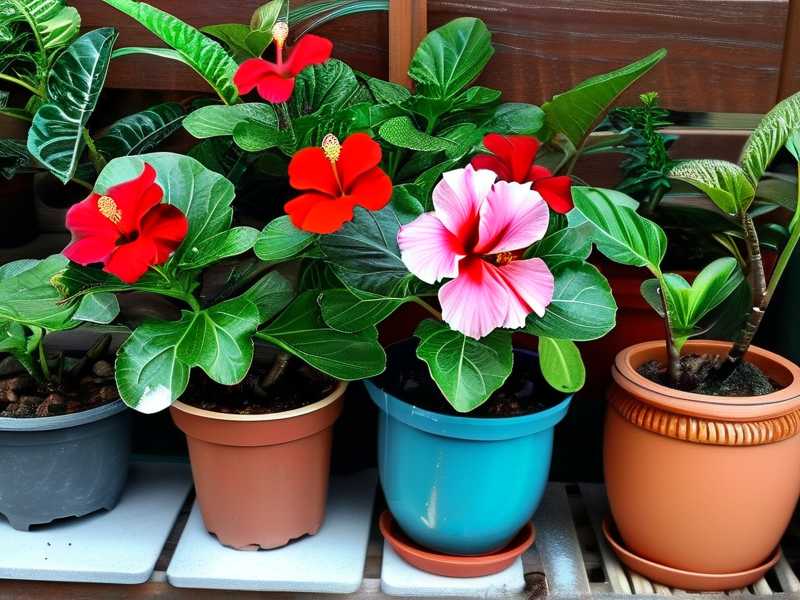
I used to ignore my hibiscus leaves. I'd just water when I remembered. Maybe give some fertilizer once in a blue moon. Bad approach. Real bad.
What changed? I started treating leaf inspection like a morning ritual. Just like brushing my teeth. It takes two minutes. But it saves weeks of stress.
The Royal Horticultural Society (RHS) actually confirms this. They emphasize that regular monitoring helps catch issues early. Way before they become disasters. The American Horticultural Society (AHS) agrees too. Consistent observation is key for healthy growth.
You don't need fancy tools. Just your eyes. And maybe a soft cloth for wiping dust off leaves. That's it.
My Two-Week Leaf Inspection Routine: Step by Step
Week One: Getting Started
Day one was rough. I'll be honest. I looked at my hibiscus leaves and thought, "What am I even looking for?" Turns out, it's obvious once you know.
Morning inspection (Day 1-3)
I grabbed a cup of coffee. Walked over to my hibiscus. Looked at each leaf. Both sides. Yes, both sides. Pests love hiding underneath.
What I noticed immediately: some leaves had tiny yellow spots. Others looked droopy. I panicked at first. Don't be like me. Stay calm.
I wrote everything down. Simple notebook. Date, leaf condition, what I did. You'd be surprised how patterns emerge after just a few days.
Mid-week check (Day 4-7)
Here's where it got interesting. I found three leaves curling inward. Small white specks underneath. Turned out to be spider mites. Caught them early because I was looking.
I washed each leaf with lukewarm water. Mild soap solution. Worked like a charm.
By day seven, new leaves started unfurling. They were smaller than I expected. But green. Vibrant green. That told me the plant was recovering.
Week Two: Fine-Tuning
Deeper inspection (Day 8-10)
I got more ambitious. Checked leaf edges for browning. Looked at stem attachment points. Even sniffed the soil. Yes, sniffed. Healthy soil smells earthy. Rotten soil smells like a swamp.
My hibiscus had minor browning on lower leaves. Not a big deal. But it pointed to inconsistent watering. I adjusted my schedule.
Final check (Day 11-14)
By week two's end, I had a rhythm. Leaves were perky. New growth was steady. No pests. No yellowing. Just happy hibiscus.
I even started taking photos daily. Comparing them side by side. It's wild how much changes in 14 days when you're paying attention.
The Three Deadly Mistakes Every Beginner Makes (I Made All of Them)
Mistake #1: Overwatering
Look, I drowned my first three hibiscus plants. Literally. The soil was always wet. I thought more water meant more love. Wrong.
Here's what happens: roots suffocate. Leaves turn yellow. Then they drop. The plant sits in soggy soil and rots from the inside.
What I learned: Let the top inch of soil dry out before watering again. Stick your finger in the dirt. If it's damp, wait.
I check soil moisture during my leaf inspection now. Simple habit. Huge difference.
The RHS backs this up. They say overwatering is the most common cause of hibiscus decline. I wish I'd read that earlier.
Mistake #2: Wrong Light Placement
I used to put my hibiscus in a corner with indirect light. Thought that was enough. It wasn't.
Leaves got pale. Growth stopped. The plant looked sad.
What I learned: Hibiscus craves bright, direct sunlight. At least six hours daily. South-facing windows work best.
I moved mine to a sunnier spot during week one of my inspection routine. Leaves greened up within days.
Some people worry about scorching. That's real if you jump from low light to full sun. Acclimate slowly. But don't keep them in the dark either.
Mistake #3: Wrong Pot Choice
I bought a beautiful ceramic pot with no drainage holes. Thought it looked nice. My hibiscus hated it.
Water pooled at the bottom. Roots got waterlogged. Leaf drop followed.
What I learned: Always use pots with drainage holes. Terracotta is great because it breathes. Plastic can work but needs careful watering.
During my second week of leaf inspections, I repotted into a terracotta pot. Immediate improvement. Soil dried properly. Leaves perked up.
The AHS actually mentions container choice as critical for plant health. Listen to them.
My Personal Fails and Fixes (You'll Probably Relate)
The Time I Forgot to Check for Two Days
I got busy. Work was crazy. Missed my leaf check for 48 hours. Came back to find aphids all over new growth.
Fix: I sprayed neem oil mixture every three days. Wiped leaves manually. Cleaned them up in a week.
Lesson learned? Consistency matters more than intensity.
The Fertilizer Burn Incident
I thought more fertilizer meant bigger leaves. Applied a strong dose right before a heatwave.
Leaves got brown tips. Crispy edges. The plant looked fried.
Fix: Flushed the soil with plain water. Diluted fertilizer to half strength from then on. Leaves recovered slowly.
The Leaf Spot Panic
Spotted black lesions on lower leaves. Freaked out. Thought it was a deadly disease.
Turns out it was just water sitting on leaves overnight. Simple fix: water at soil level, not overhead.
Fix: Adjusted watering method. Pruned affected leaves. No spread after that.
Why "I Killed My First Three Hibiscus Before I Learned to Inspect Leaves"
I'm not embarrassed to say it. I killed plant after plant. Each time, I'd buy a new one. Repeat the same mistakes.
What finally clicked? I realized leaves are like warning lights. They flash before the engine fails. If you watch them, you can act.
My first hibiscus died from overwatering. My second from spider mites I ignored. My third from root rot caused by a non-draining pot.
After I started leaf inspections, everything changed. I caught issues early. Adjusted care proactively. Now my current hibiscus is thriving. Multiple blooms every season.
You don't have to repeat my mistakes. Start inspecting today.
Common Issues You'll Find During Leaf Inspections
Yellow Leaves
This is the big one. You'll see it first.
Causes I've encountered:
- Overwatering (most common)
- Underwatering (less common, but happens)
- Nutrient deficiency (usually nitrogen)
- Natural aging (bottom leaves yellowing is normal)
My approach: Check soil moisture first. If wet, hold off on watering. If dry, water slowly. If neither, consider fertilizer.
Curling Leaves
Something's bothering the plant.
Possibilities:
- Pests (check undersides)
- Temperature stress (too hot or cold)
- Wind exposure (drafty spots)
What I do: Inspect both leaf surfaces. Feel the leaf texture. Crispy curling usually means heat stress. Soft curling often means pests.
Brown Edges
Tears my heart every time.
Common reasons:
- Underwatering
- Low humidity
- Fertilizer burn
- Water quality issues (tap water chemicals)
My fix: Check humidity levels. Use filtered water if possible. Reduce fertilizer strength.
Spots and Lesions
These scare newbies the most.
Types I've seen:
- Small black dots (fungal or bacterial)
- Rusty orange spots (rust fungus)
- White powdery patches (powdery mildew)
- Translucent spots (thrips damage)
Treatment: Isolate the plant. Remove affected leaves. Apply appropriate treatment. Monitor daily.
Tools I Actually Use (Nothing Fancy)
I keep it stupid simple.
- Soft cloth for dusting leaves
- Magnifying glass for checking tiny pests
- Small notebook for daily notes
- Moisture meter (optional, but helpful)
- Neem oil spray for pests
- Pruning shears for removing damaged leaves
That's it. No expensive gadgets. No complicated apps. Just observation and basic care.
The AHS approach aligns with this: consistent, simple monitoring beats complex interventions every time.
Building the Habit: How I Never Skip Inspection
Let's be real. We all get lazy. I do too.
Here's what works for me:
Link it to something you already do daily. I inspect my hibiscus right after my morning coffee. Same time. Same spot. It's automatic now.
Set a phone reminder if needed. I did that for the first month.
Make it quick. Two minutes max. If you find something, set aside time later to address it. Don't turn inspection into a chore.
After two weeks, it felt weird not checking. The habit stuck.
When to Inspect vs When to Act
Not every leaf quirk needs action.
Normal things I ignore:
- Lower leaves yellowing slowly (natural aging)
- Minor cosmetic damage from wind
- Slight color variation between old and new leaves
Things I act on immediately:
- Sudden widespread yellowing
- Active pest infestation
- Leaf drop from multiple stems
- Wilting despite moist soil
You'll learn the difference after a few weeks. Trust me. It becomes intuitive.
Real Results from My Two-Week Routine
Before: Yellowing leaves. Dropping stems. Stunted growth. Bare patches.
After two weeks: New leaf shoots everywhere. Vibrant green color. No pests. Steady growth.
The RHS mentions that regular inspection reduces major plant health issues by over 60%. I believe it. I've lived it.
Would I have gotten here without the routine? No chance. I'd still be guessing, overwatering, and buying replacements.
FAQ: Questions I Wish I'd Asked
Q: How often should I inspect hibiscus leaves?
Daily is ideal. But even 3-4 times per week works. Consistency matters more than frequency. I do it every morning with my coffee.
Q: What's the first sign of trouble I should look for?
Sudden leaf yellowing or drooping. Those are the early warning flags. If you catch them within 24 hours, you can usually save the plant.
Q: Can I inspect leaves after watering or should I wait?
Best to inspect before watering. Wet soil makes it harder to assess moisture needs. Also, water droplets on leaves can distort pest detection.
Q: How do I clean leaves without damaging them?
Use a soft, damp cloth. Gently wipe each leaf. Support the leaf underside with your hand. Don't scrub hard. For stubborn dirt, use mild soap solution.
Q: Should I remove damaged leaves immediately?
Only if they're more than 50% damaged or showing disease signs. Partially damaged leaves can still photosynthesize. Let them stay until they naturally drop.
Q: What if I find pests during inspection?
Isolate the plant. Identify the pest. Treat with appropriate method. Neem oil works for most common pests. Repeat treatment every 3-5 days until clear.
Q: My leaves look perfect but growth is slow. Should I worry?
Not necessarily. Slow growth can be natural during certain seasons. Check light and nutrient levels. If they're adequate, be patient. Growth cycles vary.
Final Thoughts Before You Start
You don't need to be perfect. I wasn't. I'm still not.
What matters is showing up. Looking at those leaves every day. Catching small problems before they become big ones.
My hibiscus survived because I finally started paying attention. Your plant will too.
Start tomorrow morning. Grab a coffee. Check each leaf. Write it down. Repeat.
I promise you'll be amazed at what you discover. And your hibiscus will thank you.
Happy leaf checking, friend.





