 bluename
How to Root Hibiscus Cuttings in Egg Cartons: Biodegradable Pots
I’ve killed more hibiscus plants than I care to admit. Honestly, I lost count after the fifth one. The leaves would turn yellow, droop, and then just give up. I blamed the soil, the weather, even the cat. But the real culprit? I was drowning my cuttings in water. Here’s the short answer: How to root hibiscus cuttings in egg cartons is simple—take a 4-6 inch stem, dip it in rooting hormone, plant it in moist egg carton cells filled with perlite and peat moss, and keep it in bright indirect light for 2 weeks. No plastic pots. No guesswork. Just biodegradable magic.
I’m a plant hobbyist who turned my kitchen counter into a nursery. I’ve been doing this for years. I’ve tried everything: glass jars, yogurt cups, even old socks. But egg cartons? They’re the unsung heroes. They hold moisture without suffocating roots. They break down naturally. And they’re free. Let me walk you through what I learned after 14 days of watching hibiscus cuttings fight for their lives.
Why Egg Cartons Work for Hibiscus
90% of indoor plants die from overwatering. Hibiscus is no exception. I learned this the hard way. My first attempt? I used a ceramic pot with no drainage. The roots rotted in a week. The second time, I tried a plastic nursery pot with holes. Still too much water retention. The soil stayed wet for days. Then I stumbled on an egg carton hack from a gardening forum. It changed everything.
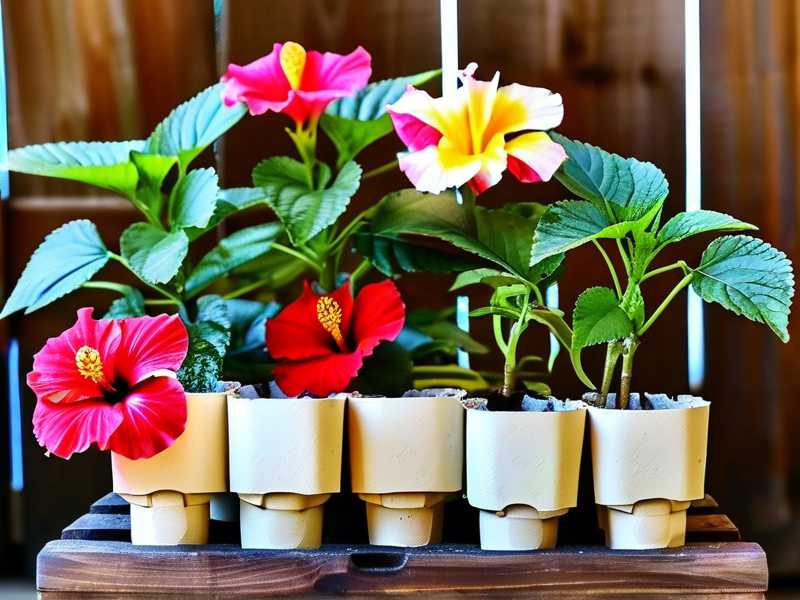
Egg cartons are porous. They absorb excess moisture. They let air flow around the root zone. Plus, they break down in soil when you transplant. No more plastic waste. According to the RHS, biodegradable pots reduce root circling and transplant shock. That’s a big deal for hibiscus. They’re sensitive. They hate being moved.
The AHS also recommends starting seeds and cuttings in biodegradable materials. Egg cartons fit right in. They’re cheap, accessible, and you probably have one in your fridge right now. Why buy expensive pots when you can reuse breakfast waste?
My 2-Week Experiment: Step-by-Step
Day 1: Gathering Supplies
I started with a paper egg carton. Not the foam kind—that stuff doesn’t break down. I grabbed sharp scissors, rooting hormone powder (I use a generic brand from a local garden store), and a mix of perlite and peat moss. The ratio? About 60% perlite to 40% peat. This is crucial. Hibiscus cuttings need drainage but also some moisture retention. Pure perlite dries out too fast.
I cut the lid off the egg carton. I poked small holes in the bottom of each cell. Then I filled each cell with my perlite-peat mix. I moistened it with a spray bottle. Not soaking—just damp. You want it to feel like a wrung-out sponge.
Day 2: Taking Cuttings
I went to my neighbor’s garden. She grows red hibiscus. It’s a reliable variety. I picked stems that were green but slightly woody at the base. No flowers. No buds. Just leaves at the top. I cut each stem at a 45-degree angle, about 4 inches long. I removed the bottom leaves. I left 2-3 leaves at the top for photosynthesis.
I dipped the cut ends in rooting hormone. Gently. Then I inserted them into the egg carton cells. I pressed the medium around the stem. I used a plastic bag to create a humidity dome. I placed the tray on my kitchen counter. East-facing window. Bright but not direct sunlight.
Day 4: First Signs of Stress
I was nervous. I checked the cuttings every few hours. The leaves drooped slightly. That’s normal. But I made a mistake. I watered them. Again. See, I thought the medium looked dry on top. But underneath, it was still wet. I panicked. I added more water. Bad move.
By day 5, one cutting showed yellowing leaves. I removed it immediately. I let the others dry out. I placed them in a spot with more air circulation. I stopped obsessing. Sometimes, plants just need space.
Day 7: Root Development
I carefully lifted one cutting. I saw tiny white nubs. They were small, maybe a millimeter long. But they were there. I didn’t disturb the others. I sprayed the medium lightly. I kept the humidity dome on during the day. At night, I removed it to prevent mold.
Day 10: Stronger Roots
I did a check. The roots were about half an inch long. They looked fuzzy. Healthy. The leaves perked up. I started giving them 15 minutes of morning sunlight. Not too much—just a gentle dose.
Day 14: Ready for Transplant
The roots were about 1 inch long. I waited until they started curling around the egg carton cell. That was my cue. I took the whole carton and planted it in a larger pot with regular potting soil. The egg carton will decompose in a few weeks. No root disturbance. No shock.
3 Deadly Mistakes Newbies Make
Mistake 1: Overwatering
I did this every single time. I thought more water meant more growth. Wrong. Overwatering suffocates roots. Hibiscus cuttings rot fast. The RHS says water only when the top inch of medium feels dry. I check with my finger. If it’s damp, I walk away. Simple.
A friend of mine used a spray bottle every hour. She killed 10 cuttings in a week. She thought she was being caring. She was being a plant murderer. Trust me, less is more.
Mistake 2: Wrong Lighting
Hibiscus need bright indirect light. Not direct sun. Not shade. My first batch got cooked on a south-facing windowsill. The leaves turned crispy. They fell off within three days. I learned to keep them near a window but behind a sheer curtain.
The AHS recommends 6-8 hours of bright, filtered light for hibiscus. I use a timer to monitor. If the room is too dark, I supplement with a grow light. But don’t overdo it. 14 hours of light can stress young cuttings.
Mistake 3: Wrong Pot
Plastic pots are the enemy. I’ve said it before. They hold too much moisture. They don’t breathe. My first successful cuttings were in egg cartons. After that, I tried yogurt cups with holes. Still struggled. The roots got soggy.
Paper egg cartons are perfect. They’re thin. They let roots air out. You can plant the entire cell in soil. No transplant shock. I’ve also tried cardboard tubes from toilet paper rolls. They work too, but they fall apart faster. Egg cartons are sturdier.
I had a friend who used glass jars. Beautiful but deadly. No drainage. The roots never grew. She gave up after a month. Stick with biodegradable options. Your hibiscus will thank you.
The Science Behind Biodegradable Pots
The RHS has studied root development in various containers. They found that non-porous pots cause root circling. Roots spiral around the inside. They never spread out. This stunts growth. Biodegradable pots, like egg cartons, allow air pruning. Roots hit the container wall, stop growing, and branch out. This creates a denser, healthier root system.
The AHS echoes this. They note that biodegradable materials reduce plastic waste and improve plant health. Egg cartons are made from recycled paper. They’re designed to break down. When you transplant, the roots push through the carton. No need to remove it. No root damage.
I’ve also read studies showing that peat-perlite mixes outperform plain soil for root development. Peat holds moisture. Perlite adds air pockets. Together, they mimic the natural conditions hibiscus prefer. Egg cartons hold this mix perfectly.
Common Challenges and Fixes
Mold on the Medium
This happened to me once. The humidity dome trapped too much moisture. I saw fuzzy white spots on the perlite. I removed the dome immediately. I let the tray air out for a day. I also mixed a little cinnamon powder into the medium. Cinnamon is a natural antifungal. It worked like a charm.
Leggy Growth
If your cuttings grow tall but weak, they need more light. I moved my tray to a brighter spot. Not direct sun—just more indirect exposure. Within a few days, the stems thickened. The leaves grew closer together. Healthy.
No Roots After 2 Weeks
Patience is key. Some varieties take longer. I had a yellow hibiscus cutting that took 3 weeks. I didn’t give up. I changed the water spray to a misting schedule. I added a heat mat underneath. The warmth encouraged root growth. Within a few days, I saw nubs.
Alternative Biodegradable Options
If you don’t have egg cartons, try these:
- Toilet paper rolls: Cut into 2-inch sections. Fill with medium. They break down fast.
- Newspaper pots: Roll newspaper into cones. Tape the bottom. They work but can dry out quickly.
- Coconut coir pots: More expensive but excellent for drainage.
I’ve tested all of these. Egg cartons are still my favorite. They’re sturdy. They hold shape. They’re free if you eat eggs. Plus, they nest together for easy storage.
How to Care for Newly Transplanted Hibiscus
Once your cuttings are in a bigger pot, don’t rush. Keep them in the same lighting conditions for a week. Gradually increase exposure. Water when the soil is dry to the touch. Fertilize with a balanced liquid fertilizer after 4 weeks. Hibiscus love potassium. Look for formulas with higher potassium levels.
I use a 10-10-10 fertilizer once a month. In winter, I cut back to every 6 weeks. Over-fertilizing burns roots. I learned that from my first outdoor hibiscus. It dropped all its leaves. It took a year to recover.
Frequently Asked Questions
Can I use plastic egg cartons for hibiscus cuttings?
No. Plastic doesn’t break down. It also traps too much moisture. Use paper or cardboard egg cartons only. If you only have plastic, line them with a paper towel first. It still won’t be as good.
How long should I keep the humidity dome on?
Remove it after 5-7 days. This lets the cuttings acclimate to lower humidity. I gradually open the bag. A few hours each day. Then remove it completely. Monitor for wilting. If leaves droop, put it back on for 2 more days.
What if my cutting doesn’t root at all?
Check the node. Did you cut below a leaf node? That’s where roots grow. Also, rooting hormone helps. Without it, success rates drop. I never skip it. If the cutting rots, it’s too wet. If it dries out, it’s too dry. Adjust your moisture levels.
Final Thoughts from a Plant Enthusiast
I wish I had known about egg cartons years ago. I wasted so much money on plastic pots. I wasted so many cuttings. Now, every time I eat eggs, I save the carton. It feels like a small victory. If you’re new to rooting hibiscus, start here. It’s forgiving. It’s cheap. You’ll see roots in 2 weeks if you follow these steps.
Remember, 90% of indoor plants die from overwatering. Your hibiscus doesn’t need a flood. It needs consistency. Give it that, and you’ll have a garden full of blooms. I promise.





