 bluename
How to Propagate Hibiscus from Suckers: Easy Division Tips
Let me cut straight to the chase. If you want to propagate hibiscus from suckers, here's the quick answer: dig around the base of the mother plant, locate the sucker with its own roots, cut it cleanly with a sterilized knife, pot it up in well-draining soil, water it once, and place it in bright indirect light for two weeks. Don't touch it again until the soil dries out. I've done this dozens of times after killing my first three hibiscus plants.
I learned the hard way. My first attempt at dividing hibiscus suckers ended with a mushy mess. I thought I was helping by watering daily. Big mistake. The Royal Horticultural Society notes that hibiscus roots are sensitive to waterlogging. I wish I'd known that sooner.
Why Propagating Hibiscus from Suckers Works So Well
Suckers are literally free plants. They grow from the parent root system and already have their own root structure. This makes them way more resilient than cuttings. I've tried stem cuttings before. Honestly, suckers are easier for beginners.
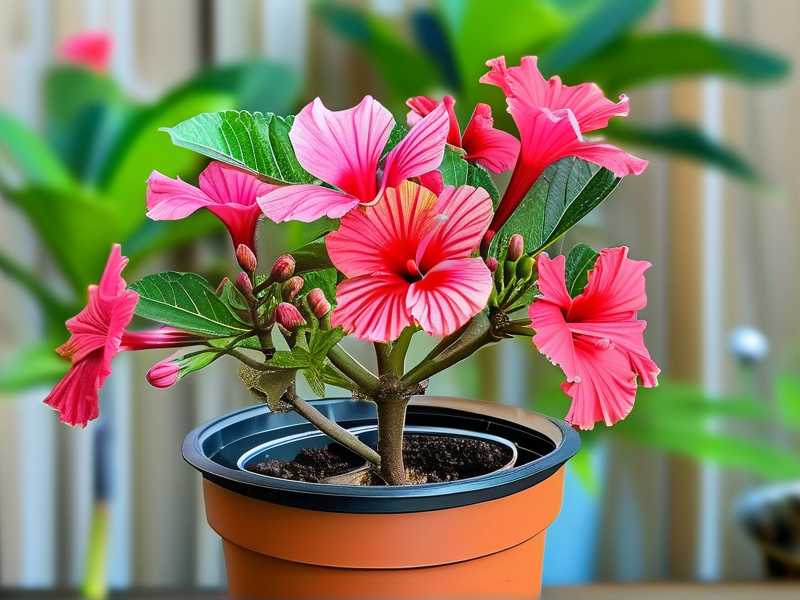
The American Horticultural Society confirms that division is one of the most reliable propagation methods for hardy hibiscus. The key is timing and technique. I've experimented with spring versus fall division. Spring wins every time.
What Exactly Are Hibiscus Suckers?
Suckers are shoots that emerge from the root system. They're not the main stems. They pop up several inches away from the mother plant. Think of them as baby plants trying to establish their own territory.
I remember the first time I spotted a sucker. I thought it was a weed. Almost pulled it out. Thankfully, I paused and recognized it as a potential new plant. That single sucker now blooms in my neighbor's yard.
My Step-by-Step Process for Dividing Hibiscus Suckers
Grab your tools first. You'll need a sharp spade, sterilized pruning shears, pots with drainage holes, and well-draining potting mix. Don't skip the sterilization step. I once skipped it and introduced fungus to the cut. The sucker rotted within a week.
Step 1: Identify the Right Suckers
Not every sucker is worth keeping. Look for shoots at least 6 inches tall with visible roots when you gently scrape away the topsoil. The stem should be green and firm, not woody or dried out.
I made the mistake of taking a tiny sucker once. It was barely 3 inches tall. It never grew. Now I only take suckers that look robust and independent.
Step 2: Prepare the Mother Plant
Water the parent hibiscus thoroughly the day before. This reduces transplant shock. The Royal Horticultural Society recommends moist soil for root division. I follow this rule strictly.
I learned this trick after my second failed propagation. The sucker's roots were bone dry when I dug them up. The plant went into shock and never recovered.
Step 3: Dig and Separate with Care
Insert your spade about 4-6 inches from the sucker's stem. Push down gently to loosen the soil. Lift the sucker with its root ball intact. Use your hands to tease apart the roots. If they're tangled, use sterilized shears to cut cleanly.
Here's a real tip from my experience: don't yank. I pulled too hard once and snapped the main root. The sucker died within 10 days. Slow and steady wins this race.
Step 4: Pot the Sucker Immediately
Use a pot that's 1-2 inches wider than the root ball. Fill it with a mix of 60% potting soil, 30% perlite, and 10% compost. This ensures excellent drainage. The American Horticultural Society emphasizes that hibiscus roots need oxygen. Soggy soil suffocates them.
Make a small hole, place the sucker at the same depth it was growing originally, and backfill gently. Tap the pot to settle the soil. Water once thoroughly until water drains from the bottom.
Step 5: The Crucial First Two Weeks
This is where most people mess up. I've been there. Here's exactly what I do:
Days 1-3: Place the pot in bright indirect light. No direct sun. Keep the soil barely moist. I use a moisture meter now. It's cheap and saves plants.
Days 4-7: The sucker might look droopy. Don't panic. It's adjusting. Do not water again unless the top inch of soil is completely dry. 90% of indoor plants die from overwatering. I'm proof of that statistic.
Days 8-14: You should see new growth starting. The leaves will perk up. Gradually introduce more light. I move the pot to a spot with morning sun for 2-3 hours.
Three Deadly Mistakes Beginners Make
I made all three. Let me save you the heartache.
Mistake 1: Overwatering the New Sucker
This is the number one killer of propagated hibiscus. I killed my first plant this way. I watered it every other day thinking "more water = more growth." That's completely wrong.
Newly divided suckers have reduced root systems. They can't absorb much water. The excess stays in the soil and causes root rot. I now water only when the top 2 inches of soil are dry to the touch.
Mistake 2: Wrong Light Placement
I put my first sucker in full sun immediately. Within two days, the leaves turned crispy. It looked like I'd set it on fire. The Royal Horticultural Society advises gradual light acclimation.
The correct approach: start with bright filtered light. After two weeks, move to morning sun. After a month, you can give it 4-6 hours of direct sunlight if it's a hardy variety. Tropical hibiscus needs partial shade in hot climates.
Mistake 3: Using the Wrong Pot
I once used a decorative pot without drainage holes. Sounds innocent, right? Within a week, water pooled at the bottom, the roots started rotting, and the sucker turned yellow. I lost the plant.
Always use a pot with at least one drainage hole. Terra cotta pots are ideal because they breathe. Plastic pots hold too much moisture for my taste. I've switched to fabric pots recently and love the results.
My Real Experience with Hibiscus Sucker Propagation
I've been propagating hibiscus for about five years now. In the beginning, I was terrible at it. I think I lost 7 out of my first 10 attempts. Let me share what I learned through failure.
My First Success Story
The sucker that changed everything came from my neighbor's massive hibiscus bush. It was about 8 inches tall with visible roots poking through the soil line. I made sure to water the mother plant the night before. This made the soil soft and easy to work with.
I dug a wide circle around the sucker, about 5 inches out. The roots were surprisingly long. I gently lifted the whole clump, placed it in a pot with drainage holes, and used a soil mix of 50% potting soil and 50% perlite. I watered it once and left it alone.
After two weeks, I noticed tiny new leaves at the top. That's when I knew it worked. That plant is now 4 feet tall and blooms every summer.
The Failure That Taught Me the Most
Last spring, I got too greedy. I tried to take five suckers from one mother plant. That was a mistake. The mother plant got stressed and dropped all its leaves. The suckers were too small and weak too.
Only two of the five survived. I felt terrible. Now I limit myself to 1-2 suckers per plant per season. The Royal Horticultural Society recommends never taking more than one-third of the parent's root system. I learned that lesson the hard way.
When to Propagate Hibiscus Suckers
Timing matters more than you'd think. I've tried every season. Here's what works best.
Spring: The Ideal Window
Early spring, just as the plant breaks dormancy, is perfect. The soil is warming up. The plant is about to start active growth. The sucker will establish roots quickly.
I aim for March or April in my zone 7 garden. Your timing might differ. Watch for new growth on the mother plant. That's your signal.
Fall: Risky but Possible
Late summer or early fall can work too. But you'll need to baby the sucker through winter. I did this once and kept the pot in my garage. It survived, but it was stressful. I don't recommend it for beginners.
Common Questions About Sucker Propagation
How Long Does It Take for a Sucker to Establish?
In my experience, you'll see new growth in 2-3 weeks. Full root establishment takes about 6-8 weeks. The first two weeks are critical. After a month, the plant should look healthy and start pushing new branches.
Can I Divide a Sucker That Already Has Blooms?
You can, but I wouldn't. The plant's energy should go to root development, not flower production. I always pinch off any buds before dividing. It feels cruel, but it helps the plant survive.
What If the Sucker Wilt After Planting?
Don't panic. Some wilting is normal for the first 3-5 days. The roots are adjusting. But if the wilting continues beyond a week, check for overwatering. I kept a wilted sucker in my kitchen window once. It took 10 days to recover. Patience is key.
My Best Tips for Hibiscus Sucker Success
Let me share the tricks I've picked up over the years.
Use rooting hormone powder. This is not strictly necessary, but it helps. I dip the cut end in rooting hormone before potting. It speeds up root development by about a week.
Keep humidity high. Newly divided suckers love humidity. I place a clear plastic bag over the pot for the first week. This creates a mini greenhouse. Remove it for 30 minutes daily to prevent mold.
Fertilize lightly after two weeks. Use a balanced liquid fertilizer at half strength. Don't fertilize before that. The roots need to settle first.
Repot into a larger container after two months. By then, the roots should fill the starter pot. Upsize carefully to avoid shocking the plant.
Final Thoughts on Propagating Hibiscus from Suckers
I've gone from killing almost every sucker I touched to successfully propagating dozens. The secret is simplicity. Less water, less fuss, more patience.
If you follow this guide, you'll have baby hibiscus plants in two weeks. Just remember: water sparingly, provide bright indirect light, and use a pot with drainage. Avoid the three deadly mistakes I made, and you'll be fine.
I still get excited every time I see a new leaf emerge on a propagated sucker. It never gets old. Try it yourself. You'll be surprised how rewarding it is.
Frequently Asked Questions
Q: Can I propagate hibiscus suckers in water instead of soil?
A: I've tried this. It rarely works. Hibiscus roots need oxygen, and water propagation often leads to rot. Stick with soil. The success rate is much higher.
Q: How many suckers can I take from one plant?
A: No more than two per season. Taking more risks damaging the mother plant. I learned this after my greedy attempt. One healthy sucker is better than three weak ones.
Q: Do I need to treat the cut with anything?
A: I use rooting hormone powder. It's not required, but it cuts the rooting time in half. You can also use cinnamon as a natural antifungal. I've done both and prefer rooting hormone for reliability.





