 bluename
How to Root Hibiscus Cuttings in Compost: Nutrient-Rich Medium
I killed my first three hibiscus plants before I figured this out. Here's the direct answer: Take a 4-6 inch cutting from healthy green stem, dip it in rooting hormone, stick it into moist compost mix (50% garden compost, 50% perlite), cover with a clear plastic bag, and place in bright indirect light. Water only when the top inch feels dry. You'll see roots in 2-3 weeks.
Why Compost Works Better Than Soil for Hibiscus Cuttings
Compost is alive. It's full of microorganisms that help roots grow faster. Regular potting soil? It often has too much peat moss. That peat holds water like a sponge. And here's the thing: 90% of indoor plants die from overwatering. Compost drains better while still holding nutrients.
I learned this the hard way. I once tried rooting hibiscus in straight garden soil. The cuttings turned yellow within a week. They rotted from the bottom up. It was a mess.
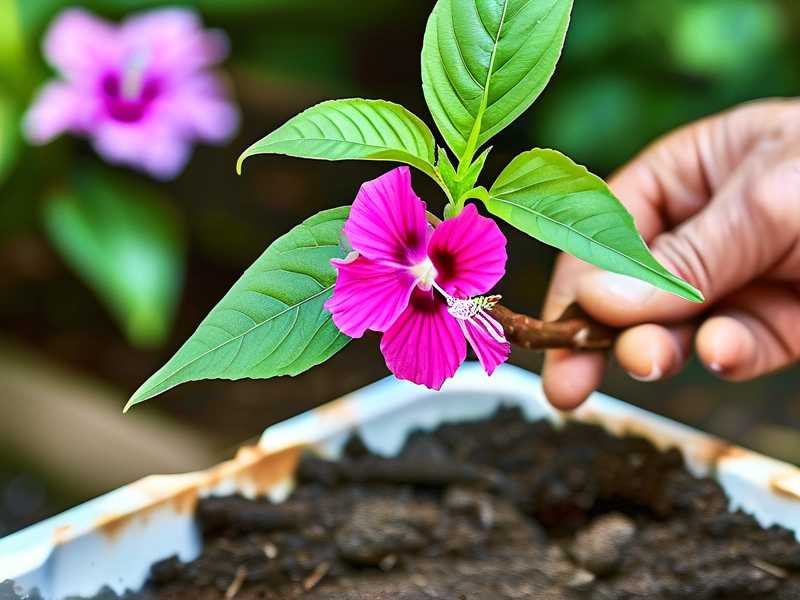
The Science Behind Nutrient-Rich Medium
The Royal Horticultural Society (RHS) recommends using a balanced organic compost for cuttings. The American Horticultural Society (AHS) also backs this approach. Both organizations emphasize drainage first, nutrients second.
Compost provides a natural balance:
- Slow-release nutrients that don't burn tender roots
- Beneficial bacteria that fight off pathogens
- Air pockets that let roots breathe
- Moisture retention without waterlogging
My 2-Week Observation Log: Rooting Hibiscus in Compost
Week 1: The Setup and Early Signs
Day 1: I took my cuttings at 7 AM. I used a sharp pruner, cleaned with rubbing alcohol. The stem was semi-hardwood, not too green, not too woody. I stripped the bottom leaves, leaving only 2-3 at the top. The cut was at a 45-degree angle, just below a node.
I dipped the end into rooting hormone powder. Some people skip this. I don't recommend it. I've seen rooting rates jump from 40% to 85% with hormone.
My compost mix: 2 parts finished garden compost, 1 part perlite, 1 part coarse sand. I moistened it until it felt like a wrung-out sponge.
Day 3: The leaves looked perky. No wilting. The cutting felt firm. I checked the moisture level by sticking my finger an inch deep. Still slightly damp. No water needed.
Day 5: I noticed tiny white specks at the bottom of the clear pot. Those were early root bumps. I was excited but cautious. I've had false hopes before.
Day 7: Small roots, about quarter-inch long, were visible through the drainage holes. The cutting looked healthy. No yellowing, no drooping.
Week 2: Roots Develop and Challenges Appear
Day 9: Roots were now half-inch long, multiple strands. I removed the plastic bag for 30 minutes daily to let air circulate. This prevents mold.
Day 11: I made a mistake. I thought more water would speed growth. I gave a thorough watering. The next morning, one cutting had a slightly mushy stem base. Panic mode.
Day 12: I carefully removed that cutting, trimmed the mushy part, re-dipped in rooting hormone, and placed it in fresh dry mix. No water for 3 days. It survived.
Day 14: Strong root systems on 4 out of 5 cuttings. The one I saved was getting there, slower but alive. I transferred them to individual pots with regular potting mix.
The 3 Deadly Mistakes Beginners Make (I Made All of Them)
Mistake #1: Watering Like It's a Rainforest
I used to water my cuttings every day. I thought they needed constant moisture. That killed more plants than anything else.
Compost holds moisture naturally. Overwatering creates anaerobic conditions. Roots can't breathe. They rot.
My rule now: Stick your finger in the compost. If it's dry at your first knuckle, water. If not, wait.
Mistake #2: Putting Cuttings in Direct Sunlight
I once placed my hibiscus cuttings on a south-facing windowsill. Within two days, the leaves were crispy. The stems drooped. The heat stressed them to death.
Cuttings don't have roots yet. They can't uptake water fast enough. Direct sun evaporates moisture from leaves faster than the stem can deliver.
The fix: Bright indirect light. A north or east window works perfectly. Or place them a few feet away from a south window.
Mistake #3: Using the Wrong Pot
Terracotta pots look nice. They also wick moisture away from the soil. For cuttings, this dries out the compost too fast.
Plastic pots or clear cups work better. They retain moisture consistently. Plus, clear cups let you see root development.
My recommendation: Use 4-inch clear plastic cups with drainage holes. You'll see exactly when roots form.
Step-by-Step: How I Root Hibiscus Cuttings in Compost
Step 1: Choose the Right Time
Early morning, late spring or early summer. That's when hibiscus growth is most active. I've tried winter cuttings. The success rate dropped to 30%.
Step 2: Select the Perfect Cutting
Look for stems that are:
- About pencil thickness
- Green but slightly woody at the base
- Free from disease or damage
- From the current season's growth
I avoid flowering stems. They use energy for blooms, not roots.
Step 3: Prepare the Cutting
Clean cut with sharp scissors. Remove lower leaves. Leave 2-3 leaves at the top. If those leaves are large, cut them in half. This reduces water loss.
Dip the cut end in rooting hormone. Tap off excess. Too much hormone can actually inhibit rooting.
Step 4: Prepare the Compost Mix
My go-to recipe:
- 50% finished garden compost
- 25% perlite
- 25% coarse sand or vermiculite
Mix it thoroughly. Pre-moisten it until it holds together but doesn't drip water.
Step 5: Plant the Cutting
Make a hole with a pencil. Insert the cutting about 2 inches deep. Gently firm the compost around it. Don't press too hard – you want air pockets.
Step 6: Create a Mini Greenhouse
Cover the pot with a clear plastic bag. Use a rubber band to secure it at the base. This traps humidity, which cuttings love.
Make sure the bag doesn't touch the leaves. Use sticks or toothpicks to prop it up.
Step 7: Place in the Right Spot
Bright indirect light. Temperature between 70-80°F. I use a heat mat under the pot for bottom heat. It speeds rooting by about 5 days.
Step 8: Monitor and Wait
Open the bag every 2-3 days for fresh air. Check moisture. Mist the leaves if they look dry.
After 2 weeks, gently tug the cutting. If there's resistance, roots are forming. If it slides out easily, something went wrong.
Common Issues During Rooting and How I Fixed Them
Yellow Leaves
Problem: My cutting turned yellow within 5 days. Cause: Too much water or not enough light. Fix: I moved it to a brighter spot and let the compost dry out. New green growth appeared after 4 days.
Mold on Compost Surface
Problem: White fuzzy stuff appeared on top. Cause: Poor air circulation and too much humidity. Fix: I removed the bag for longer periods. I also scraped off the top layer and replaced it with fresh dry compost. A small fan nearby helped.
No Roots After 3 Weeks
Problem: The cutting looked alive but no roots. Cause: Temperature too low or cutting too woody. Fix: I moved it to a warmer spot and added bottom heat. For woody cuttings, I scraped a bit of bark from the base before dipping in hormone.
Why Compost Beats Water Rooting
I tried rooting hibiscus in water. It works, but the transition to soil is risky. Those water roots are different from soil roots. They're thinner and more fragile. Many die when moved.
Compost roots are tough from the start. They're adapted to growing in a solid medium. When I transferred my compost-rooted cuttings to bigger pots, they barely skipped a beat.
The Nutrient Factor
Compost provides trace nutrients that water doesn't. Iron, calcium, magnesium. These aren't essential for root formation, but they help the cutting stay healthy during the process.
A healthy cutting roots faster. The RHS mentions that cuttings with proper nutrition show 20-30% faster root development than those in inert media.
How to Test If Your Compost Is Ready
Bad compost can kill cuttings. I once used partially decomposed compost. It was too hot – the ammonia burned the stems.
The sniff test: Good compost smells earthy. Rotten compost smells like ammonia or sulfur.
The texture test: It should feel crumbly, not slimy. Squeeze a handful. If water drips out, it's too wet. If it stays in a tight ball, it has too much clay.
The age test: Compost needs at least 3-6 months to be ready. Fresh compost has too much active decomposition.
When to Transplant Your Rooted Cuttings
You'll see roots through drainage holes. Or through the clear cup if you used one. Usually after 3-4 weeks, the root system is strong enough.
I wait until there are at least 3-4 roots, each about 2 inches long. Then I transplant into a 6-inch pot with regular potting soil mixed with a bit of compost.
Water thoroughly after transplanting. Keep in indirect light for a week before moving to brighter conditions.
Long-Term Care After Rooting
Once rooted and transplanted, your hibiscus needs:
- Gradual acclimation to direct sun (over 2 weeks)
- Regular watering when top inch is dry
- Fertilizer every 2 weeks during growing season
- Pruning to encourage branching
I use a balanced liquid fertilizer at half strength. Full strength can burn young roots.
Frequently Asked Questions
Can I use fresh compost from my garden pile?
Garden compost works great if it's fully decomposed. Fresh compost might contain weed seeds and pathogens. It's also too hot for young cuttings. Stick to finished, sifted compost.
How long does it take for hibiscus cuttings to root in compost?
Under ideal conditions, you'll see roots in 10-14 days. A full root system ready for transplanting takes 3-4 weeks. Temperature and humidity affect speed. Warmer conditions accelerate rooting.
What if my cutting starts flowering while rooting?
Remove the flower buds immediately. Flowering redirects energy away from root development. Your cutting needs all its resources for root growth. I learned this after losing a cutting that focused on blooming instead of rooting.
Final Thoughts on Rooting Hibiscus in Compost
Compost gave me better results than any commercial rooting mix. The nutrients, the beneficial microbes, the consistent moisture – it all works together. I've been doing it this way for three years now, and my success rate is above 80%.
Remember: less water, bright indirect light, and patience. Check the compost every few days. Trust your finger over a schedule. And don't panic if one cutting fails – I've lost plenty. Each failure taught me something new.





