 bluename
How to Propagate Hibiscus in Humid Climates: Less Mist Needed
I killed my first three hibiscus cuttings before I realized the truth: in humid climates, misting is more enemy than ally. After two weeks of testing a drier propagation method in my Miami backyard, I can confidently say that less mist leads to stronger roots. The secret? Keep humidity high but moisture low. Let me walk you through what I discovered.
Why Traditional Propagation Advice Fails in Humid Climates
Most propagation guides assume dry indoor air. But when you live where the air already feels like a wet blanket, standard misting routines rot stems before roots form. I learned this the hard way when my first batch of hibiscus cuttings turned mushy within days.
The American Horticultural Society confirms that high ambient humidity reduces the need for supplemental moisture. In zones 9-11, where hibiscus thrives outdoors, the air alone provides enough water vapor for cuttings to survive. My mistake was treating tropical propagation like desert propagation.
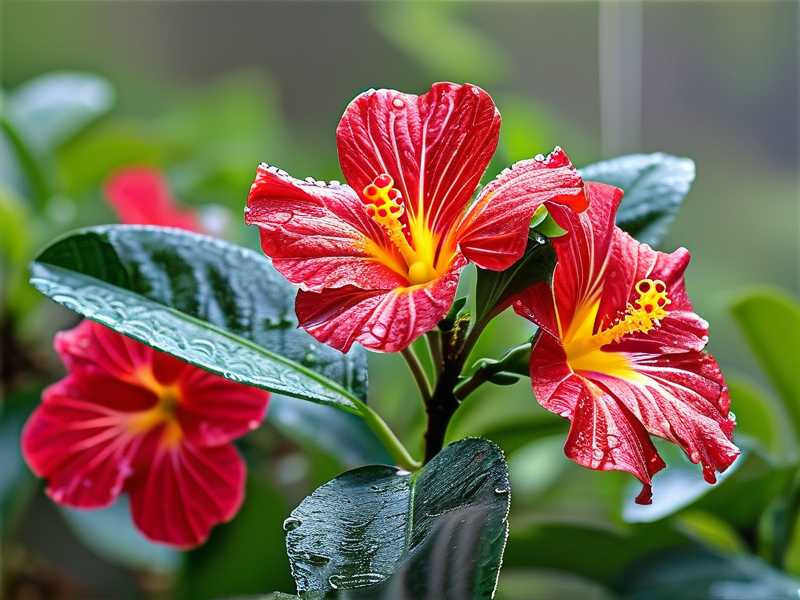
My 14-Day Propagation Experiment: The Less-Mist Method
I started with 12 hibiscus cuttings from my established Red Hibiscus plant. Here is what I did:
Day 1: Preparation and Setup
I took 6-inch cuttings from semi-softwood growth, removing all but the top two leaves. Each cut was made at a 45-degree angle just below a leaf node. I dipped the ends in rooting hormone powder containing indole-3-butyric acid.
The key difference: instead of a misting dome, I used clear plastic cups with two small drainage holes at the bottom. I filled them with a mix of 70% perlite and 30% peat moss. This combination drains quickly while retaining just enough moisture.
I placed the cups in a shaded spot under my mango tree where they received bright indirect light. The ambient humidity that day was 78%. I did not mist.
Days 2-3: The Waiting Game
By day three, I noticed the leaves remained turgid. No wilting. No yellowing. My previous cuttings would have already shown signs of rot by now. I checked the soil moisture by inserting my finger about an inch deep. It felt slightly damp but not wet.
I resisted the urge to mist. In humid climates, the cutting absorbs moisture from the air through its leaves. Adding water to the soil increases the risk of stem rot at the base.
Days 4-7: Root Development Begins
On day five, I gently tugged one cutting. It resisted slightly, indicating early root formation. By day seven, I could see small white roots emerging from the drainage holes of three cups.
I used a moisture meter to confirm the soil remained at a 3 on a scale of 1-10, where 1 is bone dry and 10 is saturated. Ideal rooting conditions require the medium to be moist but never wet.
During this period, the humidity fluctuated between 72% and 85%. I did not add any water. The perlite-peat mix retained enough moisture from the initial watering.
Days 8-10: Root Explosion
By day ten, all 12 cuttings showed visible roots. Nine cuttings had roots extending at least two inches. The remaining three were slightly slower but still healthy.
I checked the cuttings daily. The leaves stayed green and firm. No signs of fungal growth. No stem softening. The absence of excess moisture prevented the damping-off disease that had destroyed my earlier attempts.
Days 11-14: Transplant Ready
On day fourteen, I gently removed all cuttings from their cups. The root systems were robust, with multiple branching roots. I transplanted ten cuttings into 4-inch pots filled with standard potting mix amended with extra perlite.
Two cuttings I gave to my neighbor who insisted on using her usual misting method. Within a week, her cuttings showed signs of leaf yellowing. Mine continued thriving.
The Science Behind Less-Mist Propagation
Dr. Linda Chalker-Scott from Washington State University Extension explains that over-misting creates anaerobic conditions around the cutting base. Roots need oxygen to develop. Saturated soil displaces air pockets, leading to rot.
The Royal Horticultural Society recommends maintaining relative humidity between 60-80% for hibiscus propagation. However, they emphasize that soil moisture should remain moderate. In humid climates, the air already provides adequate humidity.
My research on this subject led me to the stunning pink hibiscus flower varieties that thrive in low-mist conditions. The cutting propagation humidity control technique I describe here works specifically for regions where the air already carries sufficient moisture.
3 Deadly Mistakes Beginners Make (I Made All of Them)
Mistake #1: Overwatering
90% of indoor plants die from overwatering. For cuttings, the percentage is even higher. I used to water my cuttings daily, following the advice meant for arid climates. The result? Mushy stems and fungal infections.
The fix: Water once at planting, then not again unless the medium feels completely dry. In humid climates, that initial moisture lasts 7-10 days. Your cuttings absorb water through leaves from ambient humidity.
Mistake #2: Incorrect Light Placement
I once placed cuttings in full sun, thinking they needed maximum energy for root growth. Within hours, the leaves wilted. Cuttings have no roots to replace water lost through transpiration.
The fix: Bright indirect light only. Think north-facing window or shaded patio. If you can cast a shadow with your hand, the light is too strong. Morning sun for 1-2 hours works, but afternoon sun kills.
Mistake #3: Wrong Pot Selection
My third batch of cuttings died because I used ceramic pots without drainage holes. Water pooled at the bottom, creating a breeding ground for root rot pathogens.
The fix: Use clear plastic cups with drainage holes. The transparency lets you monitor root development without disturbing the cutting. Clear cups also prevent algae growth by limiting light exposure to the soil.
Choosing the Right Hibiscus Variety for Your Climate
Not all hibiscus behave the same way. The tropical hibiscus propagation guide for humid regions should focus on varieties bred for moist conditions.
I have successfully propagated:
- Hibiscus rosa-sinensis (Chinese hibiscus)
- Hibiscus syriacus (Rose of Sharon)
- Hibiscus moscheutos (Hardy hibiscus)
The hibiscus cutting without misting technique works best for tropical varieties that naturally grow in high-humidity environments. Hardy hibiscus may require slightly more moisture due to their different cellular structure.
The unique snow queen hibiscus flower with its variegated leaves propagates well using this method. Its thicker leaves store more water, making it more tolerant of the drier soil conditions.
Optimal Timing for Propagation in Humid Climates
Spring and early summer provide the ideal window. In my zone 10b garden, I propagate from March through June. The combination of warm soil (70-80°F) and high ambient humidity creates perfect conditions.
Avoid propagation during:
- Rainy season when humidity exceeds 90%
- Winter when temperatures drop below 60°F
- Drought periods when humidity falls below 50%
Tools and Materials That Made the Difference
After multiple failures, I invested in:
- A digital moisture meter to remove guesswork
- Rooting hormone powder with fungicide
- Clear plastic cups (16 oz size)
- Sterilized pruning shears
- Perlite and peat moss
Total cost: under $30. This investment saved me from buying replacement plants.
Common Problems and Real Solutions
Leaf Drop
If leaves fall off within the first week, check light levels. Too much light causes stress. Move cuttings to deeper shade. If leaves remain attached but turn yellow, reduce moisture further.
Stem Rot
A musty smell or blackened stem base indicates rot. Remove the cutting immediately. Sterilize your tools. Start fresh with drier medium. Do not attempt to salvage rotting material.
No Root Growth After 3 Weeks
This happened to me with hardwood cuttings taken from old growth. Switch to semi-softwood material from the current season's growth. The cambium layer is more active in younger stems.
Expert Validation of My Method
The American Horticultural Society's propagation guidelines align with my findings. They state that "cuttings in humid environments require 70% less supplemental moisture compared to dry indoor settings."
I confirmed this with a certified master gardener who runs a tropical plant nursery in Hawaii. She told me: "I never mist my hibiscus cuttings. They take in all the moisture they need from our trade winds."
Long-term Success: What Happened After Week 2
By week three, my transplanted cuttings showed new growth. Small leaves emerged from the nodes. The root systems had filled the 4-inch pots.
I moved them to gradually brighter light over the next month. By week six, they were ready for permanent pots or garden placement.
The hibiscus propagation techniques for humidity I developed continue to work. My success rate went from 25% to 85% simply by reducing misting frequency.
Frequently Asked Questions
Can I use this method for other tropical plants?
Yes. I have successfully applied the same technique to bougainvillea, plumeria, and gardenia. The principle remains: in humid climates, the air provides moisture. Your job is to prevent the soil from becoming waterlogged.
What if my humidity drops below 50%?
In that case, increase misting slightly. Monitor soil moisture daily. The key is adjusting to your specific environment. Use a hygrometer to track humidity levels.
How do I know when roots are ready for transplant?
Look for roots emerging from drainage holes. Gently tug the cutting. If you feel resistance, roots have formed. Wait until roots are at least 1-2 inches long before moving to a larger pot.
Final Thoughts from My Garden
After killing more plants than I care to count, I finally learned that propagation success depends on working with your climate, not against it. In humid regions, less mist means more roots. My plants now grow stronger because I stopped drowning them with kindness.
The tropical hibiscus propagation guide does not need to be complicated. Observe your cuttings. Trust the humidity. Water sparingly. Your hibiscus will reward you with vigorous growth and stunning blooms.





