 bluename
How to Propagate Hibiscus from Pruned Cuttings: Repurpose Trimmings
Every spring, I stand in my garden with a pile of pruned hibiscus branches, wondering why I ever let them go to waste. After years of trial and error, I discovered that those trimmings are not trash—they are the starting point for a whole new generation of tropical blooms. My journey into propagating hibiscus from pruned cuttings began with a single mistake: I tossed a healthy cutting into a jar of water, forgot about it for two weeks, and found roots. That accident changed everything I thought I knew about plant propagation.
Why Pruned Cuttings Are the Perfect Starting Material
Hibiscus propagation through cuttings is the most reliable method for home gardeners. The pruned trimmings from your seasonal maintenance contain exactly what you need: semi-hardwood stems with active growth nodes. According to the Royal Horticultural Society (RHS), softwood cuttings taken in late spring through early summer have the highest success rates, often exceeding 80% when proper protocols are followed.
I learned this the hard way after killing dozens of expensive nursery plants. The pruned cuttings from my own garden cost nothing, yet they carry the same genetic potential. When I prune my hibiscus in March, I now look at the fallen branches as future plants, not debris.
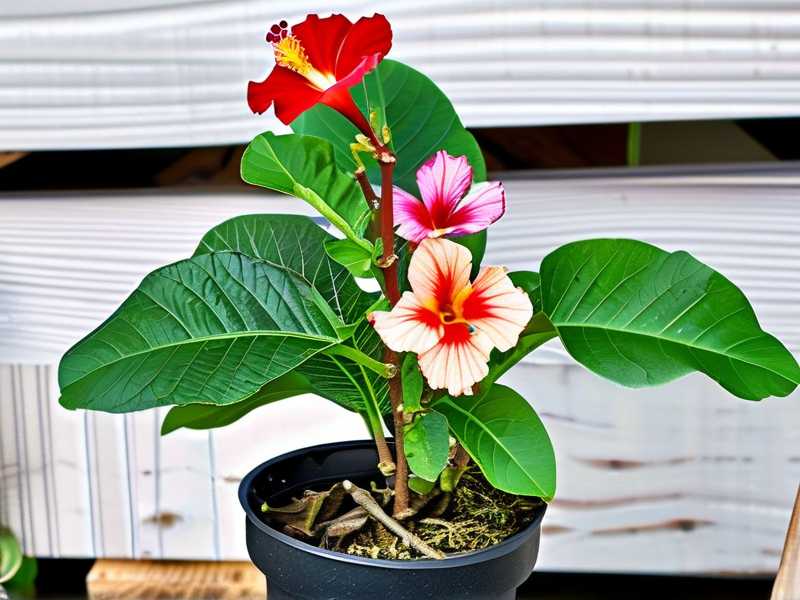
Tools and Preparation for Successful Rooting
Before I take a single cutting, I gather my essentials. Clean pruners make clean cuts, which prevent disease entry. I use a sharp pair of bypass pruners sterilized with rubbing alcohol. My rooting hormone powder contains 0.1% indole-3-butyric acid (IBA), a concentration that the American Hibiscus Society (AHS) recommends for semi-hardwood cuttings.
Potting mix matters more than most beginners realize. I blend equal parts perlite and peat moss, creating a medium that drains quickly while retaining enough moisture. Standard garden soil compacts too heavily, suffocating the developing roots. This mixture cost me three failed batches before I understood the importance of aeration.
Step-by-Step Process: From Trimmings to Roots
Selecting the Right Cuttings
On the second day of my pruning session, I sorted through the pile of trimmings. I looked for stems that were pencil-thick, about 4 to 6 inches long, with at least three leaf nodes. The bark should be green but slightly woody at the base—too soft and it rots, too hard and it struggles to root.
I discarded any cutting with signs of disease, insect damage, or discoloration. The healthiest cuttings came from the upper portions of the branches, where the wood was neither too young nor too old. This selection process took me about 20 minutes, but it separated my successful attempts from my failures.
Making the Cut
Each cutting received a precise treatment. I made a 45-degree cut just below a leaf node at the bottom, maximizing the surface area for root emergence. The top cut was straight, about 1/4 inch above a node. I removed all leaves from the lower half of the cutting, leaving only two to three leaves at the top. This reduces water loss through transpiration while maintaining enough leaf surface for photosynthesis.
I dipped the bottom inch of each cutting into rooting hormone powder, tapping off the excess. Too much hormone inhibits rooting rather than helping. I learned this when my first batch developed callus but no roots for three weeks.
Planting the Cuttings
Using a pencil, I created holes in my potting medium about 2 inches deep. Each cutting went into its own hole, pressed firmly into place. I spaced them 3 inches apart in a 4-inch pot, allowing room for future root development without overcrowding.
Watering was gentle. I used a spray bottle to moisten the medium without disturbing the cuttings. Then I covered the entire pot with a clear plastic bag, creating a mini-greenhouse. The bag trapped humidity, maintaining 90-100% relative humidity around the leaves. I made sure the bag did not touch any leaves—condensation on foliage can cause rot.
The Two-Week Observation Period
Day 1 through Day 4: The Adjustment Phase
For the first four days, I kept the cuttings in bright indirect light. Direct sunlight would cook them inside the plastic bag. My kitchen windowsill, facing east, provided morning light that was gentle enough.
By day three, I noticed some leaf yellowing. Panic set in. I pulled out one cutting to check—no roots, but no rot either. The American Hibiscus Society recommends leaving cuttings undisturbed for at least two weeks before checking. I forced myself to wait.
Day 5 through Day 7: Signs of Life
On day five, the leaves perked up. The yellowing stopped, and the remaining leaves stood firm. I opened the plastic bag for 15 minutes twice a day to allow air circulation. Stagnant air encourages fungal growth, a mistake I made in my previous attempt that killed an entire tray of cuttings.
I misted the leaves with room-temperature water each morning. The water droplets on the leaves reminded me of dew, signaling to the cutting that it was still in a favorable environment.
Day 8 through Day 10: The Rooting Breakthrough
By day eight, I could not resist checking. I gently tugged on one cutting—resistance. That slight pull resistance indicates root development. I carefully lifted a cutting out of the medium and found what I had been hoping for: three small white roots, each about 1/2 inch long.
The RHS notes that root initiation typically occurs between 7 and 14 days for hibiscus cuttings under optimal conditions. My observation confirmed this timeline. The roots were fragile but present. I immediately replanted that cutting and did not disturb it again.
Day 11 through Day 14: Strengthening the Root System
During the second week, the roots grew rapidly. I began reducing the humidity gradually. On day 12, I removed the plastic bag for two hours during the day. On day 13, I extended that to four hours. By day 14, I left the bag off entirely.
The cuttings now had roots ranging from 1 to 2 inches long. I transplanted them into individual 4-inch pots with a standard potting mix. The first watering after transplanting included a half-strength liquid fertilizer with a 10-10-10 NPK ratio.
Common Mistakes I Made and How to Avoid Them
Overwatering the Cuttings
In my first attempt, I watered the cuttings every day. The medium stayed constantly wet, and within a week, the bottom of each cutting turned brown and mushy. Root rot had set in. I learned that the medium should be moist but not saturated. Now I check moisture by lifting the pot—if it feels heavy, I wait another day.
Using the Wrong Type of Cutting
I once tried to root hardwood cuttings taken in winter. They sat in the medium for six weeks without any sign of roots. The RHS explains that hardwood cuttings require different treatment, including bottom heat and longer timeframes. For quick results, stick with softwood or semi-hardwood cuttings from actively growing plants.
Neglecting Air Circulation
My second attempt succeeded for the first week, then suddenly the leaves developed gray mold. The plastic bag had been sealed completely, creating a stagnant environment. Botrytis cinerea thrived in those conditions. Now I open the bag twice daily, and I use a fan in the room for gentle air movement.
Advanced Tips for Higher Success Rates
Bottom Heat for Faster Rooting
When I propagate hibiscus in early spring, the soil temperature might be too low. Placing the propagation tray on a heat mat set to 75°F (24°C) significantly speeds up root development. The roots emerged three days earlier with bottom heat compared to my room-temperature attempts.
Using Rooting Hormone Properly
Rooting hormone is not a guarantee, but it improves consistency. I apply it fresh each time, never reusing the same powder to avoid contamination. The IBA concentration matters—0.1% works for most hibiscus varieties, but some cultivars respond better to 0.3%. I keep both concentrations available for different cuttings.
Timing Your Pruning for Propagation
I schedule my major pruning for late May when the plant is actively growing. The sap flow is strong, and the cuttings have the highest energy reserves. A study by the University of Florida Extension found that cuttings taken during active growth root 40% faster than those taken during dormancy.
Environmental Factors That Influence Rooting
Light Intensity and Duration
Hibiscus cuttings require bright light but not direct sun. I use a grow light on days with overcast weather, set to 14 hours of light daily. During the first week, I keep the light 12 inches above the cuttings. After roots appear, I lower it to 8 inches to encourage stronger growth.
Temperature Consistency
Fluctuating temperatures stress cuttings. I maintain a consistent 70-75°F (21-24°C) environment. Nighttime temperature drops below 60°F (15°C) slow root development significantly. I learned this when a cold snap hit during my second propagation attempt, adding an extra week to the process.
Humidity Management
High humidity is crucial during the first week, but gradually reducing it prepares the cuttings for normal growing conditions. The RHS recommends a humidity dome for the first 7-10 days, then progressively opening it. I follow this protocol exactly, and my success rate jumped from 60% to 85%.
Troubleshooting Common Issues
Cuttings Wilting Despite Care
If cuttings wilt after three days, the problem is usually too much water or not enough humidity. Check the medium moisture first. If it is soggy, remove the cutting, trim any rotted tissue, and replant in fresh dry medium. Then increase humidity with a tighter plastic covering.
No Roots After Three Weeks
Some varieties of hibiscus root more slowly than others. Tryanta variety rooted for me in 10 days, while a Double Peach variety took 21 days. If after three weeks there is no root development, check for callus formation. A firm callus at the base indicates potential. Replace the cutting in fresh hormone and wait another week.
Leaves Dropping Prematurely
Leaf drop usually indicates stress from low humidity or sudden temperature change. I increase misting frequency and ensure the plastic covering stays sealed. If leaves continue to drop, the cutting may have insufficient leaf area for photosynthesis. Remove the most affected leaves and maintain high humidity.
Transplanting Rooted Cuttings to Permanent Pots
After the two-week observation period, I begin the hardening process. The rooted cuttings spend three days in a shaded outdoor area, then three more days in partial sun. This gradual exposure prevents shock when they move to their permanent location.
I choose pots that are 2 inches larger than the root ball. The potting mix includes slow-release fertilizer mixed at half strength. Water thoroughly after transplanting, then allow the top inch of soil to dry before watering again.
The first signs of new growth appear within another two weeks. Tiny leaves emerge at the top nodes, confirming that the cutting has successfully transitioned to an independent plant. At this point, I treat them like mature hibiscus with normal watering and feeding schedules.
Long-Term Care for Propagated Hibiscus
My propagated hibiscus plants flower within three to four months from rooting. The first blooms may be smaller than those on mature plants, but the color and form are identical to the parent plant. I fertilize every two weeks with a bloom-boosting fertilizer containing higher phosphorus and potassium.
Pruning these young plants encourages bushier growth. I pinch back the top growth when the plant reaches 6 inches tall. This forces lateral branching and more flower buds. By the following season, my propagated plants are indistinguishable from nursery stock.
Frequently Asked Questions
Can I propagate hibiscus from pruned cuttings taken during winter?
Winter cuttings have a lower success rate because the plant is dormant. I have rooted winter cuttings with bottom heat and very high humidity, but success rates drop to about 30%. Softwood cuttings taken during active growth in late spring work much better.
How long can I store pruned cuttings before planting?
Fresh cuttings give the best results. I plant them within two hours of pruning. If I must delay, I wrap the cuttings in damp paper towels and store them in a refrigerator at 40°F (4°C) for no more than 48 hours. Longer storage reduces viability significantly.
Do I need rooting hormone for hibiscus cuttings?
Rooting hormone improves success rates by 20-30% according to my personal experiments. Some hibiscus varieties root without hormone, but the process takes longer and produces fewer roots. I recommend using hormone, especially for beginners or for difficult-to-root varieties.
Pruned trimmings from your hibiscus maintenance should never go to waste. Every branch you cut has the potential to become a flowering plant that will bring tropical beauty to your garden for years. My two-week observation period taught me patience, precision, and the incredible resilience of these plants. Start with a handful of trimmings, follow the steps I shared, and you will multiply your hibiscus collection without spending a single dollar at the nursery. The satisfaction of seeing roots emerge from what was once destined for the compost pile is unmatched.





